 Not only are they cute, but that gorgeous dark patina definitely needs saving. However, that damaged green vinyl has got to GO. It has cuts, paint, and oodles of blucky yuck.
 If you'd like to see my past footstool makeovers, you can take a peek HERE. Or you can take a peek at this video below too.

DIY TIME
Okay, it's time to get this vintage vinyl footstool makeover underway! Obviously, it makes sense to remove said vinyl. Lemme tell ya that this is always the part that takes forever, so if you're inclined to try, don't be discouraged! You can read my tutorial in this past post. Isn't this view hilarious?!? "Help me! I've fallen and I can't get up!" haha! If you look close, you''ll see oodles of upholstery tacks. Before I can take those out, however, I first need to remove those legs. They are all loose and it's not surprising.
 Next, pop on some gloves and have at those tacks. After what seems like over one hundred tacks are removed, I can finally see the light. It's at this point I'm always asking myself, "what have you got yourself into?" haha.

NEXT STEPS
Now all our parts are removed, it's time to reassemble. First, I use screws to better anchor those leg bases to the frame. Then, I reset the legs and attach them with glue and nails. Better than new! Next, it's upholstery time. I found this gorgeous linen in a local shop and thought it gave the vintage vibe while also accenting that rich, dark brown in the legs.
 Without a doubt, my nailer is what makes this job a breeze. I have a pneumatic gun as well, but this battery-operated one is much easier on my wrists and is portable. Plus, I add a dust shield and something fun.


THE REVEAL
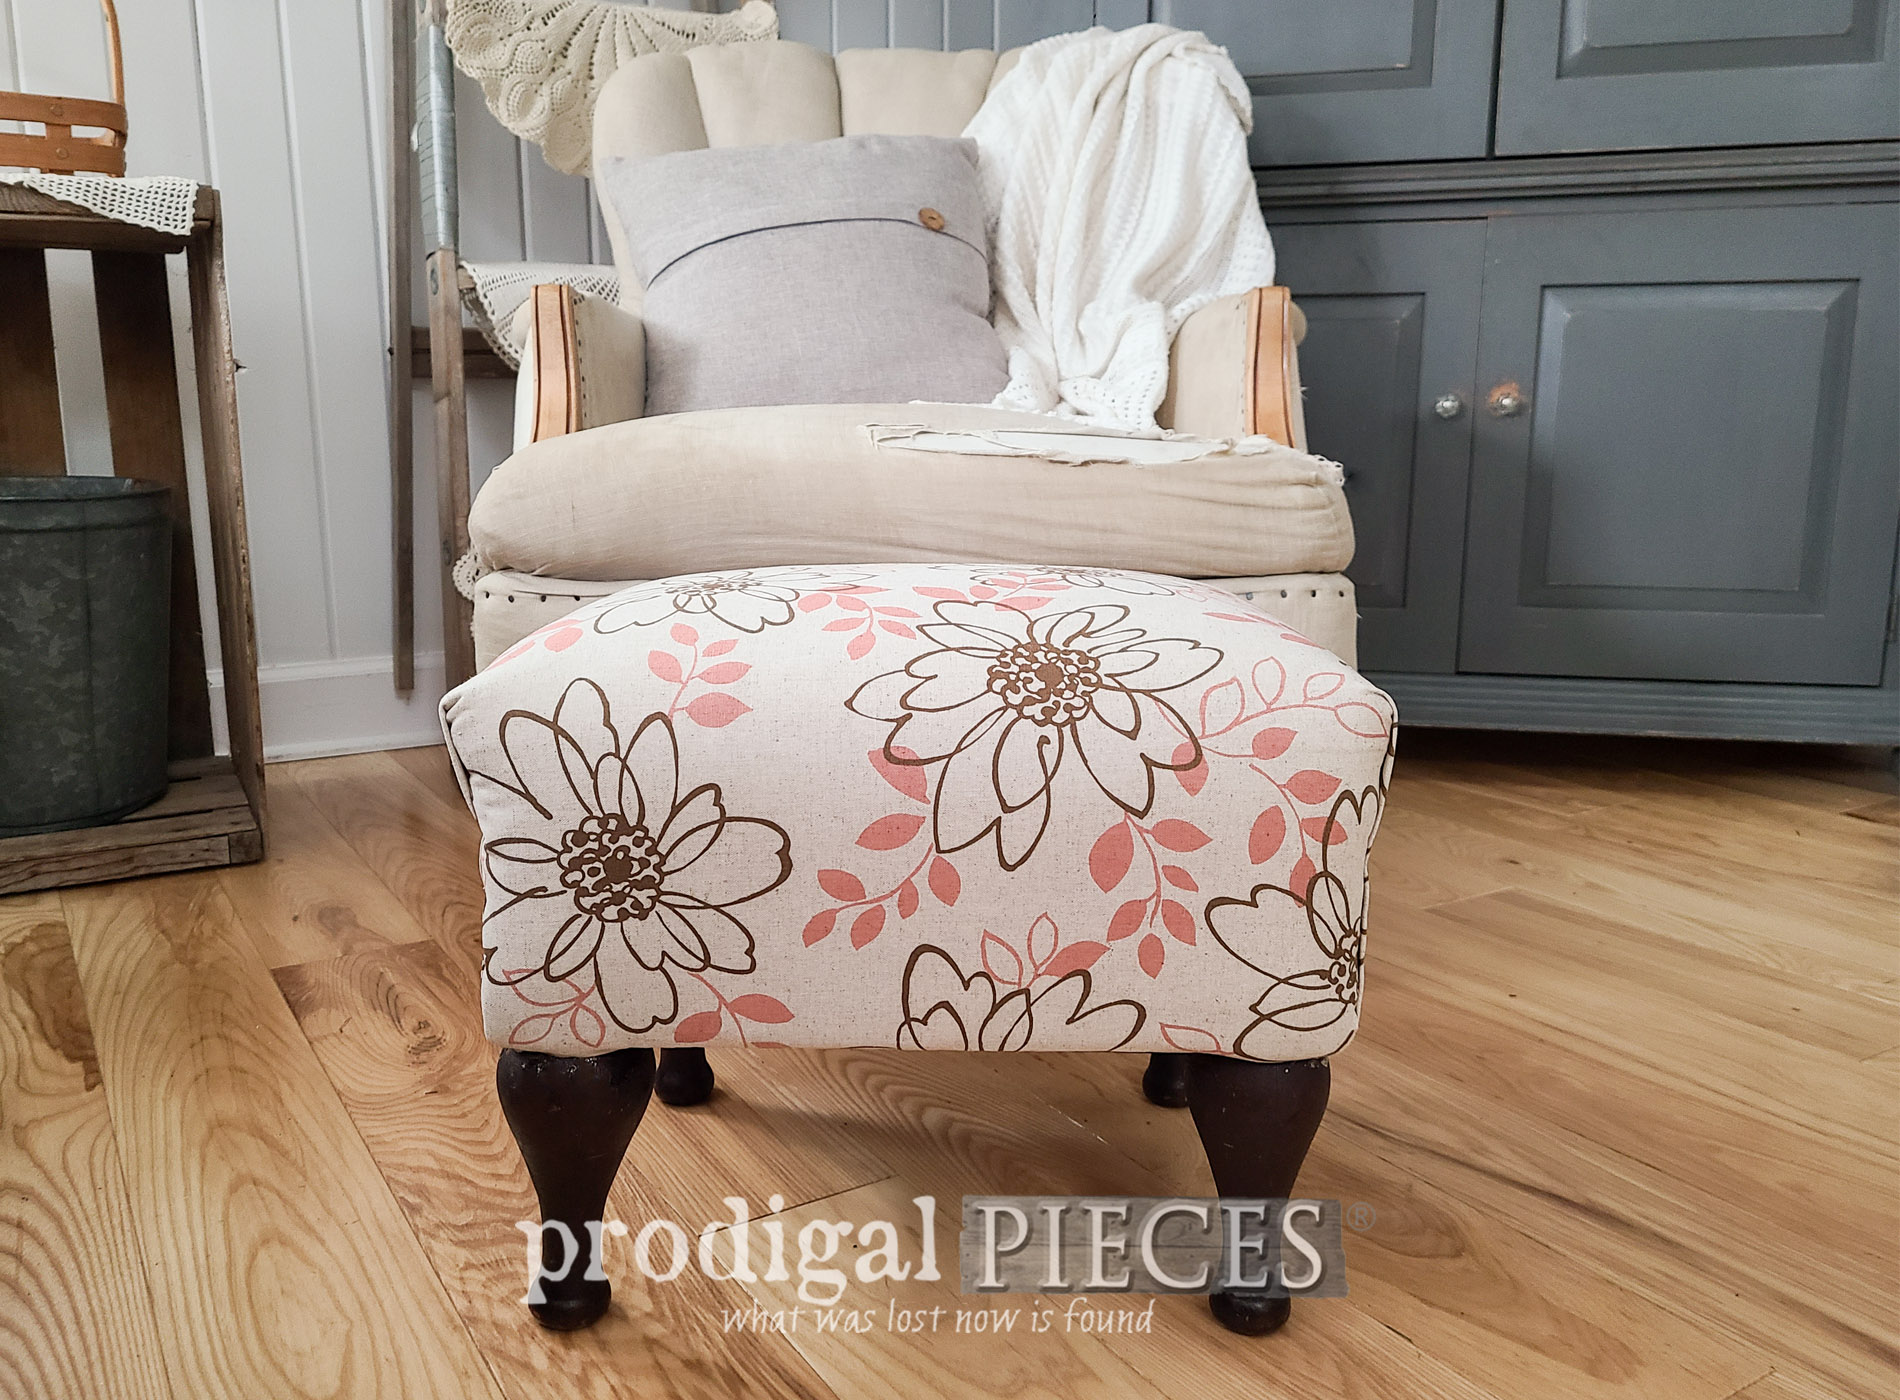
Here's my vintage vinyl footstool that is now refreshed and ready to go. I think the fabric really compliments those fun legs.

 I'd say it's now shining and no longer yelling, "help me!" haha. I wanted to modernize it a bit with the way I upholstered. I used the basic lines to do that, but I also added nailheads to give it a rustic vibe too.

 Finally, I can take a few second to put my feet up. Won't you join me for a cuppa trashure?
 Last, if you'd like to give your tootsies a treat, you can purchase this footstool for your home in my online shop. (SOLD)
[metaslider id=30251]
 In addition, do pin and share to inspire others to see past the damage and wear to see the potential that's there.
 Up next, I'll be sharing what I have envisioned for this vintage quilt rack. SEE THE END RESULT HERE.
 In addition, to get these DIY tips & tricks in your inbox, be sure to sign up for my newsletter. PLUS, you will get your FREE Furniture Buying Checklist and special discount to my shop. Until next time!

Also, more upholstery projects like this vintage vinyl footstool:

