Do you ever have those times you lay eyes on something, and you can't un-see what it looks like to you? That's what happened when this vintage piece came into my possession. Do you know what it is? Well, it's about to be an upcycled quilt rack. haha.

I see these all the time in thrift store. Now, while I do have handmade quilts from family and also the quilts I've made, that doesn't mean I don't appreciate this rack for what it is. I've even made a repurposed quilt rack
in this post. Also, I've made a
wall quilt using vinyl flooring. However, I couldn't get past that I saw something else in it.

I've seen many bloggers turn them into a sort of kitchen caddy adding baskets and such. Well, I'm not going to do that. Instead, I have some kid fun up my sleeve using only things I have on hand. woot!
DIY TIME
First, it's time to take apart the rack. If this had been made of a hardwood, I probably would think again about my vision. However, it's only a basic pine, so I say GAME ON. I pop off those plugs and take it all apart.

Then, I filled all the screw holes with wood filler. Once the filler cured, I sand it all down with my sander to get down to raw wood.


Next, it's time to put my scrap stash to use. My goal is to not spend a penny but use only what I have on hand. I head out and dig to find a pine board that my mom purchased from a garage sale. I've used most of the other boards when I added shelving to
my DIY coffee bar.
Last, after sketching out my design on paper, I begin making cuts with my jigsaw and miter saw. I love my tools. Remember, my motto is toolsoverjewels. tsk.
NEXT STEPS
Once I have my pieces cut, it's time to do a dry fit to make sure my design is coming together as planned. I think we're good to go!! I add pocket holes to my pieces to make my assembly strong, plus it gives a nice, finished look. Can you guess what I'm creating?

It's at this point I just cut loose and had fun. I'm a crazy toy nut and have made oodles of items for my kids over the years. You can see some of them
HERE.
In addition to a little bit of paint fun, I find my design therapy. My set is coming along wonderfully.

REVEAL TIME
Maybe you think I'm crazy, but my upcycled quilt rack looked like this to my mind's eye. Welcome to my mini treehouse home complete with toadstools made out of misfit knobs.


Can you tell I had fun? Maybe I'm a big kid at heart, but I truly believe kids have so much potential. What we provide them when they are young affects their future.
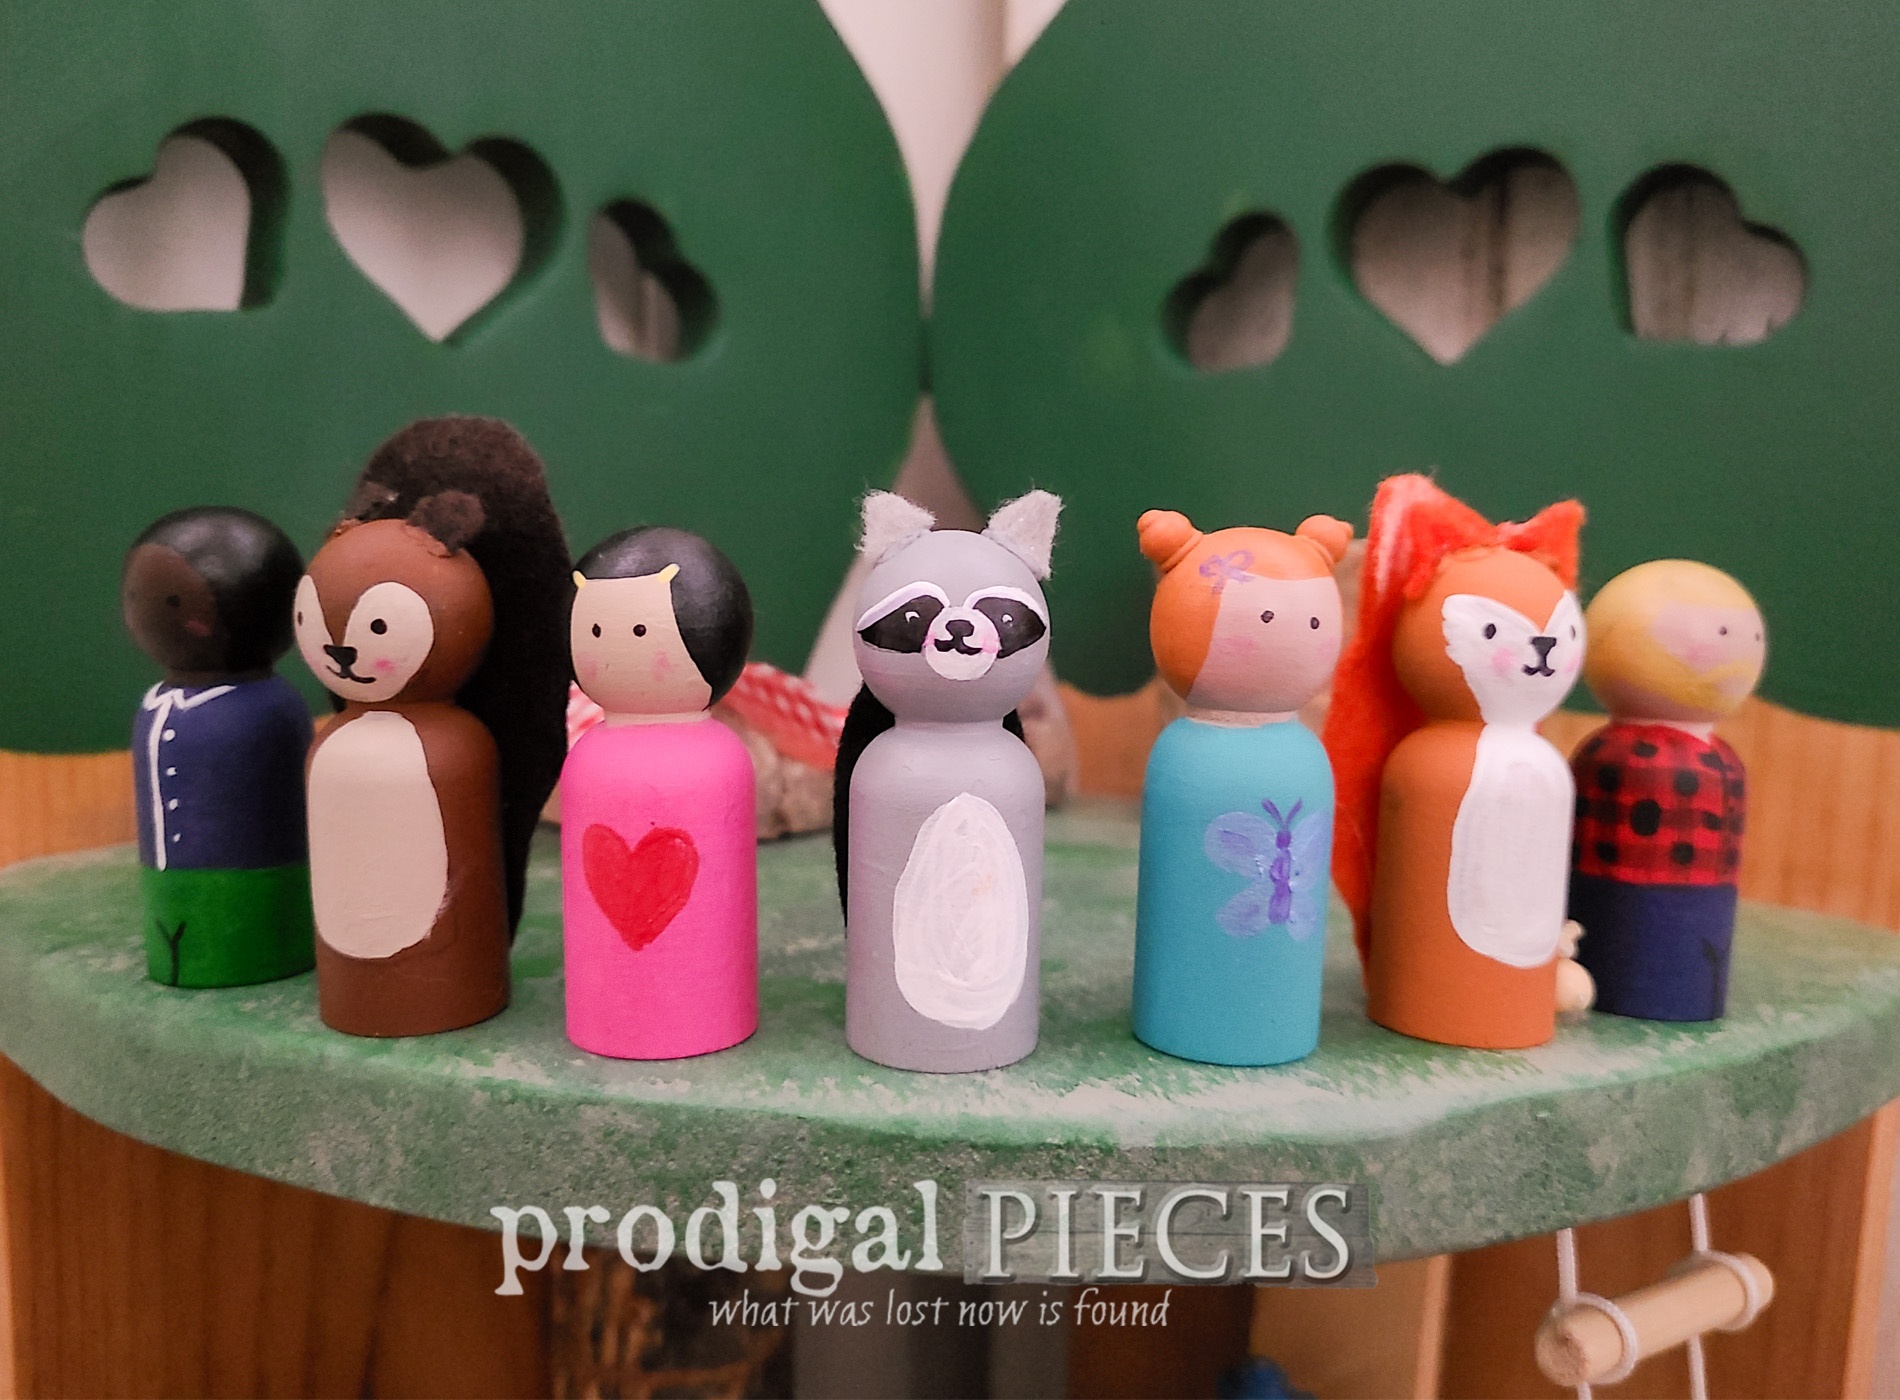
Here's my lineup of creative therapy. Which is your favorite?


My upcycled quilt rack turned treehouse playset is ready for imaginative fun! I'm showcasing this set with my oldest son's furniture I created for him years ago when I built him a treehouse of his own.


Look out! My main man in his buffalo plaid shirt and sporty beard are on the roll. haha. I told ya I love creating this stuff.


I'm wore out from hours of creating, so it's time for a nap. ZZZzzzzz

However, that is until someone wants to play. tee hee.

While you may feel like you're missing out, no worries! You can find this woodland treehouse playset available in
my online shop.


SHARE
Also, do pin and share my upcycled quilt rack to inspire others to create kid fun. Even if you don't have kids, you can totally have the fun of creating and bless someone's socks off.

Now, you may be wondering what happened to those slats that went between the quilt rack ends.
HEAD HERE TO SEE!

To get these DIY tips & tricks in your inbox, be sure to
sign up for my newsletter. PLUS, you will get your FREE Furniture Buying Checklist and special discount to
my shop. Until next time!

Also, more upcycled fun like my upcycled quilt rack: