A gal can have things that make her smile, right? I'm not much for sparkly or blingy things as much as I am for the down-trodden and those needing love. Much like our Heavenly Father loves us no matter where we are in life. Even furniture. hee hee. Do you see what I see? That there be tufts, y'all. I'm in the mood to give this vintage tufted bench a facelift for modern day.

At first glance, it looks in great shape. The skirt isn't falling off and it has all its buttons - even the legs are what sealed the deal for me. And isn't it odd that somehow, I feel like I'm violating the bench by lifting up the skirt...tsk.

However, the corners are worn through and small tears here and there. Let's see what we're up against, shall we?

DIY TIME
First, this part of the job is not only therapeutic, but is also essential to understand the structure of the upholstery. Whenever you tackle a project like this, it's important to pay attention to the order of assembly. Take notes or pictures...ie. what comes off first? That would be what you attach last with new upholstery. If you want to tackle a beginner-type project, start with a footstool. I demonstrate how easy it is in
this tutorial or in the video below.

Then, for a better view, when I flip the bench over here is what I see...the tufts are tied down and sturdy as ever. I remove the upholstery tacks and retrieve the welting to reuse for later. I had to giggle...it looks like a lady has fallen and can't get up. ha!

Here's a fresh start with a intact base perfect for a new look. It feels good to see this ready to go after my hands and arms are aching like I just finished a round at the WWE.

With that in mind, remember I've saved all the pieces and took note of assembly. That way, I can replace the upholstery with as little fuss as possible.
NEXT STEPS
Next, I flip it back upside-down and put on a new layer of batting to increase bum satisfaction. When I'm stapling the batting, I am basically tacking it on to hold it in place while I add the top layer.

Then, I cut my upholstery and attach it as well. It's a soft green in a solid color, but I want to add a bit of a modern vibe. So, I paint on a couple of stripes using acrylic paint mixed with a textile medium. You can see how I've painted with this medium in
past posts HERE.

Finally, the last repair/addition is to add new buttons for tufting. The process is simple with the right tools. In addition, you can get a kit like this in the notions section of your local store.

Skip the box store and shop local - I do! Here's a peek at a place I frequent built out of reclaimed wood.


Isn't it lovely? Funny thing is, it's right next to my source for all the reclaimed wood I could ask for. (
see HERE) Finally, I'm able to finish up this vintage tufted bench and share the new look.
THE REVEAL
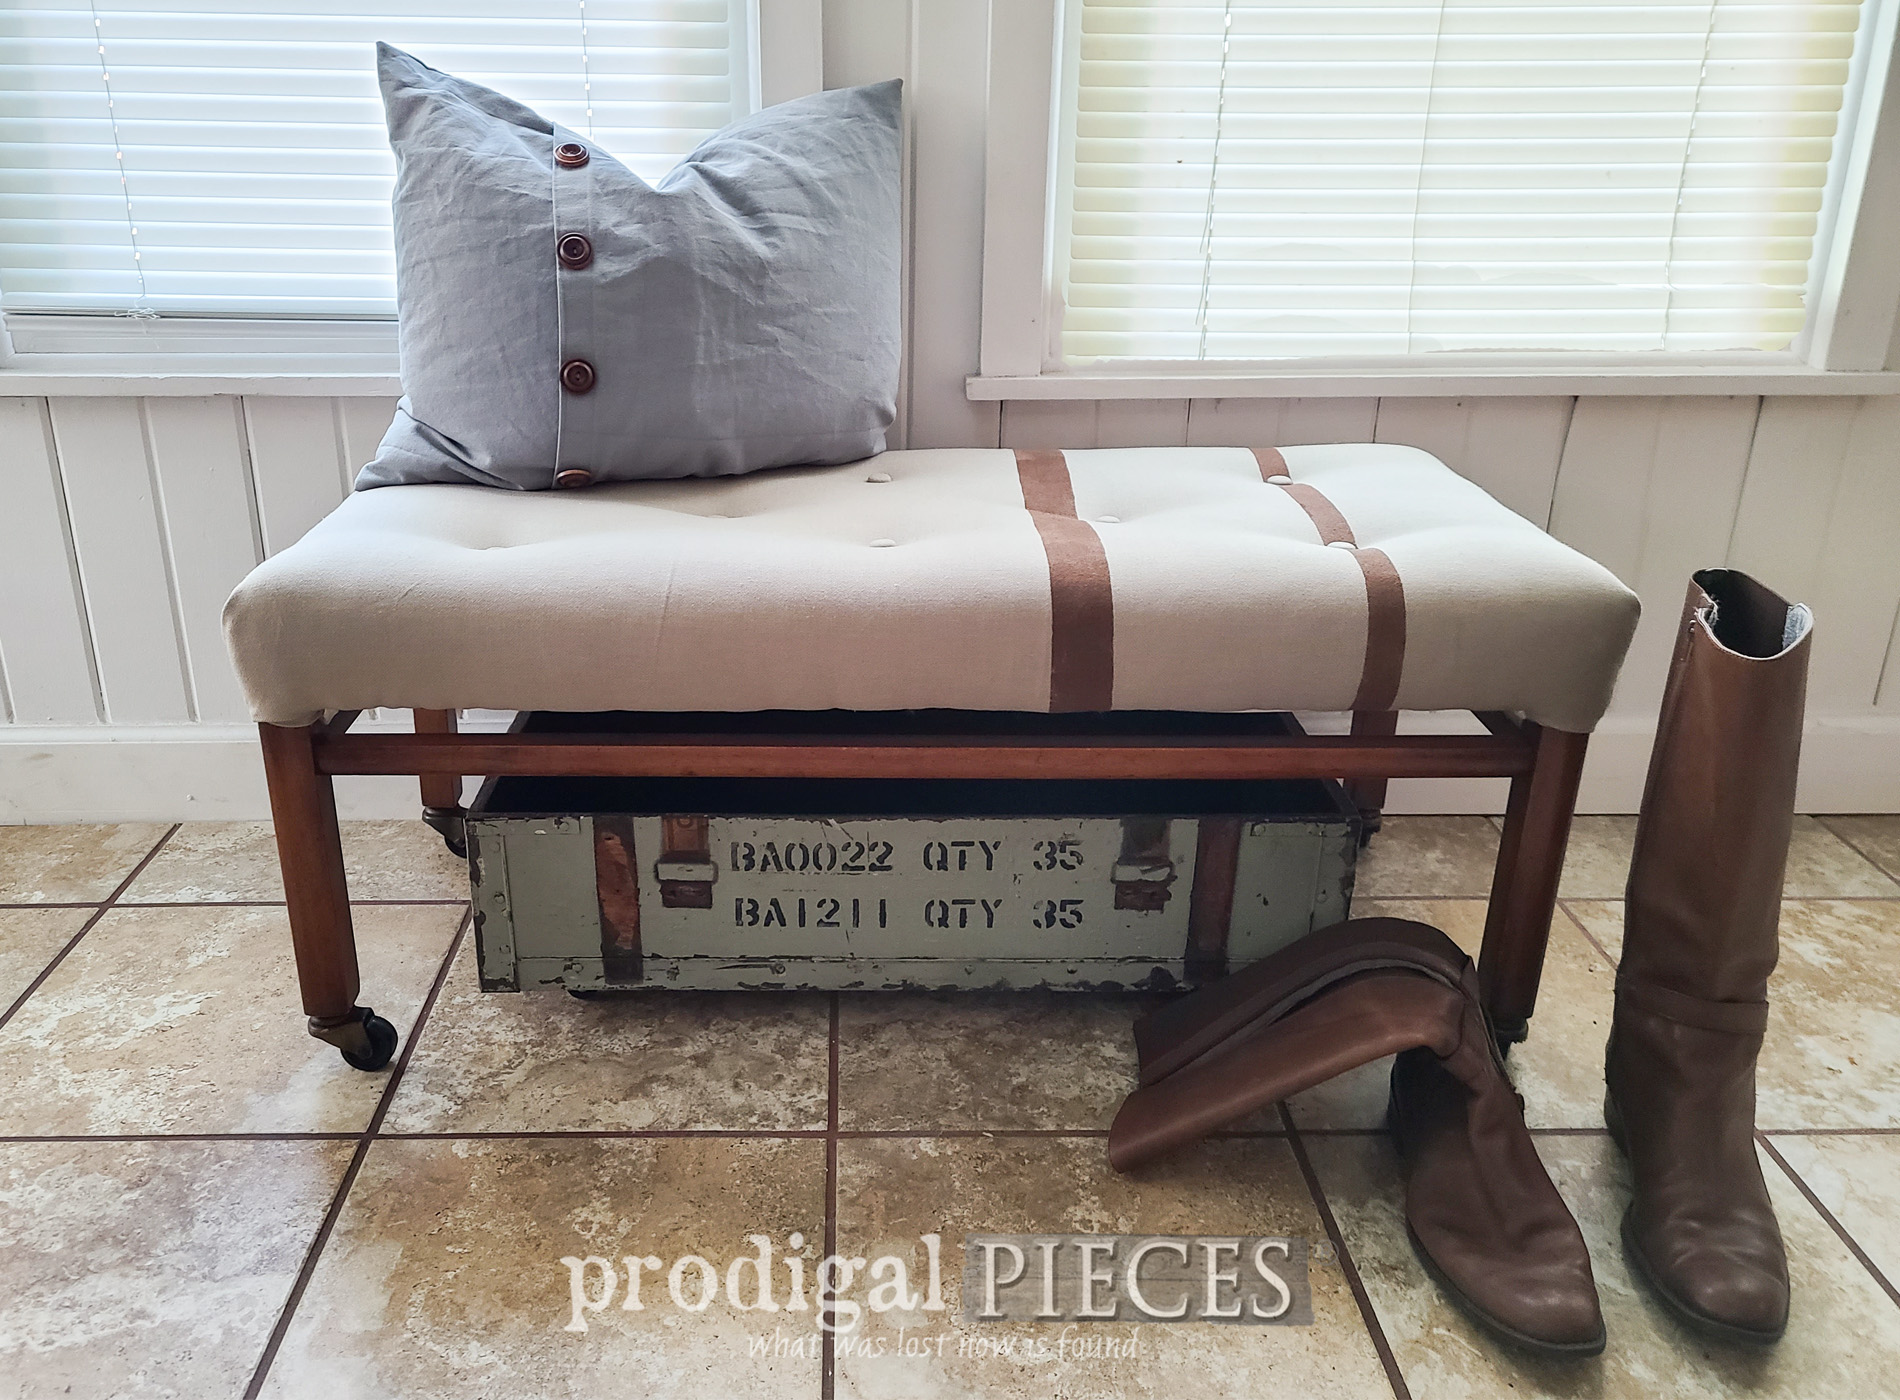
At last, here is this fun find refreshed and ready for many more years.


For me, I'd say this is bench is breathing a HUGE sigh of relief. {{aaaaaahhhhhh}} No more wonky skirt, or tears, or just dated upholstery. (not that I have anything against plaid...I love plaid.).


Also, as always, I'm curious...what would you have done with this bench? Left the legs out in their sassy style or replace the skirt. Maybe a floral print, or...? Either way, I'm smitten with the outcome and am excited to see it in its new skin.

Finally, if you'd like to add this to your home story, you can find it and much more available in
my online store.

Additionally, leave me some comment love below and do pin and share my vintage tufted bench makeover. Inspire others to give DIY a try!

Up next, another thrifted find that is ready for a brand-new look and function. Stay tuned!

To get these DIY tips & tricks in your inbox, be sure to
sign up for my newsletter. Until next time!

 PINTEREST | EMAIL
Also, more makeovers like this vintage tufted bench: