It's that time again where my
Trash to Treasure buddies and I put together a whole slew of inspiration for you the first Tuesday of each month . I'm excited! Not only do I get to share with you again, but this time it's something for ME. It's not often I get to work on a project for myself, so pardon me for being a little giddy. tee hee. Today, my goal is to give my vintage industrial office chair a makeover like none other.

First, let me tell you the back story behind this chair. I wrote about it back in one of my
very early blog posts
HERE. (boy have I learned so much since those first years!). Picture me elated as I found the chair on the curb. To say the least, I was in heaven over a damaged chair with a missing caster. I was so STOKED!!

As you scratch you head why I would be elated, first take a close look at it.

BACKSTORY
Now, mind you, the vinyl was torn when I got it. However, my kids saw fit to increase said damage over the last few years. When I brought it home, all the arm rest vinyl had come unstitched at one point. Bummer. I took the time to stitch them back up. That held strong for a few years until recently the front of the seat gave and I didn't repair it in time (hence the cracks).


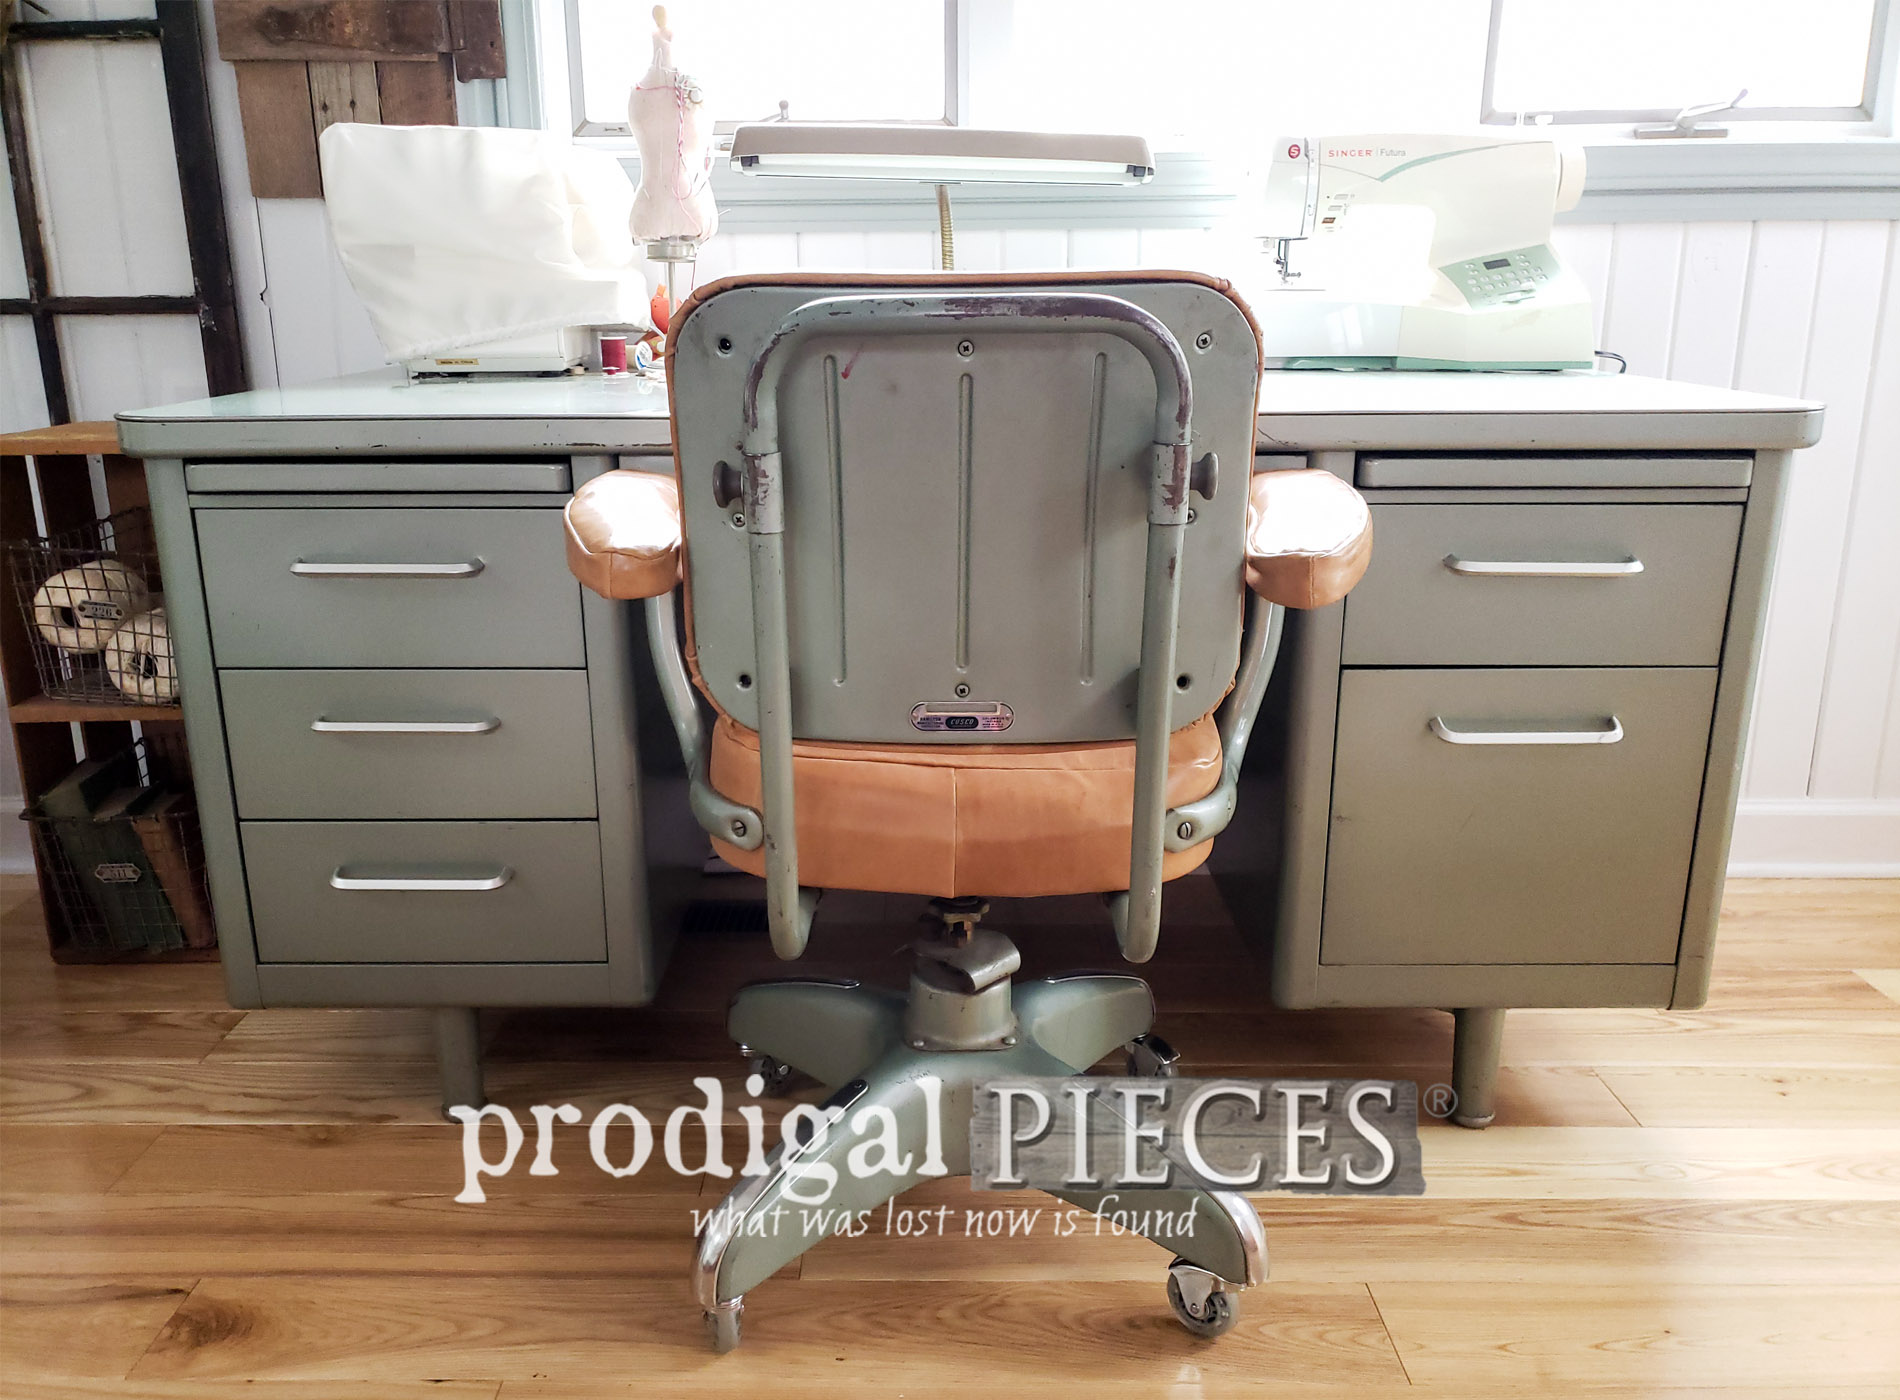
Isn't that green paint with chrome accents fantastic? I didn't find the desk until a few years later, but it serves as my sewing desk. It matches the chair perfectly. I love it!
Also, I mentioned the missing caster. Easy fix. I just popped a cheapie one in and I was good to go for a few years.

However, the problem is now I have brand new hardwood floors and those casters would require a chair mat. Nope, nada. The last thing I wanted to add was one of those ugly things to my room. So, I came up with a better fix. They make the most awesome casters now that won't damage hardwood floors. They're the same wheels used on scooters and work wonderfully.
I've created a step-by-step video down below of my work, but will also explain it here. Some instances seeing the process in action really helps.
Most places recommend removing old casters and pins with a large screwdriver. Not for me! I pop off the old caster and then attach the chuck of my drill. Next, I put the drill in reverse and POP!! Easiest fix you ever did see. (see video for demo)

UPHOLSTERY
Now that my casters are fixed, I can work on the top of the chair. yahoo!

Getting the chair apart is not a hard ordeal. Though, if you've ever done upholstery, you know that taking it all apart is a lengthy task as well as a messy one. The key to getting this is keeping track of the steps you take, and keeping all the pieces removed to use as stencils. In addition, taking pictures or videos of your process really helps in the reversal of adding new later.
Back a couple of years ago, my husband (JC) and I, built a beautiful leather bench. You can read that
fun post HERE. I've hoarded the leftover leather saving it for sewing myself a new purse. My older feed sack purse I created in
this post, is in need of a break.

Well, it's going to have to hold on a little longer because I chose to use my leather for my chair instead. {{happy dance}}
Here is the old vinyl roughly laid out on the leather so I can visualize my cuts.

There just may be enough left I can use some of the leather for a bag for me. Here's hoping!
SEWING
Once I got all of my leather pieces cut, it was time to sew. And, oh do I love to sew!

Since leather is bulky and you adding holes with pins is not a good idea, I just love these little sewing clips. They work awesome with my PUL and other slippery fabrics, keeping it all in place.
No special sewing machine needed for this smaller project. My sewing machine can handle the job with a sharp leather needle. Working slow is key to make it all come out as planned.

Next, before I could add the upholstery, I needed to cut a new piece of upholstery foam. I simply trace the old cushion with a marker.

A quick handy tool to get this done is an electric carving knife (ya know, for turkey & roasts?)

After the foam was cut, I stuck it inside the seat cover I created. Let me tell ya, doing upholstery on a wiggly, twisty, mobile chair is worse than trying to dress a toddler! Here are the clips used to attach the seat.

FINAL STEPS
Using a set of pliers set against the edge I'm placing the clips on, then squeezing the clip on and then lightly hammering them tight. I had to get placement right and tug it nice and taught. My injured shoulder said no-no to that process.
Then, I put the armrests back together. That was a bit tricky, but pretty simple in idea - just putting it back the way I found it.

Last, was the chair back. Again, pretty straightforward in reversal of how I took it apart. I use my cordless hot glue gun to help tack it in place so I could attach it to the back frame.

THE REVEAL
Now it's time to have a big ol' happy dance because my beloved vintage industrial office chair is stylin'!


Is it perfect? Yes, for me anyway, but there was a learning curve here. Plus, it still squeaks and creaks a bit because the bottom metal base seat is cracked. I don't care though because it give it character. I'm so glad it's mine!
The fun upgrade were the casters. Now I can fly around the room like a kid on these smooth things! And they matched the retro style I was after perfectly.


Finally, my sewing desk set is complete and no more pinching my rear on those cracks or scuffing my elbows on the worn vinyl. Hooray!!


Let the sewing begin! Can you tell I'm a smidgen excited?

My goal in sharing this vintage industrial office chair makeover is to inspire YOU to give DIY projects a try. It's fun and you'll come out knowing more than when you started. Do pin and share my project to inspire others too!

Up next, this thrifted bookcase headboard is about to get the transformation of a lifetime. See my past bookcase headboard upcycle
in this post. Then,
head HERE to see this one made new.

Before you go, be sure to
sign up for my newsletter. Until next time!

 PINTEREST | EMAIL
Time to see what my Trash to Treasure ladies have created to inspire you!


- Confessions of a Serial DIYer
- Artsy Chicks Rule
- Girl in the Garage
- Bless'er House
More upholstery projects like my vintage industrial office chair:


 Time to see what my Trash to Treasure ladies have created to inspire you!