When cooler weather hangs around for quite some time in my part of the world, I begin to miss my workshop. I tend to focus on indoor projects for the most part. However, sometimes something pops up that makes me willing to wear my 3 layers and have at it. tee hee. This vintage gem I recently found is about to become my upcycled bookcase headboard turned farmhouse hutch. Do you see the potential?

First, I'm curious...how many of you had one of these? I didn't, but many of my friends did. Seemed cool to have your books handy right as you were ready to hunker down for the night. My family and I are confessed bibliophiles, so this would be sweet.
DIY TIME
Since I didn't have a need for a bookcase headboard, I instantly saw something else. Likewise, if you've been following me for long, you would know I repurposed this other bookcase headboard into a bench -
SEE HERE. While that was a fun project, this one gave me a different vibe.
First, I punch out the cheap backing and plug the wiring hole. It had a plastic cap that comes out so you can add an alarm clock or lamp. I took it out and decided to fill it with a piece of dowel form a broken closet rod. (it pays to
hoard have a stash)


Next, after it was plugged, I filled it in and all the other nicks and dings with wood filler, and then sanded it down with my sander. Then, I used my circular saw to take off the bookcase sides even with the shelf. I love my tools! (my motto: toolsoverjewels)

Here's the leftovers after cutting the sides. I see more potential there!

SO COLD
So...as I mentioned it's a might chilly out here, as in FREEZING. Time to head inside to do more of my work. eep!

Now that I'm nice and toasty inside, I begin the rest of my vision. Storage is what I'm about creating, so a few cubby drawers fit the bill perfectly. Using my drill and my jigsaw, I cut out the openings.

In order to have cubby drawers, I used those cut off side pieces to make faces and backs of tiny drawers. Also, this is where my scrap stash comes in handy to build the little drawers. My brad nailer made the job a breeze. yay!
In addition, I added a bottom to my upcycled bookcase headboard hutch.

TIME FOR PAINT
Finally, it's time for the fun part...PAINT! {{happy dance}}. You know it was coming to that, didn't you? It helps create a unified appearance to my design as I give the drawers and hutch one coat of a soft gray paint.

Meanwhile, I set about to dive back in my stash for some beadboard. I cut it to size and then I gave it a nice deep color with a Hickory Gel Stain.

Once all was cured, I tacked the beadboard on with my nailer. In addition, I added some apothecary bin pulls to the drawers. You can see how I've used those same pulls in past posts
HERE.
ALL DONE
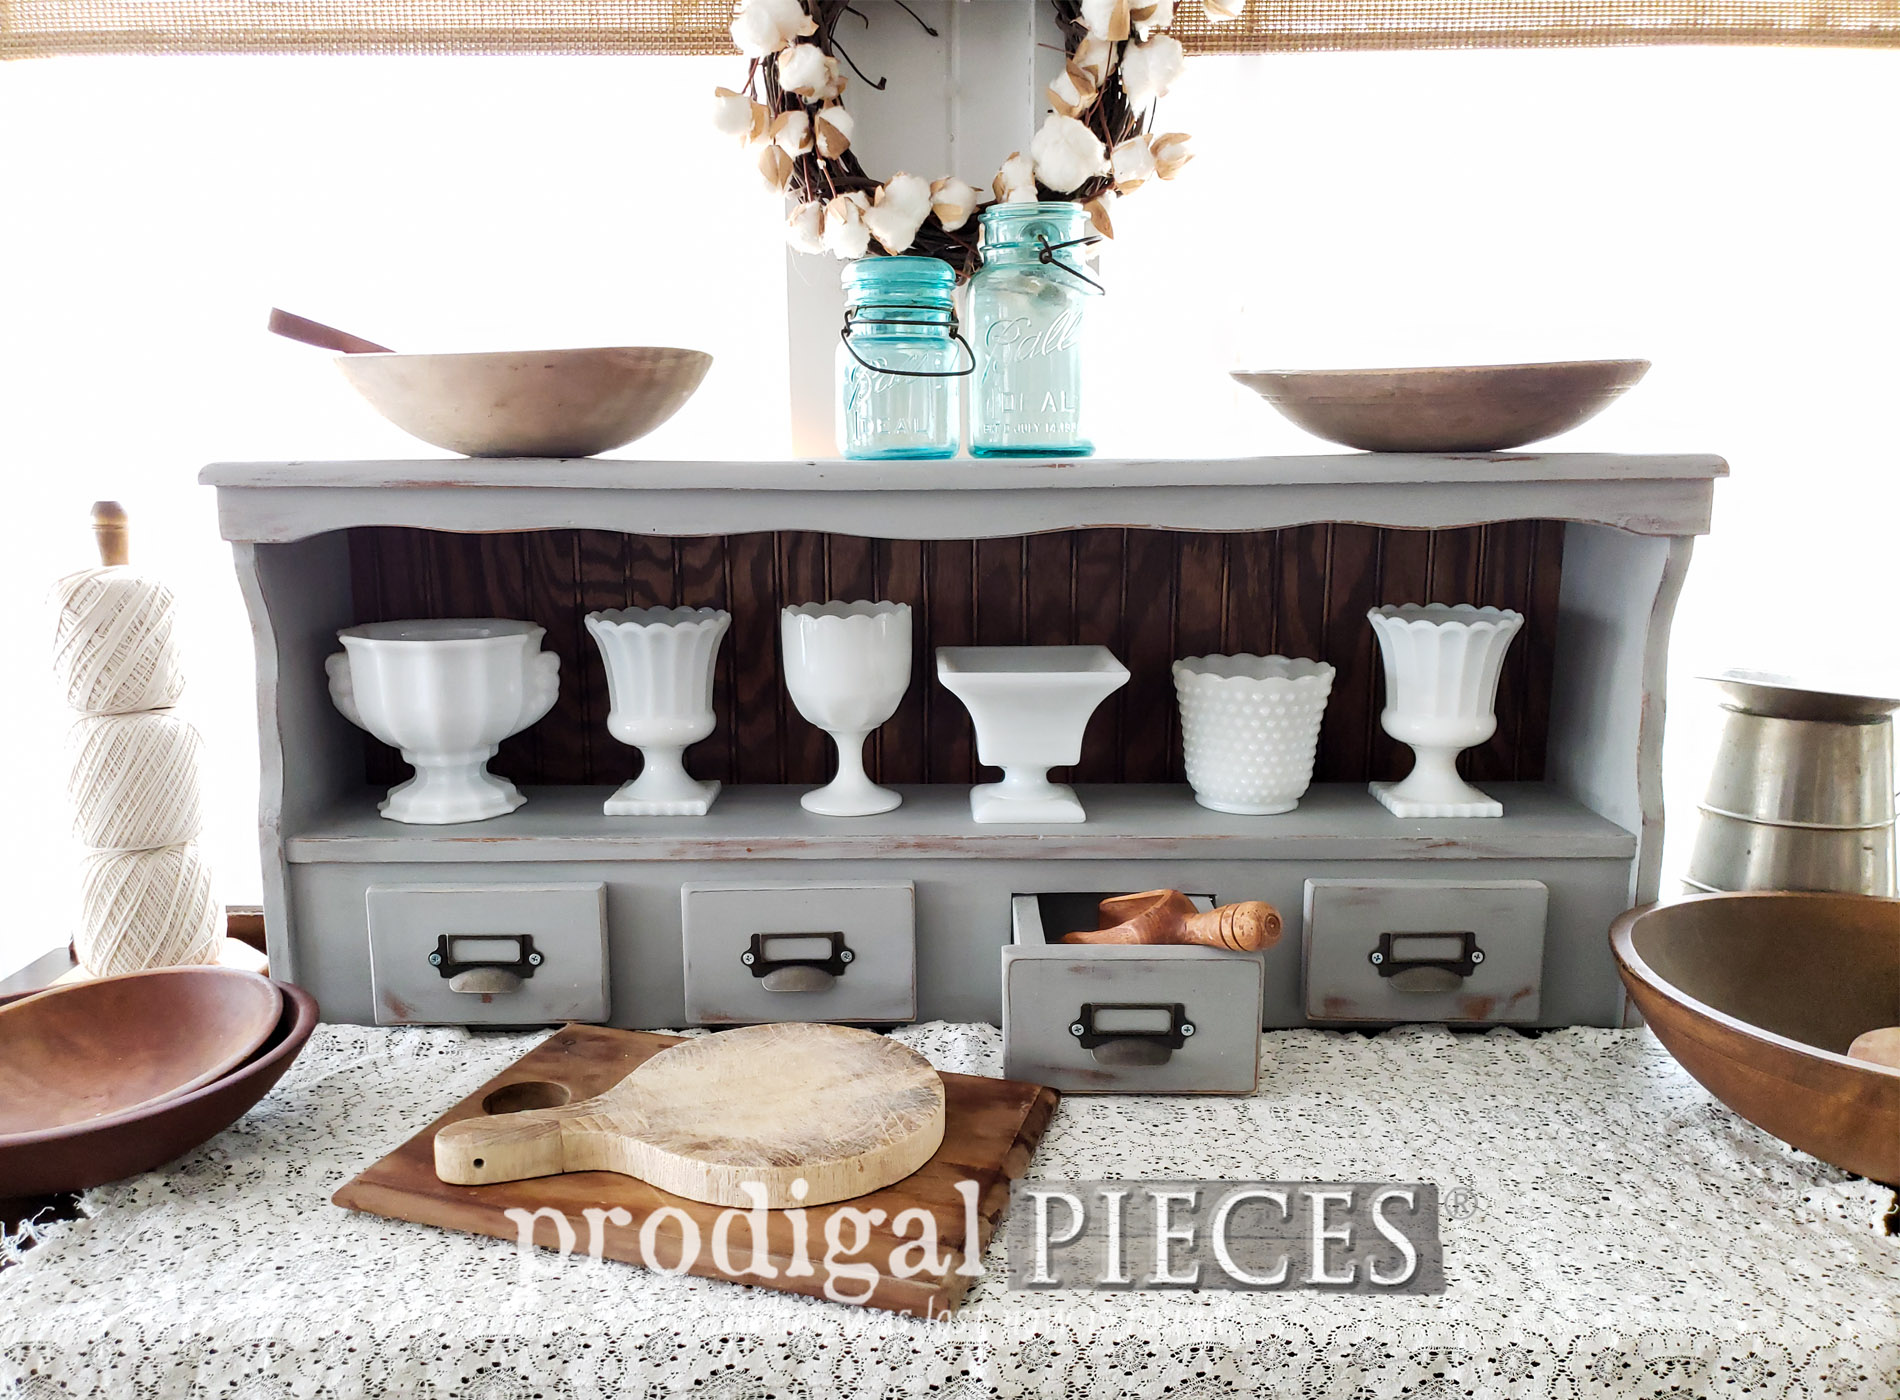
Finally, it's time to see my upcycled bookcase headboard hutch in its finished state.


I couldn't be happier with the outcome. Not only is it fun, but also functional and stylish too. The best part about this hutch is it can be wall-mounted or resting on a surface as I've shown here. How would you display it?


Even the versatility of it makes my heart happy. Perfect for kitchen, laundry, entry, bedroom, and bath. Endless possibilities, don't you think?
Furthermore, my milk glass urn collection really pops against that dark grain.


The only scrap I had left were those 2" x 2" pieces on the sides of the headboard. Those were sacrificed to keeping my fire going in order to stay warm while working. haha!
At last I have my building fix and had fun too. I hope you are inspired by what I've shared. Additionally, if you'd like to own this hutch, you can find it available in
my online store.


SHARE
In addition, pin and share this fun upcycle to inspire others too. Thank you!

With that in mind, up next, I'm digging into my stash to create more farmhouse decor.
See their new look HERE.

Before you go, be sure to
sign up for my newsletter. Until next time!

 PINTEREST | EMAIL
Also, more projects like my upcycled bookcase headboard: