 Just for reference that you don't think I'm off my rocker (I've already established I'm on my rocker back in this post...tee hee), here are some fun past projects for reference:
- ammo box turned mobile storage
- antique sewing machine drawers storage
- bread box turned charging station
- misfit drawers into tiered stand
- pink trash can gets makeover
- the list goes on...
DIY TIME
Initially, I'm assuming your house is much like mine with different appliances and electronics that require a remote. Corralling them can be quite the hassle, especially when you have more than one person living with you. Right?? Consequently, they get lost, misplaced, dropped into cushion cracks, etc. However, when I found this vintage sewing box at the thrift store, I knew it would be just what I needed to creatively and stylishly hide the storage. In addition to remote control storage, it is useful for many other things too. Before I get started, I want to let you know I've put together a video tutorial for you down below so you can see my fun in action. Likewise, I'm also providing the steps outlined for you in text form too. I'm awesome like that. tsk. (just kidding)
STEP 1
When you're considering a project like this, first have in mind your end result. For me, I just adore typography of any kind and this looks like a blank slate to me that just needs dressing up. First, I head out to my workshop and use my sander to remove the finish on the door panels.
STEP 2
Next, I wipe it all down with a 2:1 vinegar/water mixture to clean and remove any residue. I grab my paint brush and apply one coat of a flat latex paint in black. To resume, after the paint has cured I use the two antique sewing cabinet labels I created to trace. However, if you're not into creating graphics, I found these life-size decals for only $1.50 on Etsy HERE. After tracing, I paint in the spots with a metallic gold paint.
STEP 3
Meanwhile the paint is curing, I use my light pad and artist's oil pastel to make my typography transfers. Also, you can see my full image transfer method tutorial in this post, or just watch the video to see it done.
STEP 4
Afterward and before I apply my image transfers, I use a king size Sharpie marker to outline the gold paint. However, while I typically prefer a brush and paint, these markers are easy and fun to use too.
STEP 5
Additionally, using the transfers we made, trace them on, and then fill in with various size Sharpies. See video for details.
FINAL STEP
Last, but not least, create time-worn wear by lightly sanding. Finally, to seal it all in, use a clear wax and buff with a soft cloth to reveal the luster. We're done!

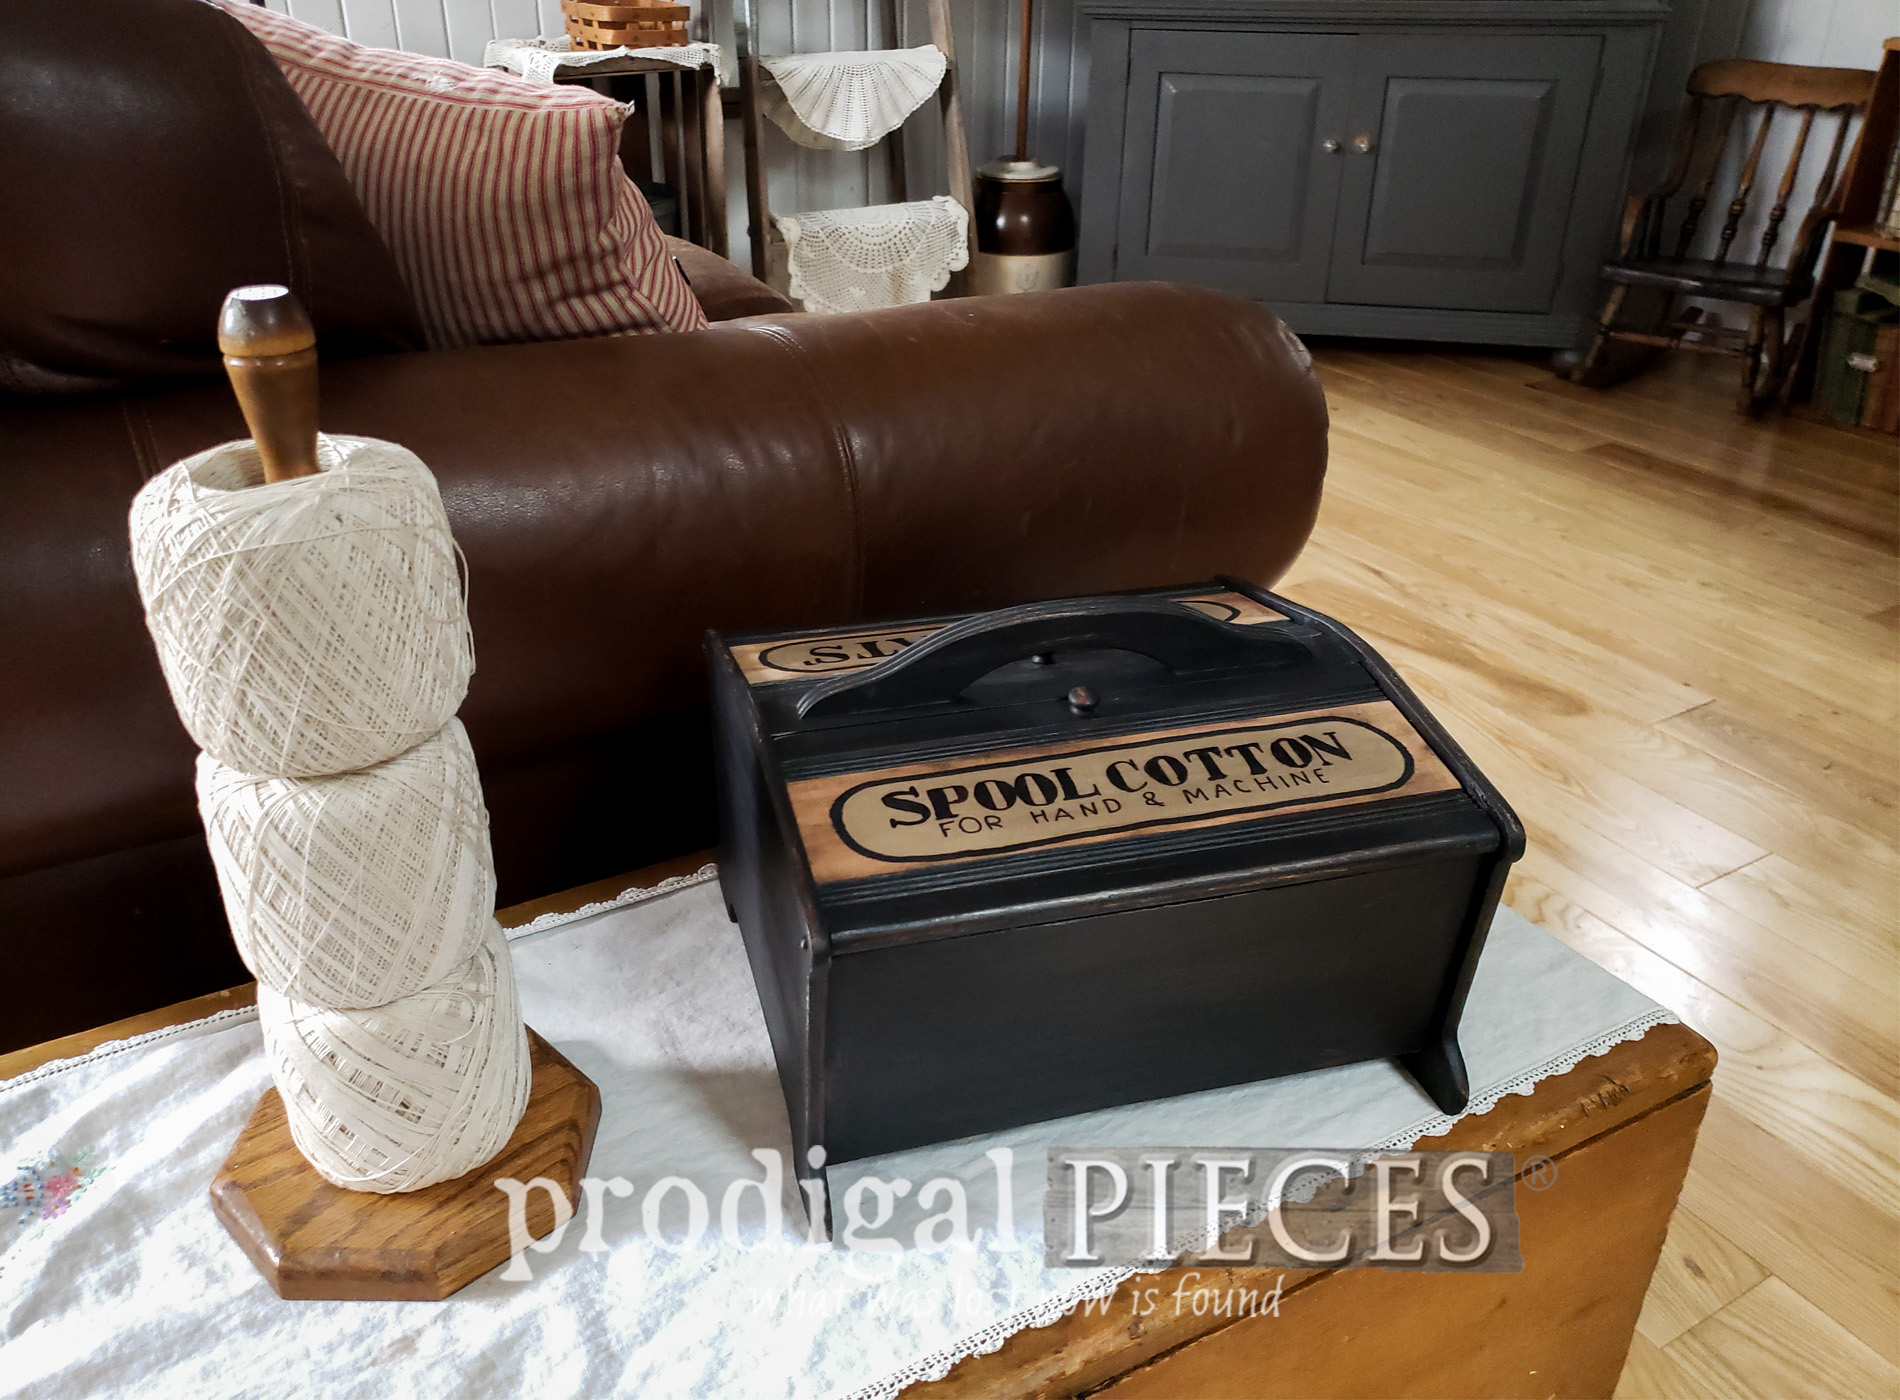
 Not only is our vintage sewing box revived, but it is also so much cuter now. Am I right? Plenty of storage for remotes, or whatever your heart desires.

 I totally had fun sharing this with you. Likewise, if you'd like to own this newly created piece you can find it available in my online shop.
[metaslider id=30251]
 Additionally, pin and share my upcycled remote control holder. I'm sure I'm not the only one wanting to corral the crazy remotes.
 Up next, look at what followed me home from Curb le Chic. ahem. Come see the makeover HERE.
 To get these DIY tips & tricks in your inbox, be sure to sign up for my newsletter. Until next time!

Also, more projects like my upcycled remote control holder:

