
FIRST UPCYCLED CRATE
First, let me say that this trio came from different sources. I'll start at the bottom with the largest crate and work my up with each one. I actually bought this one at a local thrift store using my coupon. The retail price was more than I would have normally paid. But, since I had the coupon burning a hole in my pocket, I decided to pull the trigger on it and bring it home. Isn't it cool with the original cantaloupe label? This particular crate reminded me of one I found a flea market one time and use as my current side table. Since I love it so much, I chose to make this one in the same likeness. The size of this crate made it perfect to add a center shelf for added storage. My wood stash always comes in handy in times like these. I cut a piece of plywood with my jigsaw and then painted it this fun Colonial Red to compliment the label.
 Next, while the paint cured, I repaired the label and sealed it with a poly. I also sanded down a few rough spots. Then, it was good to go. Here is the first of my upcycled crates now perfect as a farmhouse side table or nightstand.

 Also, I used my vintage locker baskets to add even more whimsy, but you could use whatever floats your boat. My favorite is that the original label is still intact and ready to tell a story all its own.


SECOND UPCYCLED CRATE
Second, is one of the crates I found on the curb. You know I had to stop and get it...right? The patina alone is gorgeous. Yes, it's seen better days with its jerry-rigged broken slats. However, to me, that just means its stood the test of time and it deserves to be rescued.
MORE FUN
Then, as the second of my upcycled crates project, I decided to do something a little different. I had a remnant piece of desk top that I saved from when I turned a desk into nightstands (see HERE). You know I couldn't let that good piece of wood go to waste. tsk. After I repaired the broken slats, I cut the desk top piece to fit the bottom of the crate with my jigsaw. Then, I cut the random piece that had reinforced the bottom and used it to reinforce the sides to accept pulls. No waste going on around here! woot!

 Notice that before I added the casters (basic store-bought stuff) I painted them to look old. A must, of course. Am I right? Plus, the feed sack pillow and beautiful quilt from my bestie have a sweet place to await my tired self.


THIRD UPCYCLED CRATE
Last, but certainly not least, is the top smaller crate. This poor soul is one I grabbed off the curb during a heavy rain. In addition, the bottom was rotted out, so I finished it off with my hammer.
 I mean, who could pass up this rustic gem? A face only a junkin' mother could love...I know. haha. It even had rusty thumb tack punched into one side. I love it. My first of the upcycled crates became a side table and the second an awesome storage crate. However, this one I decided to take to new heights.
NEW HEIGHTS
That's when I grabbed these reclaimed piano bench legs. You see, awhile back I upcycled a piano bench into a lap desk (as seen HERE). Of course, I kept all the parts I didn't initially use and they always come back to bless me in future projects. I even have a container of rusty screws and nails I save for projects like this. It makes creating fun! After I attach the legs, I cut yet another piece of weathered wood from my stash to fill the inside.
Then, it's time to make this project cohesive with a wash of paint.
I even have a container of rusty screws and nails I save for projects like this. It makes creating fun! After I attach the legs, I cut yet another piece of weathered wood from my stash to fill the inside.
Then, it's time to make this project cohesive with a wash of paint.

THE REVEAL
Finally, are you ready to see it? Take a peek...
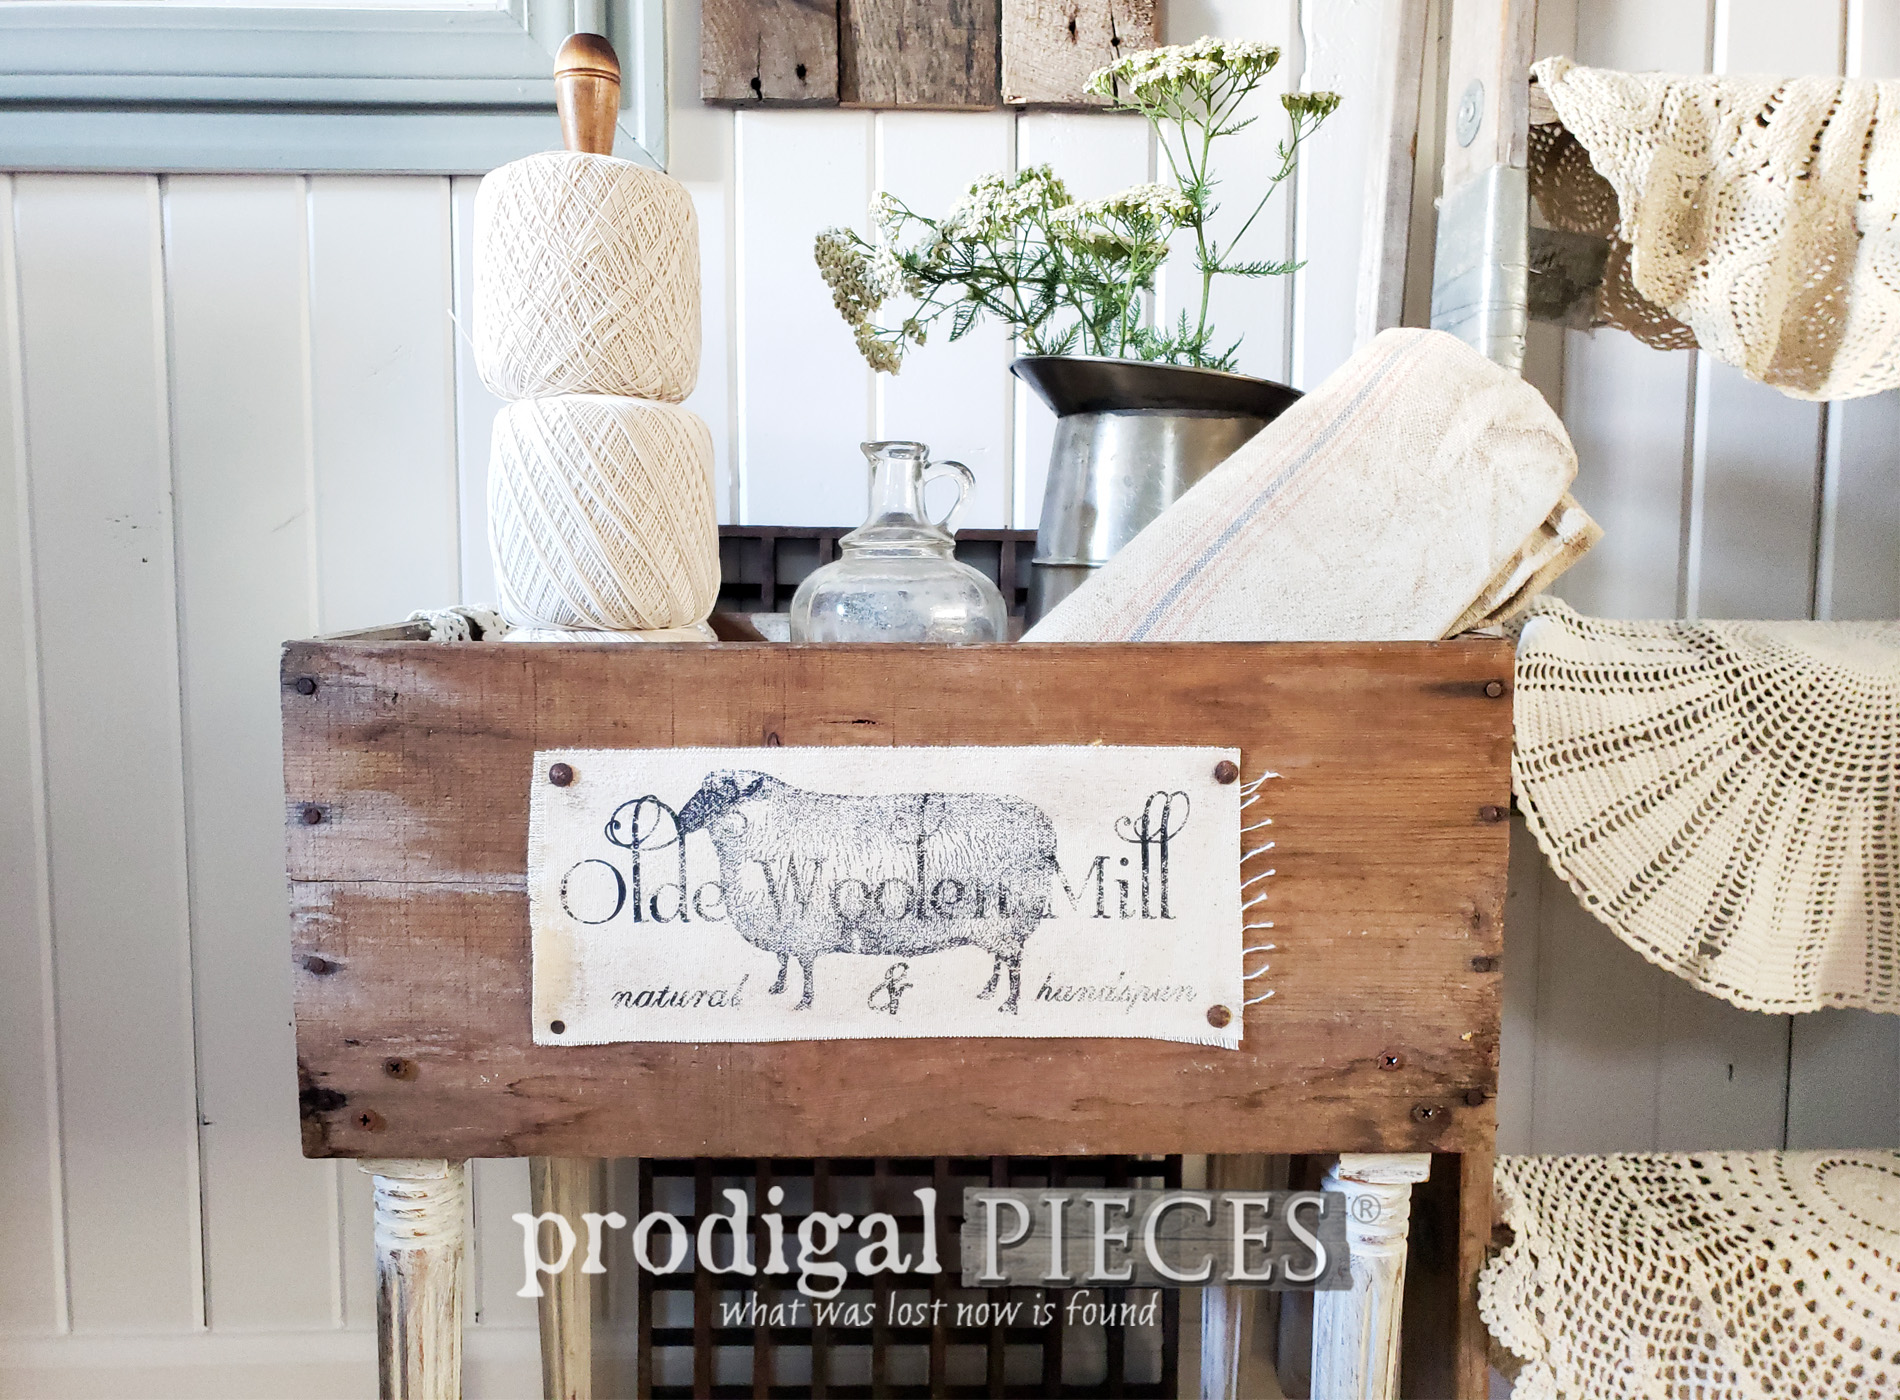
 For this last of my upcycled crates creations, I added the same graphic I used on my blanket chest to a bit of canvas. Don't ewe just love sheep? You can see all of my fun farmhouse sheep tutorials HERE too.


 As I always say, my goal is to inspire you to see beyond the obvious. Yes, these were someone's junk set out for trash, initially. However, there are so many possibilities to make use of upcycled crates. Likewise, taking the time to think outside the crate saves our landfills from becoming full of good items, and also can lead you on a wonderful creative adventure.
 All 3 crate creations are available in my shop. I already have my own crates throughout my house that I thoroughly love. (SOLD)
[metaslider id=30251]
Also, pin and share my upcycled crates creations. I'm sure I'm not the only one that sees these cast-offs wondering what to do with them.
UP NEXT
Up next, this thrifted find is going to get some cottage fun. SEE THE NEW LOOK HERE. To get these DIY tips & tricks in your inbox, be sure to sign up for my newsletter. Finally, it's time to see what my Trash to Treasure gals have for you!
 Additionally, take a peek at these awesome projects created to inspire you:


Also, more projects like my upcycled crates:

