It's that time again!
Trash to Treasure Tuesday is upon us and I'm excited to have my blogger friends joining me for another month of fun. You'll see their projects in a bit, but check out what I have for you. It's been a few years coming, but I'm finally getting to my vision for this upcycled antique sewing machine top. {{happy dance}}

Maybe at first when you see this you're like...um...what is THAT? Well, let me show you a picture for the original antique treadle sewing machine I acquired over 4 years ago.

If you've been hanging with me for that long you deserve an award! I took it apart and made few things with it. One of them is a reclaimed wood table
using the base seen HERE.

The other project was taking the drawers and frames to make my bathroom storage in
our remodel HERE.

I have been relentlessly purging my workshop (aka. garage) for the last few weeks and refuse to take on more work until it's done. I've been saving this particular piece to make an upcycled antique sewing machine project for my garden shed makeover. However, since that won't be happening anytime soon because of the magnitude of junk (detailed in the last few posts) we were served this summer, I'm taking it on now.
THE BEFORE
Here's a peek of the inside and what I'm up against to transform this once gem.
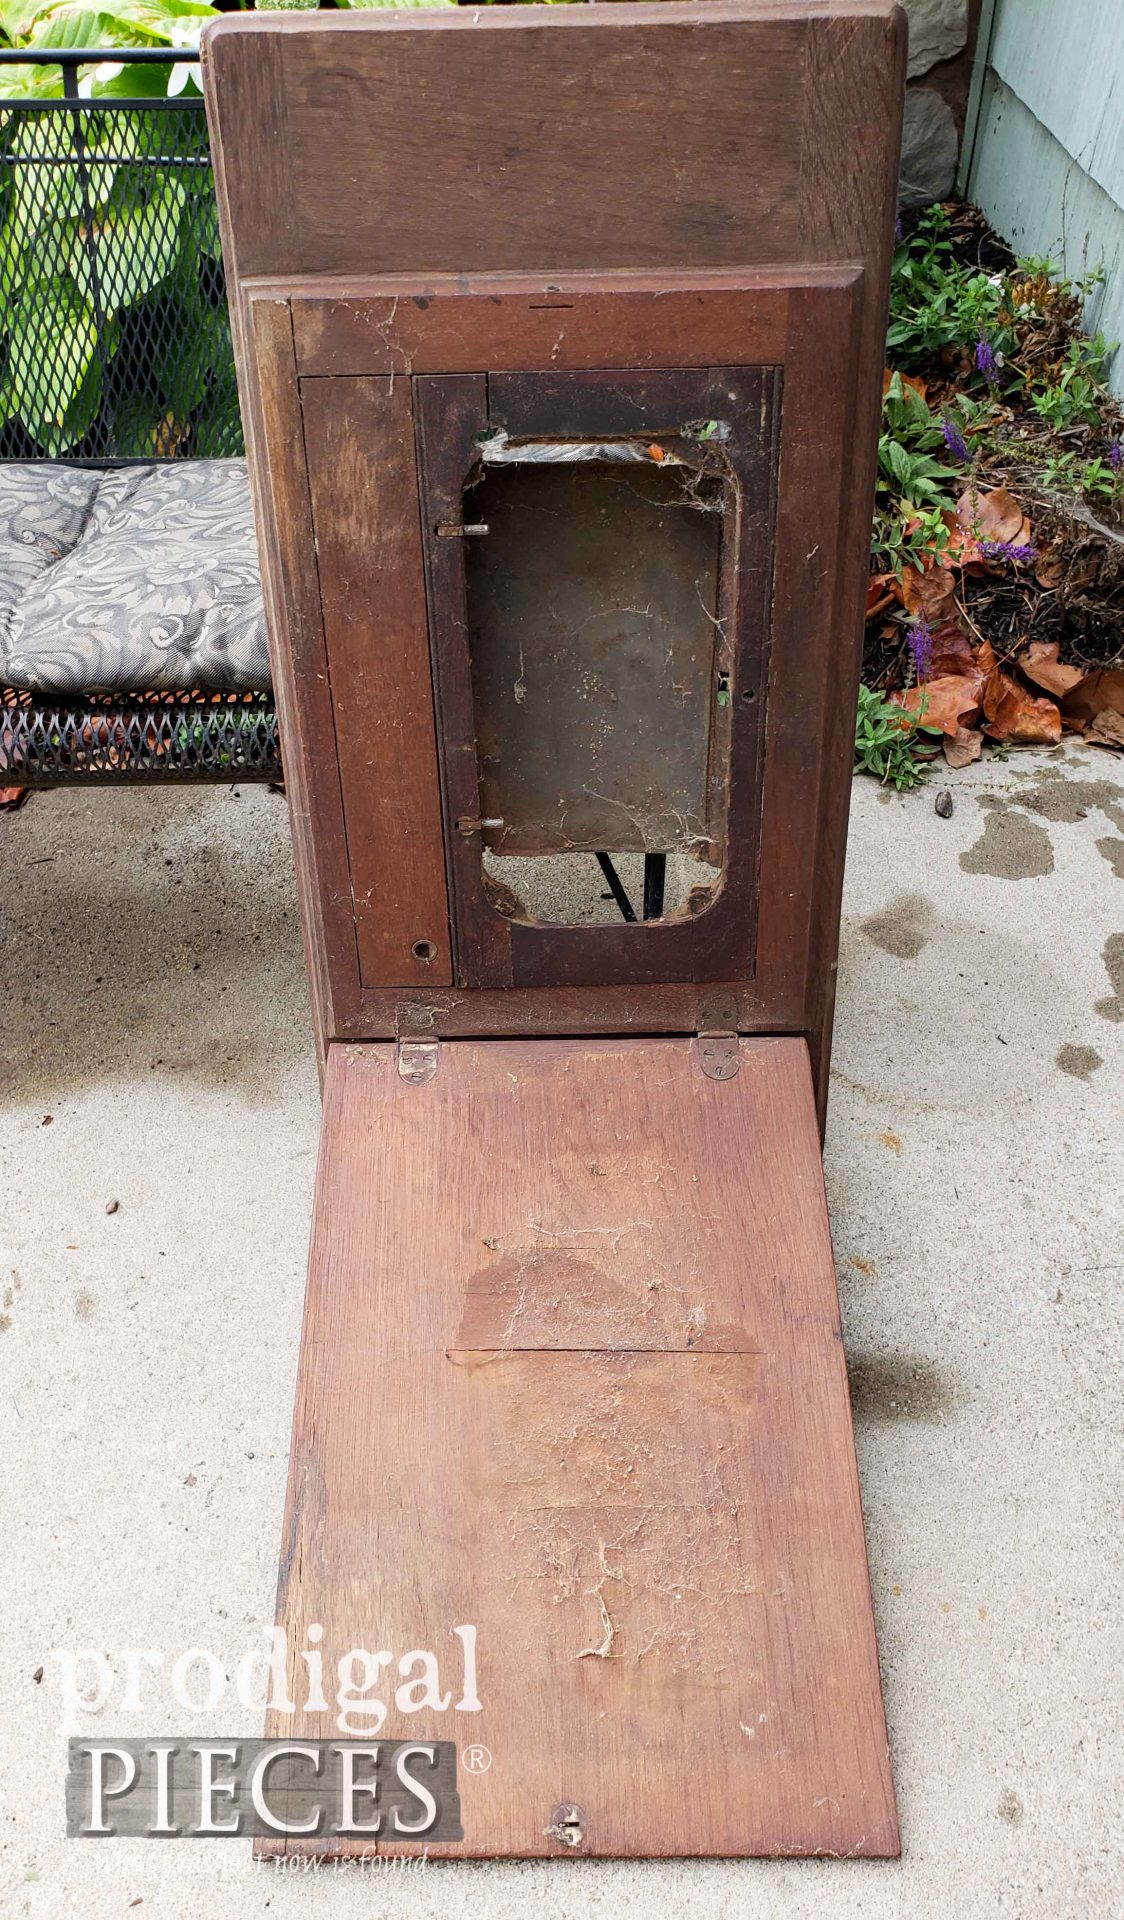

TIME TO UPCYCLE
Now you can see I have really weathered wood, rust, webs, and oh so much goodness! Yes, I am not normal...but who's normal? tsk.
First order of business was to take apart what I could. I removed the mounting hardware, and metal sheet at the back of the opening.

Then, I used wood glue and my nailer to tighten up joints here and there. I also needed to removed the veneer on the front/top of the table and sand the surface underneath.
Once I had the veneer removed I used a stain to let the wood age naturally to draw out the patina. Since I was aiming to mount this to a wall, I wanted everything to stay where it should. I locked the inside opening in place with screws, and added a few button magnet closures to the top surface and lid with my drill and forstner bit.
Next, in order to support that heavy lid I needed to add support. I pulled out one of my thrifted corbels from my stash. It was a bit too long on one side, so I cut it to length with my jigsaw, and used my sander to mock the routed edges.

Then, I sanded the entire corbel and gave it a new stain with a hickory gel stain to age it a bit.
FINISH WORK BEGINS
Finally, I finish all my prep for assembly and I can now begin my finish work. Here's the front of the upcycled antique sewing machine top I've prepped.

Next, I am using this graphic I found and enlarged to fill that center space and add typography that I adore.

I simply printed it on legal paper and then decoupage it on with a thinned school glue. Notice it is bubbling a bit...no worries. Those will all lay down as the decoupage dries. Plus, I don't mind a bit of aged appeal since this entire project is full of stories already.

THE NEXT STEP
As soon as the decoupaged cured, I begin the process of finishing the interior. I painted two coats of a custom mixed gray to the inside of the top panel. Once that is ready, I tape off a section for the checkerboard I marked and measured.

I use an antique white paint to hand-paint in the border and squares. When cured, I apply two coats of a matte poly to seal and protect it.
Last, but not least, I use my hemp oil to nourish the wood and let that gorgeous patina shine. The wood is so parched that it soaks it right up.

To make this game board wall-mount worthy, I then add keyhole hardware to the back. This will allow it to hang flush and sturdy. You could also use a keyhole jig and router bit too.
ALL DONE
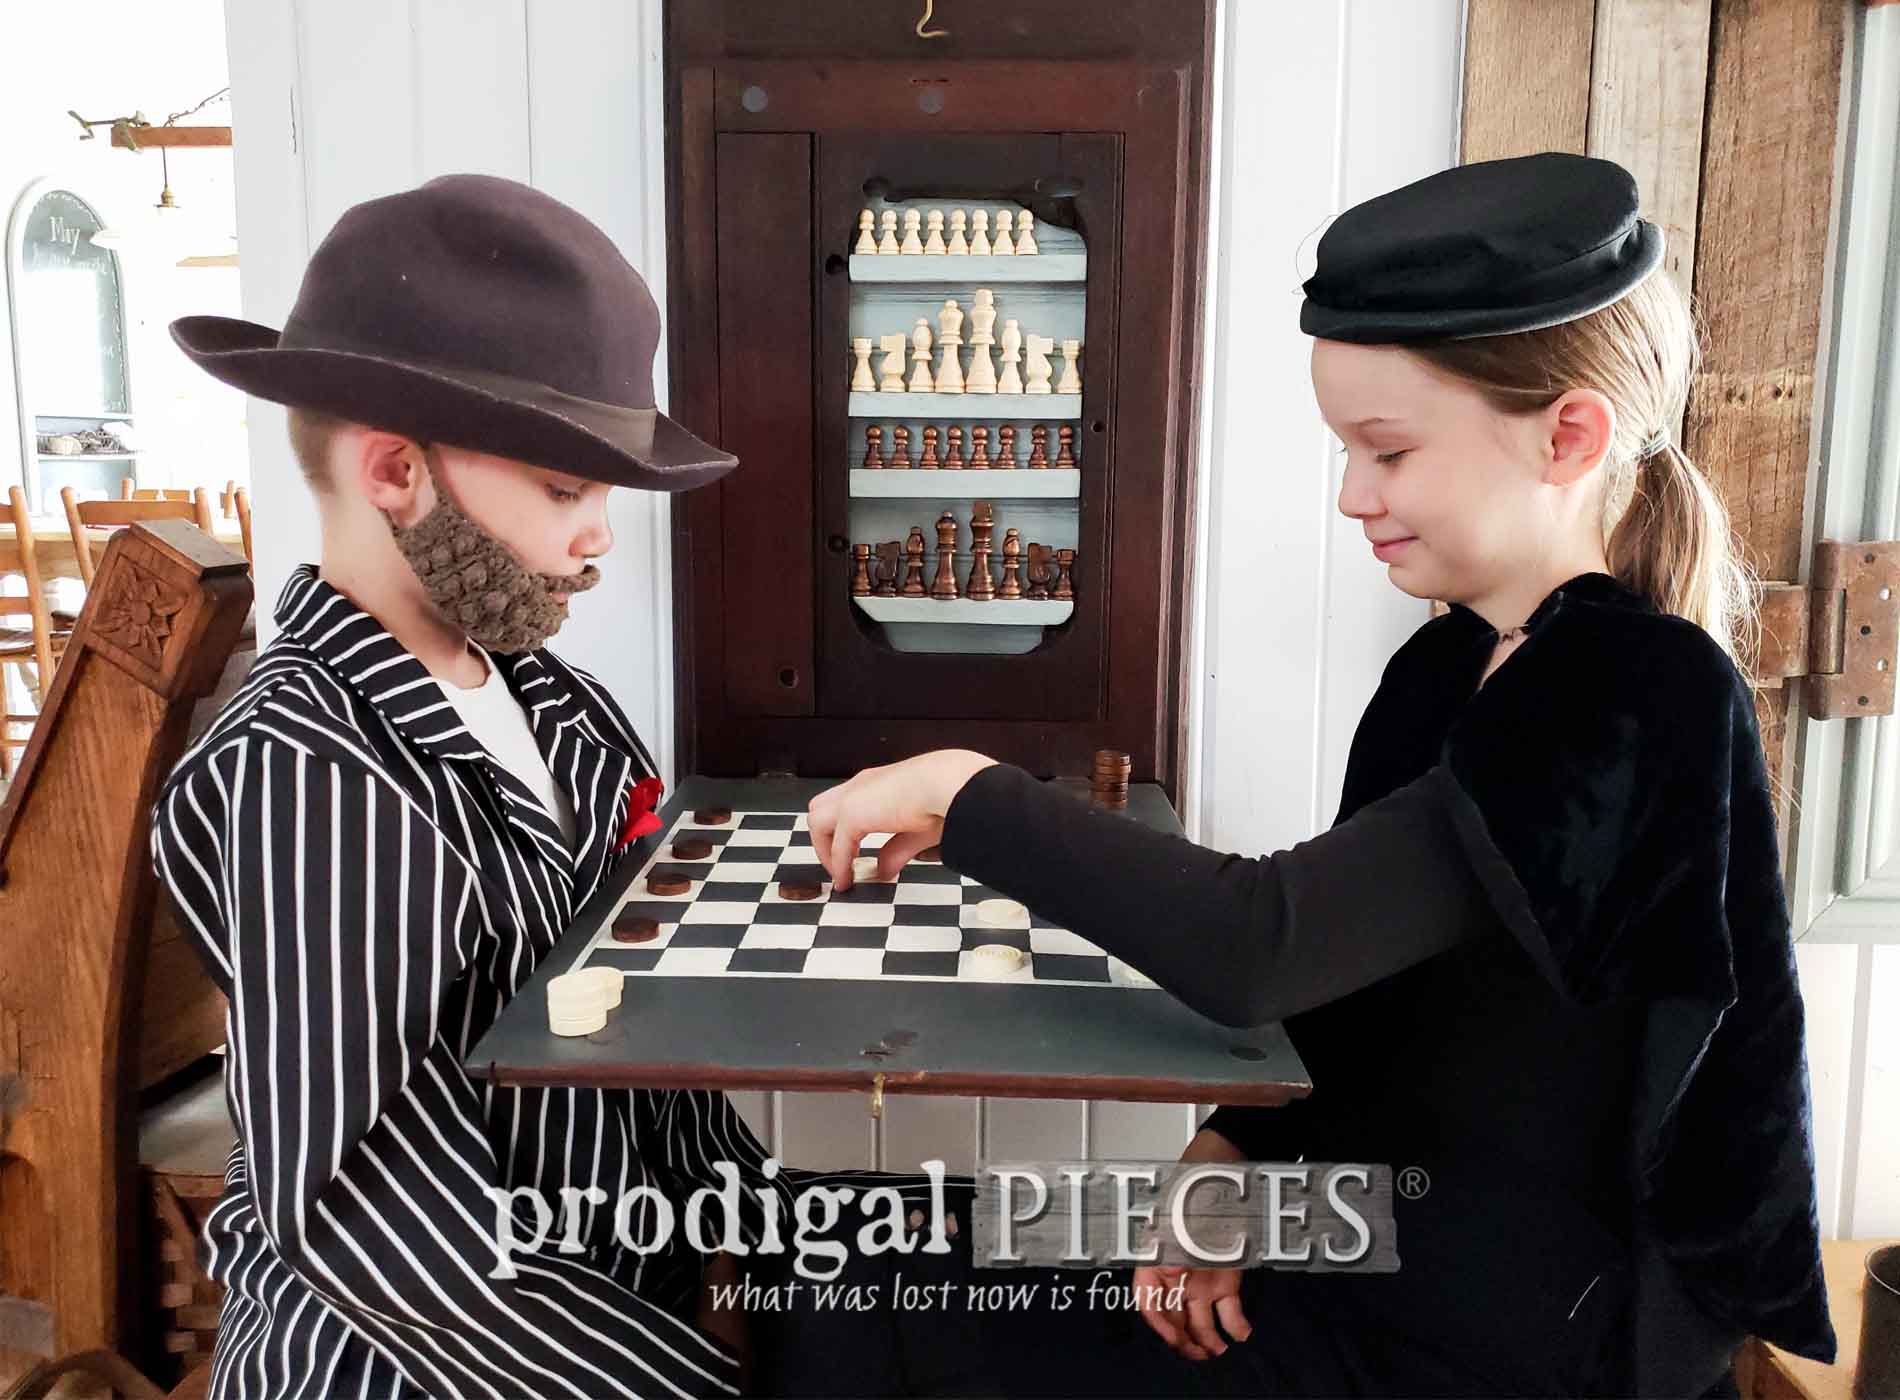
Let's take a peek at my finished work, shall we? I love it!


It came out just as I had envisioned for all these years, so I can definitely say I'm smitten. If you notice, you can see I added a hook to the top for extra closure. The corbel swings out and gives full support to the chess/checkerboard.


Isn't it fun?!? Two of my six kids were more than eager to give my creation a test run. This same duo helped me stage
my rocking chair turned horse project too. And yes, this is their normal way of playtime with their vintage clothing. My kids rock, just sayin'.

Bonus is that every part of this creation came from my stash, hardware and all. The only new thing is the chess/checkers set. I debated on making an edible set as we do around here. I have a chocolate mold for a chess set and make them so you can eat the opponent when you capture them. mwahahaha.

My junk lovin' self is delighted with the outcome. It is functional, but also decorative as most would never know what hides inside. I'm eager to hear if you have been inspired. If you'd like to own this game board, it's now available in
my online store.


WRAP UP
Do pin and share my upcycled antique sewing machine creation. You just never know who may have a similar one sitting around for four years or so. ahem.

Up next, I aim to tackle this buffet. See the
new look and lend a helping hand HERE.

To get these DIY tips & tricks in your inbox, be sure to
sign up for my newsletter. Until next time!

 PINTEREST | EMAIL
Check out these funtastic DIYs to inspire YOU.


- Confessions of a Serial DIYer
- Artsy Chicks Rule
- Bless'er House
- Girl in the Garage
More fun projects like this upcycled antique sewing machine:


 Check out these funtastic DIYs to inspire YOU.