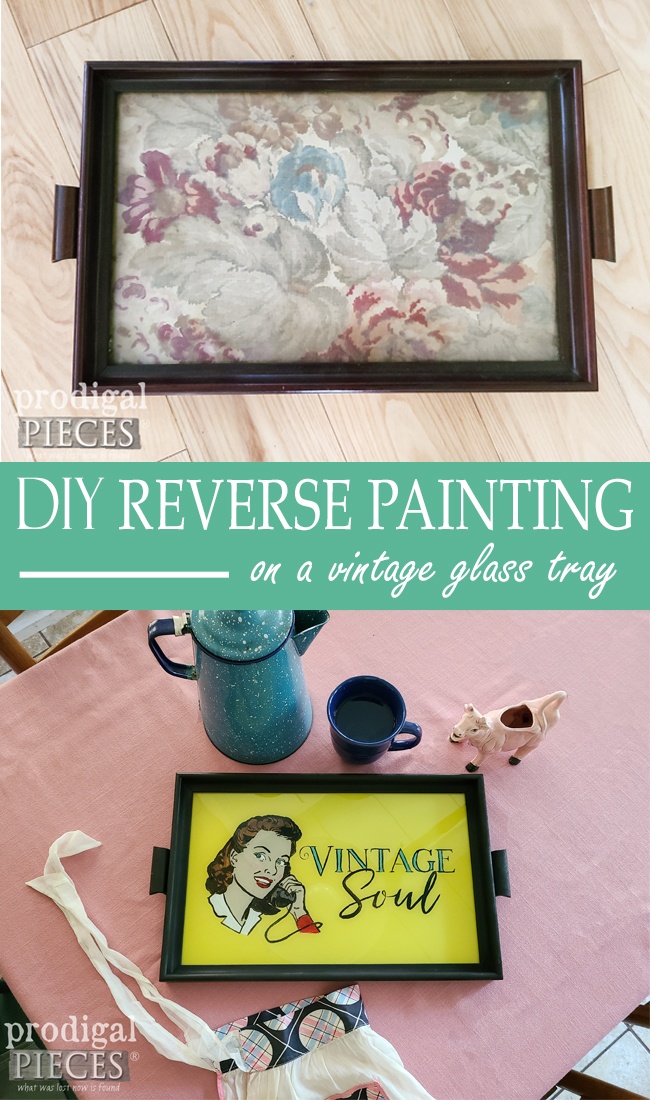
Do you ever like to stray off the beaten path and explore? I do! Especially when outside in God's wonderful creation. I guess that why I love doing what I do...the abnormal taking "trash" and turning into something completely new. Also, even better is filling my home with story-telling pieces from local and nearby haunts. Take for instance this vintage serving tray. Yes, it's dated, and needs a new life. That's why I'm sharing a reverse painting technique on this glass serving tray.

Not only does it showcase a fading insert, but also the felt backing leaves much to be desired. Time for a makeover!

DIY TIME
First, the obvious start is to take off the felt on the backto see what I'm up against. Even more, check out this cocky friend I found underneath.

Apparently, someone took that original insert and flipped it backwards to be able to insert the fabric we see up above. However, that fabric is looking pretty awful now.

Then, once all is apart, I paint the frame and backing with basic black. Next, I want to start the reverse painting on the glass insert.

NEXT STEPS
With that in mind, in the event that you'd like to give this technique a try, it's pretty simple. First, gather your supplies:
- artist's brushes
- acrylic paints in your color choices
- graphic design printed in reverse
- tape
We need the graphic to be in reverse because we're painting on the backside of our try so that the image is visible right side on the front (top). See how I have it taped here?

Afterward, I use my software and
this vintage image from my friend, Karen, at The Graphics Fairy. You can used any thing you want...magazines, coloring books, or your own design too.
Next, begin painting in the design. Now, you need to think in reverse. Normally, you would paint the general picture and then cut in outlines. Additionally, this time, you begin with the top layers - the outlines, her rosy cheeks, etc.

Let the first layer cure completely and then add in the blocks of color like the eyes, the teeth, and the lips.. Finally, after that layer cures, you add in the skin and any other final layers.

At this point, you can either leave the glass clear or finish off with a color or even a mirrored effect like I did in this
upcycled picture frame into mirror in the video tutorial below.

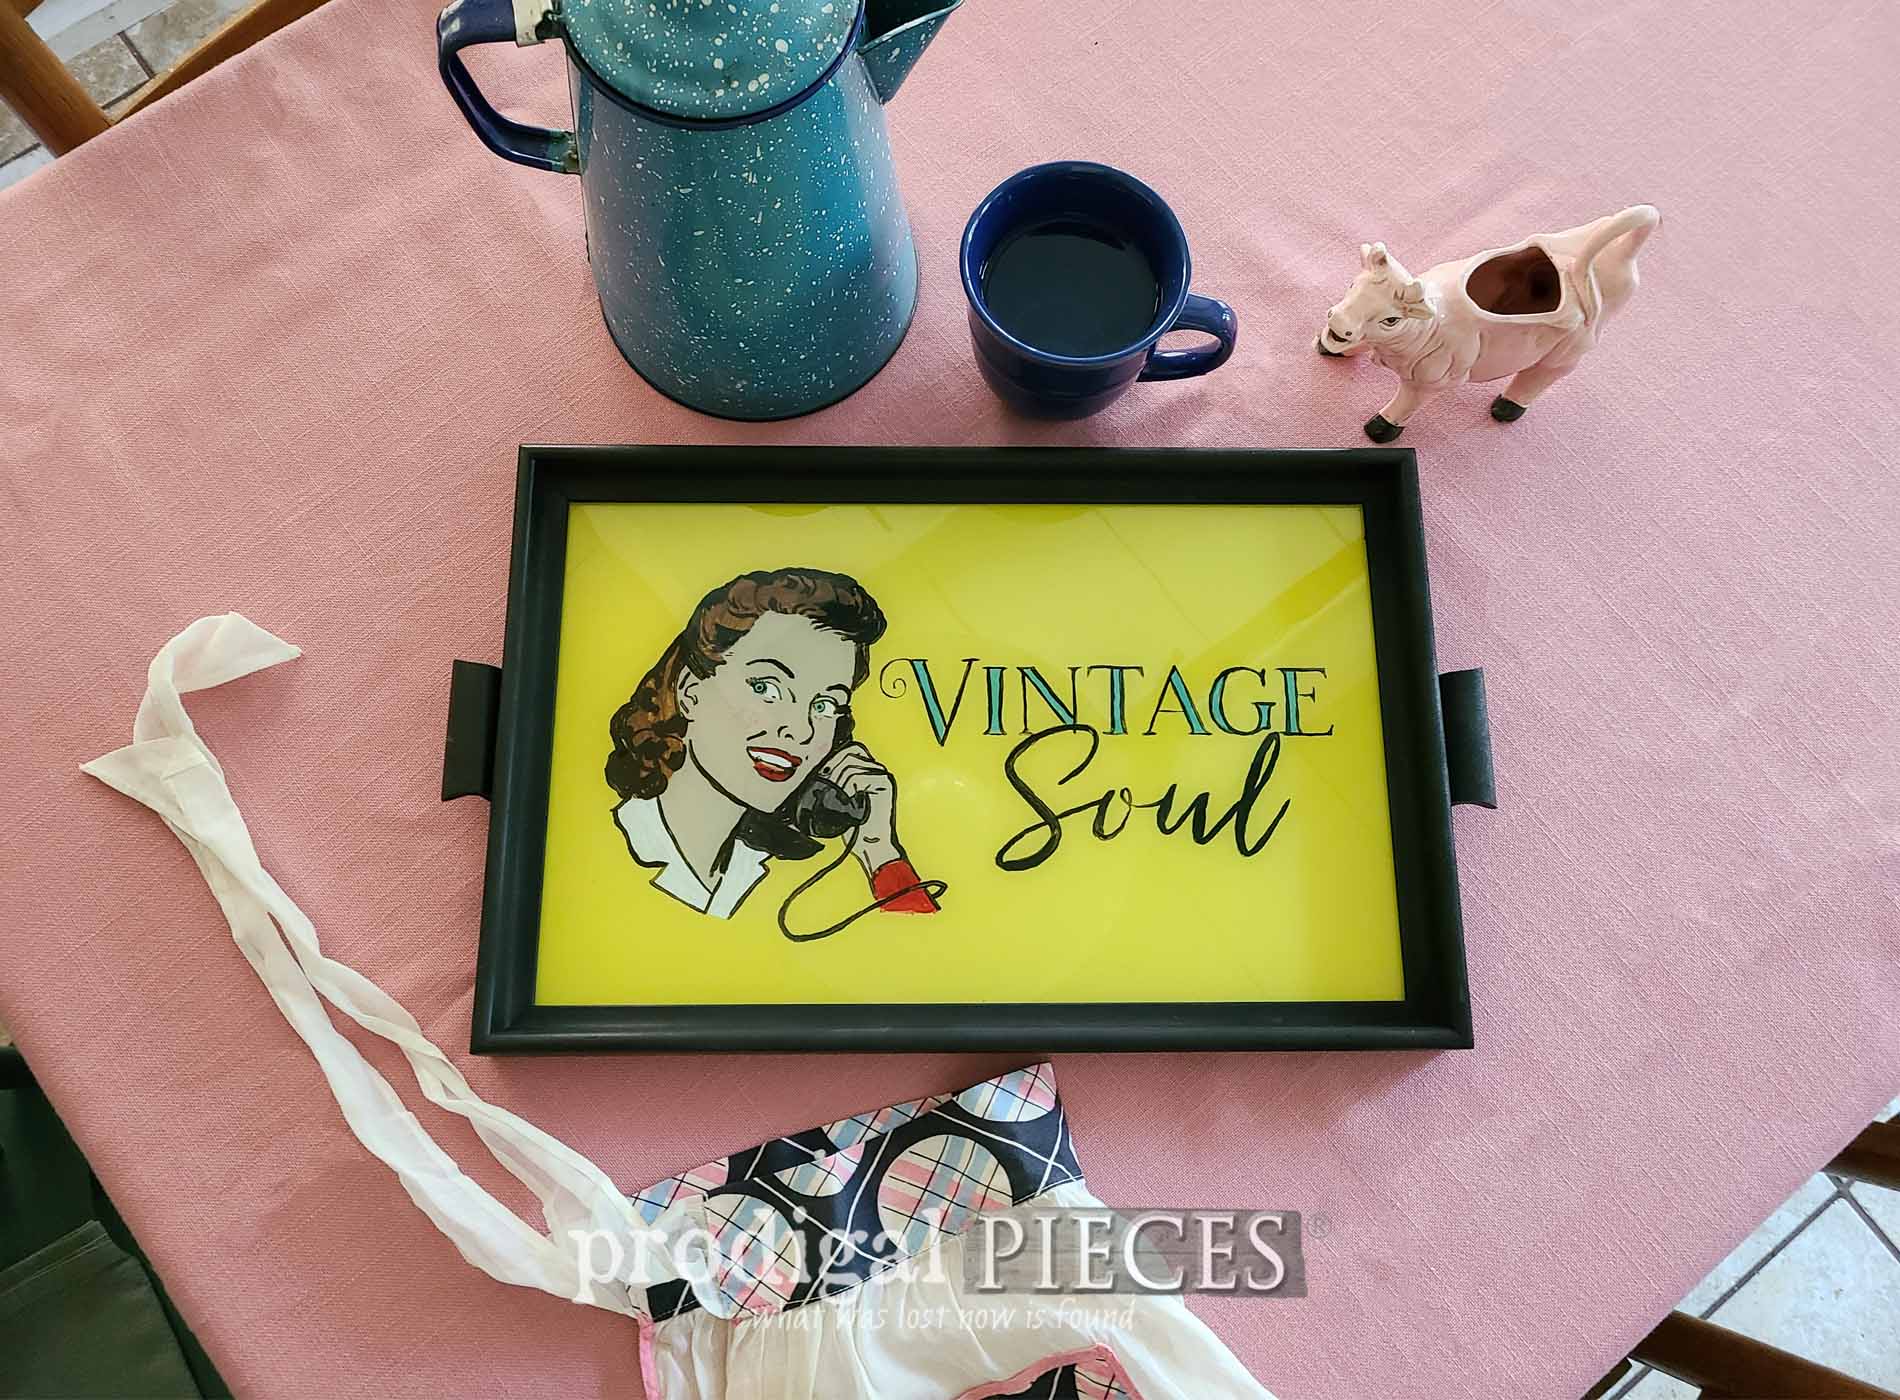
Last, for my finish I wanted a fun vintage pop of color, so I use a Sun Yellow as my backdrop.
THE REVEAL
Throwback to the 50's y'all! You know I'm a vintage soul to the core.

Could I live in the 50's decor? Maybe, but I sure would have fun with it. Also, would you guess this is the same tray as before?


I hope you can tell I had a blast with this. My goal is to inspire! I'm curious...what would you have done with it?

In the meantime, if you'd like to make this a part of your home story, you can find this tray and more available in
my online store.

SHARE
Likewise, inspire others to give this reverse painting a try - pin and share! The options are limitless and perfect for any kind of update you want.
In addition, up next, it's
Trash to Treasure Tuesday! My dad brings me this chair with all the confidence that I can do something with it. {{gulp}}
Take a peek HERE!

To get these DIY tips & tricks in your inbox, be sure to
sign up for my newsletter. Until next time!

 PINTEREST | EMAIL
Also, check out these other reverse painting projects to try: