It's the second Tuesday of the month, so that means it's
Trash to Treasure Transformation time. Yippee!! I'm joined by four other awesome gals and I'm sharing their inspiring work in a bit. Until then, I'm featuring this cracked up maple wood chair that my dad brought to me. Can we say upcycled broken chair project? At least, I hope...ahem.

My dad has all the faith in my when he brings this chair over as a project piece. He believes I can do something with it, so I say...GAME ON. Who can resist a dad encouraging like that?
Obviously, the chair can't be used in the current state. Upon close inspection, I'm first intrigued at how the split happened on this S. Bent & Bros. beauty. Apparently this once gem has been dealt some Ohio weather and the wood warped. No surprise...I feel the same around February of each year. tsk.

I get all excited thinking I can use a bow tie joint (aka. butterfly spline) to tie it back together. However, I've never attempted one and felt that the other splits in the seat deem it likely to split again. So... it's time to take this apart and make it into something fun instead.
DIY TIME
First, I need to get the back rest off so I can handle the seat. My favorite cutter tool makes this a breeze - just buzz and done.

Second, I use my hammer to tap off the top and it comes off easily. Now what? Well, I had to sit and stare at these pieces for a bit to decide what is the best next course of action.

Then, I decide to put the seat back together using my biscuit joiner and biscuits. I use the tool to make a cut into both seat edges and then join with wood glue and a biscuit. We also use the joiner for building things like our
reclaimed kitchen counters.

Meanwhile, I decide to keep the base as-is, but dress it up a bit. In order to do that, I have to make all the legs the same length (height) by cutting the back two short. Then, I use my drill and forstner bit and two scraps of wood to make these braces. I don't have a drill press that would make this project easy, however I know a few tricks to make a hand drill a simple fix. I mark the angles on the side of the wood and match my drill and bit to enter in at the same angle.

NEXT STEPS
Finally, my last few bits to use up are the back spindles, and the back splat. I create a simple ladder-style piece with the spindles, but find the splat a bit of a puzzle to make use of. Then, I can't get past what I see every time I look at the splat.

My jigsaw and i have some fun creating a little pair of somethings. Can you see it?

After that, I get back to making the upcycled broken chair seat into what my eyes can't get past...a funky sign. I know I'm off on many different tangents, but hopefully you enjoy the end result.
THE REVEALS
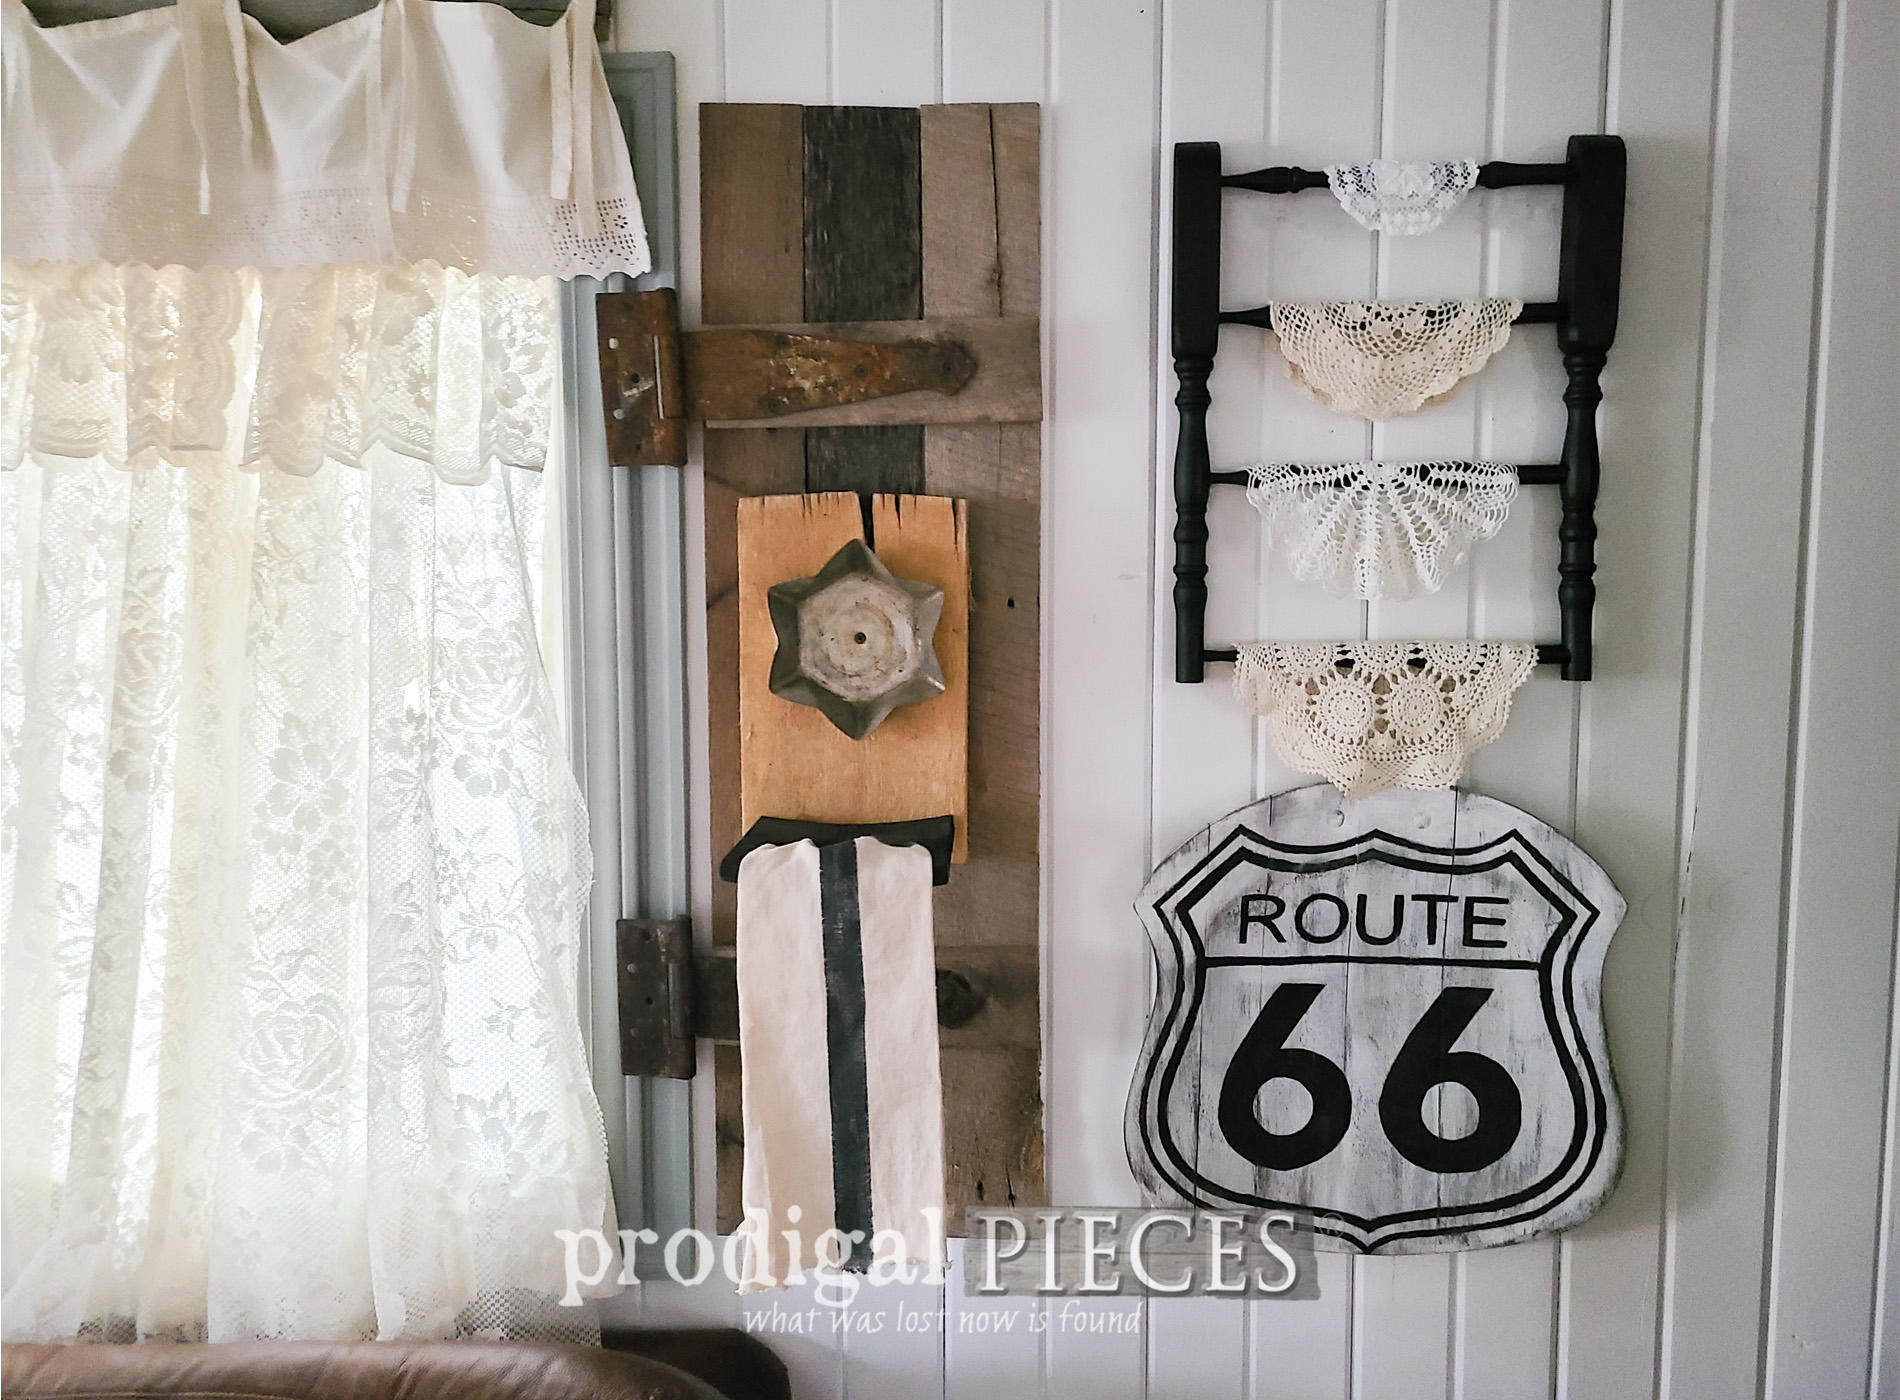
Warning...reveal pictures overload, but bear with me...they're fun!! Five projects all in from one upcycled broken chair. Let's take a peek!

First, I have the spindles removed from the back turned into a ladder decor piece. It's quirky, whimsical, and fun for any room. I chose doilies for this one, but it could be so fun done in many ways.


Second, below that, you can see the vision I have for the chair seat. Doesn't the shape remind of of an interstate sign? Route 66 it is! tee hee! You know I love typography, so I had to use
my transfer method yet again to make it fun.


Third, beside these two, I have a last bit of the chair back turned into a towel holder using a piece of reclaimed wood from our remodel, and a bit of tin.

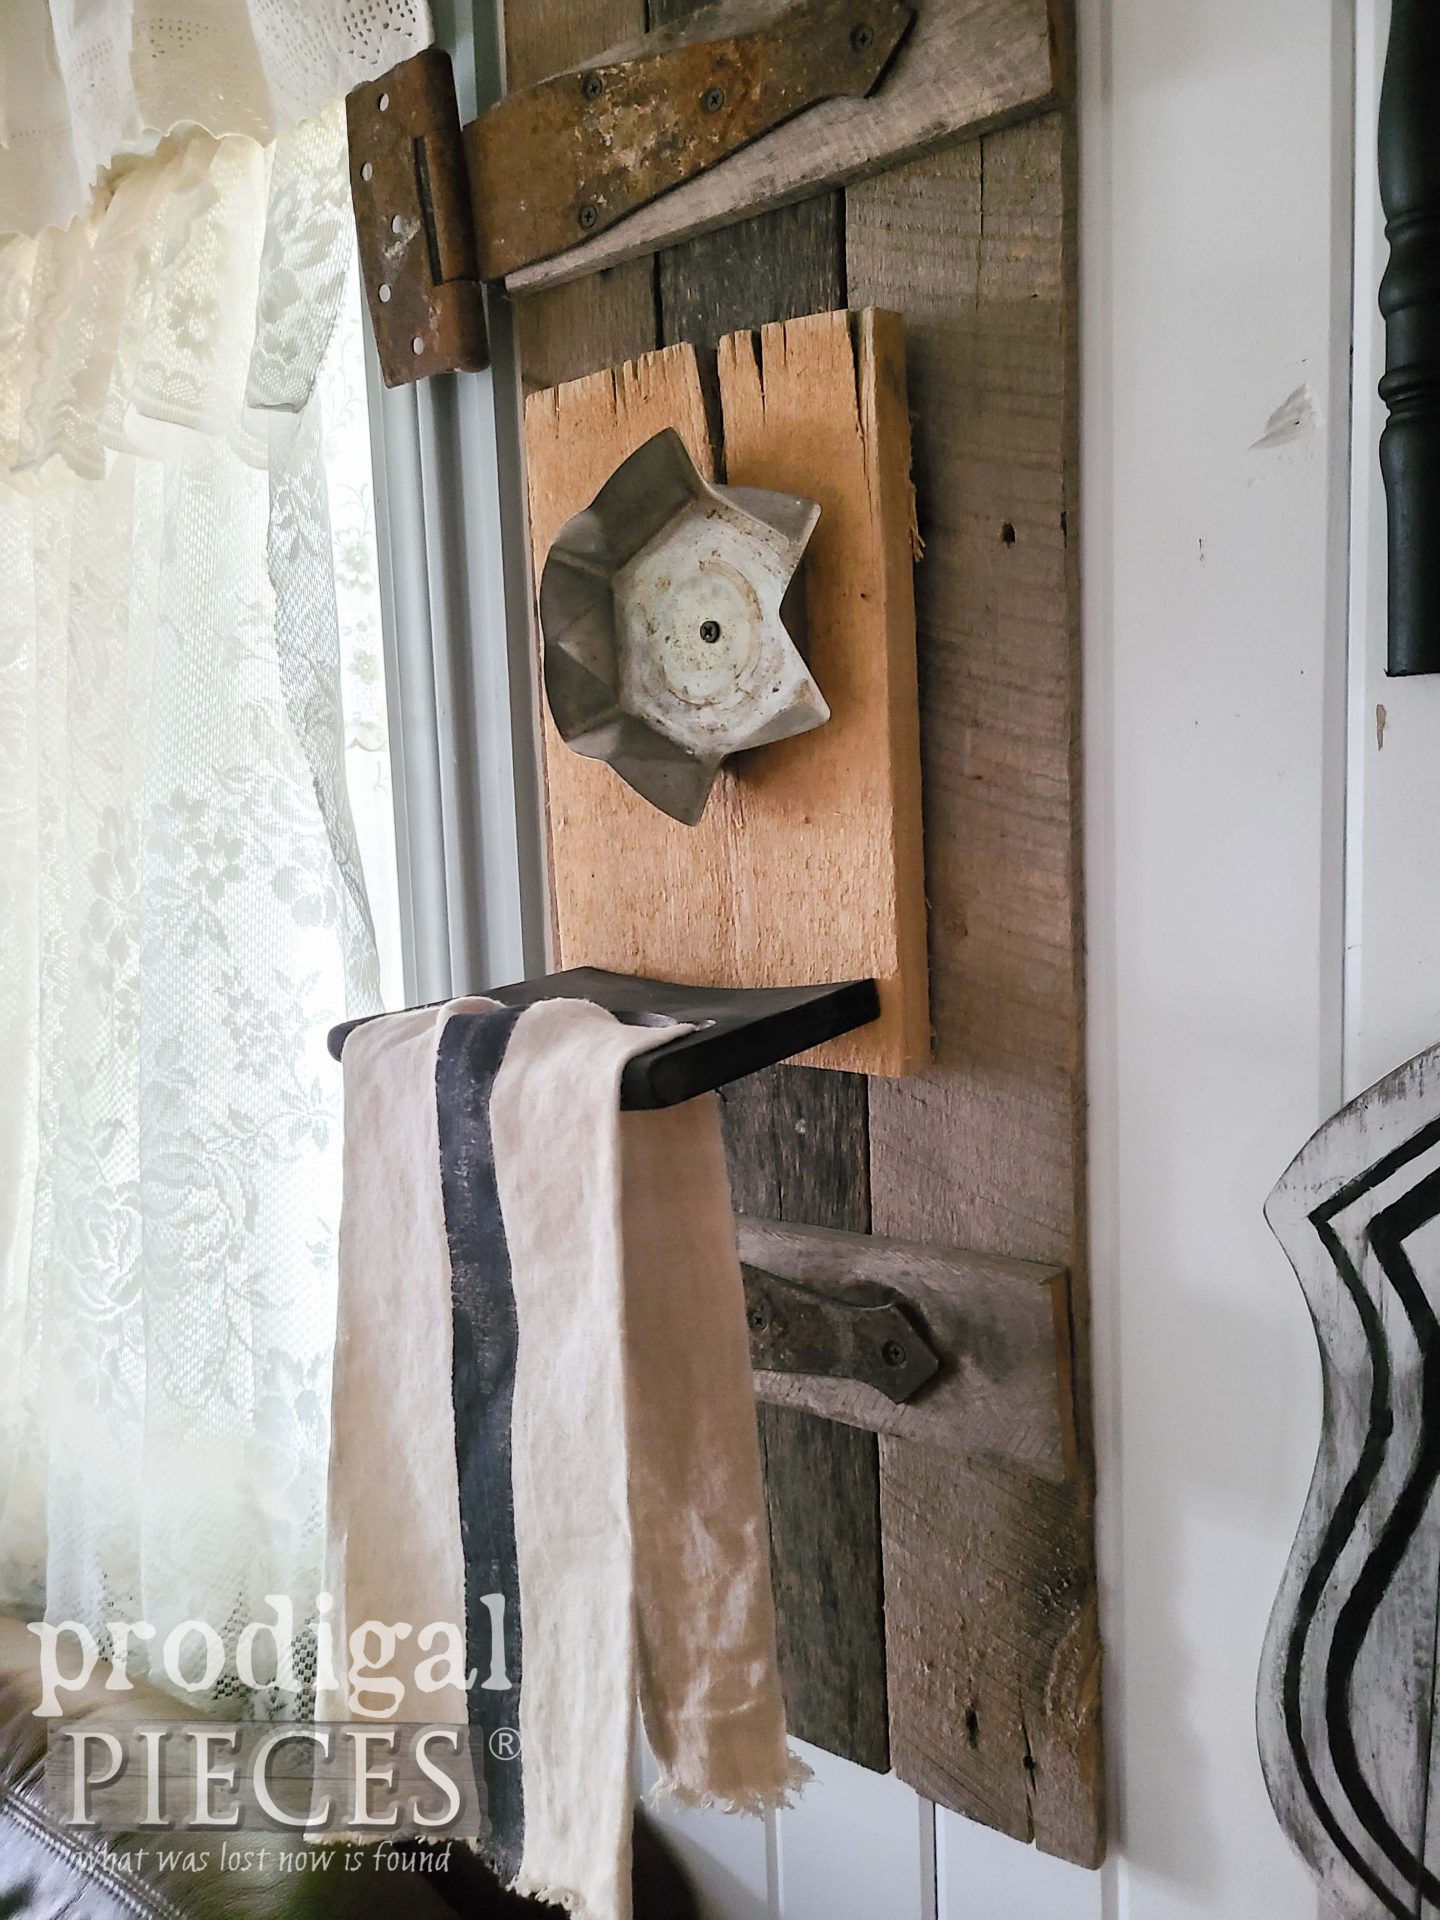
Do you recognize the piece on the front? It already had holes from the spindles, so I inserted dowel pins and joined it to the board.

Next, down below I share my little elephant creations also made from the chair back I upcycled. They take shape well after my Dremel helps me add the fine details. And, because the same spindle holes are in these pieces and happen to be in just the right spot (ahem) I add a fun tail pin with a dowel.


So, am I crazy for seeing elephants? IDK, but I do have tons of fun!
LAST, BUT NOT LEAST
Last, but not least, check out the chair bottom upcycle. I had to keep it together since it's sturdy as-is. In addition to that bottom, I am pleased with the outcome of the oak top as well.


And...there ya go. A busted chair became five different projects in one. Which one is your favorite? I don't have any partiality becuase I'm the creator, so I'm eager to hear from you. In addition, if you'd like to add any of these to your home story, just visit
my online store to get the details.


Also, inspire others by pinning and sharing my upcycled broken chair fun. Let's do it and DIY!

To get these DIY tips & tricks in your inbox, be sure to
sign up for my newsletter.
Before you head off, don't forget to check out the Trash to Treasure fun below!


- Confessions of a Serial DIYer
- Artsy Chicks Rule
- Girl in the Garage
- Salvaged Inspirations
Also, more funcycled projects like this upcycled broken chair: