
THE BACKSTORY
Here how the story goes...we live in Ohio and love to be outdoors, but the winters can be long. However, come early spring it's still cold, but we do get a random warm day (by warm I mean above 30 degrees). So, when one of those days popped up, we did our family walk around the neighborhood, which also happened to be the day before trash pickup. Now I can bet you know where this is going. tee hee hee. When we turned the block while I was chatting to my husband, I gasped. I whispered, "There's spindles!". JC asked me what I was talking about. I told him to look (while pointing to a neighbor's trash). He told me it was a piece of junk. I responded, "But those spindles..." Gotta love me, right?! We kept on walking and the next morning; I told Mr. O that he should come with me to grab this trashure potential. He was an eager beaver! It had been a while since we had worked on something together. You can see his past projects here.PICKUP
I hopped out of our truck and put it in the back, and we quickly headed home. Once home, I brought it out and set it on the driveway. There it be.
DIY TIME
I looked at him and he looked at me. I said, "Well, whatcha think?". He instantly started telling me ideas and I told him that first we needed to take it apart and assess the damage. So, here we are with are potential parts. There really wasn't a piece we couldn't use, just a matter of figuring out the right purpose. We sat, picked up, turned over, and analyzed each piece discussing our game plan. The excitement began to build, and we couldn't wait to get started. Because we were working with particle board and solid wood, we had to choose wisely.
Since we had to work in phases on each, I will share as we went with our repurposed side table, and then show it all to you at the end. I hope you don't get lost. haha. First, we started with the table top. It had pre-drilled holes, so Mr. O finished the holes all the way through with my drill.
There really wasn't a piece we couldn't use, just a matter of figuring out the right purpose. We sat, picked up, turned over, and analyzed each piece discussing our game plan. The excitement began to build, and we couldn't wait to get started. Because we were working with particle board and solid wood, we had to choose wisely.
Since we had to work in phases on each, I will share as we went with our repurposed side table, and then show it all to you at the end. I hope you don't get lost. haha. First, we started with the table top. It had pre-drilled holes, so Mr. O finished the holes all the way through with my drill.

NEXT STEPS
We also measured, marked, and drilled for a couple of handles. Once the holes were drilled, we grabbed a set of wooden knobs from my stash and put them on the bottom. To make it unified, he used a soft white paint. Oh, and if you haven't guessed yet, we're turning the top into a footed serving tray. And of course, what's a big brother supposed to do when little sister wants to join in the fun too?
 He's so awesome, isn't he?
PAINT TIME
Okay, so we put two coats of the paint on, letting cure for an hour or so in between. Then, we both decided to add a little fun. Stencils for the win!! You can see this Waverly stencil and how I used it on a dresser in this post.
When the stenciling was dry, we did a topcoat of poly for a long-lasting and durable finish. We'll show you the end result in a minute. Hang with us!
You can see this Waverly stencil and how I used it on a dresser in this post.
When the stenciling was dry, we did a topcoat of poly for a long-lasting and durable finish. We'll show you the end result in a minute. Hang with us!
NEXT
Now for the next project...this time, we took the bottom shelf from our repurposed side table. Then, Mr. O and I went shopping through my stash to get these gems. We have the table shelf cut up, a piece of reclaimed wood, two corbels, and two pegs. If you can envision and coat/towel rack with shelf, you're good. haha. It didn't take much to get this put together, but we did have to spray paint the pieces with our favorite Heirloom white in satin.
Then all Mr. O had to do was help me assemble it and we're good to go.
We have the table shelf cut up, a piece of reclaimed wood, two corbels, and two pegs. If you can envision and coat/towel rack with shelf, you're good. haha. It didn't take much to get this put together, but we did have to spray paint the pieces with our favorite Heirloom white in satin.
Then all Mr. O had to do was help me assemble it and we're good to go.
 Again, we'll show you in a minute...hang with us!
LADDER TIME
Next up were the long spindle legs. We both got excited when the idea hit to make a ladder. Again, my awesome trashure stash comes into play as we pulled out some of my broken garden trellis and cut it up to make a repurposed ladder. Last, but not least were those little spindle legs. These threw me for a bit because I had so many ideas AND I wanted it to be doable for Mr. O.
 We settled on a simple creation that kinda looked like a ladder, but we had more plans for it. We added some scrap wood, and I used my favorite flat gray primer to make it all gel. After that I added some fun. This was my favorite paint for my repurposed changing table cart HERE.
 Well, we just took you on a whirlwind tour of four repurposed side table projects. Are you ready to see them all done? We are!!
THE REVEALS
See if you can find them below... Front and center we have our footed serving tray. Mr. O said this was his favorite project of the bunch, and I think it's easy to see why.
 He worked hard on it, and it shows. Plus, he loves the idea of being able to take it into any room of the home and put it to use. Isn't the stenciling fun?
 Then, if you look past the tray, you can see the reclaimed ladder we built.
 It can be hung or left leaning on the wall to showcase vintage goodness. I like to display my doilies, or towels, or drying herbs. Or, how about hung over a table for funky lighting... you get the idea. So many uses!

LAST
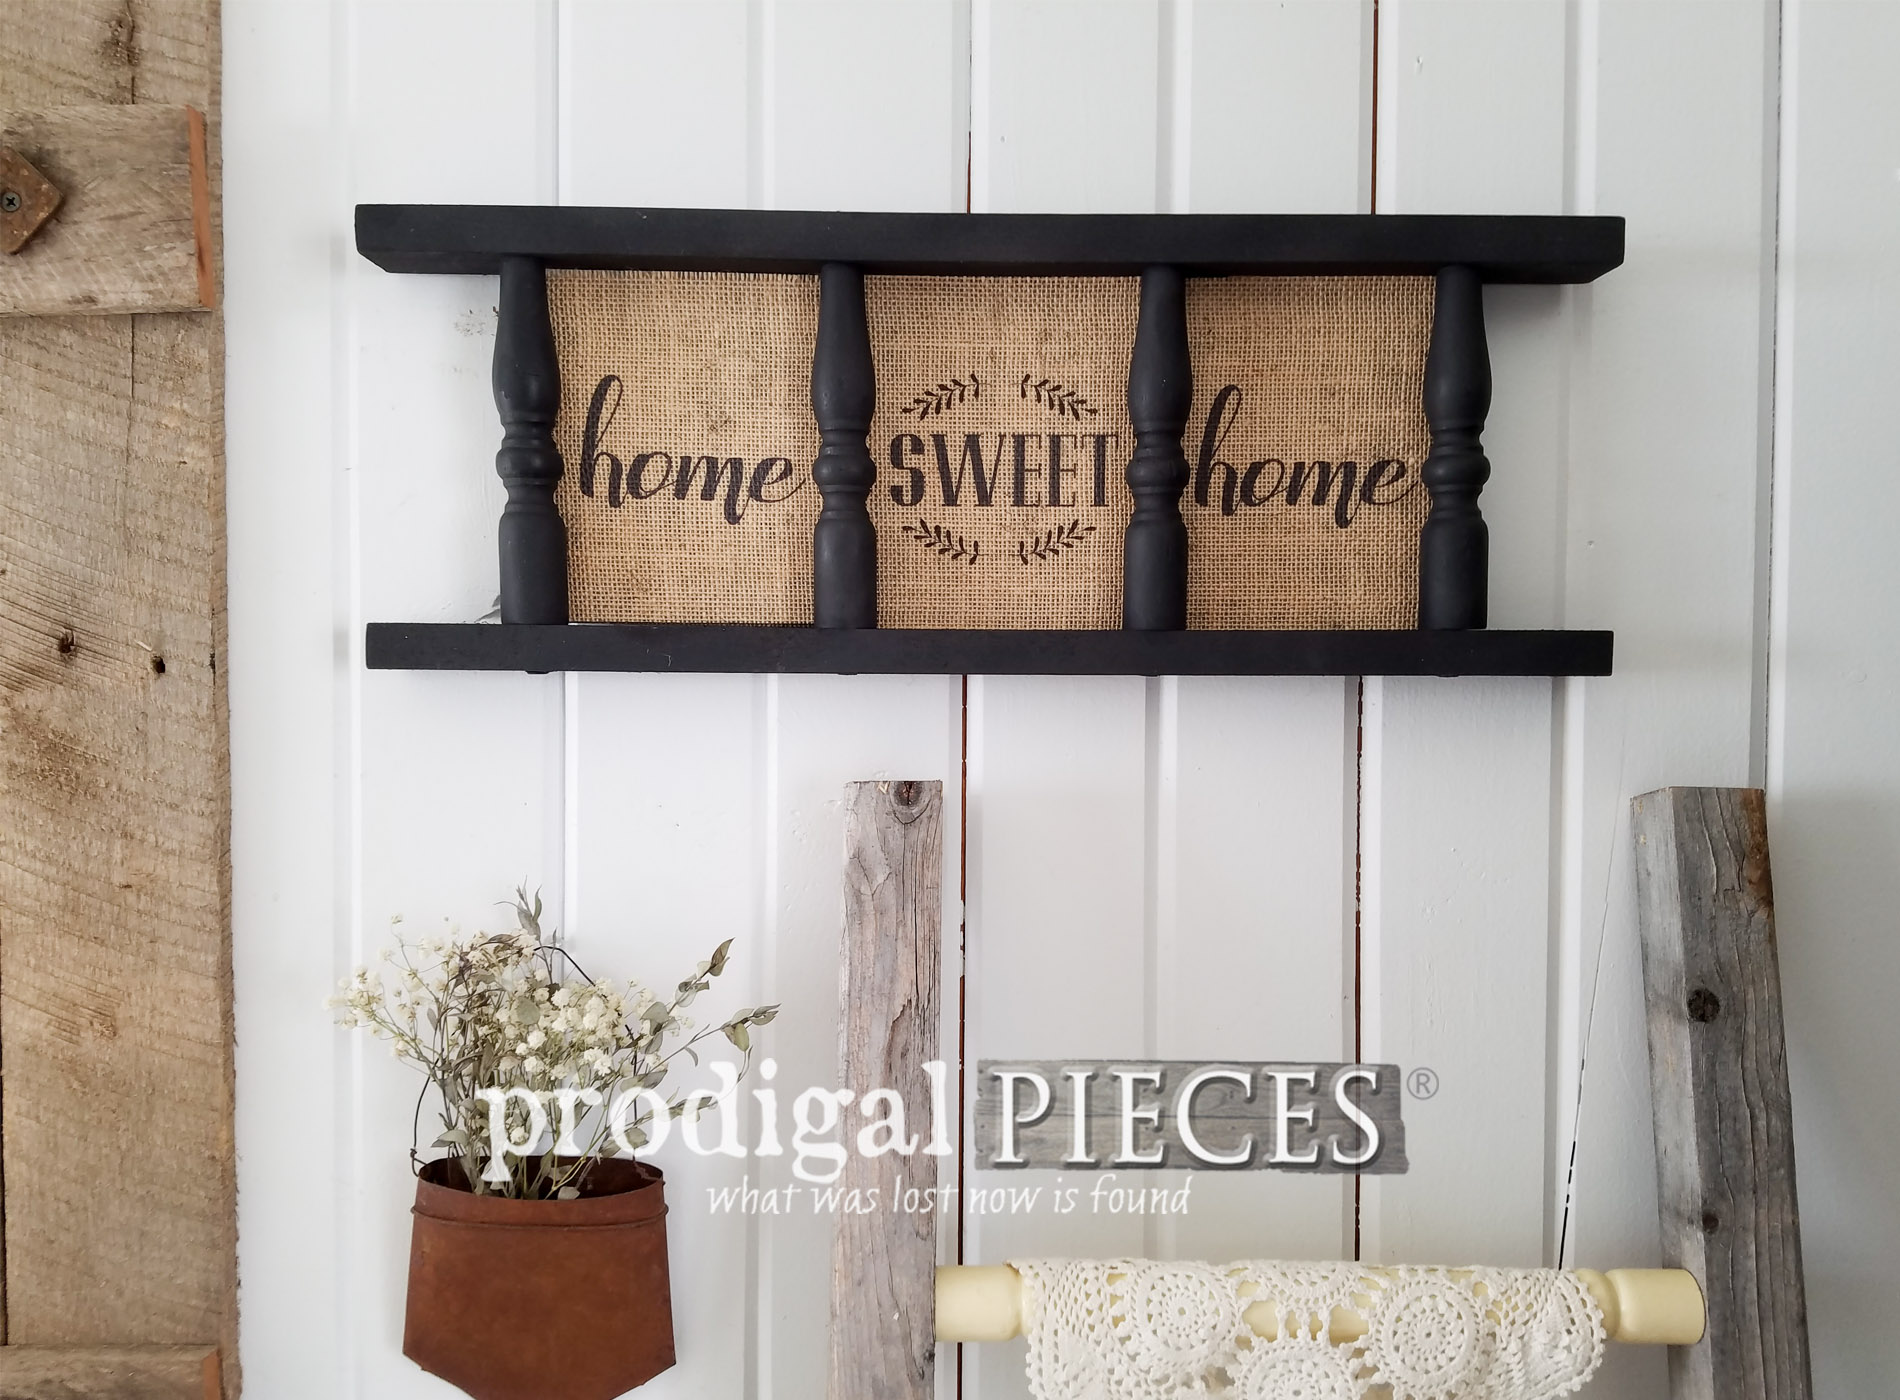
Next, if you look up above that is our cute farmhouse decor. All made from the left over from the spindle feet of the repurposed side table. After painting it in gray, we added a piece of hardboard and then some burlap signs on the awesome laminated burlap that makes it easy for sticking in your printer. I love that stuff and we think this came out so cute. Don't you?
 LAST, BUT NOT LEAST
Last, but not least, is our reclaimed shelf. Ta da!
 Mr. O wanted to add some fun typography to the reclaimed barn wood. I asked him to pick from a few phrases and this is what he decided on. Yours truly hand-painted the text on and Mr. O. approved. ♥

 Mr. O and I sincerely hope we have inspired you to not only check out your trash on your daily walks (hee hee!), but to see past the obvious brokenness we can so easily see. It's much like how God sees us compared to how maybe we view ourselves. Or, how we think others view us.
 There is nothing but love from our Lord. We just have to choose to see the potential.
 Much to our delight, some of these items are still available for purchase from my shop. Mr. O worked can't wait to see where his creations end up. It's a built-in geography lesson (says the homeschooling mama).
[metaslider id=30251]
SHARE
In addition, pin and share our repurposed side table creations to inspire others. It's what we're all about. Thanks! Up next, Mr. O's older sister is going to be showing you how she gave this vintage Art Deco waterfall dresser a complete new look. See what it looks like now HERE.
 To get these DIY tips & tricks in your inbox, be sure to sign up for my newsletter. Until next time!

Also, more Mr. O projects like this repurposed side table:

