Yippee!! It's time for
Trash to Treasure Tuesday where my blogger friends and I get together to share project to inspire you. You will see their projects in a minute, as is there's nothing better than getting together with like-minded folks to share what you love. Most certainly one of my favorite projects are old gems like this. I'm sure you can see how it's been worn down, so I plan to turn this into a black antique vanity with rustic, refined feel. Check it out...

I purchased this from a lady who bought it as a project piece. She had started with it and decided it wasn't something she wanted to complete because she was expecting a new baby soon. I fell in love with the mirror and keyhole design of this 1920's piece. It has such style even though the veneer top had been removed and the entire thing had a whole lotta wear.


TIME TO FIX
Nothing that a little DIY lovin' couldn't fix though. Time to get started! Much like
my farmhouse desk that had a damaged top, I decided to run with the rustic feel of it. First, I filled the larger worm holes with a bit of wood filler, but left a few for character's sake.

Once the wood filler dried, I lightly sanded it down and then prepped for the design I had in mind. Back a few months ago I shared on social media how stoked I was to find an overhead projector at the thrift store for $10. We have used it
oodles of projects and this time it would help me with the top design.

If you look close you can see the scrollwork art I projected onto the top. I used my artist brush to paint in the design. This is the start of this black antique vanity makeover. So fun!
MAKING REPAIRS
Next, while the design was curing, I set about to repair the drawers. They were falling apart and needed glued and clamped. However, their faces were also damaged and needed repair. On the two lower side drawers there was veneer that was missing and awfully pulling away.

It popped off easily with my putty knife and used my utility knife to leave that unique diamond design. However, the small upper drawers had a thicker veneer that wasn't in too bad a shape, except one had a missing chunk.

What to do? Well, I didn't want to take that veneer off because it added dimension to the drawers, so just like
the hope chest I just completed, I dug into my scrap veneer stash for a piece to make a patch.
TOOLS ARE KEY
Since the angle of the missing chunk was hard to figure out, I whipped out one of my favorite new tools - angularizer ruler. This this makes my job soooo much easier!

I just set the tool to the exact parameters and used it as a stencil to cut a new piece of veneer. BAM! I love it. I glued the new piece on and let cure, then sanded all the drawers down with my orbital sander.
Let me tell ya, I can find chairs like nothing when I don't need one, but...when I need one I can't find one for anything! It took me months to find a chair that would match the side and accent the design for this black antique vanity makeover.

This one didn't have the turned legs I was after. However, it was from the same era and the arched back worked with the mirror design. I had to take it apart to glue it up, and then added new upholstery, cushion, and batting to the cushion.
PAINT TIME
Time for the rest of this vanity to get a little black dress. My color choice is a straight black. First, I tackle the chair frame, and then the edge of the vanity top. Only one coat of black was needed and then let it cure. Since I wanted an aged look, I distressed all surfaces. Then once done distressing, I added a topcoat of black wax to seal the paint and give it a low lustre finish.

THE REVEAL
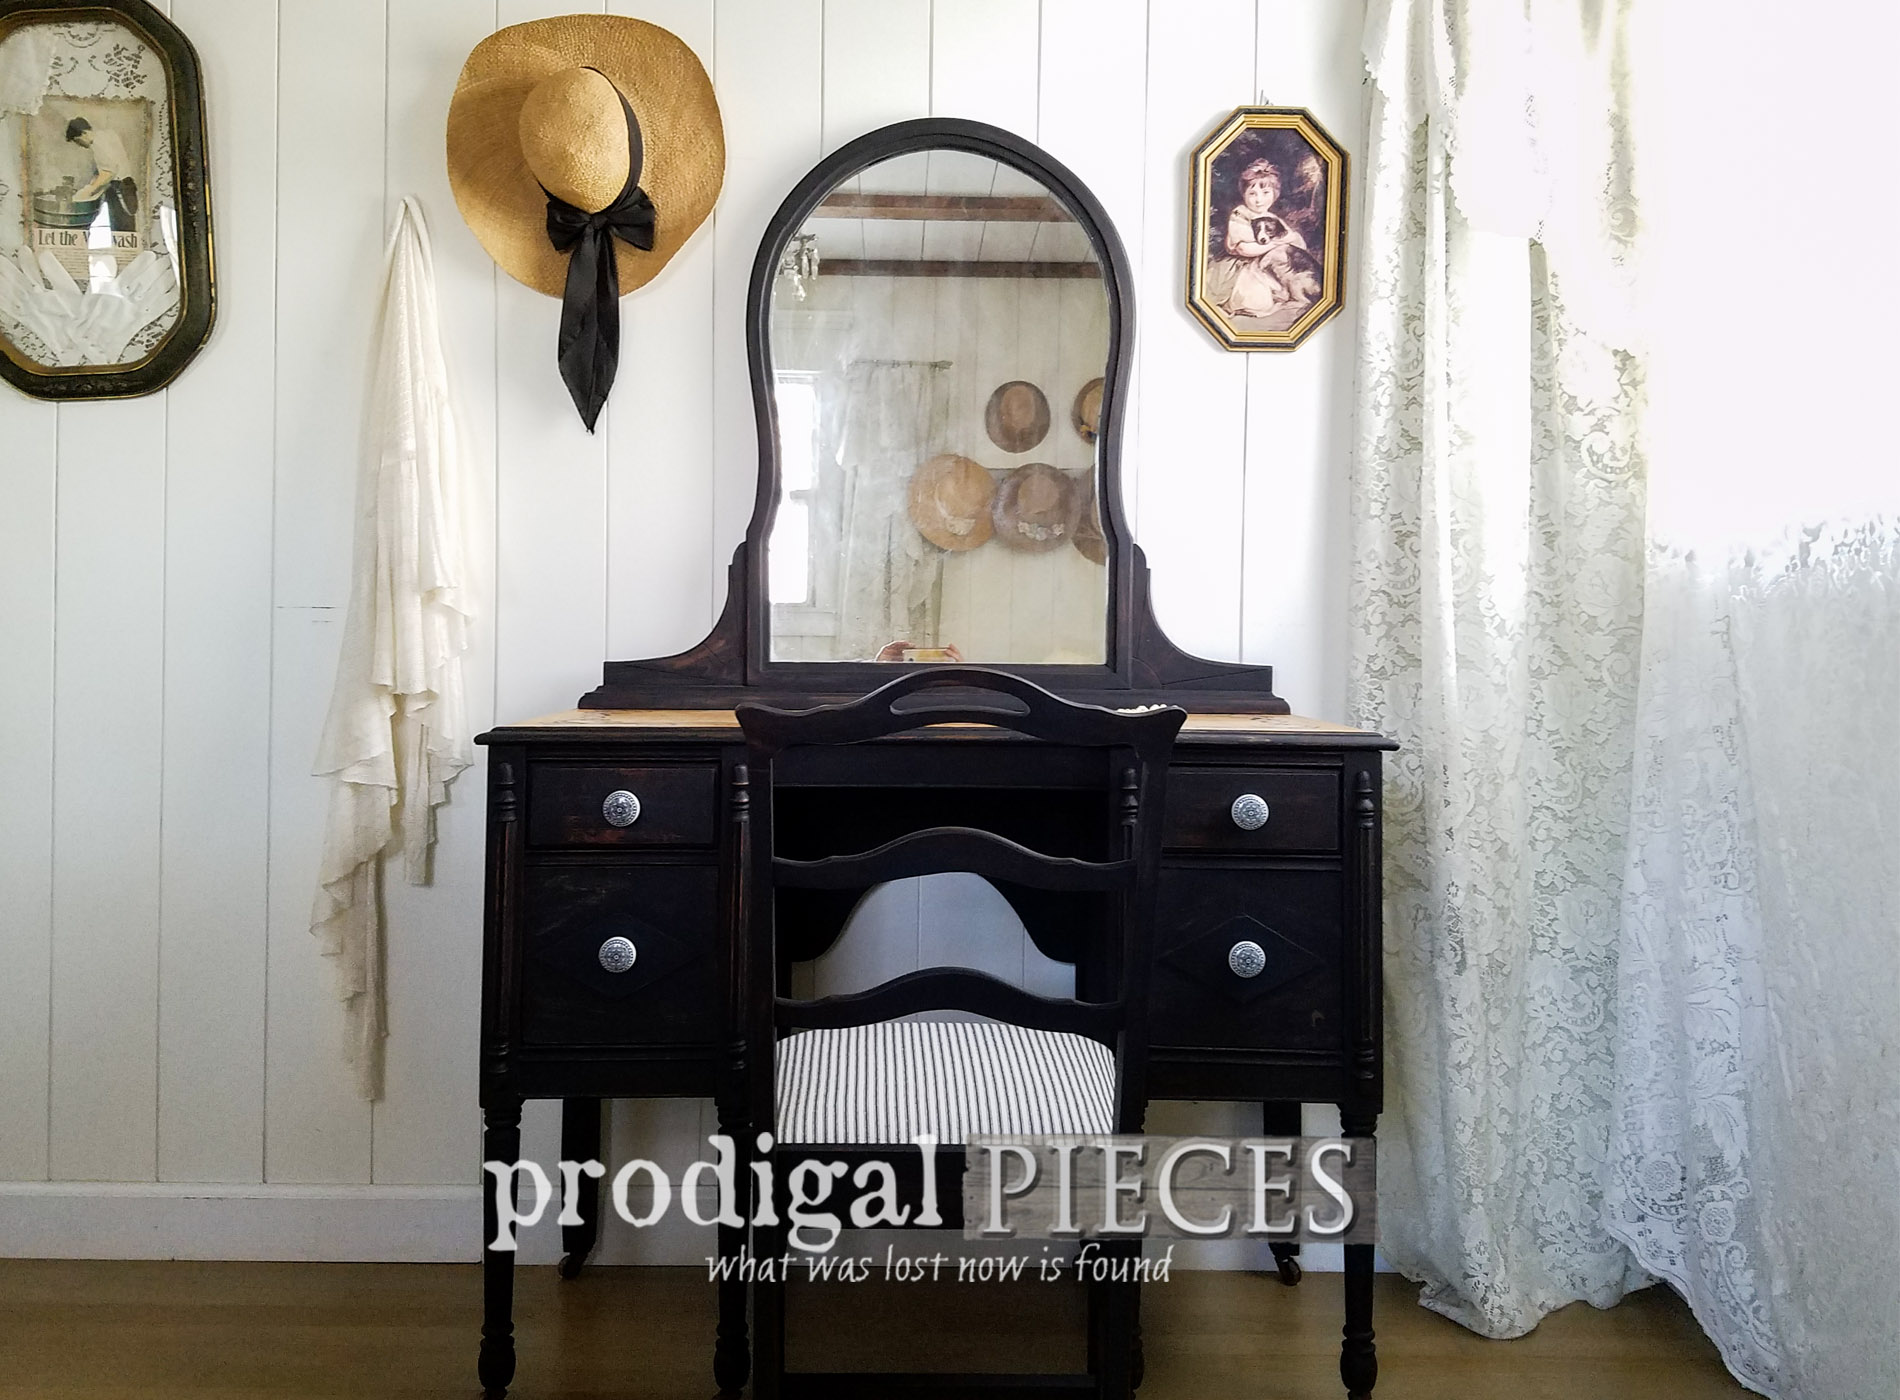
Ready to see it all together? Let's see this black antique vanity set with its rustic and refined new look. Woot!


This once unwanted vanity now has a new life with a bit of whimsy to the top, which is my favorite part, of course. hee hee.

Leaving it rustic adds to the charm and my painted details gave me a fun blank slate to add some flair. Do you love it too?

The chair has one of my favorite textiles, ticking fabric, in black. This classic farmhouse fabric adds to the overall rustic, yet refined feel I was after. I just love the lines of this chair.

The vanity came with the original knobs, but there weren't anything to keep as they were a rusted metal with much decay. However, they will go to my
trashure stash for a funky project someday. I chose to use these beautiful ceramic knobs instead. Their design echos the scrollwork on top.


ALL DONE
Like all my vanities, I don't have room for this one and if you love it too, you can find it available in
my online store.


Additionally, pin and share this black antique vanity makeover to encourage others to see past the wear and embrace it. It's fun to think outside the box. woot!

Up next, my youngest son and I take on this curbside table in a mama & son project. Any guesses? See what it looks like now
over HERE.

To get these DIY tips & tricks in your inbox, be sure to
sign up for my newsletter. Until next time!

 PINTEREST | EMAIL


- Confessions of a Serial DIYer
- Girl in the Garage
- Artsy Chicks Rule
- Bless'er House
Also, more furniture projects like this black antique vanity: