Do you ever feel the need to just purge and start fresh? That's my life story. hahaha... I seem to be ever battling the need to destash my stash. People mean well when they give me stuff and I usually have a soft heart and take it. Then what...I store it forever and work like a mule trying to stay afloat. I'm not complaining, but have decided that this entire month is dedicated to tackling my workshop. No more furniture coming in (unless custom requested), no more anything until it is done. First up, I'm taking these louver doors and turning them into a repurposed kitchen island cart. Woot!

Notice the loot surrounding them. See what I mean? An awesome local friend gave these to me along with a chest of drawers (
see the makeover HERE) and
a dresser (thank you, Becky!). I have a thing for shutters and knew I could find some use for them. But...it's already been over a year and they need to find a new purpose.
DIY TIME
I have two uses for them in my plans. The first one is a kitchen island by adding reclaimed wood and some other stash goodies. First, they meet my friend, Saw. hee hee hee. I cut them with my miter saw about a third of the way down from the top through that solid point.
Next, I grab some of my scrap lumber and start creating rails. I cut to length and then use Kreg Jig and my drill to make pocket screw holes. This thing is amazing, and you can see it in action on
all of my projects.

After that I choose some scrap 1" x 12" boards to make a shelf. Since I wanted the shelf to sit snug in between the louvered doors, I used my jig saw to create notches. Then, I used my Kreg Jig again to make pocket holes.

Here's what those awesome pocket holes look like when being attached.

I purchased those angle clamps, and I'll be using them just as much so kinda like a gift to self. ha! And ya know, since evolution didn't work and give me like 6 arms, these babies come in handy to hold my work while I'm putting it together. I love me some tools!
ASSEMBLY
Once I got the basic structure together, I add accessories for towels and such. I jumped online to see what kind of towel bars were available and up came kitchen carts like the one I was making. Mind you, I had never seen these before, but when I saw what they had on theirs, I was like, "tsk. I can make those". At this point I'm already sinking waaaay more time into this project than need be. Why? Because it's fun.
Those images of other carts got stuck in my head, so off I went to pull out more scrap and make a few accessories to my repurposed kitchen island cart. I used my jig saw again to cut out some pieces and then forstner bit to make places for dowel to rest (aka. towel bars)

MORE DIY
I had some leftover reclaimed wood (you can read about my source
HERE) from making these
custom floating kitchen shelves for Sarah at Sadie Olive.

Here is what I have left. I chose to use the two longer boards. Notice the tight grain as this is pine from first growth wood, circa 1800. yummy. See, it pays to have a stash. {{wink, wink}}

When I finished up my assembly, I didn't quite like how narrow the base was. I didn't want it to topple with the heavy top. To remedy that, I took it off and created a wider bottom using the shelving we yanked out of our kitchen/laundry/dining room remodel.

PAINT TIME
So... more cutting and assembly, but I wanted it right. Since the weather wasn't one where I could use my sprayer and spray shelter (faster and easier), I was so very thankful for my triangle brush that is designed for painting louvers and other hard to reach areas. It made my job so much easier.

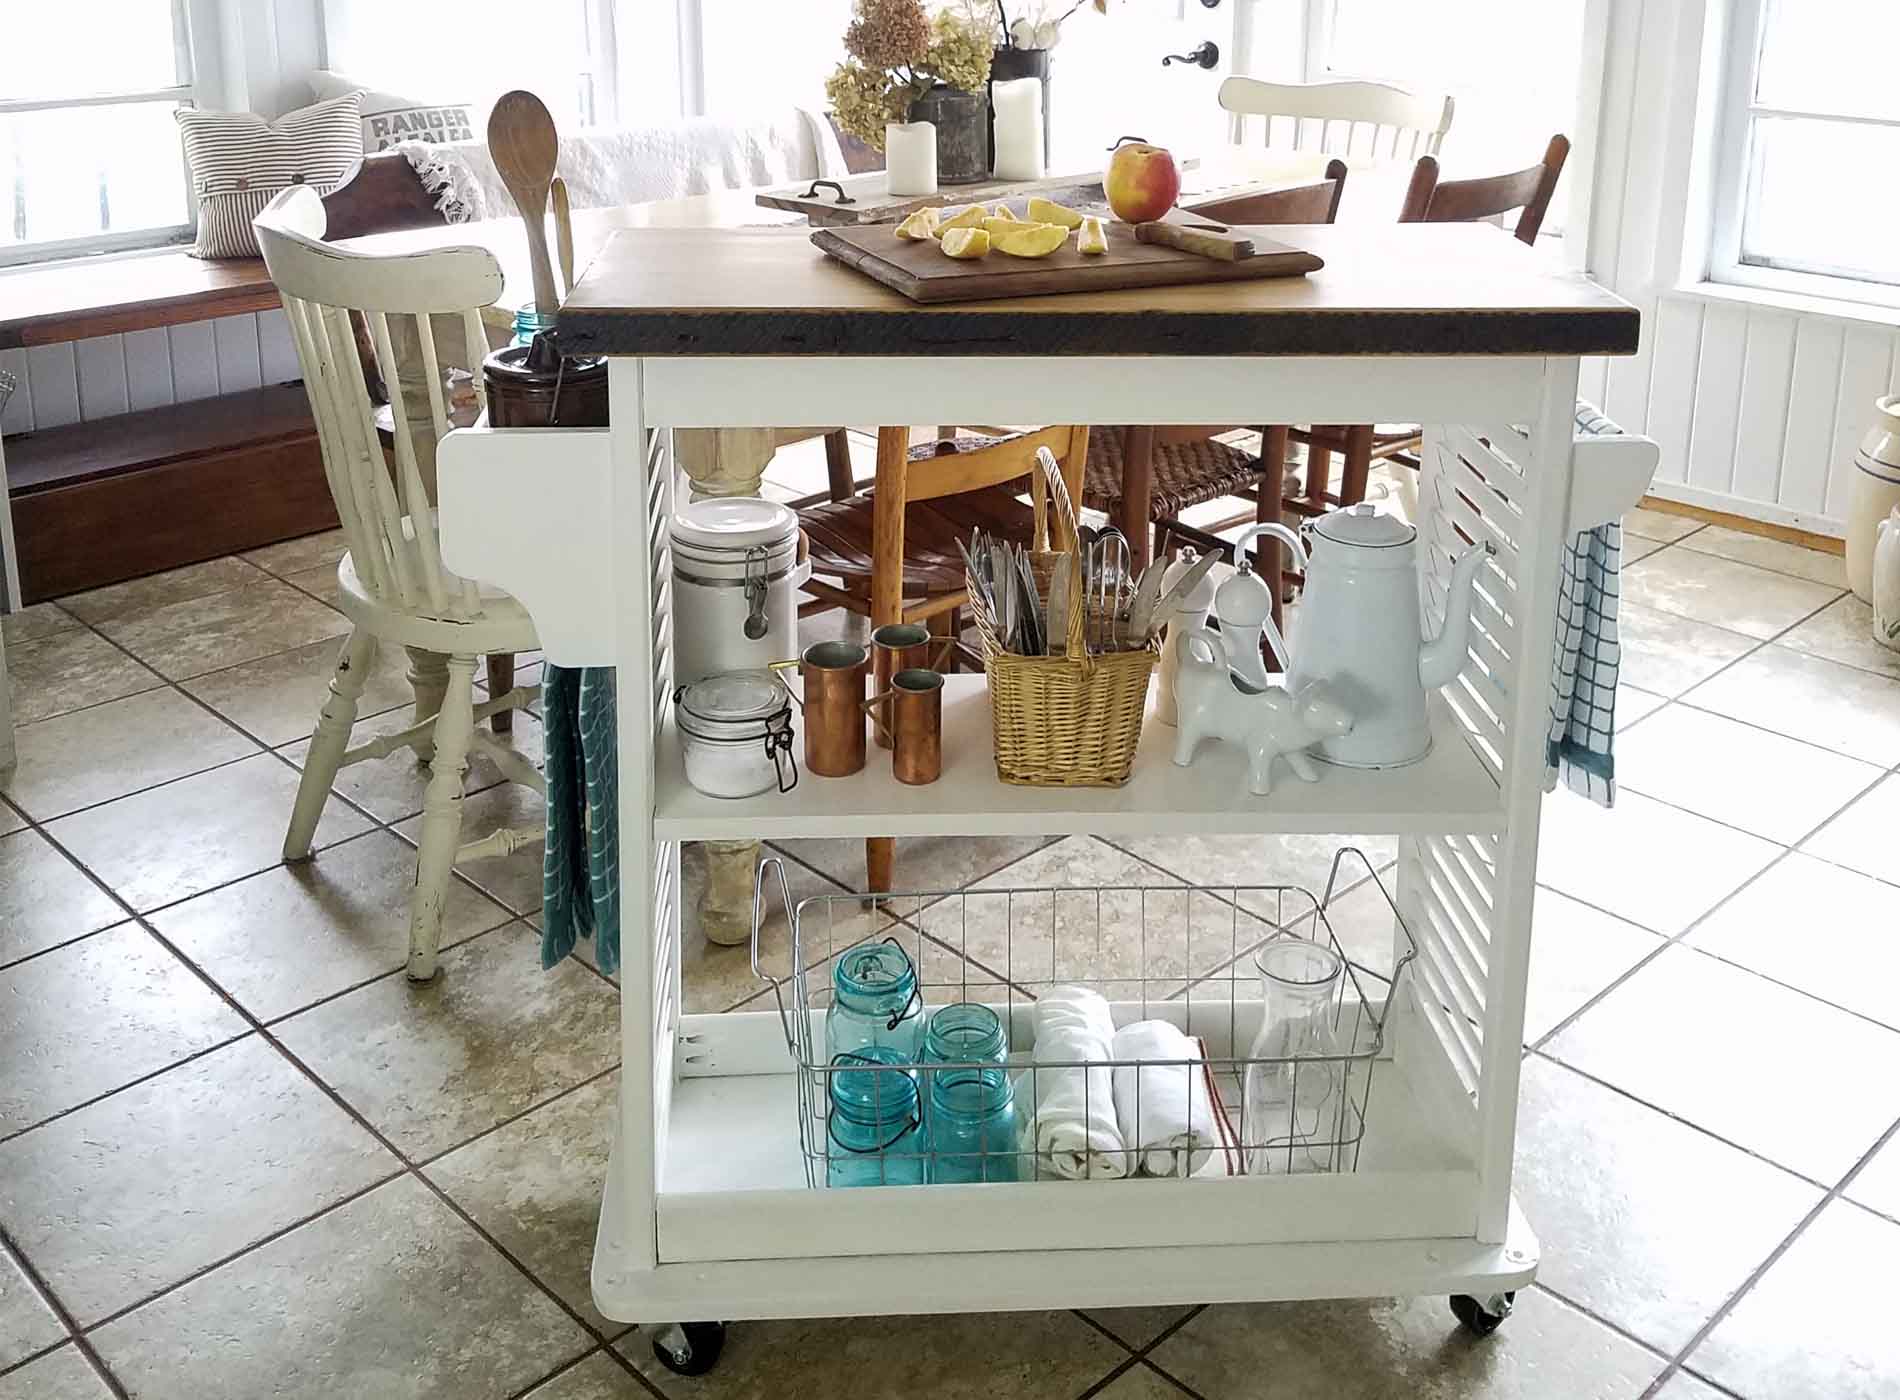
Are you ready to see it all together? Drumroll please...


Can you believe this entire repurposed kitchen island cart is from items in my stash? Even the casters were ones I had set aside to make myself a project.

CHEERS FOR TOOLS
And how about that top? Typically, you would need to run the boards through a joiner to get them like that. It even has some original square head nails embedded in the edge. So cool.


Even the contents of my kitchen island cart are from the thrift store or free. Can't beat those deals. Since I'm offering this is
my shop, I'm including that upcycled freezer basket too. You can never have enough storage.

And for added fun, I set up my table with a few
trashure goodies too. Just some old paint cans, my bathtub tray (
tutorial), and my faux cotton stems (
tutorial).

Most of what you see is something I've created. Now, that's not to brag, but to show you that you don't have to break the bank to get the look you're after. And...I'm here to help!


SHARE
I hope you had fun seeing some of the junk transformed into a kitchen island cart (aka Trashure). Likewise, pin and share to inspire others to give it DIY a try too.

Up next, I'll have more projects coming out of my workshop because this mama's on a mission to
PURGE. See what I did with the other parts of these louvers
HERE. Before you go, be sure to
sign up for my newsletter. Until next time!

 PINTEREST | EMAIL
While you're at it, here are projects like my repurposed kitchen island cart:


 Notice the loot surrounding them. See what I mean? An awesome local friend gave these to me along with a chest of drawers (see the makeover HERE) and a dresser (thank you, Becky!). I have a thing for shutters and knew I could find some use for them. But...it's already been over a year and they need to find a new purpose.
 After that I choose some scrap 1" x 12" boards to make a shelf. Since I wanted the shelf to sit snug in between the louvered doors, I used my jig saw to create notches. Then, I used my Kreg Jig again to make pocket holes.
 Here's what those awesome pocket holes look like when being attached.
 I purchased those angle clamps, and I'll be using them just as much so kinda like a gift to self. ha! And ya know, since evolution didn't work and give me like 6 arms, these babies come in handy to hold my work while I'm putting it together. I love me some tools!

 Here is what I have left. I chose to use the two longer boards. Notice the tight grain as this is pine from first growth wood, circa 1800. yummy. See, it pays to have a stash. {{wink, wink}}
 When I finished up my assembly, I didn't quite like how narrow the base was. I didn't want it to topple with the heavy top. To remedy that, I took it off and created a wider bottom using the shelving we yanked out of our kitchen/laundry/dining room remodel.

 Are you ready to see it all together? Drumroll please...

 Can you believe this entire repurposed kitchen island cart is from items in my stash? Even the casters were ones I had set aside to make myself a project.


 Even the contents of my kitchen island cart are from the thrift store or free. Can't beat those deals. Since I'm offering this is my shop, I'm including that upcycled freezer basket too. You can never have enough storage.
 And for added fun, I set up my table with a few trashure goodies too. Just some old paint cans, my bathtub tray (tutorial), and my faux cotton stems (tutorial).
 Most of what you see is something I've created. Now, that's not to brag, but to show you that you don't have to break the bank to get the look you're after. And...I'm here to help!


 Up next, I'll have more projects coming out of my workshop because this mama's on a mission to PURGE. See what I did with the other parts of these louvers HERE. Before you go, be sure to sign up for my newsletter. Until next time!


