 If you remember, I recently built a chair from the ladder that my dad had given us and I couldn't bare to throw out the remaining parts. I had no intention of letting those pieces go to waste. Big surprise, right?
First, I wanted to use those small bits of ladder dowel above to make a grain scoop sconce. As a matter of fact, here is what my original one looks like as it still hangs right there on my wall:
If you remember, I recently built a chair from the ladder that my dad had given us and I couldn't bare to throw out the remaining parts. I had no intention of letting those pieces go to waste. Big surprise, right?
First, I wanted to use those small bits of ladder dowel above to make a grain scoop sconce. As a matter of fact, here is what my original one looks like as it still hangs right there on my wall: Not only is this simple enough to recreate, but I'm going to show you how. However, since this has awesome patina on it in both the metal and the wood, we're going to replicate that look with the materials below.
GETTING STARTED
Not into DIY? No worries, as I have these available in my shop already made.[metaslider id=30251]
Materials:
- 6" steel duct
- 1" x 6" x determined length below piece of weathered or new wood
- 1" x 6" weathered or new dowel
- roofing nails
- Zep Toilet Bowl Cleaner
- steel wool
- wood glue
Tools:
- drill
- drill bits
- spade bit
- jig saw
- miter saw, or hand saw
- hammer
- rubber glove
- protective gloves
- tin snips
- Dremel
- Sharpie
- bucket

DIY TIME
Before you get started, be sure to put on protective gloves. Safety first! Then, I traced my scoop onto the duct using my Sharpie. While I realize that it is highly likely you don't have a scoop to trace, you're going to draw a sort of a domed semi-circle that is 14" L x 9" H. However, you can create yourself a template using an empty cereal box, heavy craft paper, or cardstock to make it easier. Last, after you're done tracing, grab your tin snips and cut. Be careful! I love these snips because In the past, I've used them when I was siding our home, making my lanterns, and so many other past projects.


NEXT STEPS
Once you've cut our duct, use your drill with a 3/8" drill bit to make a hole in the center and about an inch or so down from the top. Then, place a piece of scrap wood behind it to catch the bit when it punches through. Next, using a bit same or smaller size than your roofing nail, make 6 holes evenly spaced starting at the corners and 1/8" up from the bottom edge.
 Likewise, since everything you just cut is fairly sharp, we need to grind those edges down using a file, or my favorite, my Dremel.
 I requested this dream tool for my birthday a few years ago and I LOVE IT. I make toys, do handy things, and create ever so much with all the accessories.
PAINTA
Now... we have a shiny scoop, right? But...that's no fun. To give this metal some time-worn lovin', we need to age it. Enter in one of my favorite secrets...Zep. In the past, I've used it on my beverage stand with much success and use it whenever I want old looking metal. Here's what you do. First, put on your rubber gloves, and grab your steel wool and head outside. Next, using a 5 gallon bucket or similar, squirt Zep all over the metal and use your steel wool to scour the metal surfaces. Also, pay close attention to direction of rubbing as we want this to look legit. For instance, a scoop would have rub marks at the tip and up and down the height of it since it would have been scooping grain.
While you can let this sit for an hour or so, I let mine sit over night and even put the tip down in the liquid in the bottom so it would corrode the most. I love it. hee hee hee. This is my favorite part because it's like opening a present to see that patina happening. When you have aged to your choosing, rinse with water and pat dry.
In the past, I've used it on my beverage stand with much success and use it whenever I want old looking metal. Here's what you do. First, put on your rubber gloves, and grab your steel wool and head outside. Next, using a 5 gallon bucket or similar, squirt Zep all over the metal and use your steel wool to scour the metal surfaces. Also, pay close attention to direction of rubbing as we want this to look legit. For instance, a scoop would have rub marks at the tip and up and down the height of it since it would have been scooping grain.
While you can let this sit for an hour or so, I let mine sit over night and even put the tip down in the liquid in the bottom so it would corrode the most. I love it. hee hee hee. This is my favorite part because it's like opening a present to see that patina happening. When you have aged to your choosing, rinse with water and pat dry.
SWEET FUN
Next, it's time to use that 1"x 6" piece of wood and trace your duct on it. I found it much easier to use a longer board and cut the rounded end first. Then, I wrapped the duct around it and marked where it ended. Once I was sure I got the right size, I used my miter saw to cut it to length. Also, for my grain scoop sconce, I used a fence board from a gate my neighbors set out for trash. Actually, ya can't let good weathered wood be hauled off, right?! If you don't have weathered wood, just create the look yourself using either a Sunbleached stain or the like on new wood. Trust me, no one will know. Additionally, even use the same effect for your piece of dowel. After you have cut the 1" x 6" piece to size with a jig saw, add a center hole the width of your dowel using a spade bit and drill. This next part can be a little tricky, but totally doable. In fact, ask a friend to help to make it easier if you like. You want to wrap your scoop around your newly cut wood and line up one of the front corners.
Using a small drill bit and the holes you already made, pre-drill holes through the metal and into the wood for you roofing nails to go in. Start at the corner and work your way around. This process will prevent the wood from splitting. Just make sure you get it in the center of your board.
This next part can be a little tricky, but totally doable. In fact, ask a friend to help to make it easier if you like. You want to wrap your scoop around your newly cut wood and line up one of the front corners.
Using a small drill bit and the holes you already made, pre-drill holes through the metal and into the wood for you roofing nails to go in. Start at the corner and work your way around. This process will prevent the wood from splitting. Just make sure you get it in the center of your board.
ASSEMBLY
Next, hammer in your nails, again, starting at one corner and working your way around. Depending on how well you lined them up, you may need to buckle your metal just a bit to make it work. This got easier for me the more I made.
THE REVEAL
You're almost done! Now you just need to add a bit of wood glue to one end of you dowel and stick it in the hole you made in the board. Viola! Would you have guessed this grain scoop sconce wasn't decades old? When I brought it in to show my kids, they thought it was my old one. Sweet! Amazingly, even JC gave me a thumbs up.

 Just for fun...
 Additionally, you may be wondering what happened to those other ladder parts. Last, I decided to use the longer piece of dowel and more of those fence posts, plus this remnant part of my dad's ladder to create another project.
 Finally, I cut this all apart with my jig saw and then made this sweet tote. If you want to try your hand at a tote, I have the tutorial HERE.
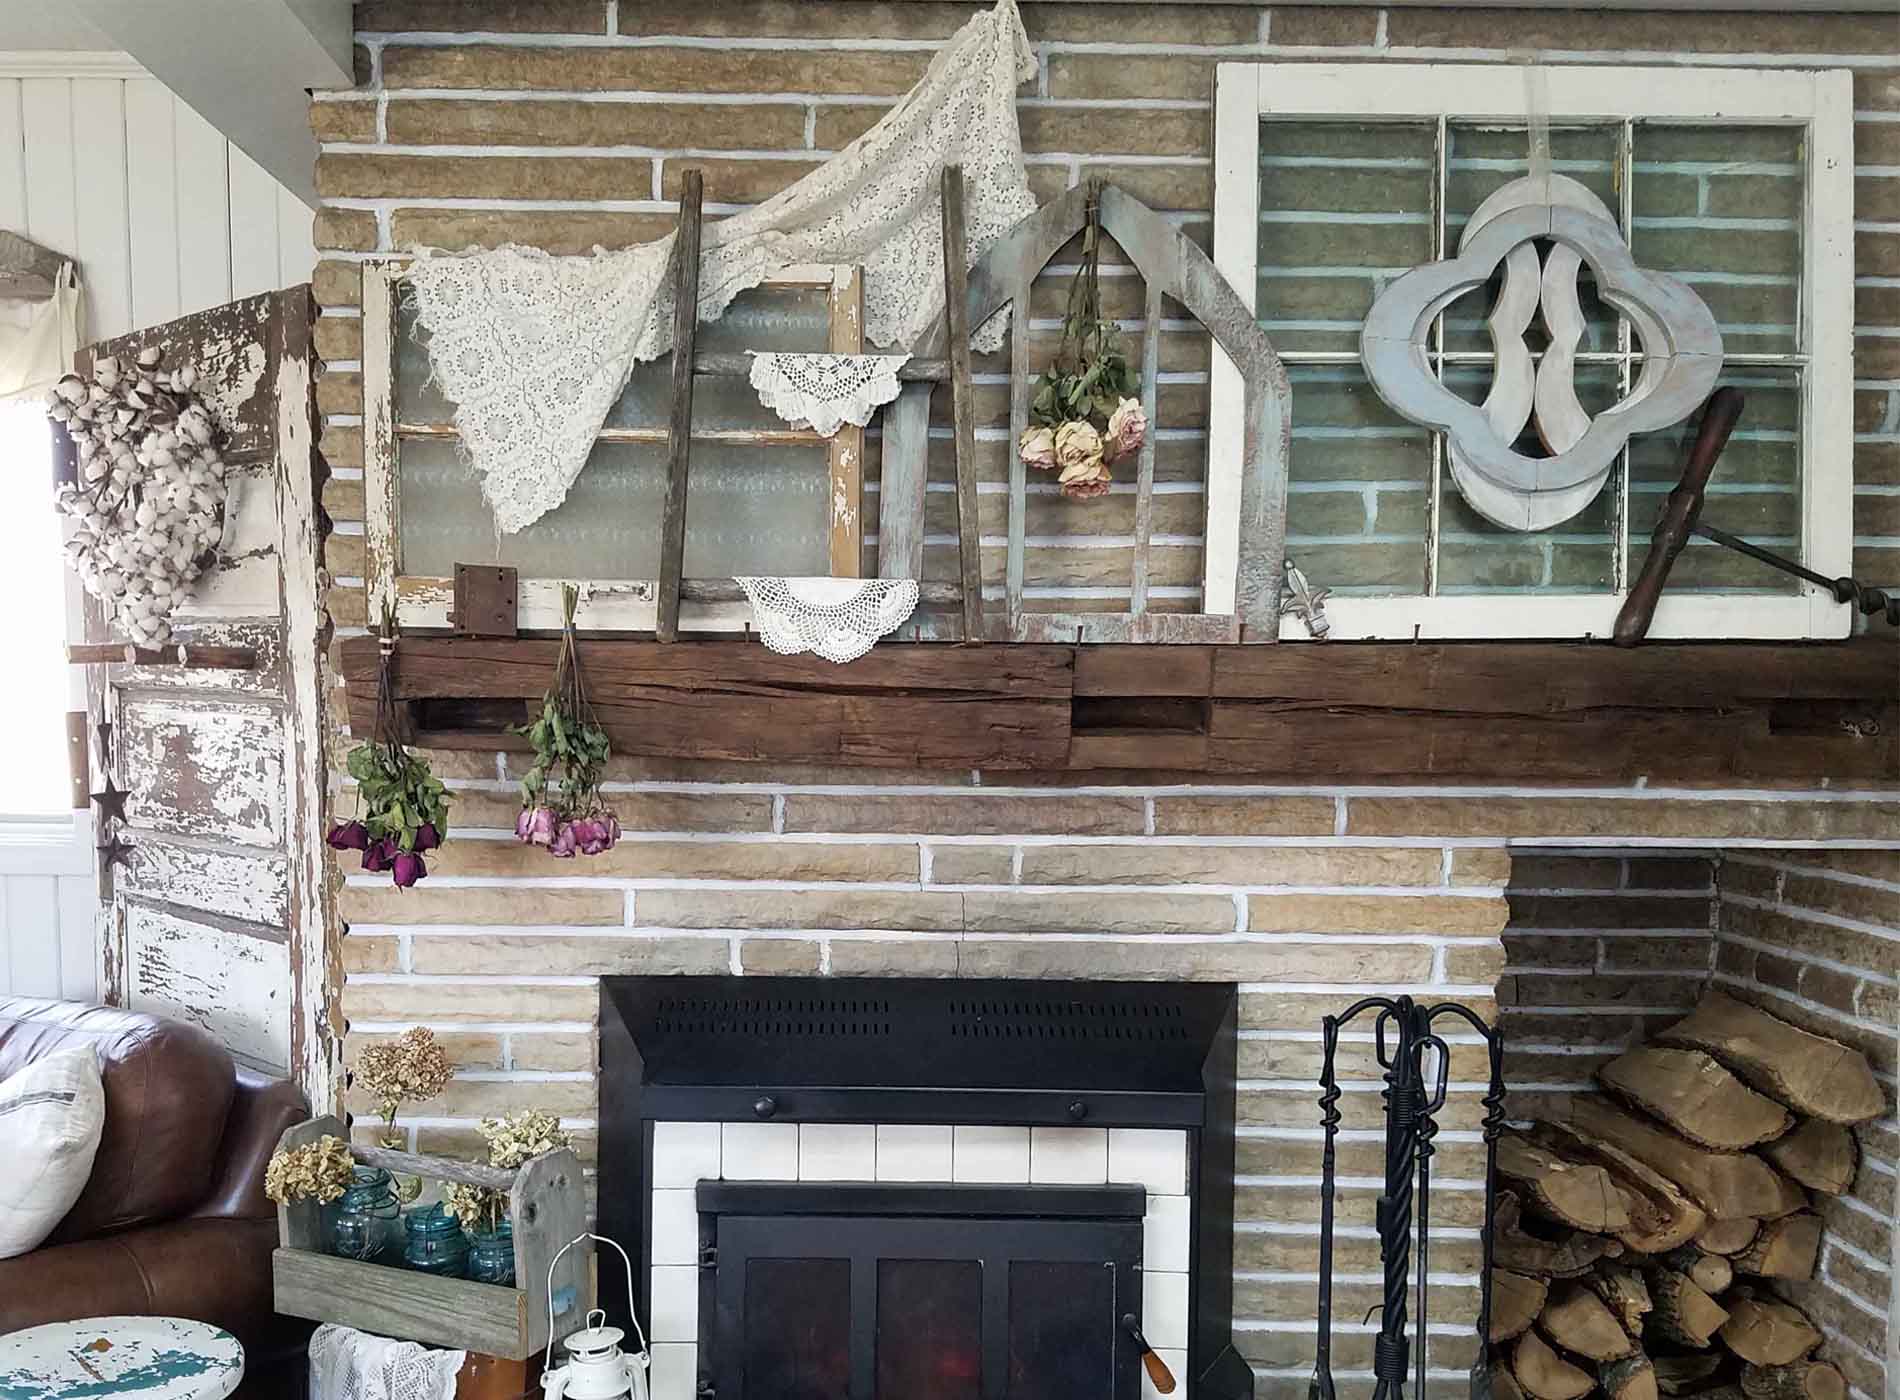
 With that in mind, it fit well in to my fireplace decor, don't you think?

 Oh, and the last bit of ladder from the first picture is now displaying my doilies.

 Also, just for fun I even took some scraps to make that arched window frame. I've added those to my shop too. Moreover, creating layers with textures is what I'm all about. woot!
 My hope is that you are inspired to give DIY a try, especially to try this grain scoop sconce tutorial. I'd love your feedback!
SHARE
In addition, do pin and share to spread the fun. To get these DIY tips & tricks in your inbox, be sure to sign up for my newsletter. PLUS, you will get your FREE Furniture Buying Checklist and special discount to my shop. Until next time!

Also, more projects like my grain scoop sconce:

