I don't know about you, but I'm super-excited today! Why? Well, today is my first post joining a wonderful group of ladies for Furniture Fixer Uppers. Each month we will be sharing our furniture makeovers to teach, to share, to inspire you. For this month, I'm sharing this vintage piece that is going to get a modern dresser makeover.

True story, I walked into the thrift store to find
only some sweaters to repurpose for my sheep (see
HERE). I pinky swear. As I was heading to the back of the store, the shop lady was on the phone talking to one of the owners telling them that yes, this particular dresser was STILL there and she was to get rid of it. ahem. I halted my tracks and said, "I'll take it." Any sane person would have done the same thing.
My peeps, when this piece is sitting there covered in trashure, falling apart and being dismissed, we must take notice. It is our job, right? (please say yes so I know I'm not alone.) To verify, this is a quality-made
vintage Kroehler dresser. Not one to "get rid of" tsk. Poor thing. So, I decided to bring this sad dresser home and give it a new look. I, of course, sent JC to pick it up for me. What an awesome husband, eh?

Upon closer inspection, I found out how much of a hot mess it really was. Well, let's just say it not only needed a boost, but reconstructive surgery. Four of the nine drawers were either missing drawers guides or slides, the panel had fallen off the side, and those basket weave center pieces were coming off as well. Nothing I couldn't handle,for sure.
DIY TIME
First up, reattach the side panel. I used my Liquid Nails Paneling Adhesive to get that sucker back on. Meanwhile, JC cut and made new guides and slides for those four drawers.

Then for added reassurance it would stay still, I used my nailer to nail it on and hold the panel in place while the glue dried.

After that, I just needed to use wood filler to repair the damaged spots, and then sand with my sander. This top was laminate, but that didn't scare me. I have done many similar
Mid Century pieces before.

PRIMING
All I needed to do was use my brush and Kilz, to hide any bleed through and prep the surface for paint adhesion. Before that though, I decided to remove those woven inlays on the three drawers. They just weren't working for me.


Once the primer was dry, I choose to get my funk on and add some color.


Some of the drawers got this aloe blossom color (one of my favorites!) with accents of the same linen color I used
here and
here. Meanwhile, others got a few coats of Pure Gold. See...I told you I was going to mix it up.
MORE DECOR
Like I'm not busy enough, I knew I didn't have any decor suited for staging my piece. In quick pinch I created some wall art using scraps and repurposed materials.

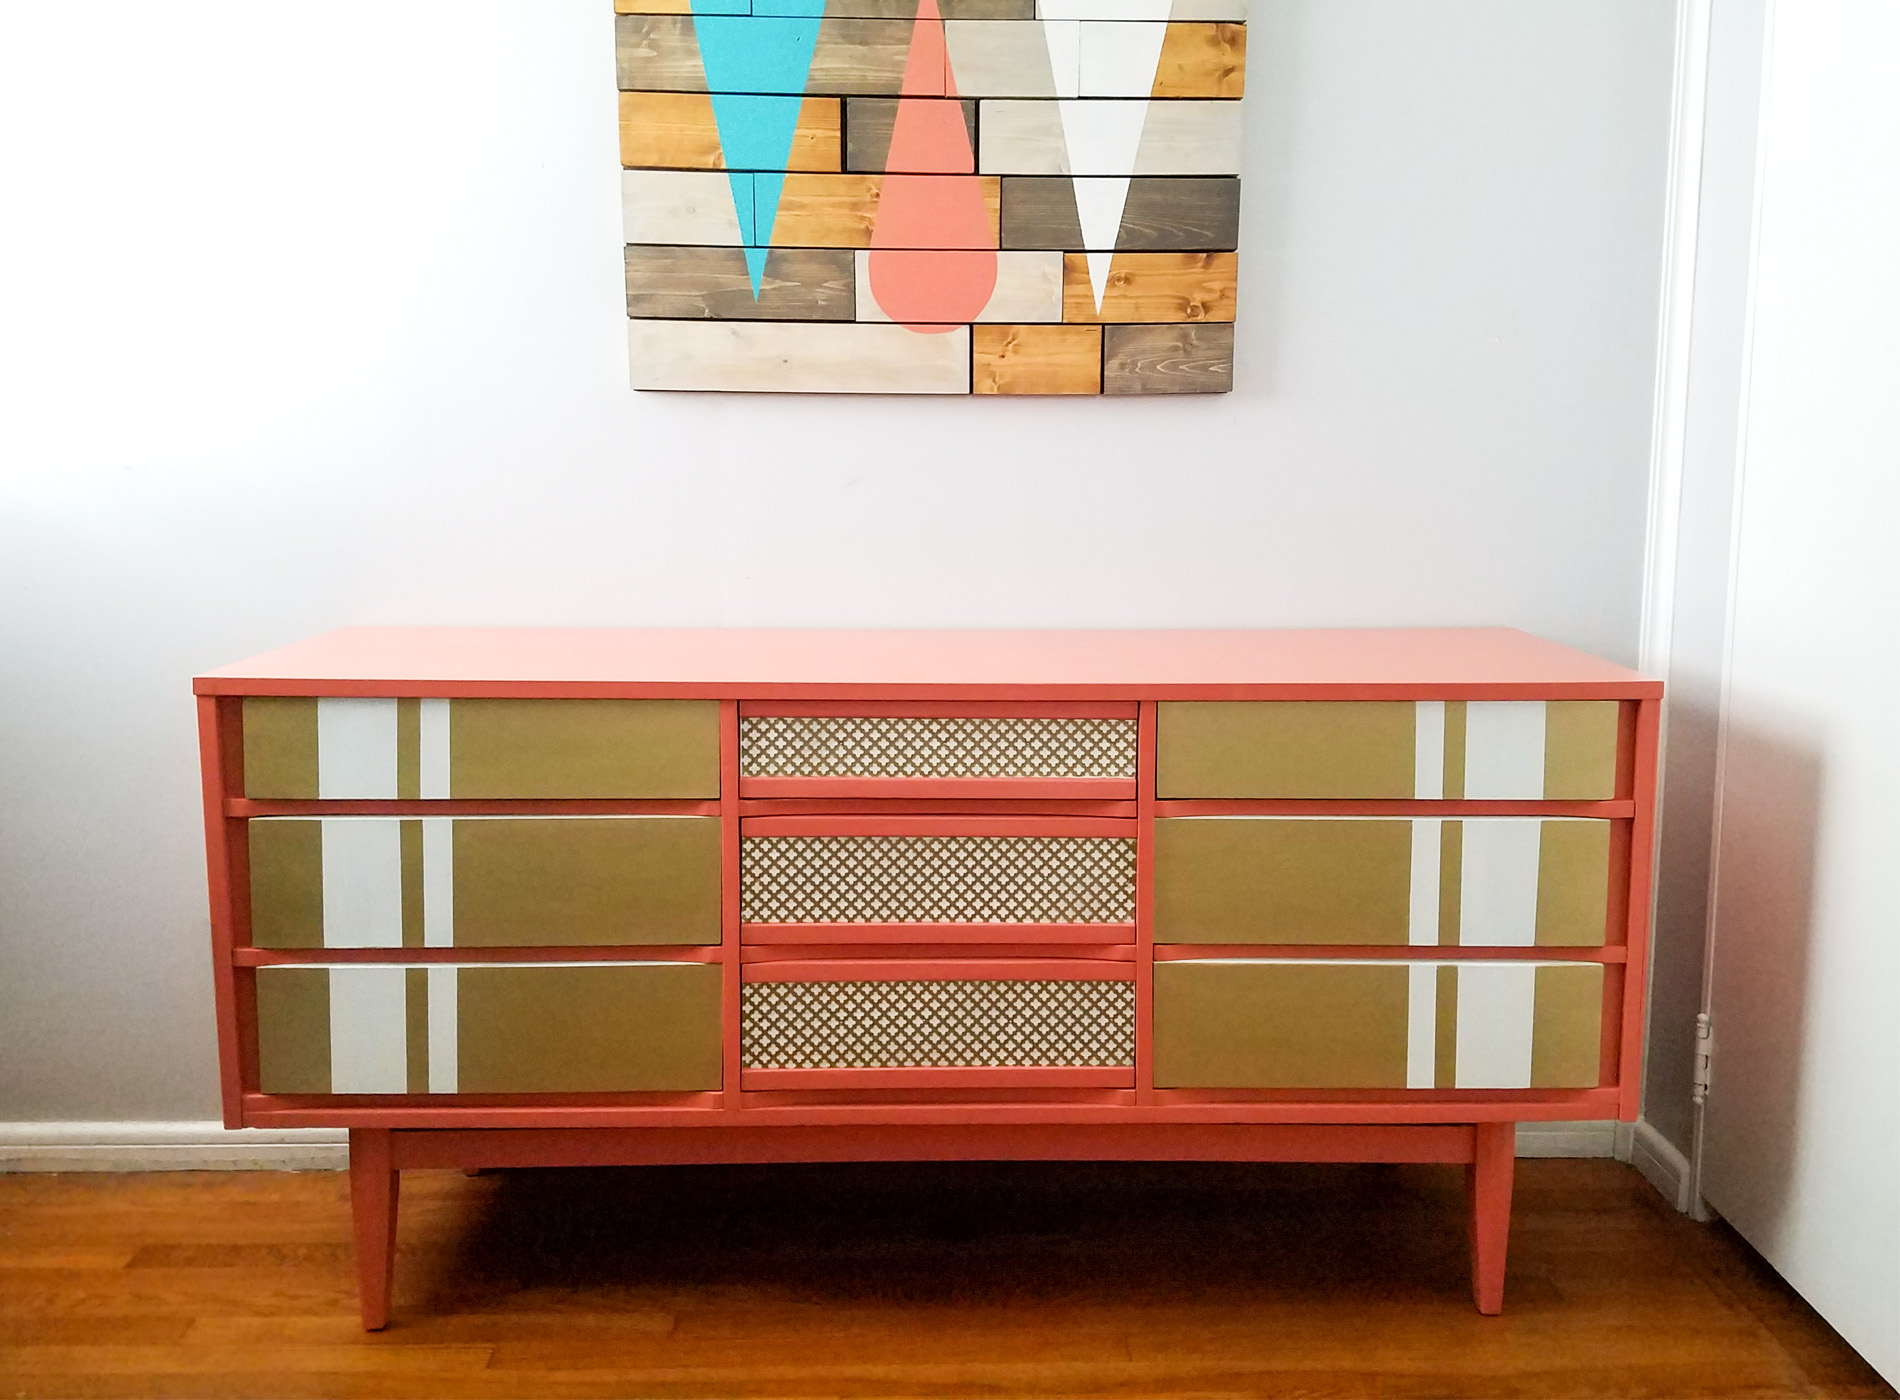
Finally, after my DIY stent was over, here is what I came up with...

Far from my first passion, rustic farmhouse, but the lines of this modern dresser drew me in. I added some gold metal inlays to the center drawers, and some fun striping to the gold drawers. All was finished off with a topcoat of a semi-gloss poly.


Not only is it funky fun but is also the look I was after...a modern dresser makeover.

The wall art was sweet because it made me take a break from my norm.

The dresser, the brushes, and wall art are available in
my online store - stop by and see!
My hope is that you look past the wear on furniture. Listen to you inner junker and get your DIY on. hee hee hee. Additionally, pin and share to inspire others too, and then head below to see more Furniture Fixer Upper goodness.

Likewise, to get these DIY tips & tricks in your inbox, be sure to
sign up for my newsletter. Until next time!

 PINTEREST | EMAIL


- Girl in the Garage
- Confessions of a Serial DIYer
- Just the Woods
- Petticoat Junktion
- The Interior Frugalista
Also, more makeovers like my modern dresser: