Do you know what time it is?? It's
Trash to Treasure Tuesday! The one day each month where my blogger friends and I put together some wonderful transformations for you. My project for the day is turning these pieces of trash (aka. trashure) into a repurposed changing table cart. woot!

I've said it before and I'll say it again, it sure is a blessing when people get you. My parents are always telling me they saw something they thought I would like to work on. They've blessed the kids and I a million times over with gift of things they found. My dad own several rental properties and one of the not-so-fun duties is cleaning up after someone who has torn apart his hard work.
Here is the aftermath of one of those instances.

Thankfully, my dad saw fit to salvage what he could from that pile and brought me that broken down changing table to turn into something new. Finally, let me show you how I made the sides into a repurposed changing table cart. Let's get our build on!
DIY TIME
First, I figured out the layout and headed to my second home, the home improvement store. I picked out the hardware I would need and had them cut the ply for me because JC has enough on his plate and why not make use of this free service, right? Here's my 4' x 8' panel cut into the pieces of shelves I requested.

First, to give them a farmhouse/industrial flair, I stained them with my Briarsmoke stain. I've used it before in other projects you can see
HERE.

Because my plywood has an open grain to it, it takes the stain heavily. That's okay with me because I want some dark features. Also, did you know that if you want your wood to really take stain deeply, you need to open the grain? If you sand your wood with a 120 grit or lower, it will leave it ready to accept the new color.

NEXT STEPS
Next, once the stain is dry, I sand it down with my sander to give it an aged appeal. Now, it's time for the changing table sides. I removed all the old hardware and filled the holes with wood filler. Then, I sanded those down and made some changes. I cut off the top finials with my hacksaw and the bottom legs to get where I needed to be on dimensions. Now it's time to paint. woot!
For the life of me I cannot figure out why there are no dark gray spray paints available out there. I mean, am I weird or something?? So, much like how I use a
zinc spray to create zinc patina, I chose this automotive primer for my finish.

Two light coats, letting it cure between, and it's ready to roll onto the next step.
WOOD GOODNESS
To make side rails, I dug into my reclaimed wood stash from our kitchen remodel and grabbed some reclaimed oak. Mmm...good stuff I tell ya. Do you swoon over aged wood too? All sane people do, ya know. haha.
A few things need to be done to get the wood ready, so I call in some of my favorite tools. I cut it to length with my miter saw and then used my Kreg jig, to make pocket holes. Why pocket holes? It will allow me to make some awesome joints to all my pieces. This is exactly why my motto has been toolsoverjewels since I was a teenager.

You might remember my other changing table found curbside just a few weeks ago. I turned that one into a potting bench with reclaimed wood, but in a different style. See it
in this post.
Now it's time to assemble my repurposed changing table cart and show you what my weird brain envisioned. mwahahaha...
THE REVEAL
Here it is!

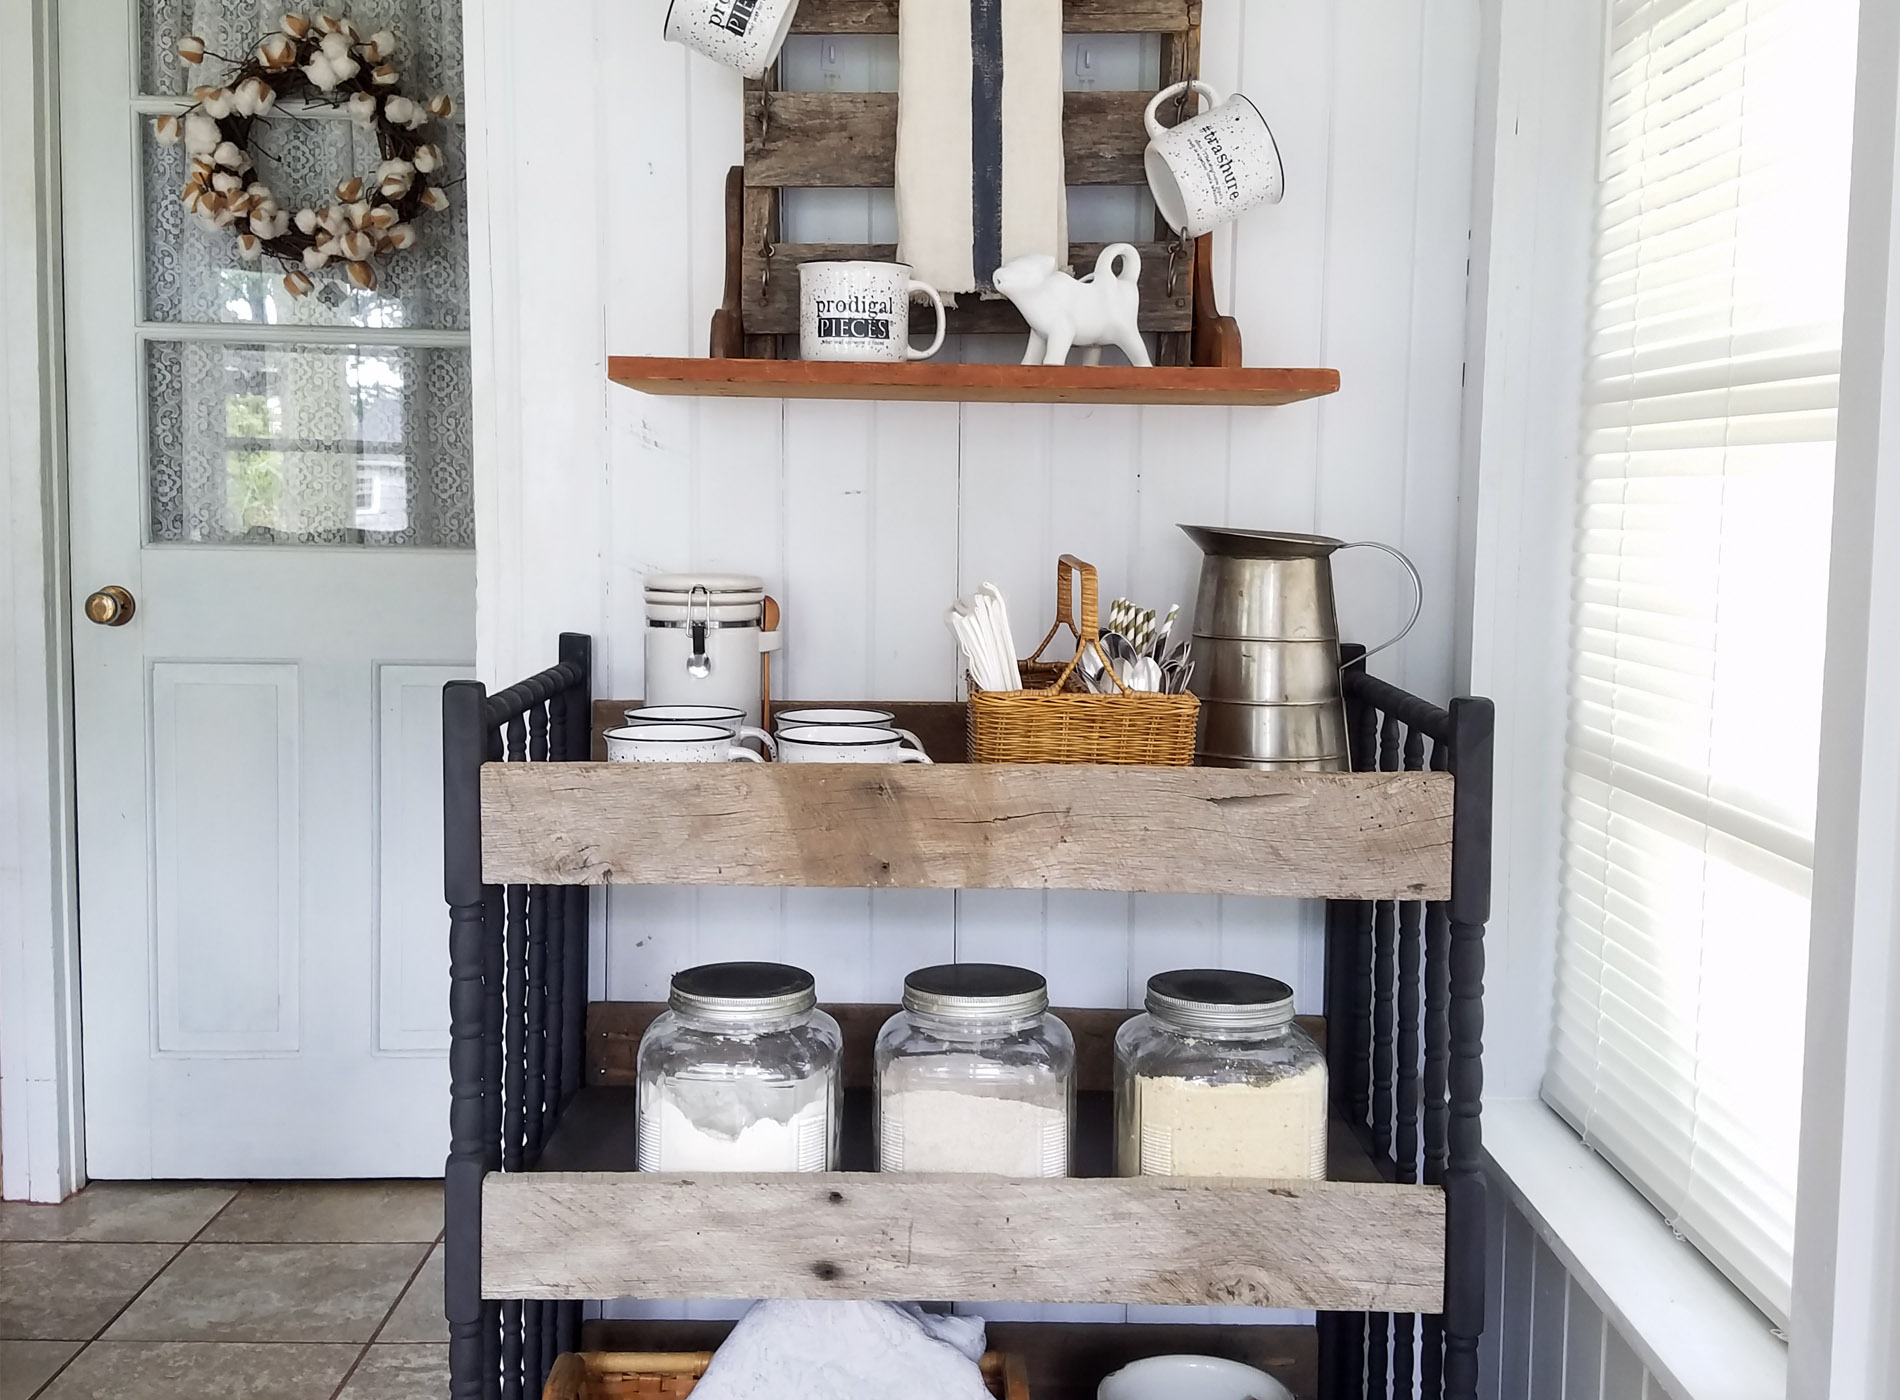
I love the new look with its rustic, industrial farmhouse style. It has oodles of character and can be so handy in most any room of the house. I could see it in a bathroom with towels and toiletries, or used for plants, or even books...so many ideas!


It was fun to stage it as a beverage station along with
my DIY mug rack. who does love a warm cuppa, right? You can find the cart, mug rack, and mugs available in
my onilne store.

PERFECT
My favorite addition to the cart was not only the barn wood, but those casters. Boy...do I love casters. Not only do they sure make my life easier, but they also add an element of fun.


Finally, I hope you had fun following me along on my junking adventures. Getting to build with found things is certainly a delight of mine. I love to make things that you can't find in a big box store. Kinda like a piece of art, I think.

In addition, pin and share this repurposed changing table cart to inspire others to give DIY a try.

Likewise, coming up next, I'm taking another cast-off from my dad's rentals and giving it a whole new look (see below then
head here to see the after). Before you go, be sure to
sign up for my newsletter.


 PINTEREST | EMAIL
Last, you just have to check out these awesome projects by my blogger friends for Trash to Treasure Tuesday.


- Confessions of a Serial DIYer
- Girl in the Garage
- Bless'er House
- Artsy Chicks Rule
While you're at it, here are more projects like this repurposed changing table cart:


 I've said it before and I'll say it again, it sure is a blessing when people get you. My parents are always telling me they saw something they thought I would like to work on. They've blessed the kids and I a million times over with gift of things they found. My dad own several rental properties and one of the not-so-fun duties is cleaning up after someone who has torn apart his hard work.
Here is the aftermath of one of those instances.
I've said it before and I'll say it again, it sure is a blessing when people get you. My parents are always telling me they saw something they thought I would like to work on. They've blessed the kids and I a million times over with gift of things they found. My dad own several rental properties and one of the not-so-fun duties is cleaning up after someone who has torn apart his hard work.
Here is the aftermath of one of those instances.
 Thankfully, my dad saw fit to salvage what he could from that pile and brought me that broken down changing table to turn into something new. Finally, let me show you how I made the sides into a repurposed changing table cart. Let's get our build on!
 First, to give them a farmhouse/industrial flair, I stained them with my Briarsmoke stain. I've used it before in other projects you can see HERE.
 Because my plywood has an open grain to it, it takes the stain heavily. That's okay with me because I want some dark features. Also, did you know that if you want your wood to really take stain deeply, you need to open the grain? If you sand your wood with a 120 grit or lower, it will leave it ready to accept the new color.

 Two light coats, letting it cure between, and it's ready to roll onto the next step.
 You might remember my other changing table found curbside just a few weeks ago. I turned that one into a potting bench with reclaimed wood, but in a different style. See it in this post.
Now it's time to assemble my repurposed changing table cart and show you what my weird brain envisioned. mwahahaha...
You might remember my other changing table found curbside just a few weeks ago. I turned that one into a potting bench with reclaimed wood, but in a different style. See it in this post.
Now it's time to assemble my repurposed changing table cart and show you what my weird brain envisioned. mwahahaha...
 I love the new look with its rustic, industrial farmhouse style. It has oodles of character and can be so handy in most any room of the house. I could see it in a bathroom with towels and toiletries, or used for plants, or even books...so many ideas!

 It was fun to stage it as a beverage station along with my DIY mug rack. who does love a warm cuppa, right? You can find the cart, mug rack, and mugs available in my onilne store.

 Finally, I hope you had fun following me along on my junking adventures. Getting to build with found things is certainly a delight of mine. I love to make things that you can't find in a big box store. Kinda like a piece of art, I think.
 In addition, pin and share this repurposed changing table cart to inspire others to give DIY a try.
 Likewise, coming up next, I'm taking another cast-off from my dad's rentals and giving it a whole new look (see below then head here to see the after). Before you go, be sure to sign up for my newsletter.

 Last, you just have to check out these awesome projects by my blogger friends for Trash to Treasure Tuesday.


