 This never fails to happen to me. I walk into the store knowing full well that I don't need another piece to work on and am there on a solitary mission. Then, there it is...a big ol' sign saying 50% off furniture. Well, any sane person couldn't ignore that, right?
However, there sat this antique chest just showing me those gorgeous mismatched glass pulls and marble top. It begged me to take it home, I tell ya. First, I gave it a quick assessment and went...ugh. 50% off may sound good, but this thing needed much work.
Here's what I'm facing...
This never fails to happen to me. I walk into the store knowing full well that I don't need another piece to work on and am there on a solitary mission. Then, there it is...a big ol' sign saying 50% off furniture. Well, any sane person couldn't ignore that, right?
However, there sat this antique chest just showing me those gorgeous mismatched glass pulls and marble top. It begged me to take it home, I tell ya. First, I gave it a quick assessment and went...ugh. 50% off may sound good, but this thing needed much work.
Here's what I'm facing...
 Broken frame to the drawers,

HOT MESS
Also, plenty of damage to the drawer fronts from someone trying to pry it out with a screwdriver. The the inside guides were falling out and a dozen nails were sent into them through the sides trying to get them to stay. And...looked like someone tried to refinish this piece and did a sloppy job. They got it all over the marble and didn't even bother to remove the knobs. Plus, there were plenty of bristles stuck in the finish. There is paint in all the crevices, and those top two drawers were flopping up and down like a mouth speaking to me from missing their hardware. Hot mess, shall we say? See...it's opening up begging me to save it. hee hee hee.
 Meanwhile, it's at this point I'm like, "What did I just buy???" I needed another headache piece like another hole in the head, but silly me can't resist. So, onward we go!
DIY TIME
First, I repair those broken drawer rails. Those had been hopelessly failed to be repaired previously. Nailed through the outside panels, through the front and were hanging loose. Then, I pull out all those nails and started fresh using my nailer to secure it from the inside.
*post sponsored by DecoArt (see full disclosure)
Next, I bust out the wood glue and wood filler. I used half a tub on this thing. At least it works wonders to make things new. After that, I use my sander to take off the chunky finish. Finally, it's now time to give this antique chest new life. First up, add some casters back to the empty spots. Thank goodness for a junk stash! I love collecting casters when I'm about and about. They come in so handy. At last, I find four wooden ones to make a set and they add that bit of height my antique chest needs.
FINISHING
Enter in this new product by DecoArt. Anything with the word "vintage" gets my attention. Aren't these colors gorgeous? Actually, here are 20 different washes available that will make your heart happy. For this antique chest makeover I chose to use one of my old standby's, DecoArt Chalky Finish Paint in Vintage along with the Vintage Effect Wash in White. In addition, you can see all my other posts with DecoArt products in these posts.
 To get started, I use apply two coats of the chalky finish paint making sure to let it cure between coats. For the next, step, I decided to use the wash to add dimension to the chest. I applied it to the center panels on the sides. Just brush on and use a soft rag to wipe off any excess leaving traces of it behind.

WASHING
The beauty of the wash is that it has an additive to give it a longer cure time than paint. Why would we want that? Well, that gives us the chance to work it in to the places we want and take off the excess before it sets up. It makes it so nice to work with. I even added it to the carved parts of the chest and drawer fronts.
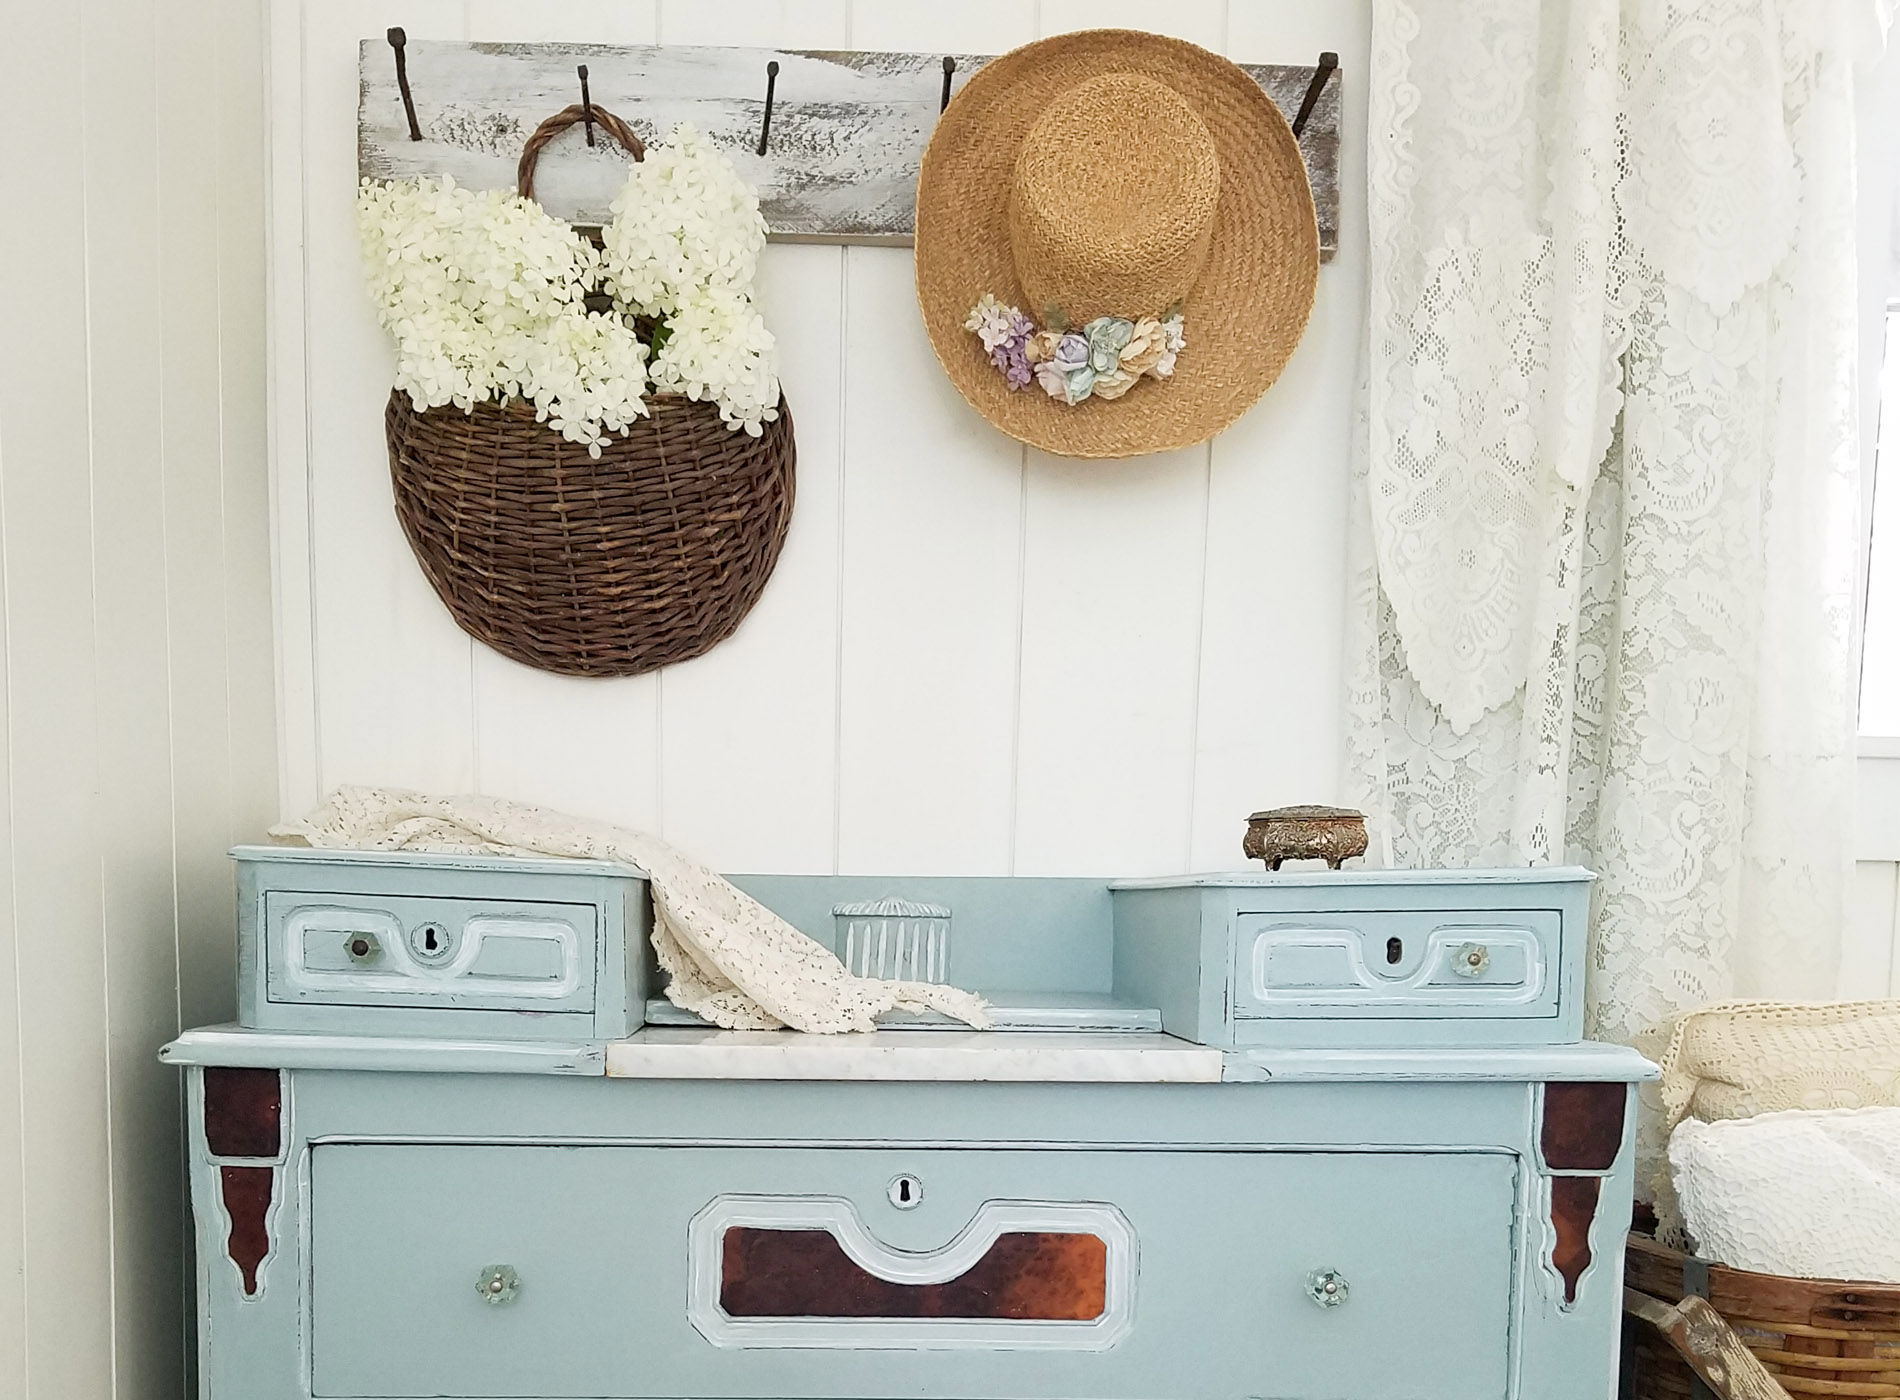
THE REVEAL
The wash sets up beautifully and then I do a bit of distressing to add time-worn wear. Finally, my antique chest makeover is done. Here is the new look! Much better than the broken down lady I found in the store. I would have loved to have restored all the wood, but there was no doing with all the damage. However, instead I have those gorgeous burled inlays showcasing their gorgeous self.
 Notice how that Vintage Effect Wash really gave dimension to to all the details? I love it! In case you were wondering, this originally had a mirror and different pulls, but I was able to scrounge out some sets to make this complete from my stash.
 Also, the side panels make for a sweet statement too, don't you think?
 My hydrangeas are in such gorgeous full bloom that I had to bring some in. They look like lace to me...sigh...


ALL THINGS VINTAGE
Likewise, I do have such fun staging my pieces. Especially with treasures like these. My grandmother-in-law passed not too long ago leaving us wonderful trinkets like that pearl necklace above, and this delicate jewelry box. I'm happy to say we have a happy ending for the chest. And, for me knowing I saved yet another piece from some dismal outcome. Oh, and by the way, I did pass up a Queen Anne vanity that was there too. I just can't save them all!
If you are in love with this chest, you can find this piece, the paint brushes, and more available in my shop.
I'm happy to say we have a happy ending for the chest. And, for me knowing I saved yet another piece from some dismal outcome. Oh, and by the way, I did pass up a Queen Anne vanity that was there too. I just can't save them all!
If you are in love with this chest, you can find this piece, the paint brushes, and more available in my shop.
[metaslider id=30251]
SHARE
In addition, pin and share this antique chest made new to inspire others to restore the unloved furniture the find. They may have great bones only needing some TLC.
UP NEXT
Likewise, time for some more fun! You just have to see what my gal friends whipped up for you today. Be inspired!

- The Interior Frugalista
- Just the Woods
- Girl in the Garage
- Confessions of a Serial DIYer
- Petticoat Junktion

Also, more makeovers like this antique chest:

