 Okay, so this table is not only showcasing that gorgeous orange stain (insert sarcasm), it is also standing on a broken leg. (aka. hot mess) See the back left?
 The top was scratched to oblivion because it is made of pine with a veneer to boot, but was solid enough it could be saved. The turned legs and decorative edging, though falling off, was enough to make me try to save this piece.

DIY TIME
Now let's look at the broken leg. At some point, someone did a really bad repair job by drilling in four screws after removing 1" chunks around the perimeter. I assume they were trying to get the damaged leg off. This was where I was like, well...let's see what we can do. So I use my drill to back out those screws to find this...
 Okay, so that's one jerry-rigged table. ahahaha... Well, only thing to do is remove that bolt and give it a go my style. To solve this leg dilemma, I used my spade bit and drill to make new holes that would house a solid wood dowel.
 This would give me the tight join and support I was after for our farmhouse side table. After using some wood glue and wood filler to repair the damage, I clamped it all together to dry overnight.
 Once all was dry, it was time for the fun part. Woot! My sander came out to play to see if I could save any of that wood top, but alas the pressed board had been peeking through too much. This is where my littlest couldn't wait to join in. She knew just what to do and grabbed a rag to wipe it all down.
 She's so proud of herself. awww... Then it was time to add a soft white to tone down that punkin' orange.
BRING ON PAINT
My paint brush also comes in handy to refresh this orange little beast. Looking good already, wouldn't you say? Little girl got her apron on and even asked for her bandanna to "protect her hair". She's rockin' it. And I gotta tell ya that that's the best part about this paint - safe to use around my kids and so easy to apply that even a toddler can do it. Once two coats were applied and cured, little girl and I distressed the paint to give it dimension. Then, I applied a poly topcoat to give it long-lasting protection.
REVEAL
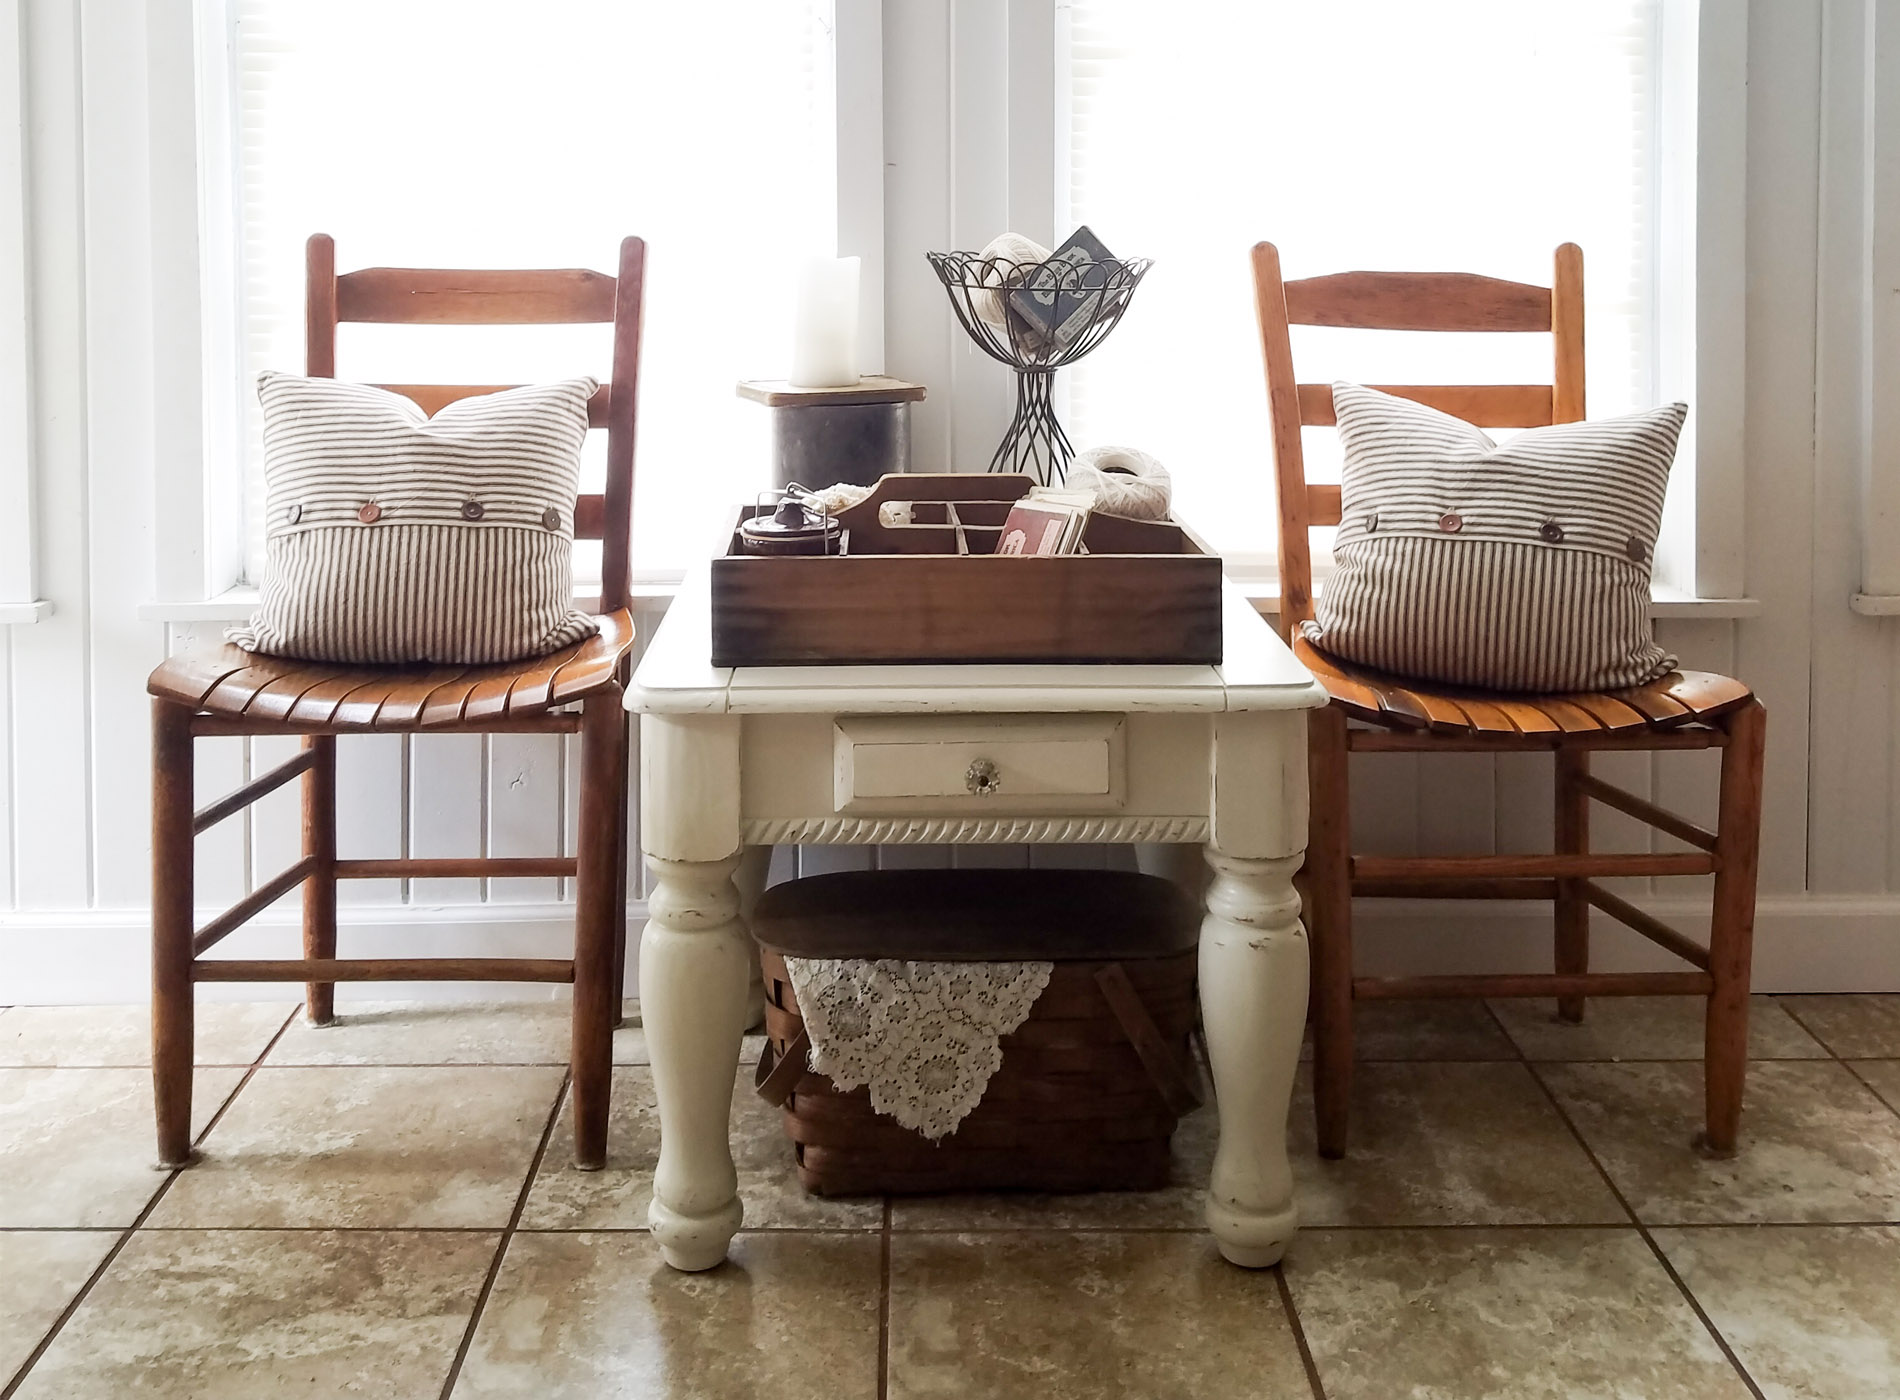
Ready to see our new and improved farmhouse side table? Here it is!
 It's looking refreshed already. It has that look we're after by just updating the paint and pull. I happened to have a spare antique glass knob that suit this just right.
 Little girl even helped me pick out some wallpaper from my vintage stash to line the drawer. She's such an awesome helper!
 I'm certainly pleased with the outcome with the leg repair and hope you are too. Just goes to show that a bit of TLC can go a long way. No need to break the bank to get the look you're after in your home.
 You can find this table, the pillows, and even a few other goodies available in my shop.
[metaslider id=30251]
 Do pin and share to inspire other to get the look their after by rolling up their sleeves and having at it. It's so much fun to share!
 Up next, that sad looking piano bench in the pile above will be getting new life. Head here to see that bench and see what those wooden pieces became here.
Be sure to sign up for my newsletter to get these DIY tips & tricks in your inbox. PLUS, you will get your FREE Furniture Buying Checklist and special discount to my shop. Until next time!
Up next, that sad looking piano bench in the pile above will be getting new life. Head here to see that bench and see what those wooden pieces became here.
Be sure to sign up for my newsletter to get these DIY tips & tricks in your inbox. PLUS, you will get your FREE Furniture Buying Checklist and special discount to my shop. Until next time!

Also, more DIY projects like this farmhouse side table:

