When the last Tuesday of the month rolls around, that means it's time for me to share a new
Reduce, Reuse, REFASHION project with you. Not only do I get so excited to create something out of a different medium, but it also challenges me to get creative. While I've been working through purging my home, I pull out this gem that I've been saving. How about a refashioned feed sack bucket tutorial for today? Let's roll!


Several years back, I had a flea market source that was a dump to look at but had oodles of treasures to be found inside. Since then, that flea market has moved far away {{sniffles}}. However, I'm happy to know the owners and what fun folk they are. With that and the fact that
my dream of moving has come to a close, I'm ready to give this feed sack new life. It even has remnant grain inside still and its original handwritten tag!

An added bonus is that it's nice and long with plenty of potential for refashioning.

REFASHION TIME
First, as you can imagine, I had to get up the gumption to actually grab my scissors and cutter to be ready to...gulp...cut this feed sack. It ain't easy! However, nearly 10 years ago, I took the dive into cutting a feed sack when I did
my viral feed sack chair.

Since then, I've also made a
feed sack purse, a
footstool, and a
tote bag from feed sacks. Further, I also have pillows here and there sprinkled throughout my home.

With that in mind, I cut it in half using my rotary cutter, guide, and mat after laundering it.

Then, to even up the edge and make some handles, I cut about 2" off the bottoms.

Next, I need a bottom, right? So I dig into my leather stash from
my leather bench,
my office chair, and
my other leather projects. Because I knew the circumference of the feed sack is approximately the same as my water bucket, I use that to trace.

SEWING
As soon as I have my pieces cut, I place the two pieces of refashioned feed sack inside the other with wrong sides facing. In this instance, I didn't need to edge finish as one already was. Also, I want a rustic edge as well. Also, using my sewing clips, I clip the leather bottom in place and sew using a heavy-duty or denim needle.


Then, to add stability, I use my plastic canvas to add strips (or spines) between the layers and hand-stitch them in.


Last, but not least, I sew the top edge together and add handles and my tag. Yes, I removed the bucket before finishing - it was just so I could place the spines in.
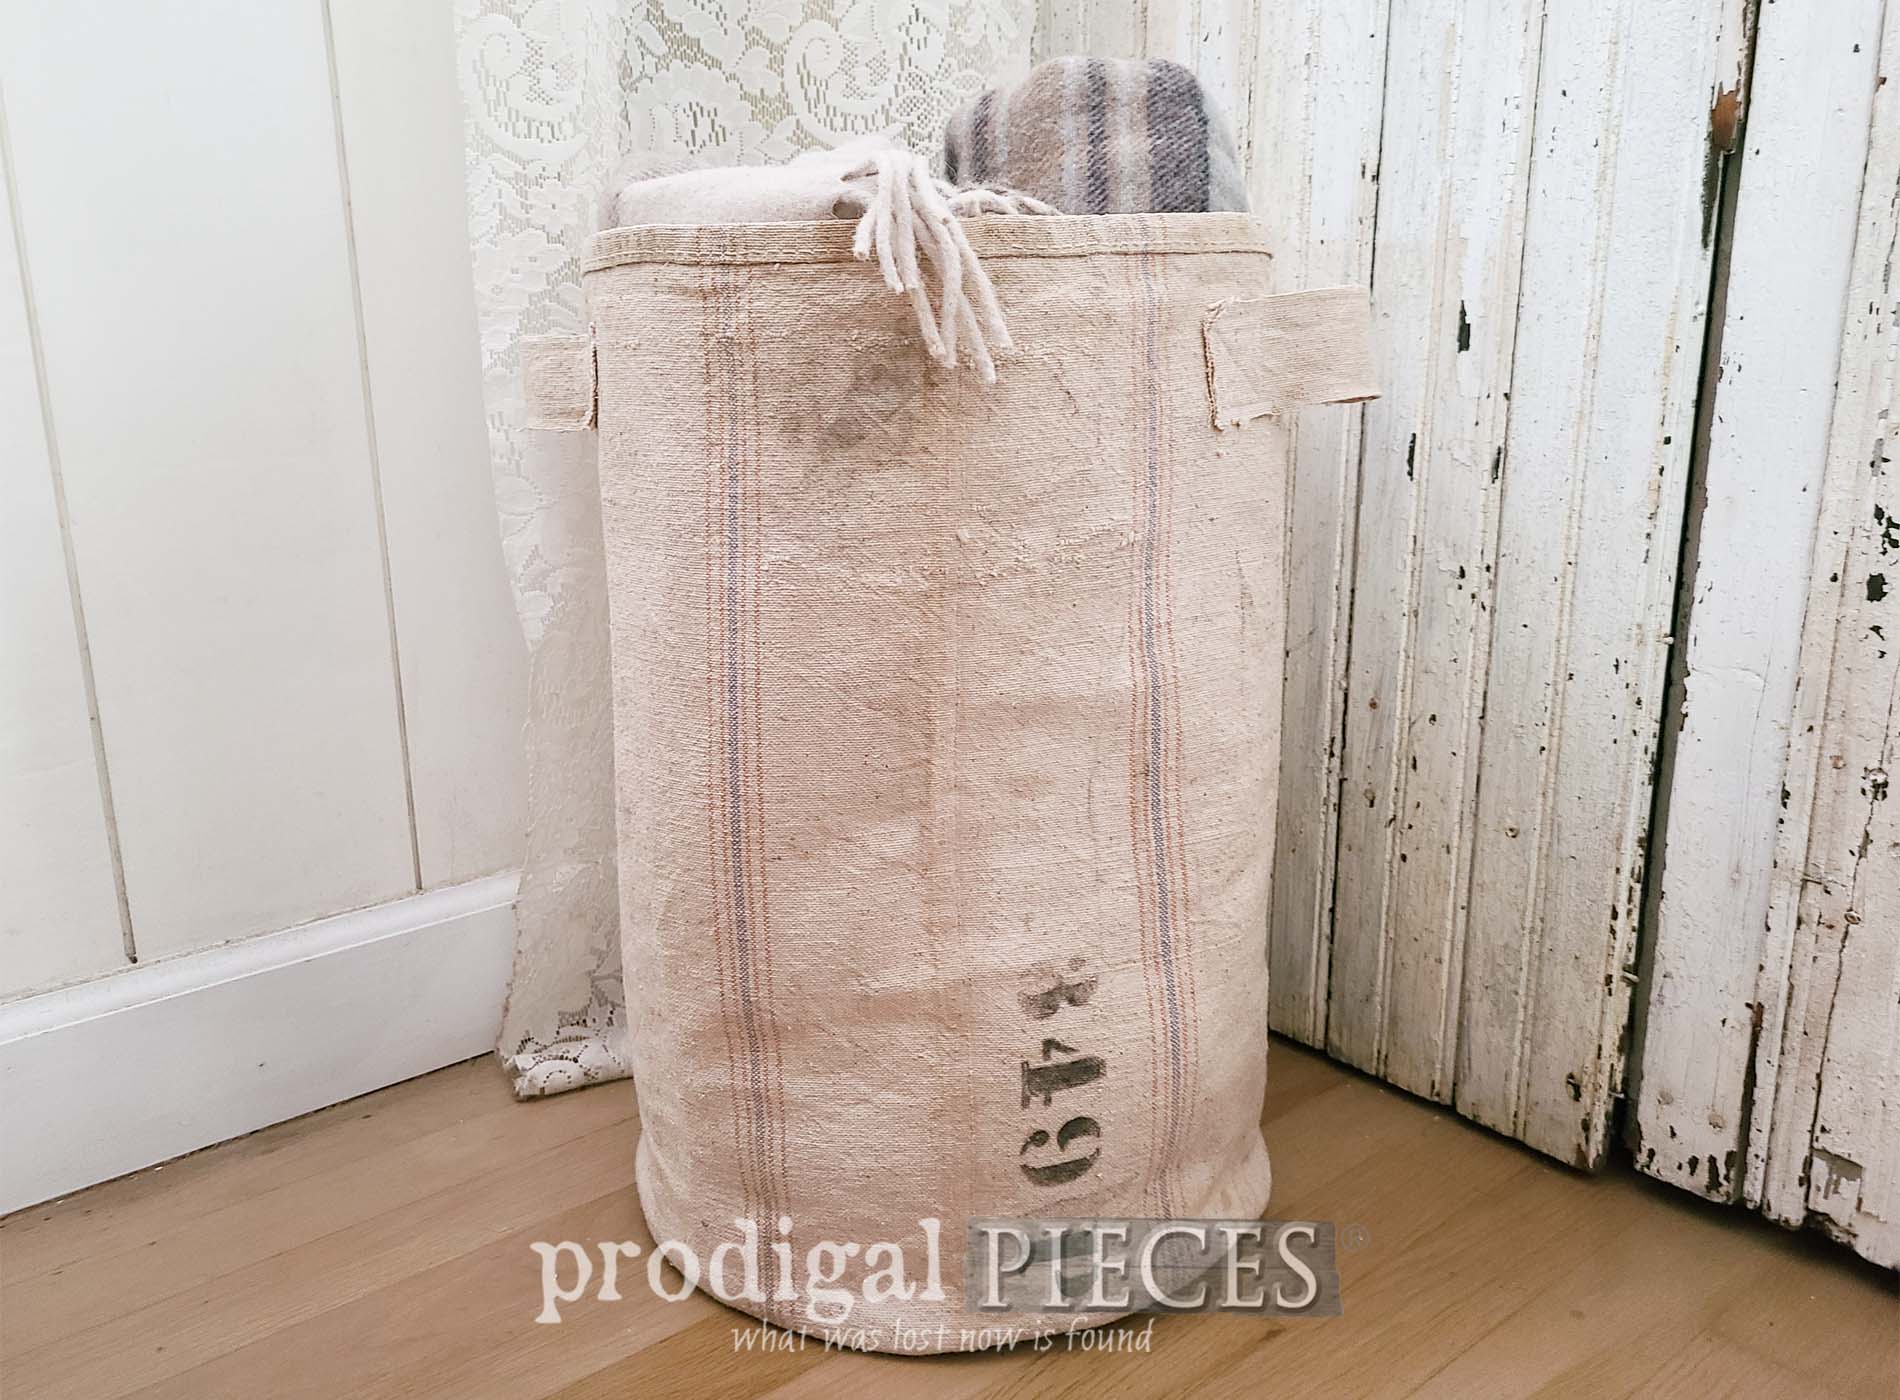
BUCKET O' FEED SACK
My refashioned feed sack now stands tall as a bucket ready for blankets, towels, laundry, or whatever your imagination dreams up. What would you use it for?


Not only is it large enough to stow away plenty of goods, but it also collapses for easy storage too.


And...you can't go wrong with leather. Even
puppy Loula wants me to keep it for her toys.


Alas, you can find it along with many other handmade, vintage, and furniture goodies in
my online store.

SHARE
As always, I'm eager to inspire and share my ideas with you. In addition, I want to hear from you, my audience. Leave me some comment love below and also pin and share to inspire others too.

To get these DIY tips & tricks in your inbox, be sure to
sign up for my FREE newsletter. Until next time!

 PINTEREST | EMAIL
While you're at it, check out these other projects like my refashioned feed sack bucket: