Yes, you read that right...the day is finally here. I say finally, because it's been nearly four years since I began our living room remodel. It's been finished since late 2019, but more on that later. Today, I'm super excited to show you what is one of the last rooms in our home to finally get a much-needed makeover from top to bottom. Take a peek at the before of our living room remodel.

While this isn't the true "before" when we moved in, that is what you can see in this old point-n-shoot camera from '03. There's textured white wallpaper, white carpet, metal windows with drip pans underneath, and a flat ceiling. We live in
a Gunnison home built in 1952 and so does everyone else on our street.

[caption id="attachment_43200" align="aligncenter" width="550"]

Time flies when you're vacuuming with your mama![/caption]
The interior is not drywall, but rather wood panels with wood studs and some have basements added at some point, like ours.
EARLY BEGINNING
However, I was pregnant with my second when we moved in. Two weeks after our move, I ended up with pneumonia and a staph blood infection with ICU stay of over two weeks. Honestly, I nearly died. So...we didn't get a jump on the remodel.
However, eventually for a simple fix, I rolled the walls with topping joint compound to hide the wallpaper and then painted it green. Then, I stippled the ceiling to hide those flaws as well. Next, we pulled up the white carpet to find gorgeous hardwood floors. I mean, who does that? (puts carpet over hardwood...blucky to me) In addition, we replace the large picture window, side window, and install a new entry door. Currently, since we've been here 20 years, we just put in another front door switching it from leaded glass metal door to a more rustic dark wood finish.
So, what you see in the before picture is a transition phase. You can even see how I painted one wall in the entry to stage
my entry mirror not long ago. I wanted it white to stage, but also because I wanted to see if I wanted white in this space again.
THE GOAL
First, I want to start with a backstory for you. When we purchased this home 20 years ago, my goal was to improve it and move out into the country and be 100% debt free. More on that as I share in the video below. As hard as I tried to make that happen in a short time, it wasn't meant to be. However, I am
free of all debt except a small amount on the mortgage. My last effort was in early 2020 as I hoped with the housing market being ripe, that we could make a run in the spring to sell our home. Without rehashing the details in this post, I invite you to
HEAD HERE to read the story.
God has a plan and I'm seeking His heart for my future.
The turn of events in just over a year ago have knocked my feet out from under me. Both in good and bad ways. Not only that, but, when I started this room, I still had my bilateral vertigo and was waiting on my MRI results to find out why I was having "strokes". Then, to top it off, we found a home where they accepted our super-low bid if we sold our house in two weeks. Guys...we got this room done in 12 days after only having part of the ceiling worked on. That means we had to shop for wood, notch panels, paint, put up faux beams, and arch the doorways. YIKES!!!
CEILING START
Before we put in that bid, here's where our room started. My kids and I had our therapy in pulling down all that wallpaper.

I want to keep this as low-cost as possible because I pay cash for all things and don't want to spend any unnecessary funds. With that in mind, I decide to take on turning the ceiling panels upside down and on top of the joists for an open beam effect. Am I a sucker for punishment or what?

I take down one of the smaller panels and see our blown insulation come rolling out. That means that for each panel I turn over, I need to get into the attic, remove the insulation to somewhere (we bagged it), and then flip the panel letting whatever fall below. MESS. Oh, and the only access into our attic is a small panel above my washing machine. Here are two of my four daughters helping me remove the insulation. Isn't it a good thing I started this in late February?


While I worked on one section, I would lay down rolled insulation so not all of our heat is sucked up there. Can you see me up in there?

Then, as we turned each panel up between the rafters, I would lay on top and staple hoping to hit the joists. Lemme just say I did so good with that...tee hee.


FEELING GOOD
I'm a mite bit happy with how well this living room remodel is going. {{YEAH, BABY!!}}

Only a ton more panel spaces to go...oy! What's crazy is that near the one wall, I had to cut the panel in place because I needed it to still cover the closets.

Finally, with the help of all six of my kids, we got that ceiling done and it's time for me to paint. Can I just say I have the BEST TEAM EVER?!


WALLS
Next, it's time to tackle the walls. Yes, they were wood panels, but we add luan (a thin plywood) over top. This allows us to have a clean slate to work with but took oodles of work to notch each piece to fit. You can see how we used the same luan in these other remodels:


Then, once the luan is up, I paint the walls the same Swan Wing white as in my master bedroom. However, the first color I choose was absolutely the
wrong color of white. How do they call that white...it's purply pink!

I take my lemons and make lemonade just using that paint as a base coat. After that, I use the beloved Swan Wing to give it two final coats.
BEAMS, BEAMS, BEAMS
Before I move on to the next part, I want to say a praise. Somehow between all my overhead work, my bilateral vertigo went away. It's not fully gone as I can still feel dizzy looking out a hotel window or climbing bleachers. However, it's nowhere near as severe where I would fall over in the dark or a monochrome room. Hallelujah and here's to conquering fears! Okay, so here are my primed panels and 2x4 joists. You can see how it's much like the look I was after when doing
my dining room ceiling recently. Also, you can see how
my faux beams in my bedroom got is featured at This Old House.

Though, notice the double joists are left raw. That's because I want to add faux beams as a part of my living room remodel. With that, we head to one of my favorite places to shop...the reclaimed wood heaven. You're looking at antique barns, factories, warehouses - all with wood from early 1800's or first growth grain...drool...


Even more, next door to it is my favorite fabric store made out of a reclaimed barn. Can a girl ask for anything more?
In my hunt, I pick out this gorgeous, shaggy, rough sawn beech from an old factory. All we need to do is cut it to length and rip it making three pieces: two mitered side pieces, and one bottom piece with two miters.


After that, we install using a professional finish nailer to make it a breeze.


FINISHING TOUCHES
Last, once we have the beams up, we also use the same wood to cover the luan panel seams and create casings for our window area. Not only that, but I also put a new ceiling and tongue-n-groove pine in that same window area. It's the same pine we put up in our dining room and also in our
boys' room ceiling.


In addition, you can see I cut all the ceiling trim having to measure each and every span as I went.

For the window and door trim, and the baseboards, I paint those the same slate green I use on
my kitchen cabinets.

THE FINAL REVEAL
To be able to say to you that this room is done is quite the relief. First, take a peek at this video below as I share a bit more information with you.

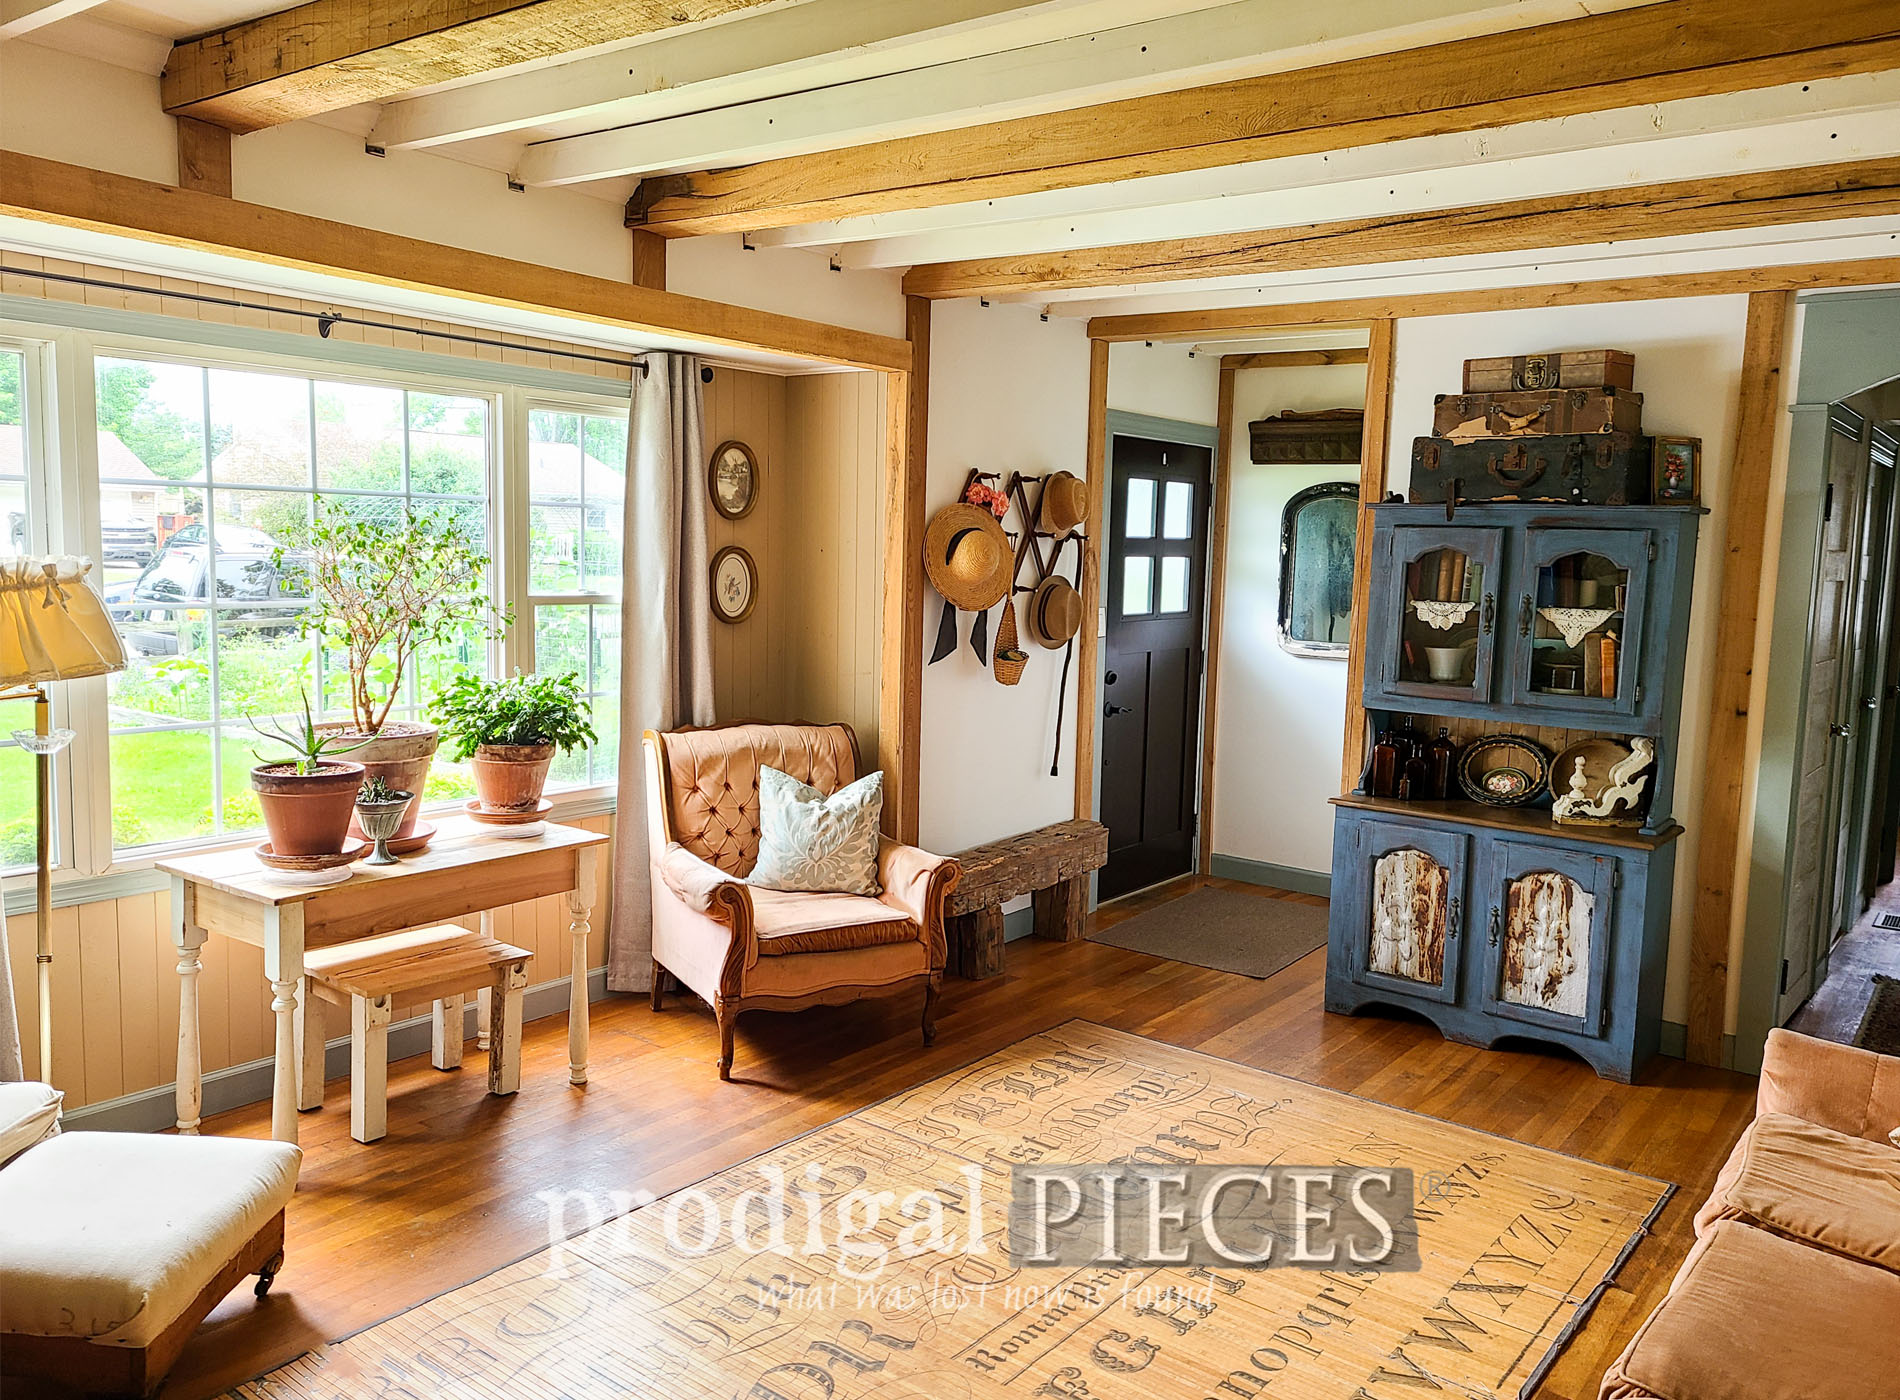
While we reworked just about every part of the room, the last frontier is the floor. I so wanted to refinish them, but couldn't get help to get that done, so they are staying as-is for the time being. In any event, I'd say the room looks
absolutely nothing like what we moved in to.


With every corner filled with something I either made or found, make this home story even sweeter. Even that $25 hutch got a new life in
this post HERE. Yes, it takes patience and elbow grease, but at least I can now say I've made my house my own. You can even see how I remodeled the adjoining hallway in this
video post HERE.

 My curbside door turned mirror
 makes the room less rectangular, and my $40 sofa and chair are just the right touch.


My free antique upright grand piano with
organ bench topped with my DIY linen cover are where I teach my kids piano.

WORKIN' FOR ME
Also, if you ever wanted to see where all the magic happens for my blog...it's right here.


Wouldn't you like to join me here for a chat?
My DIY channel back chair along with
my pallet wood desk make this spot cozy.

Even
Loula and Ivan love to chillax here. They're both babies at 10 months and two months - what a duo. See my video as to why I split my lip.

SHARE
Well folks, there ya go. My living room remodel is complete and I'm happy that I'm finally sharing it with you. Leave me some comment love below while also pinning and sharing to inspire others too.

Before you go, be sure to
sign up for my FREE newsletter to see what becomes of this latest thrifted find
over HERE.

Until next time!

 PINTEREST | EMAIL
While you're at it, here are more DIY projects like my living room remodel to inspire you: