I can't believe we've flown through another month already and my favorite time is here - Themed Furniture Makeover Day!! This month's theme is all about small tables...whew. My schedule has been kickin' my rear lately and I could use a small project. Although the focal point of this month's theme is small, my table is big in so many ways. Check it out my reclaimed sewing machine table project.
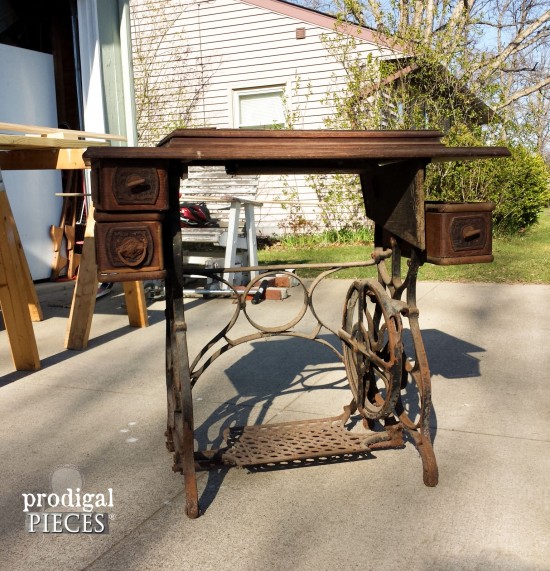
If you follow me on social media, you would know I scored this antique treadle sewing machine off of Craigslist. I had told myself that if I ever came across one of these beauties (reasonably priced) it would be mine. Sellers were asking $75, but when I asked if it was firm, they quickly dropped it to $50. Seems they wanted it gone...NOW.
No problem!!
DIY TIME
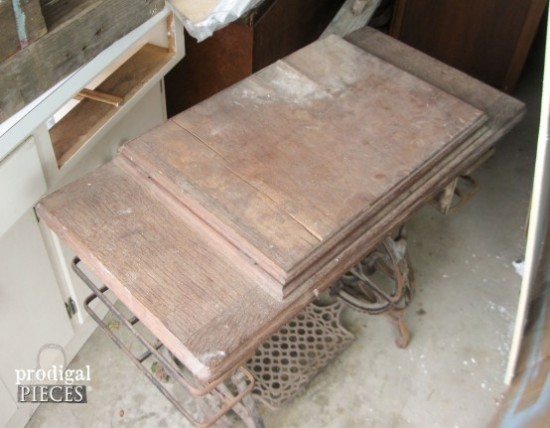
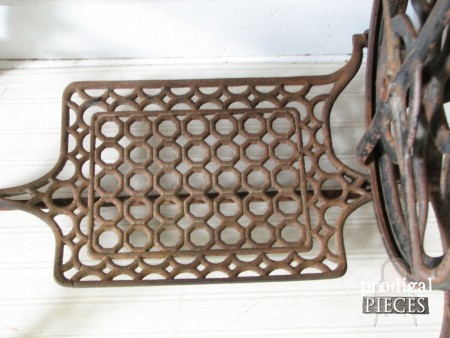
Yes, it's rusty, and yes, it's top is a wreck (
I upcycled it HERE!), but just look at those legs...
...and look at those drawers!! {swoon}
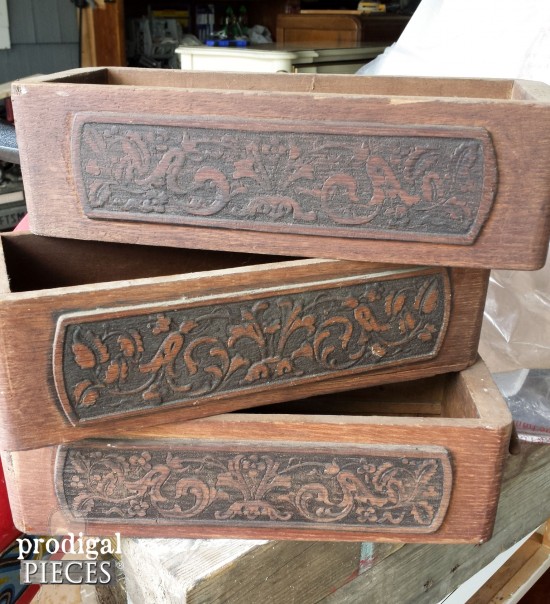
Aren't they gorgeous? For today's purposes, I needed to remove the drawers and their brackets, but don't worry, I've repurposed them in our
bathroom remodel (go see!). Now is all about a reclaimed sewing machine table.
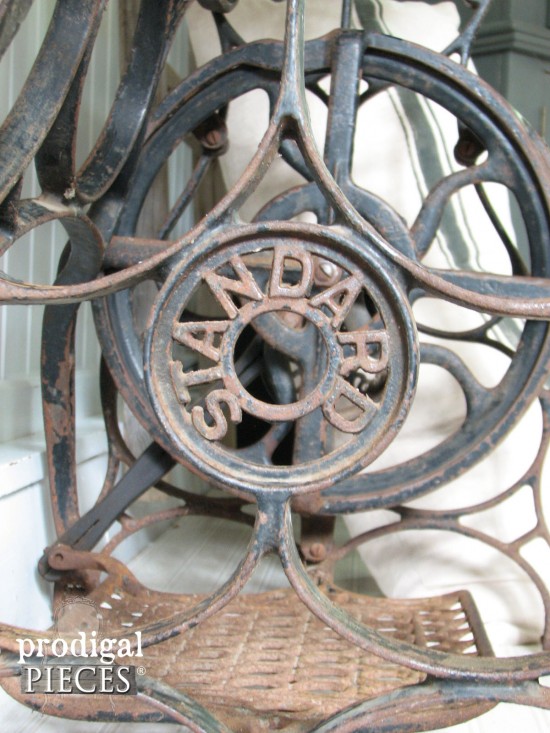
I was amazed that although the base was rusty, the bolts came off so easily.
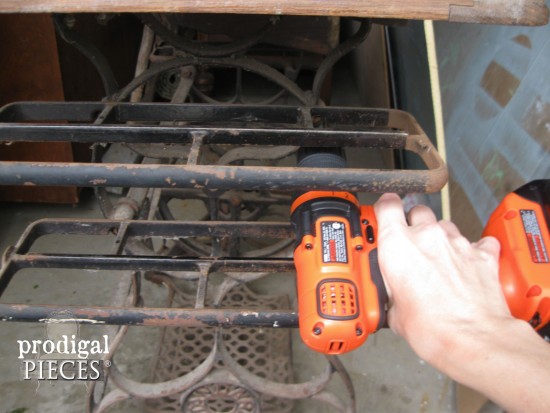
There were four brackets, but only 3 drawers, in case you didn't notice, or I may have just left them on the table. Lookin' pretty chippy, right? The treadle on this thing humms right along as if there wasn't a single spot of rust. They just don't make things like that anymore.
NEXT STEPS
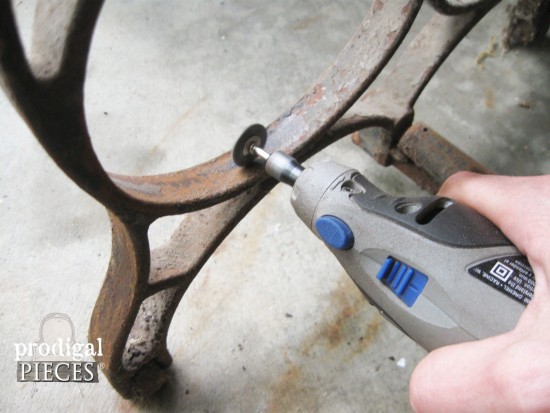
Then, after a good scrubbing, next came one of my favorite tools, my Dremel. With one of my polishing brushes, I gave it a good going over to remove flaking paint and a large amount of surface rust. The previous owners have left it in the elements {head smack}. The whole time I had the first line from the song, "Love Shack" running in my head except my version went, "Old base rusted!!". Yes, I'm dating myself. ahem.
BARN WOOD
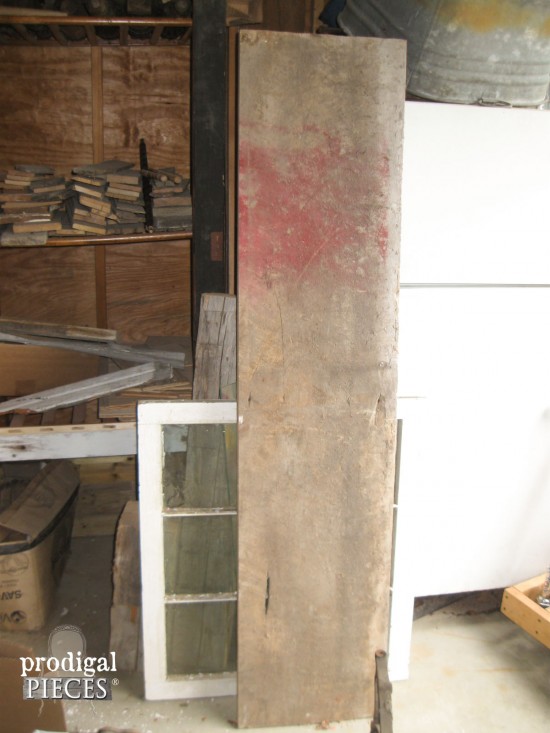
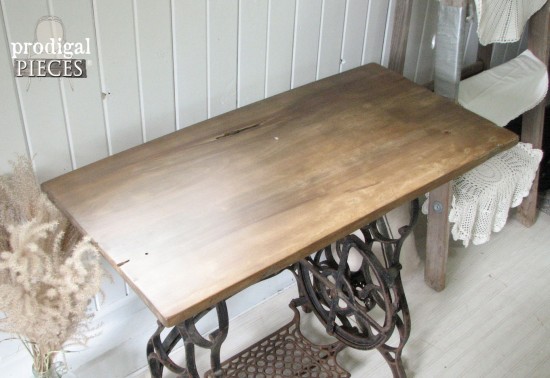
Now comes the even more fun part....the wood. Because the top was so worn and weathered, which normally I love, it had to go. I was set out to use this absolutely gorgeous piece of reclaimed beech barn wood.
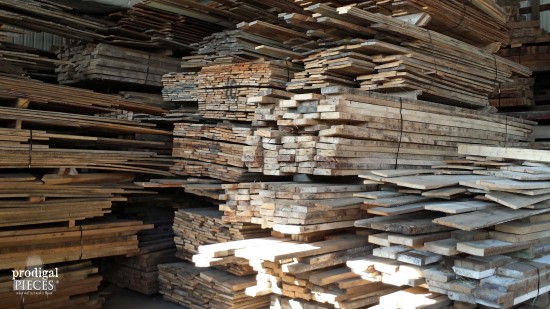
This big old beech beauty came from our
barn wood heaven we talked about, and also used in our
custom wood projects.
You just can't find this kind of wood anymore. Originating from the early 1900's and is 16.5" wide AND is actually 1" thick. FYI: most boards you buy at a box store says for instance 1" x 6", but is actually ¾" x 5¾"...ummm yeah. When I found that treadle machine, I knew I had the perfect board to make a new top.
FINISHING
Next, I bust out my circular saw and cut it to length. Once I had it to length it was time to plane it down. I bought my husband this planer a few years back, but he knew I was secretly hoping to use it too - he knows me all too well. This was my first go with it, and I was happily pleased to find it was pretty easy.
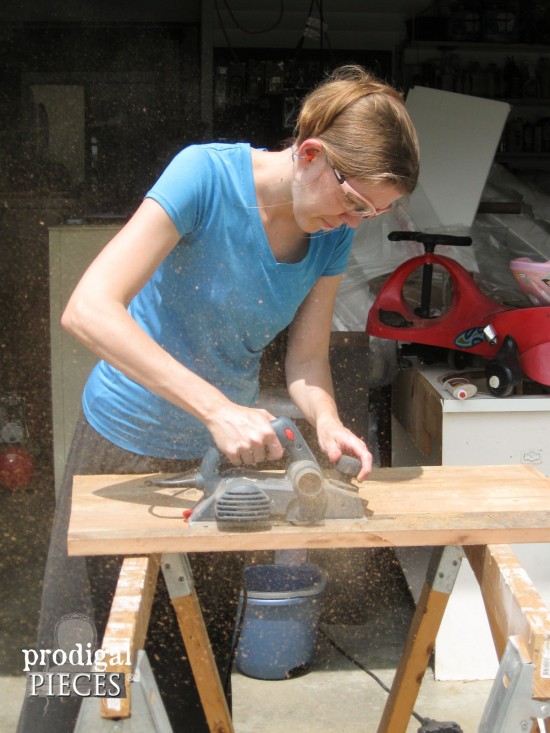
Most people use the bag that comes with the planer, but that thing kept getting in my way, so off it went. It was fun watching wood curls fly everywhere.
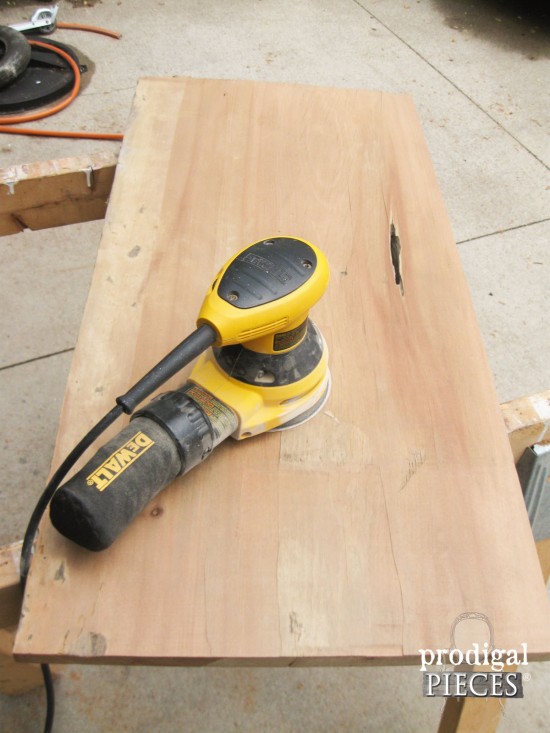
Once that was done, it was time to sand. Just look at that gorgeous color...so unique and I'm even hooked on that hole.
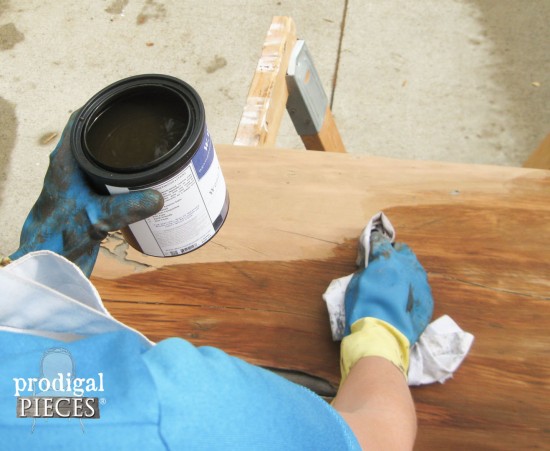
Bet you didn't think things could get more exciting, right? I'm using a reactive stain. No having to wipe on, let set, then wipe off. Just soak the wood and watch it transform before your very eyes. Amaaazing.
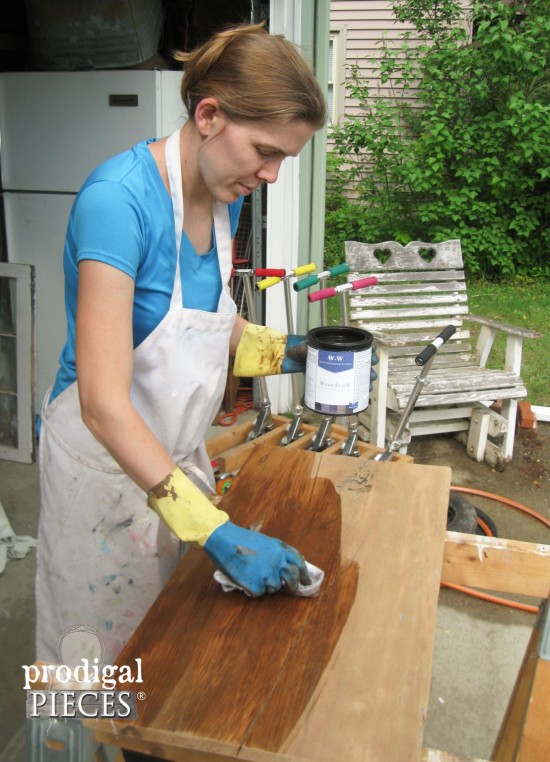
Also, it is pleasing to work with having no VOC's and couldn't have been easier to apply...really.
QUICK FINISH
Depending on humidity, this stuff is dry to the touch in minutes. Now, I will say that I had made an oops because I sanded my table starting with 80 grit, then 120 and 220 grit. After having done that I read the stain can label and it said to sand with 80 grit and then apply. The idea is you want to open up the grain so the stain can get down into the wood. I resanded, and found that worked well too, but I will be doing it correctly the next time around. I still have more of that gorgeous board left to use. Yay!
After finishing up with a few coats of satin poly, that forlorn base is ready for its new top.
THE REVEAL
Ready to see it all done? Wait no more...
PATINA PERFECTION
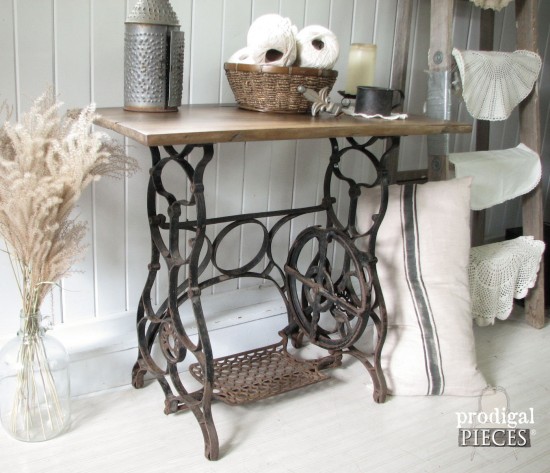
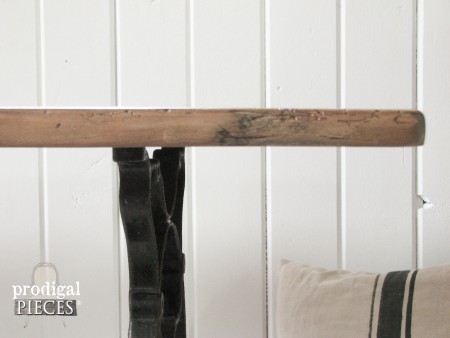
Ta da! I'm very happy with the rustic feel this reclaimed sewing machine table displays. From the rusty base (yes, I didn't want to paint), right up to the newly finished beech wood top.
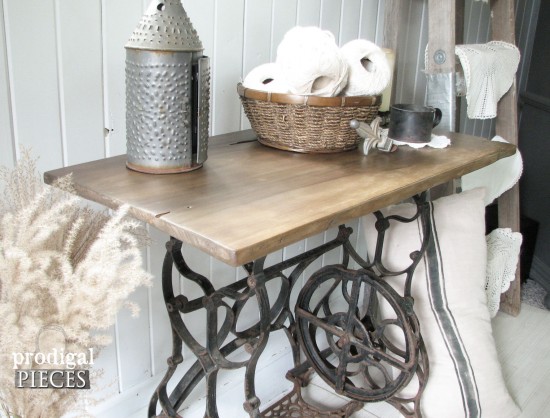
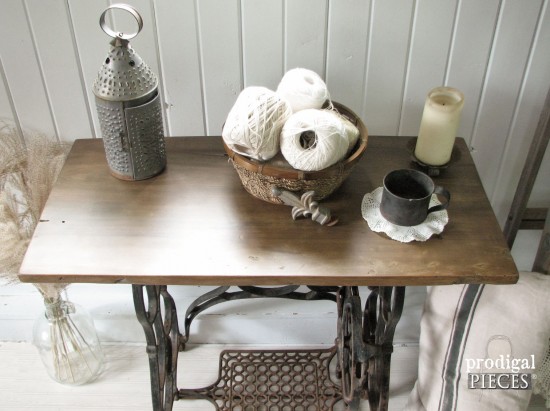
Isn't that finish beautiful?
The whole piece tells a story of days gone by.
The rust, the character of the wood...all so perfect.
Now to find another one, because this one is headed to
my online store and I had fun.


If you loved this reclaimed sewing machine table, pin and share to inspire others too.

Before you go, be sure to
sign up for my newsletter. Until next time!

 PINTEREST | EMAIL
Also, more projects like my reclaimed sewing machine table:
Don't head off just yet! I'm not the only one with a table makeover today. Feast your eyes on all these table done by the best furniture bloggers out there!

 If you follow me on social media, you would know I scored this antique treadle sewing machine off of Craigslist. I had told myself that if I ever came across one of these beauties (reasonably priced) it would be mine. Sellers were asking $75, but when I asked if it was firm, they quickly dropped it to $50. Seems they wanted it gone...NOW.
No problem!!
If you follow me on social media, you would know I scored this antique treadle sewing machine off of Craigslist. I had told myself that if I ever came across one of these beauties (reasonably priced) it would be mine. Sellers were asking $75, but when I asked if it was firm, they quickly dropped it to $50. Seems they wanted it gone...NOW.
No problem!!
 ...and look at those drawers!! {swoon}
 Aren't they gorgeous? For today's purposes, I needed to remove the drawers and their brackets, but don't worry, I've repurposed them in our bathroom remodel (go see!). Now is all about a reclaimed sewing machine table.
I was amazed that although the base was rusty, the bolts came off so easily.
Aren't they gorgeous? For today's purposes, I needed to remove the drawers and their brackets, but don't worry, I've repurposed them in our bathroom remodel (go see!). Now is all about a reclaimed sewing machine table.
I was amazed that although the base was rusty, the bolts came off so easily.
 There were four brackets, but only 3 drawers, in case you didn't notice, or I may have just left them on the table. Lookin' pretty chippy, right? The treadle on this thing humms right along as if there wasn't a single spot of rust. They just don't make things like that anymore.

 This big old beech beauty came from our barn wood heaven we talked about, and also used in our custom wood projects.
 You just can't find this kind of wood anymore. Originating from the early 1900's and is 16.5" wide AND is actually 1" thick. FYI: most boards you buy at a box store says for instance 1" x 6", but is actually ¾" x 5¾"...ummm yeah. When I found that treadle machine, I knew I had the perfect board to make a new top.
 Most people use the bag that comes with the planer, but that thing kept getting in my way, so off it went. It was fun watching wood curls fly everywhere.
Once that was done, it was time to sand. Just look at that gorgeous color...so unique and I'm even hooked on that hole.
Most people use the bag that comes with the planer, but that thing kept getting in my way, so off it went. It was fun watching wood curls fly everywhere.
Once that was done, it was time to sand. Just look at that gorgeous color...so unique and I'm even hooked on that hole.
 Bet you didn't think things could get more exciting, right? I'm using a reactive stain. No having to wipe on, let set, then wipe off. Just soak the wood and watch it transform before your very eyes. Amaaazing.
 Also, it is pleasing to work with having no VOC's and couldn't have been easier to apply...really.


 Isn't that finish beautiful?
 The whole piece tells a story of days gone by.
 The rust, the character of the wood...all so perfect.

 Now to find another one, because this one is headed to my online store and I had fun.
 Before you go, be sure to sign up for my newsletter. Until next time!


 Don't head off just yet! I'm not the only one with a table makeover today. Feast your eyes on all these table done by the best furniture bloggers out there!
