
 We replaced our worn-out fiberglass tub with a new Kohler cast iron tub found on Craigslist for $250. This beauty only had a small nick in the bottom left corner of the skirt from transportation, which made it deemed unworthy to the owner. SCORE FOR US!
The one and only thing we were not replacing in this room was the commode because we had just replaced it a couple of years prior. Otherwise, everything had got to go! From the ceiling down the floor all was removed. (You have to read about our initial gutting to totally get the picture...I'll wait.)
We replaced our worn-out fiberglass tub with a new Kohler cast iron tub found on Craigslist for $250. This beauty only had a small nick in the bottom left corner of the skirt from transportation, which made it deemed unworthy to the owner. SCORE FOR US!
The one and only thing we were not replacing in this room was the commode because we had just replaced it a couple of years prior. Otherwise, everything had got to go! From the ceiling down the floor all was removed. (You have to read about our initial gutting to totally get the picture...I'll wait.)
DIY TIME
First up (literally) was the ceiling. Since our bathroom is a tiny room, we wanted to one panel of 4' x 8' beadboard stuck up there with a sort of coffered effect. With some basic pine and trim and a fresh coat of white paint, we have a new ceiling that is stylin'.
Once our tub was in, we used a classic subway tile for the surround. Some may say, "White? But white will get dirty." I like to see where I need to clean and nothing beats a clean feeling of a crisp bathroom.
With some basic pine and trim and a fresh coat of white paint, we have a new ceiling that is stylin'.
Once our tub was in, we used a classic subway tile for the surround. Some may say, "White? But white will get dirty." I like to see where I need to clean and nothing beats a clean feeling of a crisp bathroom.
 For the grout we went with a gray color to make those tiles really pop.

*post sponsored by eFaucets and Hickory Hardware (see full disclosure)
Grouting sure can be messy but is well worth the effort.PLUMBING
When it came to our plumbing fixtures, we were a bit stumped. You see, the tub overflow set on an angle, and we couldn't just reattach the overflow with our current plumbing. That would be too easy, of course. So, I contacted Kohler with our tub model number, and they said we needed special overflow/drain kit that cost $250. Uhhh, NO. Our entire tub cost that much! So, if you know me, I'm off to find a more affordable option. Meanwhile, my family and I took showers while sitting in the tub for a few weeks because we had no overflow for a bath, and my hubby worked on tile in his "spare" time. No fun. Seriously though, this is a first world complaint. I was just happy to be able to get clean. I searched all over online and found that there is a new invention for an overflow that has flexible joints, allowing it to meet the tub surface at an angle. Bingo. Now these didn't come lost cost either but ran around $150. Still not going to give in. After searching eBay, I found someone had bought out a plumbing company and had the exact same kits for $35, minus the trim. YES! Once we got that kit in our hands, we needed to find a trim kit that would fit (a trim kit would have the accessories like a drain plug, flange, etc. to match our fixtures.) I located the original overflow kit source and purchased a matching trim kit. Easy enough, right?WHAT NEXT?
Well...when we got the trim kit, it was missing a part that would allow us to connect it all. So... I called and let them know my kit came without an essential piece. They happily sent out a new part, but that took a week or so. Bummer, more sitting and showering. All in all though, we only spent $75 for our plumbing instead of the original $250 quoted by Kohler. A little patience and research pays off. I also found our tub fixtures on eBay sold through a company called eFaucets. I love the retro feel and my tub looks happy, don't you think? Since I liked what I saw so much, I went back to eFaucets and found the matching sink fixture too. I asked eFaucets if they had a shower head to coordinate with our current set up and they happily sent us a whole set up. Wahoo!
 Even though our old shower head rocked the water pressure, it was not going to match our new look.

NEXT STEPS
Once that shower stall was finished, that was a stopping point for us for a few winter months because we wanted to get back in to finish our master bedroom. I had to stare at that hole in the wall for longer than I'd have liked. And this is what the other side looked like as well.
 There was only a single wall medicine cabinet when we moved in with a single outdoor (yes, outdoor) light fixture as well.
 No worries, I don't plan to trash the vanity. I have another purpose coming up soon. Nothing goes to waste around here!
 When we got back at it, I was finally able to drag out a light fixture I had bought at a garage sale a year or so ago for a dollar. It came out of an old farmhouse bathroom that had been renovated.
 Outside of the original finish not being the color I'd choose, I really liked the design and the embossed sconces.
 So, of course, I paint it with my handy-dandy Rust-Oleum Antique Nickel. I love that stuff.

WALLS
Next, we put up luan on the upper half of the wall, and beadboard wainscoting on the bottom. No.more.hole. YAY! And this bathroom remodel is on its way. [caption id="attachment_7263" align="aligncenter" width="550"]
 No, the light fixture doesn't look like that finished but is in transition mode at this point. :)[/caption]
The color of choice for the upper panels is "Classic Gray" by Glidden. I wanted a classic look, so why not this color?
No, the light fixture doesn't look like that finished but is in transition mode at this point. :)[/caption]
The color of choice for the upper panels is "Classic Gray" by Glidden. I wanted a classic look, so why not this color?
 The bottom bead board would get a coat of white. We had to go for quite some time without our towel hooks so we could work on the room, and there's nothing like 8 wet towels hanging about your house. tsk.
Once we were able to install our new ones from Hickory Hardware, I was quite the happy mama.
The bottom bead board would get a coat of white. We had to go for quite some time without our towel hooks so we could work on the room, and there's nothing like 8 wet towels hanging about your house. tsk.
Once we were able to install our new ones from Hickory Hardware, I was quite the happy mama.

FLOOR
Now onto the floor. Everyone in our family helped out in our bathroom remodel in some shape or form. Hands-on experience is the best teacher. You have to remember that when we moved in there was carpet in here - bleck. Then we had a green laminate, which was eventually changed to this current one.
 This time around for this bathroom remodel, I wanted a ceramic tile, one that I could scrub the dickens out of. A nice white geometric mosaic tile to compliment the clean lines of the subway tile was our choice.
 Again, this is our first time installing a mosaic. It is rather simple, and we learn a bit while working with it. A matching gray grout to the shower stall was our color choice.
 Again, imagine my poor hubby trying to get this laid down while 6 kiddos have to keep using the restroom. Fun times for sure.
DIY VANITY
Now the fun part...the vanity! I had been looking for a year or so for a dresser that we could retrofit into our bathroom vanity. Do you know how hard it is to find a piece that would accommodate our teeny tiny bathroom remodel? God has a sense of humor you know. I found this gorgeous piece while online in the NICU with our last baby. It fit our dimensions to within a half-inch. YAY!! Yes, it doesn't look pretty now, but just wait till I get my hands on it!
 It had come with a mirror, but I decided to use that for this dressing table makeover instead.


 I even have a use planned for the cut out top piece coming soon. Since this is an antique dresser, the drawers were lacking in the ease-of-use department. So again, with the help of Hickory Hardware drawer slides and some unique designing by us, we were able to make the drawers slide like butter off of hot toast.
 Next, I sand down the top for a nice, smooth finish.

DRY FIT
A dry fit is always wise. You want to make sure everything fits and is ready to go. Lookin' good don't you think?
 To finish the vanity for our bathroom remodel, I used a favorite new product to me, Waterlox in Satin Finish.
Oh yeah baby...you know, this stuff ROCKS!! It can be hard to get your hands on it, but man does it go on like a dream and give you the most durable finish EVER. No sanding between coats and self-levels like none other. I was so excited when applying that stuff. Just mind you that it's stinky and should be done outside if possible. Here in Ohio, Waterlox is manufactured, but the EPA won't let you buy it in Ohio. Dumb, dumb, dumb.
When my dad was building our home, he went into our local university and asked them what they used on their gym floor. Waterlox. He used it our home, and in over 25 years that floor didn't need refinished. So, of course, that's what I use too, but I choose a satin finish.
For the base, I want a dark charcoal gray. Thankfully, I have a color in my stash (of course) that was a seconds paint from Home Depot and would be perfect.
To finish the vanity for our bathroom remodel, I used a favorite new product to me, Waterlox in Satin Finish.
Oh yeah baby...you know, this stuff ROCKS!! It can be hard to get your hands on it, but man does it go on like a dream and give you the most durable finish EVER. No sanding between coats and self-levels like none other. I was so excited when applying that stuff. Just mind you that it's stinky and should be done outside if possible. Here in Ohio, Waterlox is manufactured, but the EPA won't let you buy it in Ohio. Dumb, dumb, dumb.
When my dad was building our home, he went into our local university and asked them what they used on their gym floor. Waterlox. He used it our home, and in over 25 years that floor didn't need refinished. So, of course, that's what I use too, but I choose a satin finish.
For the base, I want a dark charcoal gray. Thankfully, I have a color in my stash (of course) that was a seconds paint from Home Depot and would be perfect.
 Gotta love them casters!!
COMING SOON
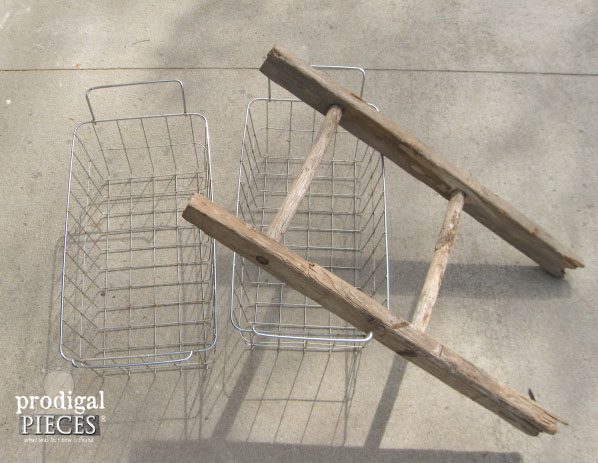
Well, I'm going to stop at this point because I don't have finished photos yet. However, stay tuned for next week's final reveal! I'll show you how I put these antique sewing machine drawers to use from my last project. ...and these freezer baskets with a broken ladder. I can't wait to show you!! (UPDATE HERE - You gotta see it!!)
 Share if you love how we're doing so far! ♥
 To get these DIY tips & tricks in your inbox, be sure to sign up for my newsletter. Until next time!

More DIY goodness like our bathroom remodel:

