I may be nuts, I may be crazy, but I don't care. When I spy old worn wood, I can't help but snatch it up and begin to create in my mind. Do you do that too? This pile o' goodness is my subject for today's
Trash to Treasure day. Part of this is going to become the reclaimed barn beam bench I've had in my brain for YEARS. The other is going to be something fun. Stick around to see because there's something important I want to share with you. Also, you'll want to see what my blogger friends have created too! (I'm so excited!)

Yes, this wood is old, it is full of patina, and oh so much potential. The barn beam pieces are actually the remnants.. They are from when we added our barn beam mantel to our family room, oh about
four years ago. ahem. You can see how we added it as a floating mantel to our stone fireplace
in this post, and how I updated it all over
HERE.
All this time I have been saving those pieces to make a reclaimed barn beam bench for when we remodel our living room. It seems like that will never happen, so I decide to create it anyway. Yippee!!
BUILD IT
First, I take my sander and heavy sandpaper to remove all the splinters that might strike a bum if sat upon. I hated to remove that patina, but a girl's gotta do what a girl's gotta do.

So, here's my scheme to get this reclaimed barn beam bench put together. Pretty simple, but measurements and angles are key. I used 4 - 5" x ½" bolts and my drill with a ½" spade bit to set them on a diagonal in each "leg" of the bench after making sure the legs were as level as could be. Each hole is then drilled 2 ¾" deep in the legs. Just tape on your bit to know the depth or use a depth gauge.

NEXT STEPS
Next, I make coordinating holes on the beam using the same technique, but this time I did made sure to note any level discrepancies and adjust depth accordingly. For instance, since the beam was warped, one bolt needed a depth a half inch deeper than the other.

After I check assembly with a dry fit, I used heavy duty construction adhesive to fill the holes and set to cure. Once, cured, I used a matte poly to give it a few topcoats. I will share the reclaimed barn beam bench reveal in a minute. Stay with me, k?
Up next is that chunk of rotted wood and the leftover wood pieces from when I made candlesticks out of the turnings in
this DIY post. When the idea hit me what to do with these odd pieces, I didn't know where they would lead me. Do you see what I see?

AT LAST
I giggled out-loud when I was holding them in my hands and said...feet! After I created my candlesticks, I stuck them aside. In the back of my brain, though, I couldn't wait to get the vision I had in my head put into action. That large hunk of rotted wood was in my burn pile, but it actually was the perfect size for my creation.
However, I was on a time crunch and wasn't sure I could pull it off. I had just gone to the thrift store the day before and forget to shop for what I needed. So, my gang of 6 and I headed back to the store on a mission. I silently prayed that God would let there be what I needed to complete my vision. If not, I would toss it aside for a later time.
While in the store, a huge rainstorm was passing through and I kept telling myself this is nothing compared to what is happening to those poor people that were hit with hurricane Harvey and then Irma, with José close behind. And also whispering to God, please send this rain out west! So many losing much in fires from dry spells and heat.
It was then I looked down and found exactly what I was looking for. What a delight to find it all right in front of me! It was then I knew I would have to work fast but could get it done. Isn't this cute?!

DIY BEAR TIME
My jigsaw and drill were the only tools I needed to get this wood stash turned into the bear in my brain. It was while cutting that I was thinking about the hurricane victims and had been praying on the best way I could help.

That's when it dawned on me to create Harvey the Bear to auction off with 100% of the proceeds going to hurricane relief. My pulse began to quicken at the idea and my hands worked fast to assemble this little guy.

With an montage of rope and joints, Harvey the (hurricane) Bear is put together. Much, I feel, like those that will have to piece together their lives to get back to normal daily life. My heart goes out to them in all parts of our country.
MEET HARVEY
In the next steps, I worked late into the evening to create the true vision of Harvey and end to my efforts. Won't you greet my little bear with open arms? He sure could use a hug!

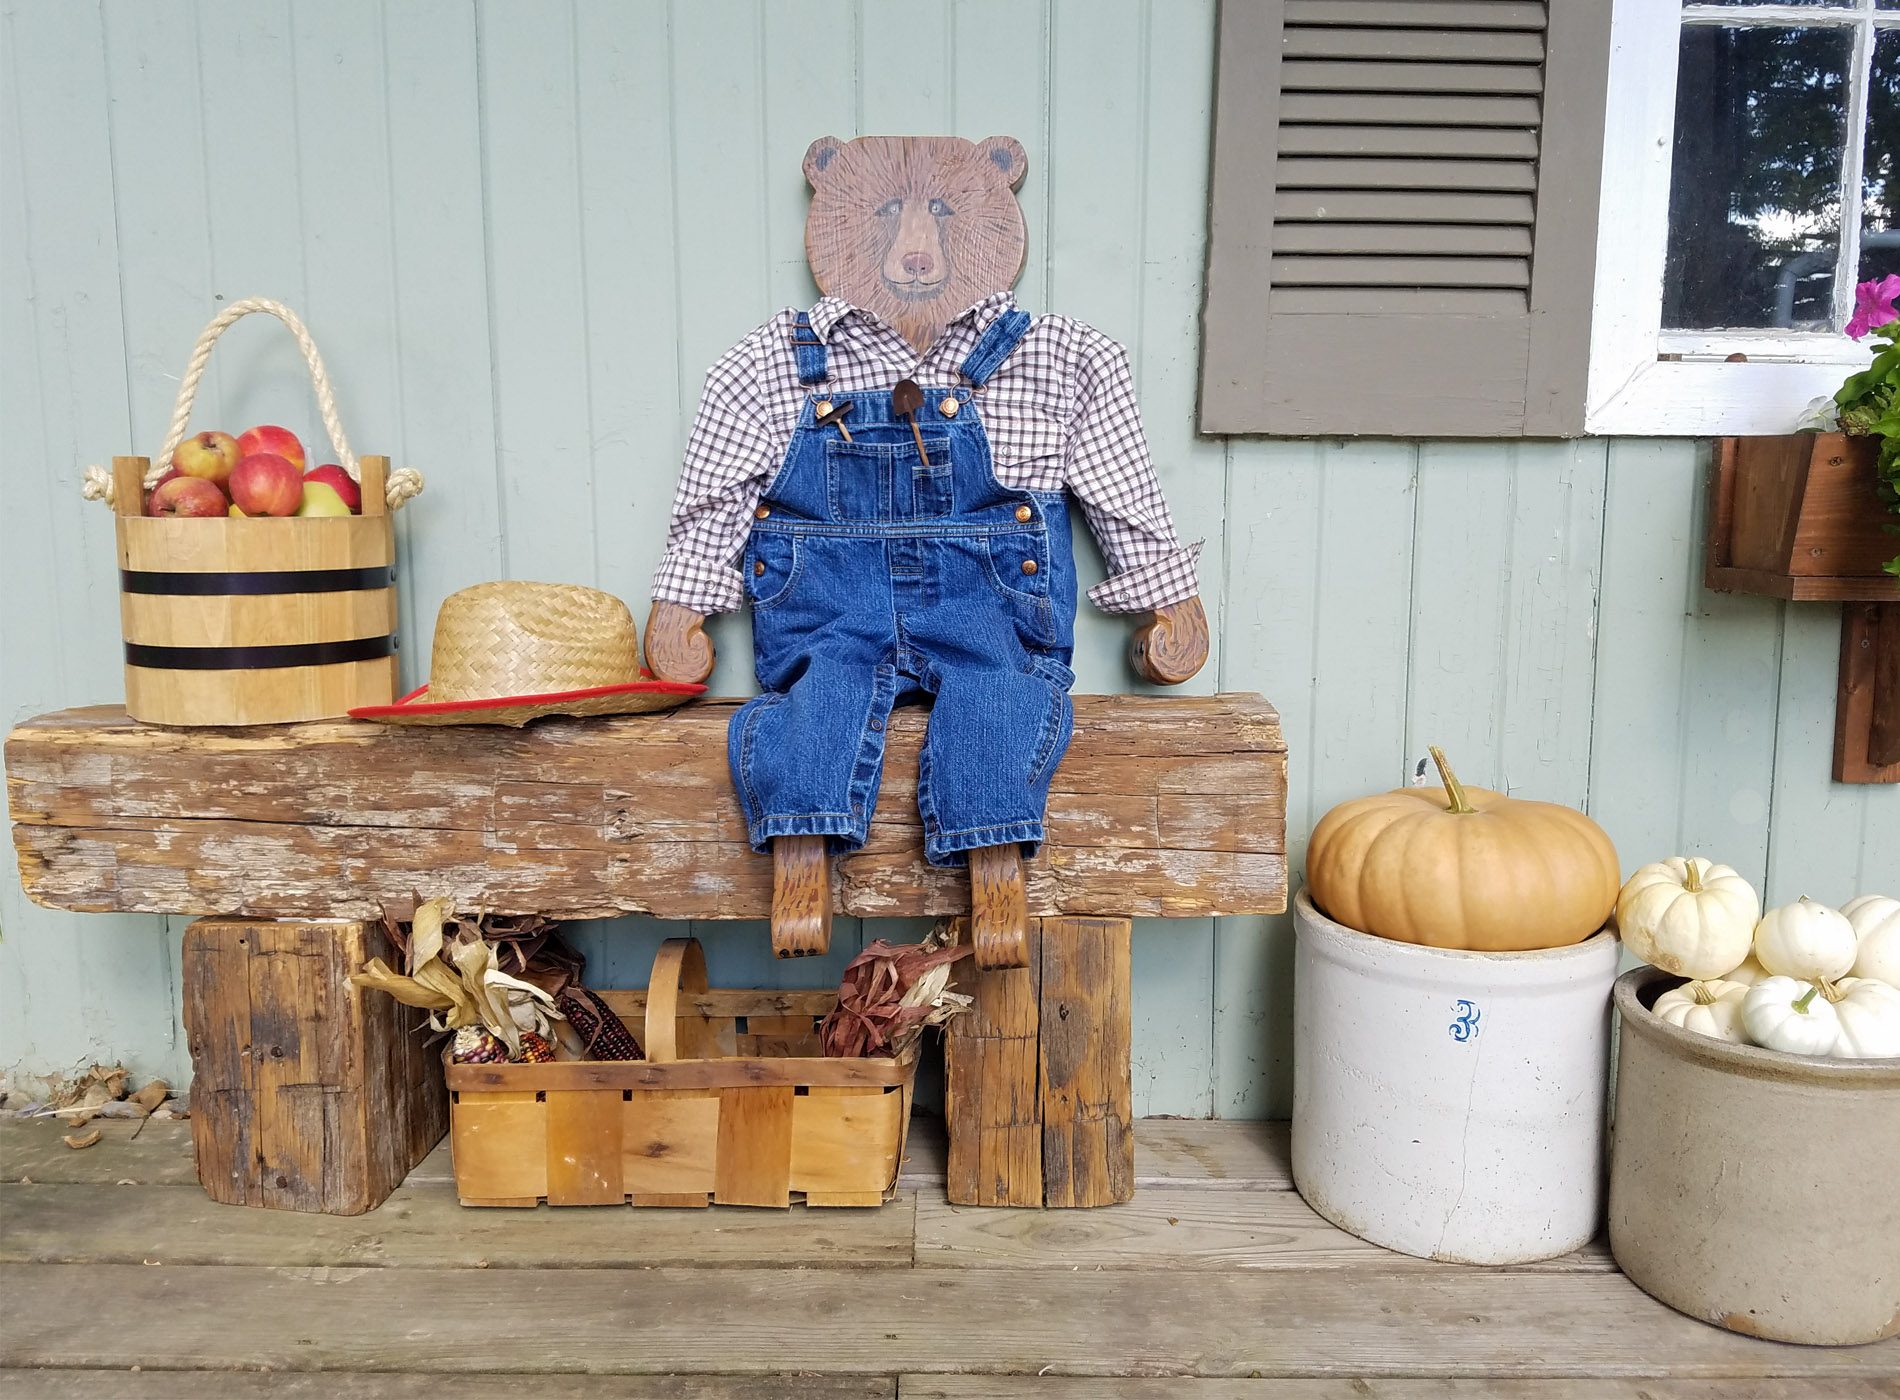
Harvey is a gentle soul with a down-to-earth spirit. My goal was to create a loveable guy - though he is wood. We can all hug trees, right? haha.

My favorite part of Harvey, aside from all of him, is his eyes.

I had a blast creating all the detail and seeing this little guy come to life. You know he had to be a stylin' bear. tsk. And, talk about jaw-drop! I didn't measure or do any alterations to make the clothes fit. However, I thought that I could adapt the clothing later. I didn't have to change a stitch.


Now, don't you forget that reclaimed barn beam bench he's sitting on. I am happy how easy that is to create too. I thoroughly expected some hang-ups, but it went just as planned. whew!

It will one day grace the entry to my home, but for now, I am glad Harvey has a place to park himself. That is until someone decides to make him their own.

HELPING HAND
As I mentioned earlier, my only goal in creating Harvey the Bear was to auction him off and send the funds to disaster relief like
my Christmas Beep and auctioned off for their Operation Christmas Child project.

Here's where I need your help. Won't you bid on this sweet bear to aid others in grief and loss? I have Harvey listed
in my shop with a starting price of $85. Bidding is open until midnight EST on Friday the 15th. You can place a bid by emailing me the amount using "Harvey the Bear Bid" in the subject line - use the
CONTACT tab at the top of the page. If during the auction the bids rise close to $200, I will raise the listing price by $50, and continue to raise it by $50 to allow the bidding to continue. Shipping is FREE to anywhere in the U.S. with the value at $20. Will also ship to other countries with a $20 discount.
On Saturday after the end of the auction, I will announce the winner here, via
my newsletter list, and in my social media. I will then re-list Harvey as a reserved item in my shop under the winner's name. The winner is then to pay for the item and I will ship out the next business day after payment is received. We accept all major forms of payment (see shop listing for details).
All proceeds will go to Samaritan's Purse.

Won't you please show you support and bid for a cause? I am trying to do what I can and I know this will be such a blessing to so many.
UPDATE: Harvey is on his way to his new home with proceeds of $250. Thank you all so much!!
Do pin and share reclaimed barn beam bench and Harvey the Bear not only to inspire others to get creative, but to support those in need. Thank you!

Up next in my blogging world, this thrifted table will get some new kicks. Come see the after
over HERE.

To get these DIY tips & tricks in your inbox, be sure to
sign up for my newsletter. PLUS, you will get your FREE Furniture Buying Checklist and special discount to
my shop.
DON'T FORGET! Head below to see what my friends have created for you!


- Artsy Chicks Rule
- Confessions of a Serial DIYer
- Bless'er House
- Girl in the Garage
More fall decor like my reclaimed barn beam bench:


 Yes, this wood is old, it is full of patina, and oh so much potential. The barn beam pieces are actually the remnants.. They are from when we added our barn beam mantel to our family room, oh about four years ago. ahem. You can see how we added it as a floating mantel to our stone fireplace in this post, and how I updated it all over HERE.
All this time I have been saving those pieces to make a reclaimed barn beam bench for when we remodel our living room. It seems like that will never happen, so I decide to create it anyway. Yippee!!
Yes, this wood is old, it is full of patina, and oh so much potential. The barn beam pieces are actually the remnants.. They are from when we added our barn beam mantel to our family room, oh about four years ago. ahem. You can see how we added it as a floating mantel to our stone fireplace in this post, and how I updated it all over HERE.
All this time I have been saving those pieces to make a reclaimed barn beam bench for when we remodel our living room. It seems like that will never happen, so I decide to create it anyway. Yippee!!
 So, here's my scheme to get this reclaimed barn beam bench put together. Pretty simple, but measurements and angles are key. I used 4 - 5" x ½" bolts and my drill with a ½" spade bit to set them on a diagonal in each "leg" of the bench after making sure the legs were as level as could be. Each hole is then drilled 2 ¾" deep in the legs. Just tape on your bit to know the depth or use a depth gauge.

 After I check assembly with a dry fit, I used heavy duty construction adhesive to fill the holes and set to cure. Once, cured, I used a matte poly to give it a few topcoats. I will share the reclaimed barn beam bench reveal in a minute. Stay with me, k?
Up next is that chunk of rotted wood and the leftover wood pieces from when I made candlesticks out of the turnings in this DIY post. When the idea hit me what to do with these odd pieces, I didn't know where they would lead me. Do you see what I see?
After I check assembly with a dry fit, I used heavy duty construction adhesive to fill the holes and set to cure. Once, cured, I used a matte poly to give it a few topcoats. I will share the reclaimed barn beam bench reveal in a minute. Stay with me, k?
Up next is that chunk of rotted wood and the leftover wood pieces from when I made candlesticks out of the turnings in this DIY post. When the idea hit me what to do with these odd pieces, I didn't know where they would lead me. Do you see what I see?


 That's when it dawned on me to create Harvey the Bear to auction off with 100% of the proceeds going to hurricane relief. My pulse began to quicken at the idea and my hands worked fast to assemble this little guy.
 With an montage of rope and joints, Harvey the (hurricane) Bear is put together. Much, I feel, like those that will have to piece together their lives to get back to normal daily life. My heart goes out to them in all parts of our country.
 Harvey is a gentle soul with a down-to-earth spirit. My goal was to create a loveable guy - though he is wood. We can all hug trees, right? haha.
 My favorite part of Harvey, aside from all of him, is his eyes.
 I had a blast creating all the detail and seeing this little guy come to life. You know he had to be a stylin' bear. tsk. And, talk about jaw-drop! I didn't measure or do any alterations to make the clothes fit. However, I thought that I could adapt the clothing later. I didn't have to change a stitch.

 Now, don't you forget that reclaimed barn beam bench he's sitting on. I am happy how easy that is to create too. I thoroughly expected some hang-ups, but it went just as planned. whew!
 It will one day grace the entry to my home, but for now, I am glad Harvey has a place to park himself. That is until someone decides to make him their own.
 Here's where I need your help. Won't you bid on this sweet bear to aid others in grief and loss? I have Harvey listed in my shop with a starting price of $85. Bidding is open until midnight EST on Friday the 15th. You can place a bid by emailing me the amount using "Harvey the Bear Bid" in the subject line - use the CONTACT tab at the top of the page. If during the auction the bids rise close to $200, I will raise the listing price by $50, and continue to raise it by $50 to allow the bidding to continue. Shipping is FREE to anywhere in the U.S. with the value at $20. Will also ship to other countries with a $20 discount.
On Saturday after the end of the auction, I will announce the winner here, via my newsletter list, and in my social media. I will then re-list Harvey as a reserved item in my shop under the winner's name. The winner is then to pay for the item and I will ship out the next business day after payment is received. We accept all major forms of payment (see shop listing for details). All proceeds will go to Samaritan's Purse.
Here's where I need your help. Won't you bid on this sweet bear to aid others in grief and loss? I have Harvey listed in my shop with a starting price of $85. Bidding is open until midnight EST on Friday the 15th. You can place a bid by emailing me the amount using "Harvey the Bear Bid" in the subject line - use the CONTACT tab at the top of the page. If during the auction the bids rise close to $200, I will raise the listing price by $50, and continue to raise it by $50 to allow the bidding to continue. Shipping is FREE to anywhere in the U.S. with the value at $20. Will also ship to other countries with a $20 discount.
On Saturday after the end of the auction, I will announce the winner here, via my newsletter list, and in my social media. I will then re-list Harvey as a reserved item in my shop under the winner's name. The winner is then to pay for the item and I will ship out the next business day after payment is received. We accept all major forms of payment (see shop listing for details). All proceeds will go to Samaritan's Purse.
 Won't you please show you support and bid for a cause? I am trying to do what I can and I know this will be such a blessing to so many.
 Up next in my blogging world, this thrifted table will get some new kicks. Come see the after over HERE.
 To get these DIY tips & tricks in your inbox, be sure to sign up for my newsletter. PLUS, you will get your FREE Furniture Buying Checklist and special discount to my shop. DON'T FORGET! Head below to see what my friends have created for you!


