 I quickly open the drawer to find "Broyhill" and dove-tailed drawers. Then, I kneel down to look under and find...yep...solid oak. SCORE!! A quick sniff-check is in order to make sure no nasty odors linger. none. Mentally I make note of the wear on top. Nothing I couldn't handle, right?
 Nervously I peeked around for the price tag - couldn't find it! Shortly after, I motioned the gentleman working the floor to come talk to me. I sweetly asked, "How much is this table?"
THE BACKSTORY
He grinned and said, "Just set this out today. Ummm...$8??" I pretend to not flush in the face while my heart beats faster. Nonchalantly I reply, "Ok. I guess I'll take it". Meanwhile, in my head a voice screams out, "Doesn't he know this is solid oak, Doesn't he know that this is quality from Broyhill?? HAPPY DANCE!! However, this totally reminded me of my other Broyhill find. Do you remember my Brasilia treasure? I put aside the fact that this orangey table was thanking me for rescuing it, and continue my hunt through the store. Thankfully, I found many more goodies that he was happy to let me take off his hands. Yes, it was a good day. After I got the Queen Anne table home, I just kinda stared at it hoping it would tell me how it wanted to grow up. Ya know, to graduate out of that awful orange stain into something new. Finally, I played with a few color schemes in my head and even debated on refinishing it altogether. If it were for me that would be what I'd do, but since this is going to be in my shop, I decided to mix it up.DIY TIME
First, my sander came out to play. It wasn't long before I had the old finish off the top and I was ready for the next step. Bring on the fun! I also wanted to update the hardware, so I filled the holes with wood filler and sanded down. Then, I drilled a hole for a new knob. Now we are ready to roll!
 Since I do have a passion for wood grain, I had no intention of hiding that glorious top, but rather redefining it.
Then, with my brush and glazing, I apply a light coat following the direction of the grain. Likewise this grain is open and quite dry, I need to move quickly.
Since I do have a passion for wood grain, I had no intention of hiding that glorious top, but rather redefining it.
Then, with my brush and glazing, I apply a light coat following the direction of the grain. Likewise this grain is open and quite dry, I need to move quickly.
 I then take a soft clean rag and wipe off the excess glazing working in the direction of the grain again. I let it cure for a bit and then move on to the topcoat. For this I use a matte poly for the final finish. Again, follow the grain, and brush on.
UP NEXT
Next, while the topcoat is curing, it's time to tackle the legs, skirt, and drawer. I chose to do a soft contrast using a soft blue-green. Isn't it pretty? And it goes on just perfectly with that fan brush spreading out as I work downward. I Last, after applying two coats of paint and letting it cure. I decided to draw out that oak grain in a more subtle way by using a white wax. It's easy to do, just brush on the wax in small circular motions, and wipe off any excess with a soft cloth.
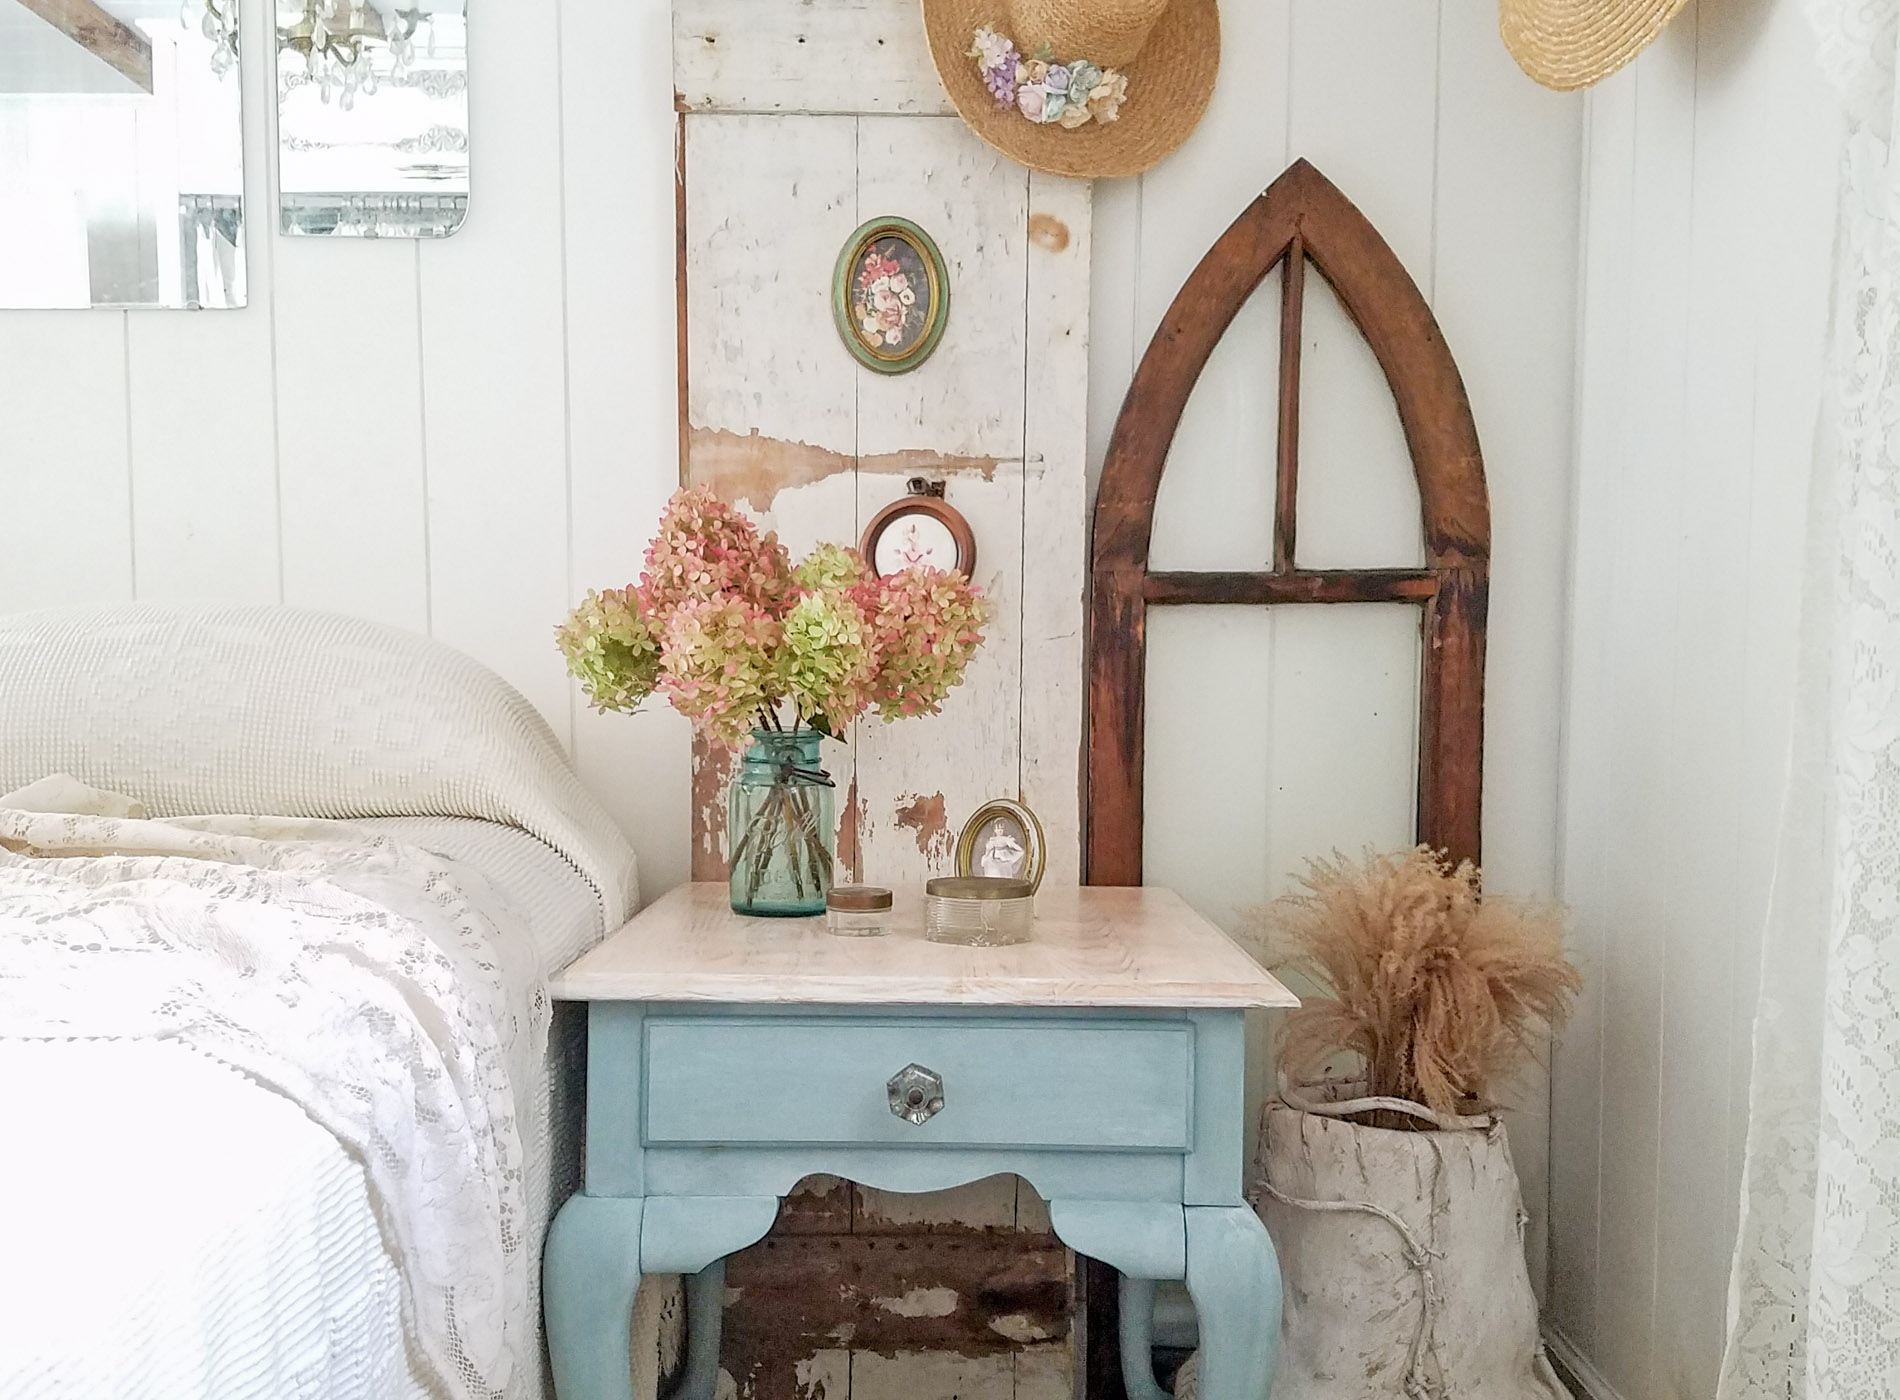
THE REVEAL
And we're done! In addition, it looks so much better in the new look and I feel I maintained the integrity of the wood without that heavy grain being so bold.
 In addition, I even added some designer wallpaper fun to the inside of the drawer, and an antique glass knob. Every girl needs some BAM! Right?


 Likewise, don't forget those leggy legs. I love the Queen Anne style tables! You can see my other favorites in these posts.
 As I mentioned earlier, that this Queen Anne table is now available in my shop for purchase along with many other goodies. Also, keep in mind that we do offer combined shipping and 2 or more furniture items can ship for the price of one.
[metaslider id=30251]
In addition, pin and share this Queen Anne table makeover to inspire others to break out of the orange oak mold and have some fun. You too can DIY! To get these DIY tips & tricks in your inbox, be sure to sign up for my newsletter. PLUS, you will get your FREE Furniture Buying Checklist and special discount to my shop. Until next time!

Also, more projects like my Queen Anne table makeover:

