One of my absolute favorite things to do is spend time with my kids. Beyond getting the wonderful opportunity to homeschool them, I can also pass along my trade. All 6 of them are eager to learn and ready to jump on a project when the opportunity arises. Enter in Miss S. She's not a newbie to the DIY world. You can see her past projects
in these posts. Today she is going to show you how she took a thrifted find and turned it into a repurposed coat rack. Woot!

The story behind this find is related to Miss S's birthday a few months back. My awesome mom loves to help the kids find project pieces so they can work on them to sell for their savings. How cool is that? So when she spied this sign at a garage sale, she knew it had potential.
We both agreed we thought it was a piece of a bed that had been turned into an antiques sign. For me, it wasn't bad, but just lacking some character.

The patina on that old wood is gorgeous, but the stickers were hard to see and the hardware was shiny. Miss S had the choice of what to do with it, so she decided to turn it into something a little more useful and fun - a repurposed coat rack.
DIY TIME
I was totally game to help her create her vision since I have created many coat racks myself you can see
in this selection of posts. With a hop in our step we headed out to the workshop to dive into my stash. Wouldn't you know we found a board already the right width and length to make a top shelf. Miss S sanded it down with my sander. I tell ya, it's fun to watch her confidence grow as she knew just what to do.

Next, she choose to use Espresso stain to give the pine a dark rick feel like the old oak. I've used that stain in project before you can see
HERE.

While the stain is curing, she chose to paint the oil-rubbed bronze hooks with a flat white paint with the intent to distress later. Easy fix with spray paint!

NEXT STEPS
Then, while those were curing, she proceeded to remove those stickers. Not too bad, just dampen with a wet rag and they come right off. I think doing that kind of removal is sort of like therapy...aaahhh...

Next, she prepped and painted the corbels that I had found at the thrift store. I first used them on
my pallet mug rack, and have plenty left to create with. I wasn't kidding when I said she knows what she's doing. Go Miss S!

Once the top shelf she originally stained was dry, she used a dry brush technique to apply a bit of white paint.
To prevent any splits in the wood, she used my drill and drill bit to pre-drill holes for the screws. Last, she attached with screws and added the corbels to the sides.

THE REVEAL
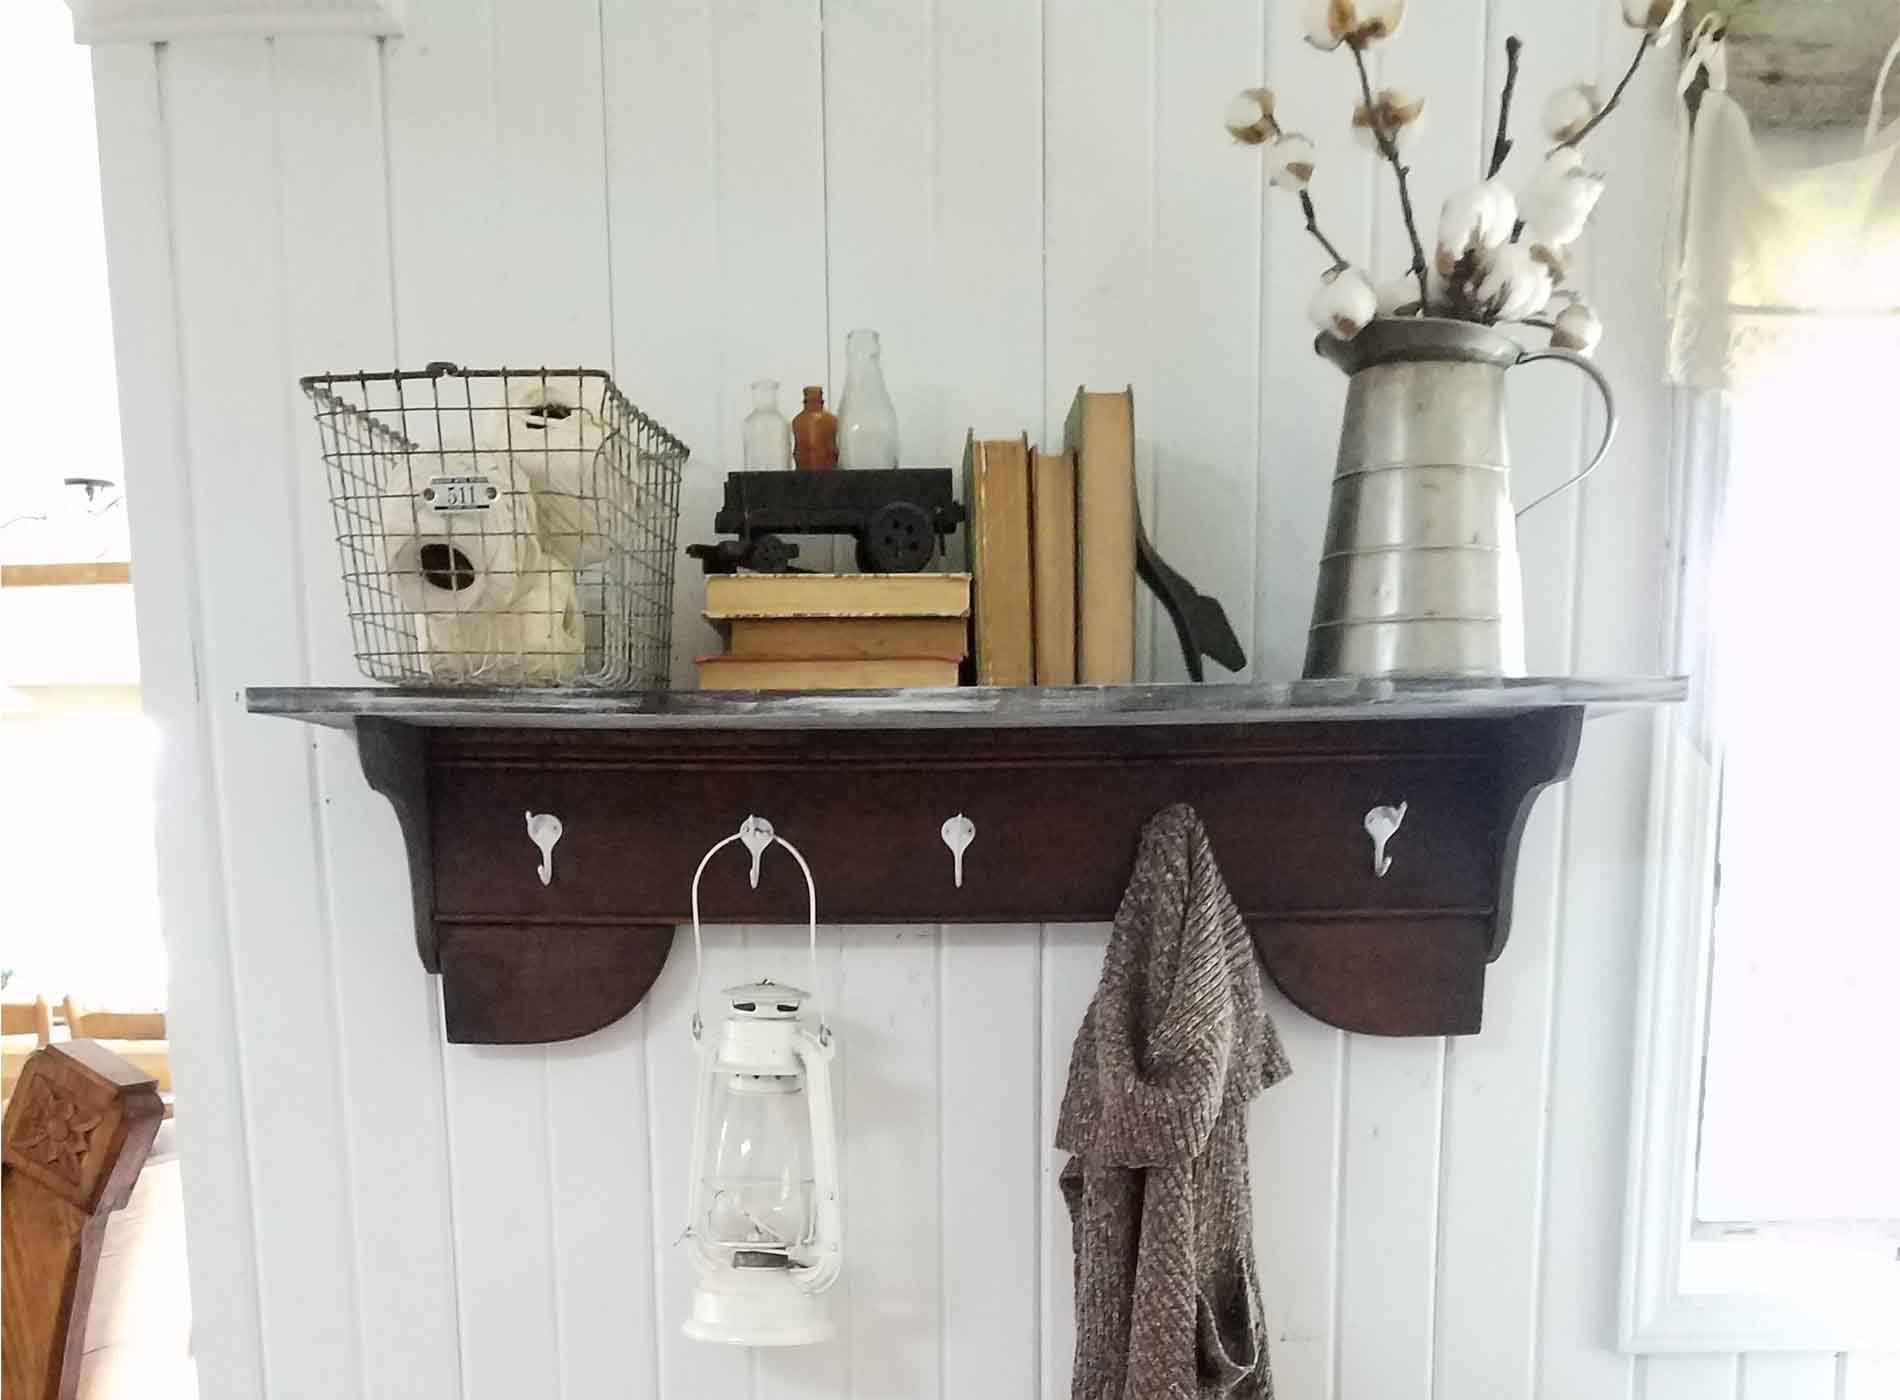
And...she's done! Take a look at her new creation - I love it.


That once dull looking sign is now ready to function and add style to any space. Plenty of hooks for daily grind necessities and shelf above for extras.

I don't know about you, but we think styling a shelf is so fun! It's like a treasure hunt finding different bits and pieces to give her repurposed coat rack shelf a farmhouse feel. Wish you could see us running here and there to shop the house and create new spaces.


The corbels add support as well as style. I like her mix of wood, paint, and stains. Makes it have that rustic farmhouse style you know I love. Don't you?

Miss S and I hope you've enjoyed her makeover. If you'd love to own it she is offering it up in
my shop. (
SOLD) Plenty of other handmade goodies in there for you too!

Do pin and share so others can be inspired (even other kids) to give DIY a try. We will love it if you do!

Up next is
Trash to Treasure Tuesday and I hope to make something really cool out of this pile of stuff! Do you think I can do it?
SEE HERE.
 Sign up for my newsletter
 so you don't miss out on what it becomes! PLUS, you will get your FREE Furniture Buying Checklist and special discount to
my shop. Until next time!

 MEWE | PINTEREST | GAB
Also, more projects like our repurposed coat rack:


 The story behind this find is related to Miss S's birthday a few months back. My awesome mom loves to help the kids find project pieces so they can work on them to sell for their savings. How cool is that? So when she spied this sign at a garage sale, she knew it had potential.
We both agreed we thought it was a piece of a bed that had been turned into an antiques sign. For me, it wasn't bad, but just lacking some character.
The story behind this find is related to Miss S's birthday a few months back. My awesome mom loves to help the kids find project pieces so they can work on them to sell for their savings. How cool is that? So when she spied this sign at a garage sale, she knew it had potential.
We both agreed we thought it was a piece of a bed that had been turned into an antiques sign. For me, it wasn't bad, but just lacking some character.
 The patina on that old wood is gorgeous, but the stickers were hard to see and the hardware was shiny. Miss S had the choice of what to do with it, so she decided to turn it into something a little more useful and fun - a repurposed coat rack.
 Next, she choose to use Espresso stain to give the pine a dark rick feel like the old oak. I've used that stain in project before you can see HERE.
 While the stain is curing, she chose to paint the oil-rubbed bronze hooks with a flat white paint with the intent to distress later. Easy fix with spray paint!

 Next, she prepped and painted the corbels that I had found at the thrift store. I first used them on my pallet mug rack, and have plenty left to create with. I wasn't kidding when I said she knows what she's doing. Go Miss S!
 Once the top shelf she originally stained was dry, she used a dry brush technique to apply a bit of white paint.
To prevent any splits in the wood, she used my drill and drill bit to pre-drill holes for the screws. Last, she attached with screws and added the corbels to the sides.
Once the top shelf she originally stained was dry, she used a dry brush technique to apply a bit of white paint.
To prevent any splits in the wood, she used my drill and drill bit to pre-drill holes for the screws. Last, she attached with screws and added the corbels to the sides.


 That once dull looking sign is now ready to function and add style to any space. Plenty of hooks for daily grind necessities and shelf above for extras.
 I don't know about you, but we think styling a shelf is so fun! It's like a treasure hunt finding different bits and pieces to give her repurposed coat rack shelf a farmhouse feel. Wish you could see us running here and there to shop the house and create new spaces.

 The corbels add support as well as style. I like her mix of wood, paint, and stains. Makes it have that rustic farmhouse style you know I love. Don't you?
 Miss S and I hope you've enjoyed her makeover. If you'd love to own it she is offering it up in my shop. (SOLD) Plenty of other handmade goodies in there for you too!
 Up next is Trash to Treasure Tuesday and I hope to make something really cool out of this pile of stuff! Do you think I can do it? SEE HERE.
 Sign up for my newsletter so you don't miss out on what it becomes! PLUS, you will get your FREE Furniture Buying Checklist and special discount to my shop. Until next time!


