 Now, don't go judging me, k? This mess is after I already took apart the stuff in here. To get a true view of where we started, head HERE to see what our first mudroom update looked like back when we moved in 16 years ago. Then, I did another update when I changed up the lighting added some decor and painted some more - take a peek HERE.

*post sponsored by HomeRight (see full disclosure)
This is the surplus of "stuff" we need to dress a family of 8 for four seasons. Just think about that for a minute...we're talking play shoes, sports shoes, dress shoes, and work shoes for four seasons. Then we have all the gear: purses, backpacks, coats, hats, gloves, scarves, snow pants, rain coats, spring, summer, and winter gear for play and for "nice". And even our dog makes this his dog cave. Yup, that's a bunch of "stuff".DIY TIME
First, I take out the boxes that were stacked on the hat shelf. As you can see it's not making my organizing heart pitter-pat. One of the keys to staying organized is having a crew that also has such goals. ahem. When my kids were little I was able to use this basic plastic shelving to hold their tiny little shoes with one set in front of the other. Fast-forward a few years and now I have giant feet and lots of 'em!
 As much as my kiddos would try to be neat, you can imagine how frustrating it would be to have to keep tucking in shoes and pulling them out. I had wanted this space renovated by last winter, but our kitchen remodel was still going strong. Since then we've also tackled our family room, which is nearly done too. However, we have sidetracked for a reason. (I'll explain in a second)
ONE MORE TIME
This time around in our mudroom update, we're focusing on replacing the floor that we put down in our first makeover. It's not that old, but we had enough hardwood left over from our family room that it just made sense (hence the deviation from finishing the family room). Also, JC and I are aiming to up our shoe storage game and restore sanity to our mudroom. Here we are with just the shoes left...see what I mean? Our shoe storage ain't cuttin' it. You can view our video tour below.

BARE MINIMUM
Then, I took out the shoes and shelves. We are starting with the floor demo first.
 JC and I chose to divide up jobs to get this project done in a timely manner. Just for a second, imagine where all the mudroom stuff went. eep! It's all over my family room and this mama wants it put back pronto. We even ended up getting nailed with a stomach virus mid-remodel that knocked us out for two weeks. Yeah, that was fun.
STARTING
First, my Sawzall comes in handy to chip off not only the tile we put down, but also the linoleum flooring we covered up. The video shows this process best.
 Mind you, we only get one Saturday a week and maybe an evening during the week to get this work done. It's slow, but we are steady and always working. Once the old floor was off, we were able to put down the underlayment and get the hardwood floors on.


HARDWOODS
While the flooring is going down, I focused on changing up the storage. The hat shelf needed to be a spot of less frustration for me. Dragging out boxes to dig through was a huge hassle. My goal is to create less fuss and add style too. I wanted to find wire baskets initially, but found they were over $12 a piece - too expensive for 8 of us. However, when I went into the dollar store to see what I could find. I was just about to succumb to buying plastic (I never do that - blucky!), when I looked up. Here is what I saw... {{angelic music playing}} PERFECT!! Those galvanized buckets are durable, big enough for what I need, and have the vintage-y vibe I adore. Plus, they were only $5 a piece - less than half of the price of wire baskets. Needless to say, I did a happy dance right there in the store. Ain't no shame in my game!
What's even better is I headed to the thrift store after that to see if I could find anything else to help, and I got these for a couple of bucks. YASSSS!!!!
PERFECT!! Those galvanized buckets are durable, big enough for what I need, and have the vintage-y vibe I adore. Plus, they were only $5 a piece - less than half of the price of wire baskets. Needless to say, I did a happy dance right there in the store. Ain't no shame in my game!
What's even better is I headed to the thrift store after that to see if I could find anything else to help, and I got these for a couple of bucks. YASSSS!!!!

PAINTING
I ended up sewing reinforced ticking liners for the wire baskets, which I'll show you in a bit. Meanwhile, the only thing the buckets needed were some personalized touches. With eight people, we needed to be able to tell whose was whose. I taped of a spot on each one and then used my paint brush and flat black paint to make a chalkboard-type look.
 Then, after two coats cured, I added each of our names to the front using my transfer technique. Once done, I used a spray poly to seal it all in.

BUILT TIME
Okay, finally getting somewhere with our mudroom update. Next, it's time to build the new shoe storage. That meant a whole lotta cutting with my miter saw. Even my Kreg Jig and drill definitely got much use.
 Assembly of the shelf is simple and offers shoe storage. Meanwhile, my turn came to break out my sprayer. This beauty of a tool works for paint (you can see in these past posts) as well as stain and poly. I am in LOVE!
I've shared how easy it is to use in my video below, but also have this video tutorial on how to set it up and use it HERE.
Assembly of the shelf is simple and offers shoe storage. Meanwhile, my turn came to break out my sprayer. This beauty of a tool works for paint (you can see in these past posts) as well as stain and poly. I am in LOVE!
I've shared how easy it is to use in my video below, but also have this video tutorial on how to set it up and use it HERE.
SWEET
Now that's some storage, isn't it? We built two of these bad boys so two pair of adult shoes could fit toe to heel from front to back. Essentially, we will have 3 shelves this size if you count the floor. Yahoo! Now...raise your hand if you would like to use a brush to tackle these beasts. {{the sound of crickets}}. See all those slats? Ain't no way I'm going to spend hours brushing. I'm delighted to have my sprayer to help me knock each shelf out in 5 minutes...no joke, 5 minutes!!
 I am using my favorite Early American stain to contrast the light hickory flooring.
 Cleanup is simple. When done, empty the canister and fill it with a bit of mineral spirits and spray the head clean. Next, I wipe my stain down and allow it to cure. Then, I fill the sprayer up with a satin poly and apply two coats. Guys, I had these shelves done in a afternoon. The longest time was the cure time in between coats. You can't beat it!

MORE PAINT
In between working on the shelving, I begin work on refreshing the paint in the mudroom. As you can see below, the original paint is a slightly different color, but now also looks much dirtier. eeewww.
 Finally, it's time to see it all come together. We used wall cleats attached to the studs to mount the first shelf. Isn't it a beaut?
 Then, it was time for the second tier of shelving to go in. See the wall cleats and the reinforcing spacers we were adding? Those are temporary for now but will eventually have a permanent spot.
 At last, all is assembled and ready for our "stuff" to go back in. How would you handle having this laying about your living space for over a month? {{eye-twitching}}
 Truth be told, this "mess" means I have my loves and if this is the worst thing we have to deal with, then bring it on. I love it!
FINAL REVEAL
Finally, it's time to show you the end result before we load it up proper. What a difference!
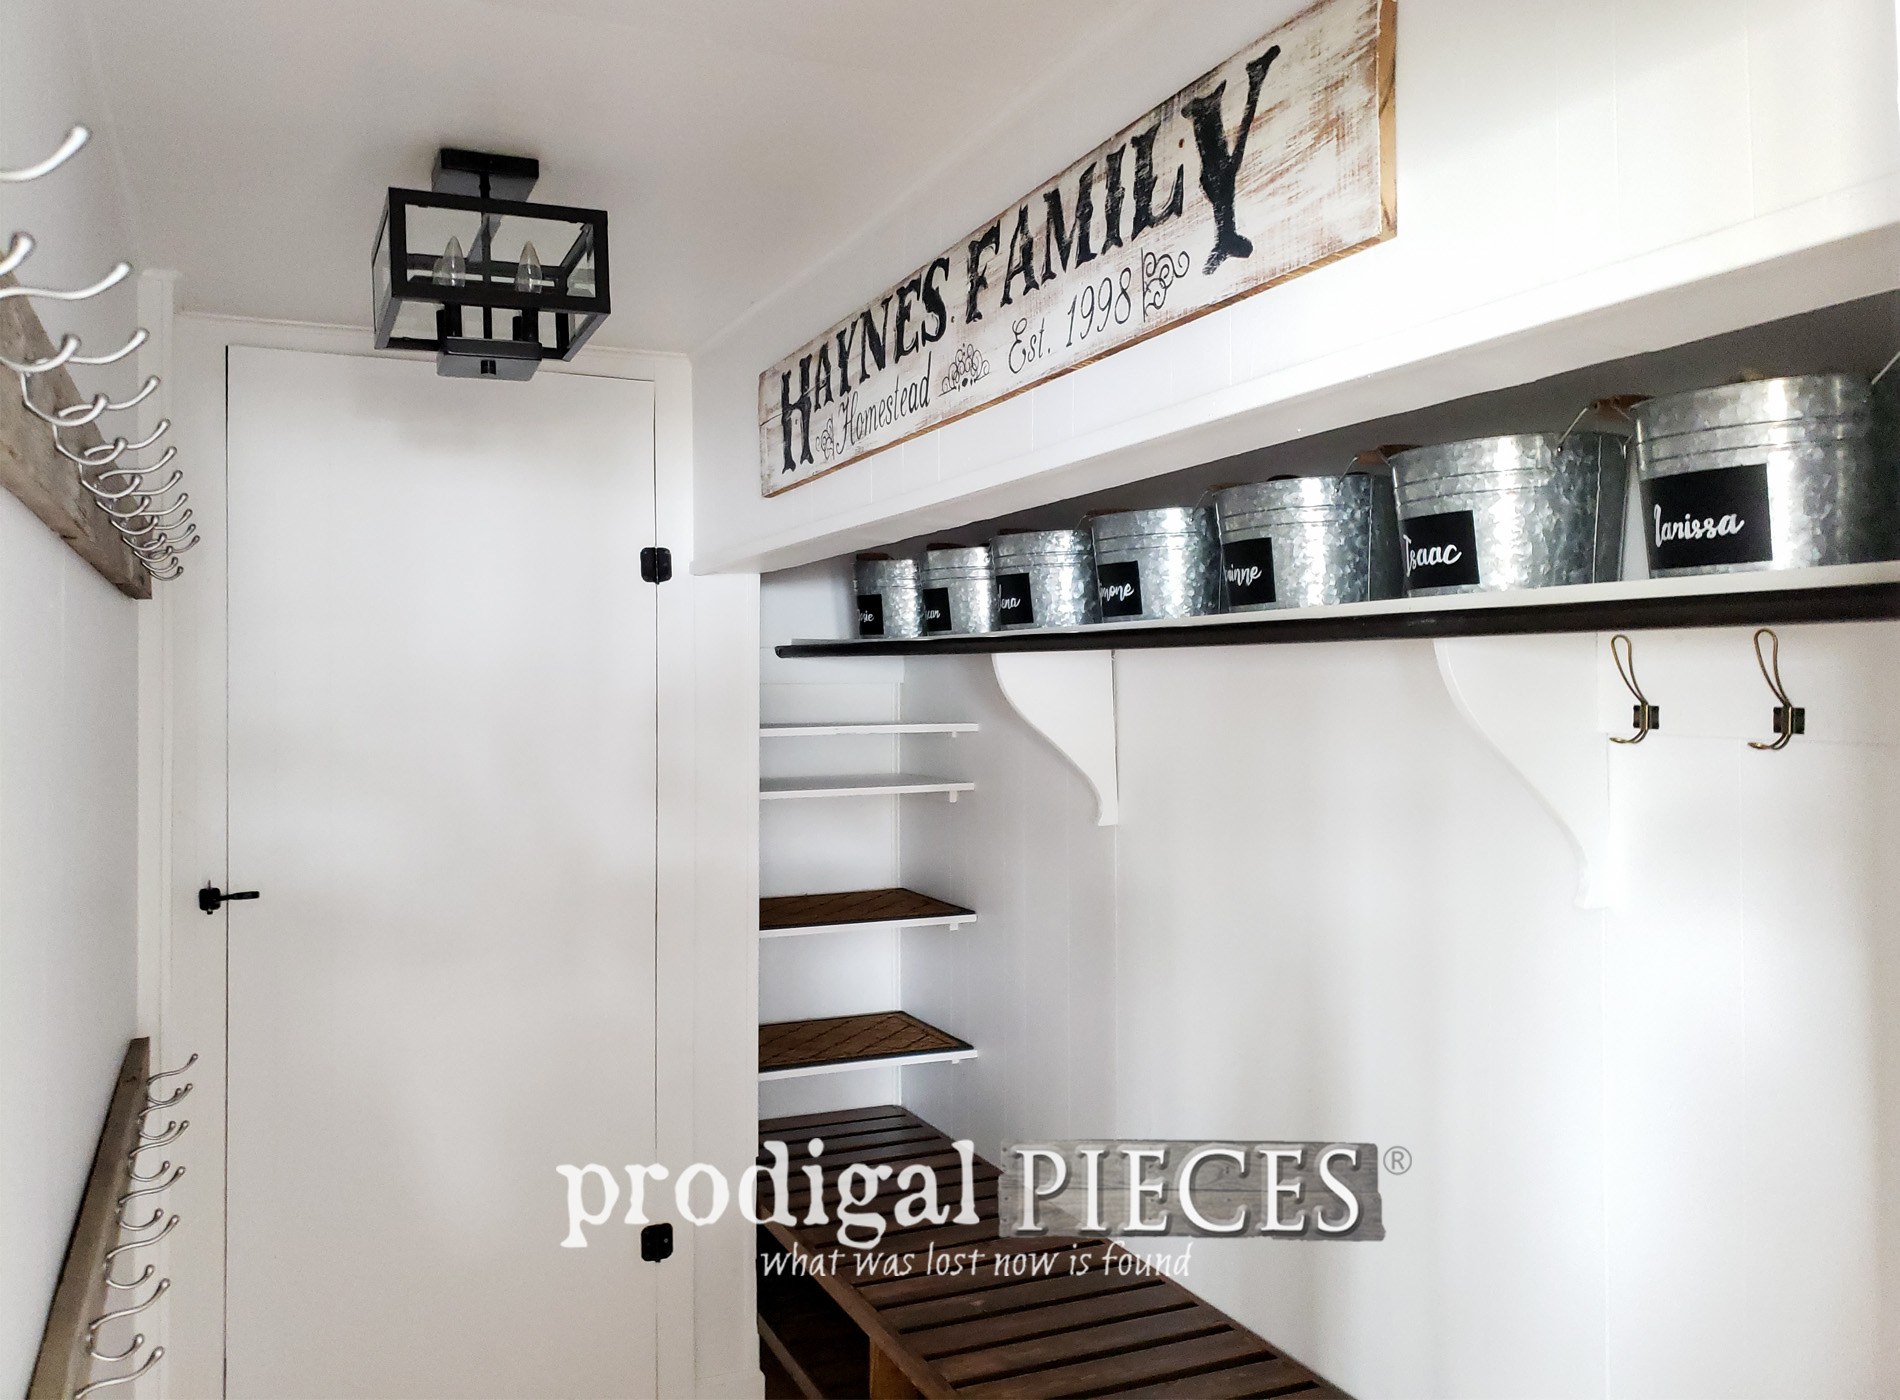
 My hat shelf now has those perfect galvanized pails to keep everything in its place and looking good too. I replaced the back upper shelf with a thicker board and then, of course, all got a fresh coat of paint. Also, we kept the lighting and are still enjoying the fresh feel it provides.
The highlight of it all for us is the shoe storage and new floor. Can you hear the angels singing? It all feels so fresh and SANE now. Yahoo!!
My hat shelf now has those perfect galvanized pails to keep everything in its place and looking good too. I replaced the back upper shelf with a thicker board and then, of course, all got a fresh coat of paint. Also, we kept the lighting and are still enjoying the fresh feel it provides.
The highlight of it all for us is the shoe storage and new floor. Can you hear the angels singing? It all feels so fresh and SANE now. Yahoo!!
 Even our game closet got purged and reorganized with those wire baskets I found at the thrift store. No more half-torn cardboard boxes for us!

 If you're wondering how I lined them, it's pretty straightforward. I made a ticking liner for each one and used my industrial snap press (LOVE, LOVE, LOVE that thing) to add snaps so I could remove the liner for washing. I have used my snap press for making cloth diaper covers and soooo many other projects. Remember my motto since a child: toolsoverjewels. Also, for a supportive bottom layer, I cut hardboard as a base.
OTHER SIDE
If you turn back the other way, you'll see we added extra wire hooks for bag and purses. The bench seat is a such a blessing because now we can have a spot to take off our shoes. Just envision 8 of us coming in and trying to work past each other to get our shoes off and put away. It can be chaos! No more.
 Last, it's time to load 'er up! Reality has to set in some time, right?

 We donated bunches, took out unnecessary stuff and it FEELS SO GOOD! Notice even my big footed folk now have 3 tiers of storage and can place shoes toe to heel again.
 The slats afford easy wipe-down cleaning and keep dirt from building up too. Another bonus is the added hooks. Before our bags and purses were hung with our coats on the other side. However, now they are out of the way affording more space for coats. {{huge sigh of relief}}

BIT O' FUN
One last feature of our mudroom update that I didn't mention before was the louver door that kept this spot enclosed. Even when folded shut, it would stick out into our entry space so that when you came in the garage door you had to step around it. We all agreed to remove the door and add something easier to maintain. No problem as I had the perfect rustic touch to add...a burlap coffee sack curtain! tee hee. It easily slides out of the way and ties back with the curtain tie I made from scrap burlap.
 Since it's normally open, the coffee sack makes for a fun visual when company is visiting. Funny thing is we don't have a lick of coffee around here.
Now my crazy mama organizing heart is happy. I not only have my mudroom update complete, but my family room is emptied and back to GAME ON for our remodel completion. Yippee!
Since it's normally open, the coffee sack makes for a fun visual when company is visiting. Funny thing is we don't have a lick of coffee around here.
Now my crazy mama organizing heart is happy. I not only have my mudroom update complete, but my family room is emptied and back to GAME ON for our remodel completion. Yippee!
SHARE
Do pin and share our mudroom update to inspire others to give DIY a try. It's easier and more affordable that most think. Up next...What will this vintage washboard and old silverware box become? tee hee. See the end result HERE.
 To get these DIY tips & tricks in your inbox, be sure to sign up for my newsletter. Until next time!

More remodel projects like our mudroom update:

