There is nothing better than getting together with a few friends to do what you love, right? Today is
Furniture Fixer Uppers Day and my blogging friends and I have some fun for you. This vintage Lane cedar chest is about to be given the help it needs along with some lovin' too. Stick around to see my friend's projects and enter to win the giveaway as well. Let's get our DIY on!

One of my furniture addictions are blanket chests, also known as hope chests. The offer style and function since they serve as seats and storage. Who could ask for more? I was gifted one as a graduation/birthday gift and still fill it with my treasures. The ones that are cedar lined like this one makes it even more special.

This one not only had the original tags but was also filled with broken glass and all sorts of blucky stuff. It also had been a dog chew toy. The top is in awful shape as well. Dingy, stained, and just not pretty.

DIY TIME
My first order of business was to remove that cushion and take off that nasty upholstery. Nothing better than having the right tools to make the job easier. This staple puller has rescued me before when I did
my hutch desk, and it does the job again.

If you've ever done upholstery, you know how
tedious it can be to get all those staples out. In this instance, there's not just one layer of upholstery, but TWO. Totally typical. ahem. How many of you remember that 1980's fabric? hahaha.

The second layer had 3 times as many staples, but that puller made it a breeze. I did launder and keep the second fabric to donate to a needy cause . No sense to waste it. I'll get back to the upholstery in a bit.
Now it's time for base of this Lane cedar chest to get some lovin' too. First, I removed the broken pulls, and replaced the missing wooden plugs. Then, I filled all the dog chewed marks with wood filler and sanded them down.
TIME FOR PAINT
Time for some paint! Since I'm going for a cottage style with crackle, I chose to do a base coat of dark gray so it would peek out my top layer. My paint brush made short order of that.
One coat done and let cure. I'm loving that gray already, don't you?

The fun doesn't stop here, however. To get the crackle finish I'm after, I use a crackle compound on top of my base coat. The trick is to apply it heavy enough that it will do what you want it to, but not so heavy it runs. Kinda like a thick jelly when applying. No problem to do.

BACK TO UPHOLSTERY
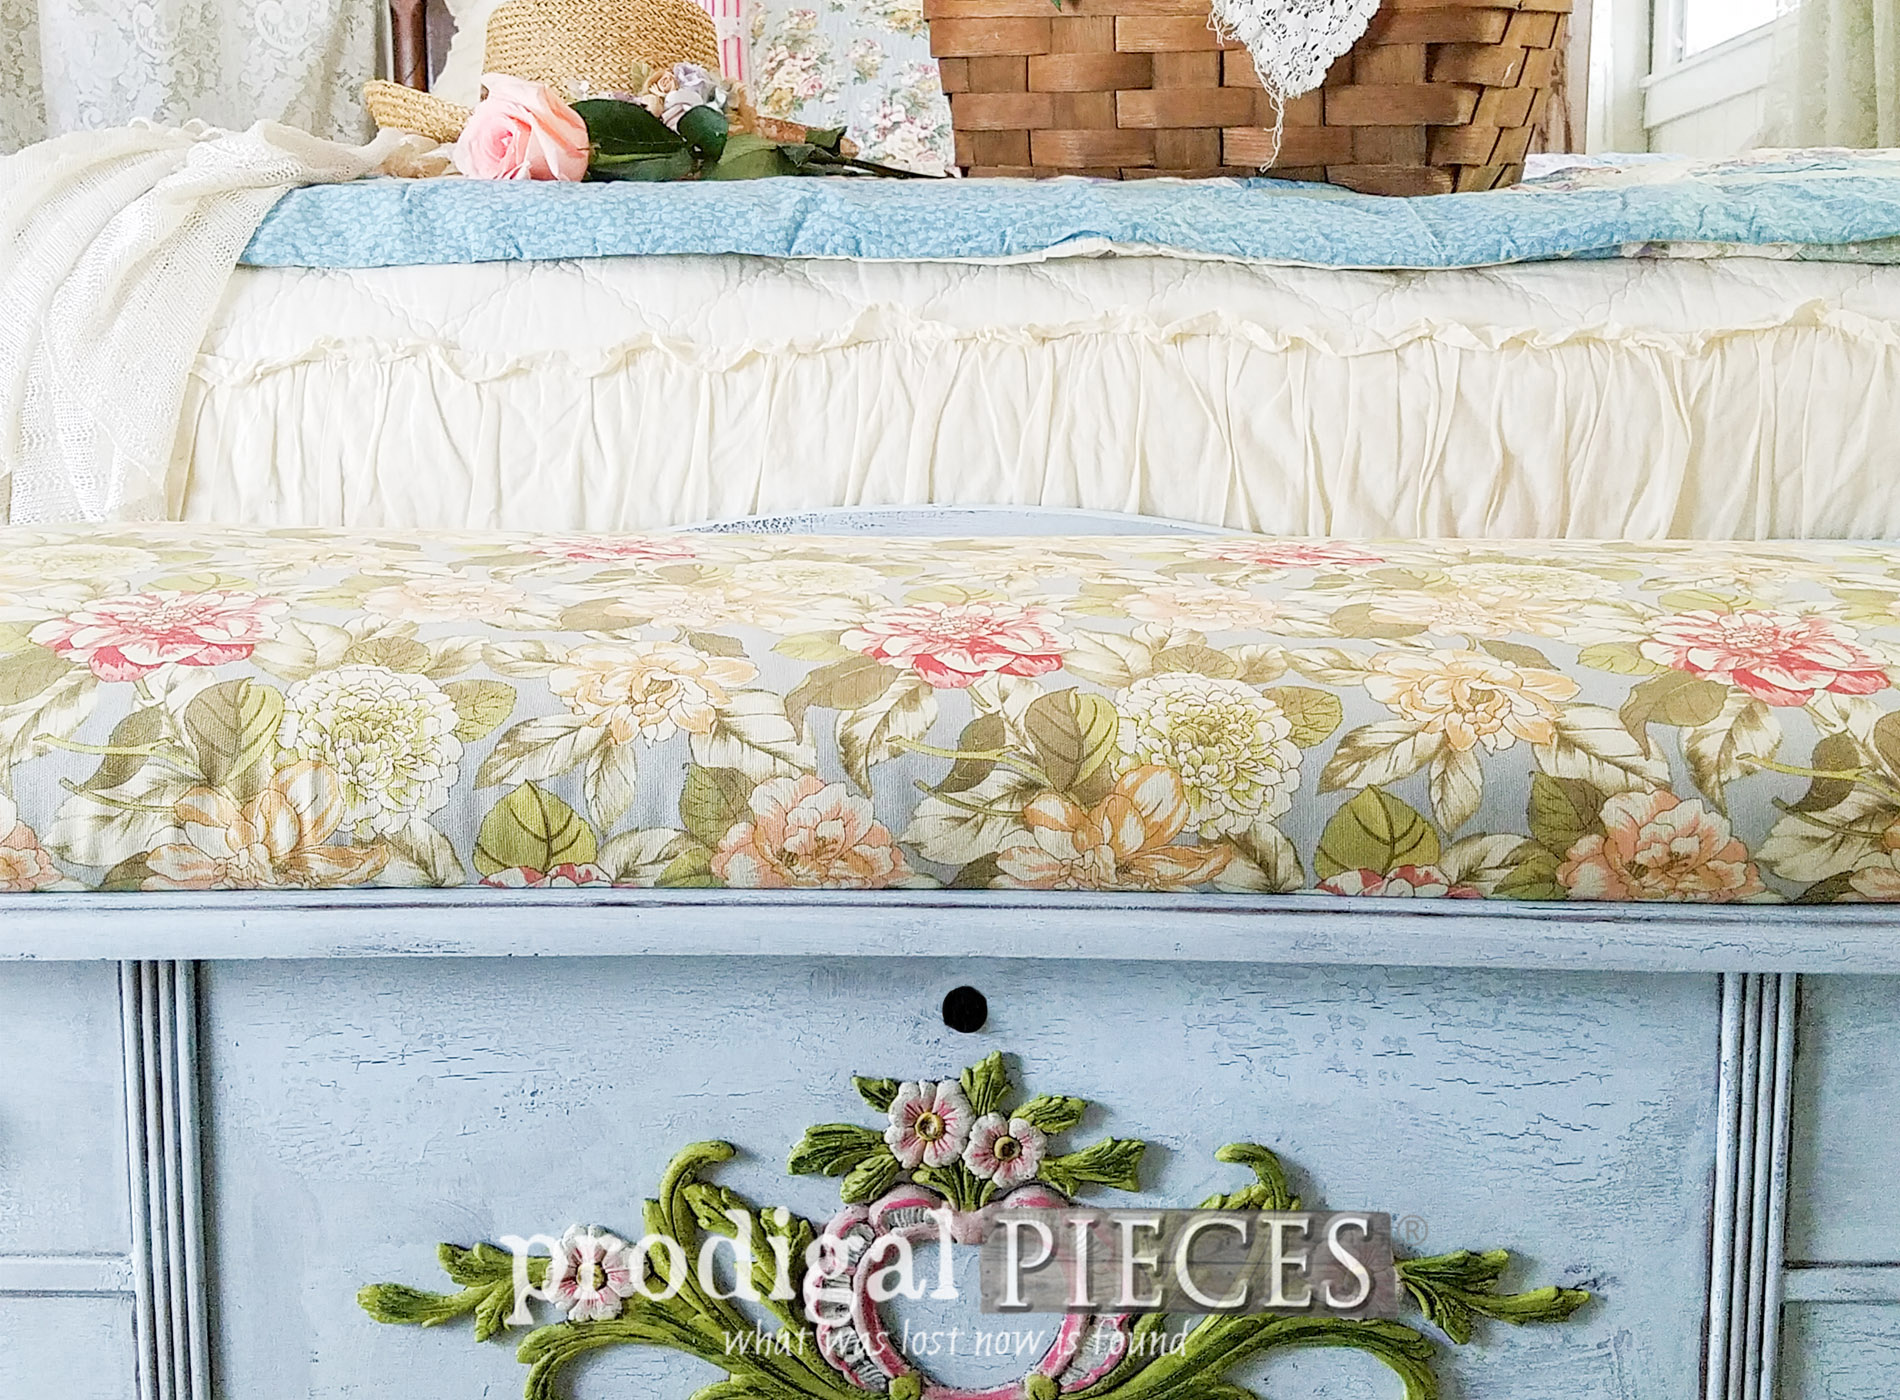
While the crackle dries, it's time to get back to the upholstery. This all came together in such a blessed way. While online shopping I quickly picked out these knobs having no idea how I was going to finish this piece. Originally, I was just going to use some fabric from my stash, but decided to stop by the fabric section and found the perfect match made by Waverly. Isn't that awesome?!

After replenishing the foam and adding more batting, I stapled it all on with my cordless stapler. My upholstery work time is cut in half by that thing. Woot!

FINISHING UP
It's time for the topcoat. {{happy dance!}} When applying this coat, it's important to lay it on heavy and do crosshatch strokes if you want much crackling. Also, don't back-brush over previously painted strokes as it will disturb the crackling process. See how it starts to crackle instantly? So fun!

If you know me, I like to draw attention to details, so I grabbed my artist's brushes and gave this Lane cedar chest some dimension.

Let all cure and then add the upholstered top back on and attach the knobs. I also removed the lock for safety reasons.


To add even more dimension, I used dark wax to highlight the nooks and crevices. It helps all the details pop and stand out. Much more fun that way.


The cedar inside is in excellent shape and the fact that it has the original tags and paperwork is pretty cool too.

ALL DONE
The fact that this Lane cedar chest came together without much planning has me pretty stoked. So exciting when you see your project coming to life before your eyes. The crackle is what makes it for me. Gives it that time-worn appeal I love and I didn't have to wait 100 years! haha.

And who doesn't love some roses. They are the perpetual flower that swoons most anyone - especially in pink.

I must say it looks good in my bedroom too, don't you agree? If I had the room I'd keep it for my girls. They love it! However, that won't happen any time soon, so this newly created piece is now available in
my online store.


Pin and share Lane cedar chest makeover to inspire others to give DIY a try. You just may cause someone to have fun!

To get these DIY tips & tricks in your inbox, be sure to
sign up for my newsletter. Until next time!

 PINTEREST | EMAIL
Before you go, check out these awesome projects! Tap the names below to see the afters.

- Girl in the Garage
- Just the Woods
- Petticoat Junktion
While you're at it, here are more projects like my Lane cedar chest makeover:


 One of my furniture addictions are blanket chests, also known as hope chests. The offer style and function since they serve as seats and storage. Who could ask for more? I was gifted one as a graduation/birthday gift and still fill it with my treasures. The ones that are cedar lined like this one makes it even more special.
 This one not only had the original tags but was also filled with broken glass and all sorts of blucky stuff. It also had been a dog chew toy. The top is in awful shape as well. Dingy, stained, and just not pretty.

 If you've ever done upholstery, you know how tedious it can be to get all those staples out. In this instance, there's not just one layer of upholstery, but TWO. Totally typical. ahem. How many of you remember that 1980's fabric? hahaha.
 The second layer had 3 times as many staples, but that puller made it a breeze. I did launder and keep the second fabric to donate to a needy cause . No sense to waste it. I'll get back to the upholstery in a bit.
Now it's time for base of this Lane cedar chest to get some lovin' too. First, I removed the broken pulls, and replaced the missing wooden plugs. Then, I filled all the dog chewed marks with wood filler and sanded them down.
The second layer had 3 times as many staples, but that puller made it a breeze. I did launder and keep the second fabric to donate to a needy cause . No sense to waste it. I'll get back to the upholstery in a bit.
Now it's time for base of this Lane cedar chest to get some lovin' too. First, I removed the broken pulls, and replaced the missing wooden plugs. Then, I filled all the dog chewed marks with wood filler and sanded them down.
 The fun doesn't stop here, however. To get the crackle finish I'm after, I use a crackle compound on top of my base coat. The trick is to apply it heavy enough that it will do what you want it to, but not so heavy it runs. Kinda like a thick jelly when applying. No problem to do.

 After replenishing the foam and adding more batting, I stapled it all on with my cordless stapler. My upholstery work time is cut in half by that thing. Woot!

 If you know me, I like to draw attention to details, so I grabbed my artist's brushes and gave this Lane cedar chest some dimension.
 Let all cure and then add the upholstered top back on and attach the knobs. I also removed the lock for safety reasons.

 I must say it looks good in my bedroom too, don't you agree? If I had the room I'd keep it for my girls. They love it! However, that won't happen any time soon, so this newly created piece is now available in my online store.
 Pin and share Lane cedar chest makeover to inspire others to give DIY a try. You just may cause someone to have fun!
 Before you go, check out these awesome projects! Tap the names below to see the afters.


