Sometimes a girl's gotta do something for herself, right? I mean, let's face it. I'm a mom to 6 amazing kids with a business and blog. More often than not I put myself to the side to tend to others. For a few years now I have been saving, no, hoarding (even dreaming) about this wood below. This is a story how this curbside
trashure was turned into my reclaimed wood planter box.

There's no doubt that the average joe would have walked right by this wood. It's broken, it's cracking, dirty, and even worm holes all over it. Only silly ol' me would see it then quickly make sure no one was going to beat me to it
and do the biggest happy dance it was mine.
Yes, folks, I'm looney like that, and that's okay because that means more for me. ha! You see, it was over 6 years ago I came home with my suburban stuffed with kids and all sorts of trashure from perusing our city cleanup. The other fave find of that day was this door you've seen here and there on my blog. I still kicking myself for not making room for the other door or going back to get it. I am one tuckered mama.

FINALLY
Since I just finished up a slew of projects, I decided it was time to
finally make use of that gorgeous worm wood. It's not only because of lack of time that it has sat so long, but I couldn't envision the perfect project for it. I mean, we're talking rustic oak siding that is tongue & groove with all sorts of charm and a wonderful patina. It's even over 13" wide which you just don't find today. Just any old project wouldn't do. It had to be just right.
Then it hit me what to do. I wanted to create a versatile piece that I could not only enjoy in my home, but it would function for many duties. My revelation was a reclaimed wood planter box. It wasn't going to be just any old box, so I set to drafting my plans. Now, this isn't a tutorial as much since there are several similar out there, but rather showing you what can be done with salvaged wood.

DIY TIME
I measured the dimensions and took note of flaws. This wood is extremely old and brittle that I wonder if it would even hold up to my saw. The first step was to glue those cracks the best I could with the best wood glue I have found.

Next, I made my measurements and checked my angles with my digital angle finder. This has been a fun gift from JC and I've used it more than I thought I would. So handy to have in many situations.

NEXT STEPS
All looked good to go, so I grabbed my little circular saw and had at it. I love this thing. So perfect for crafting and small jobs. While I could have used my other big saws to do this job, I wanted to show you that you don't need big power tools to create. And yes, I'm wearing my downy coat because it's freezing outside and snow has started to fall. Brrr...

After I triple checked my cuts, I had JC's help to do a dry fitting. All looked good so I assembled with my favorite nailer and wood glue. I tell ya, the way this cordless nailer has made my life easier is immeasurable...seriously. You can see it in action
in these posts as well.

If you look closely up above, I was a little concerned at the cracks that still existed so I reinforced with those salvaged metal strips I use in
my upcycled storage stand I recently created. I like the industrial feel they give to the box too.
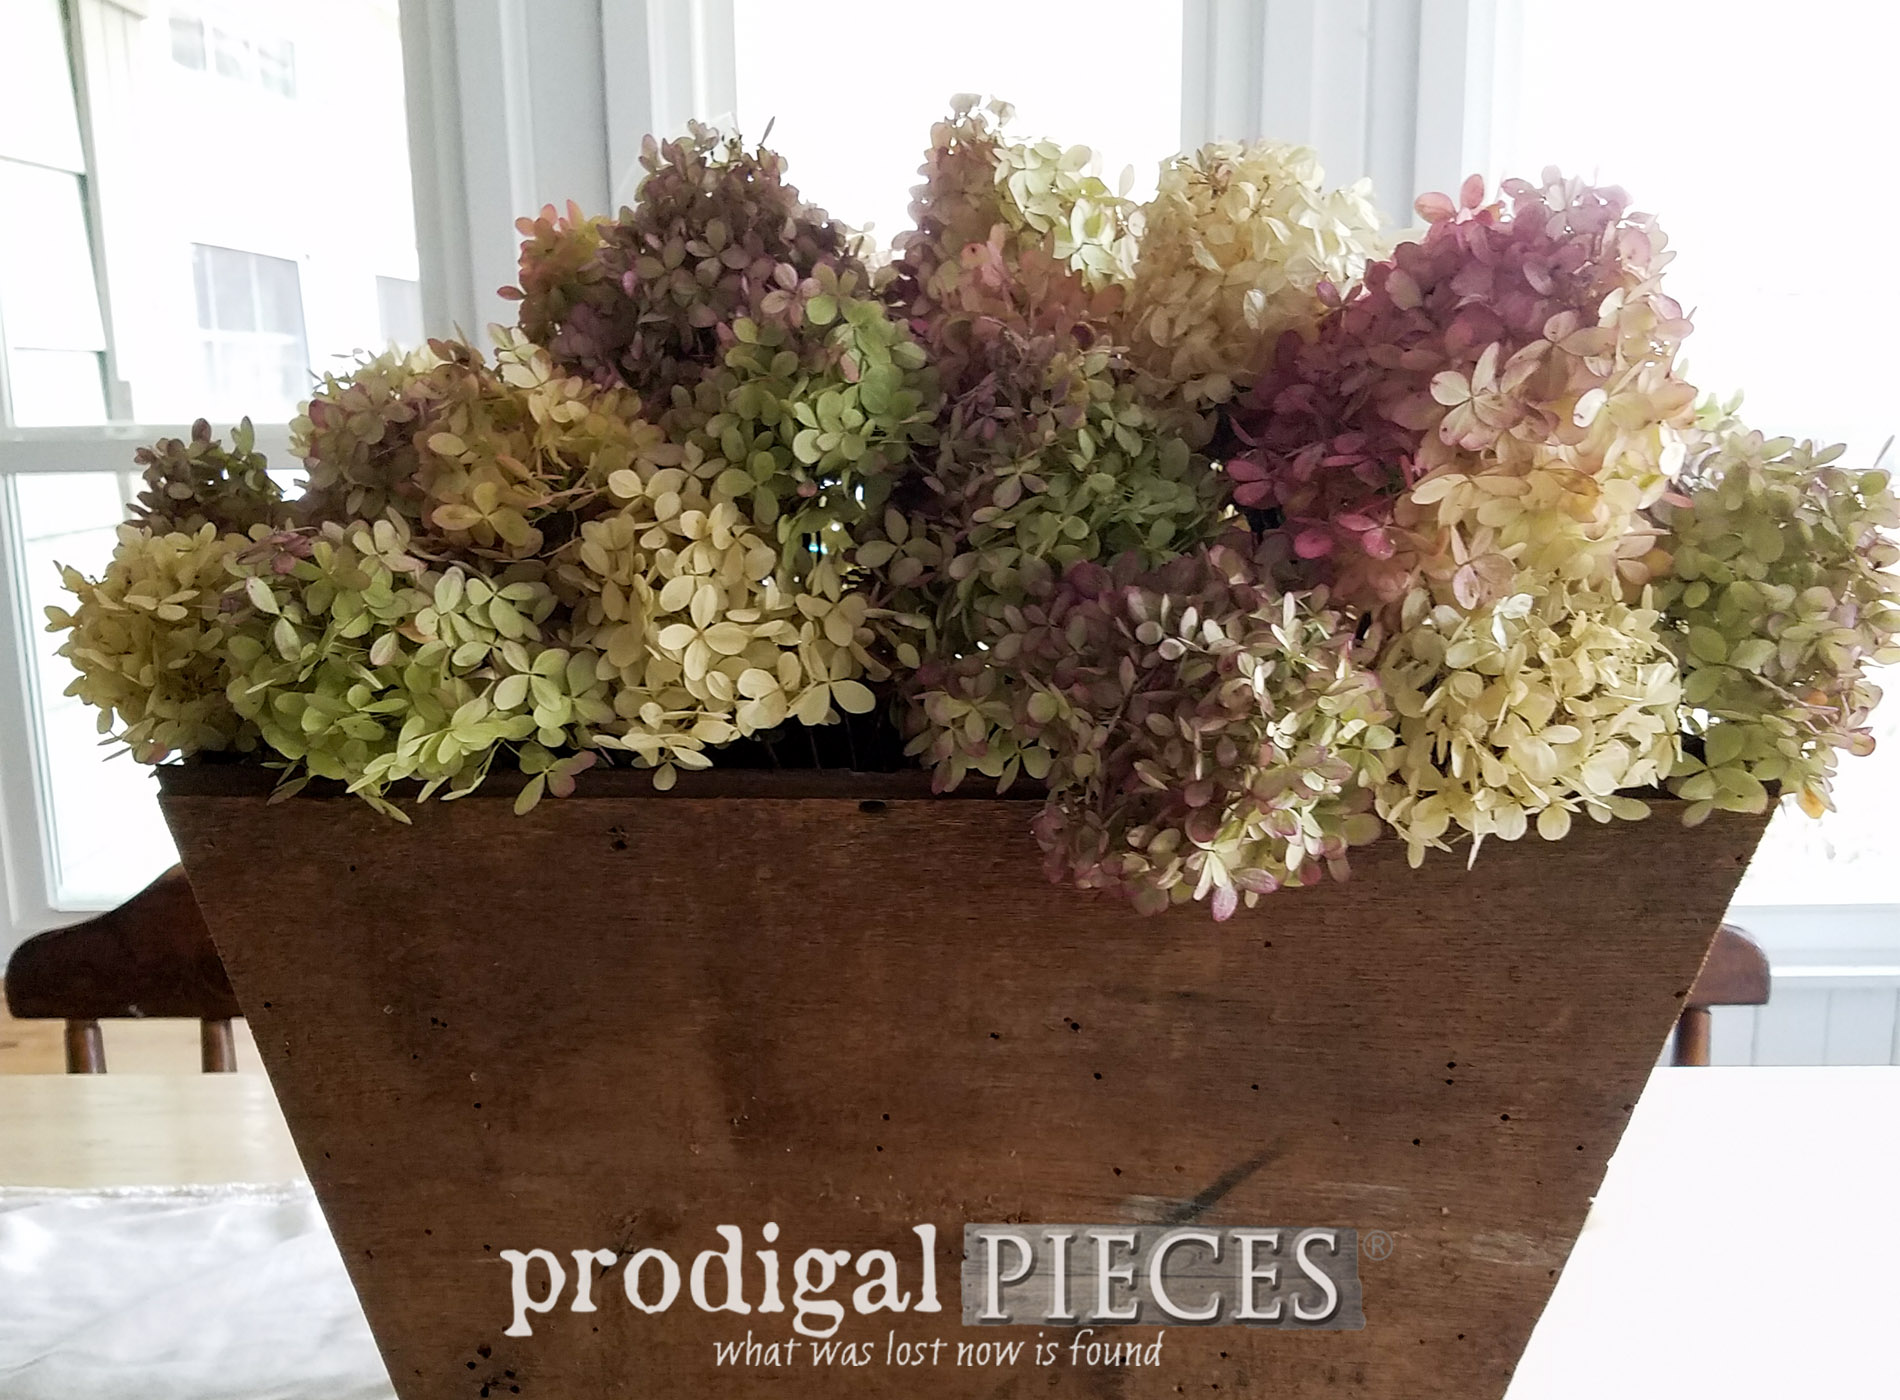
To finish it off, I headed out back to the hydrangea I planted this summer in
our backyard makeover. They did so well in their blooms and it was time to prepare the bush for winter. I snipped off the last of those fluffy heads and brought them in to dry so I could enjoy them all year long.

THE REVEAL
My reclaimed wood planter box is now ready to be used whenever the whim suits me. It's main residence will be on top of the hutch I have for our living room when we remodel it, but for now I like it on my table as a centerpiece.


The story I have from my first finding it, to the pile of "junk" fitting in my truck along with my kids...priceless. You can't find wide boards like that very often. In addition, I'm delighted to the moon and back to have created something for us all to enjoy.
And how about those blooms...swoon!

My littlest says it best when she says, "They look like little tiny butterflies!"

SO GOOD
The bottom of the box has a board cut from the thin piece of siding. I decided to just let it rest in the bottom for easy removal for cleaning. All in all, this is exactly what I had hoped for and more. Now I can fill it with my blooms each year or even stuff it with pillows, throws....Yippee!!

It even looks wonderful up on my chippy cupboard in my bedroom. I love the tapered design, the rustic appeal, and the patina...oh, the patina. mmmm....

Makes me think I should get more of the ideas done for self more often, eh? haha. This bit of scrap is all I have left of the wide board along with a length of the narrow board. I will show you what I do with those soon!

It was such a delight to share with you my little DIY FY (do it yourself for yourself) I hope you enjoyed it too! Do pin and share to inspire others to grab that cast off wood and make their own. Even if it takes 6 years to get your reclaimed wood planter box done. tsk.

Up next, this little thrifted gem gets a mini makeover with a bit of fun.
Head HERE to see!

Be sure to get these DIY tips & tricks in your inbox and
sign up for my newsletter. Until next time!

 PINTEREST | EMAIL
While you're at it, here are more DIY projects like my reclaimed wood planter box:


 There's no doubt that the average joe would have walked right by this wood. It's broken, it's cracking, dirty, and even worm holes all over it. Only silly ol' me would see it then quickly make sure no one was going to beat me to it and do the biggest happy dance it was mine.
Yes, folks, I'm looney like that, and that's okay because that means more for me. ha! You see, it was over 6 years ago I came home with my suburban stuffed with kids and all sorts of trashure from perusing our city cleanup. The other fave find of that day was this door you've seen here and there on my blog. I still kicking myself for not making room for the other door or going back to get it. I am one tuckered mama.
There's no doubt that the average joe would have walked right by this wood. It's broken, it's cracking, dirty, and even worm holes all over it. Only silly ol' me would see it then quickly make sure no one was going to beat me to it and do the biggest happy dance it was mine.
Yes, folks, I'm looney like that, and that's okay because that means more for me. ha! You see, it was over 6 years ago I came home with my suburban stuffed with kids and all sorts of trashure from perusing our city cleanup. The other fave find of that day was this door you've seen here and there on my blog. I still kicking myself for not making room for the other door or going back to get it. I am one tuckered mama.


 Next, I made my measurements and checked my angles with my digital angle finder. This has been a fun gift from JC and I've used it more than I thought I would. So handy to have in many situations.

 After I triple checked my cuts, I had JC's help to do a dry fitting. All looked good so I assembled with my favorite nailer and wood glue. I tell ya, the way this cordless nailer has made my life easier is immeasurable...seriously. You can see it in action in these posts as well.
 If you look closely up above, I was a little concerned at the cracks that still existed so I reinforced with those salvaged metal strips I use in my upcycled storage stand I recently created. I like the industrial feel they give to the box too.
To finish it off, I headed out back to the hydrangea I planted this summer in our backyard makeover. They did so well in their blooms and it was time to prepare the bush for winter. I snipped off the last of those fluffy heads and brought them in to dry so I could enjoy them all year long.
If you look closely up above, I was a little concerned at the cracks that still existed so I reinforced with those salvaged metal strips I use in my upcycled storage stand I recently created. I like the industrial feel they give to the box too.
To finish it off, I headed out back to the hydrangea I planted this summer in our backyard makeover. They did so well in their blooms and it was time to prepare the bush for winter. I snipped off the last of those fluffy heads and brought them in to dry so I could enjoy them all year long.


 The story I have from my first finding it, to the pile of "junk" fitting in my truck along with my kids...priceless. You can't find wide boards like that very often. In addition, I'm delighted to the moon and back to have created something for us all to enjoy.
And how about those blooms...swoon!
The story I have from my first finding it, to the pile of "junk" fitting in my truck along with my kids...priceless. You can't find wide boards like that very often. In addition, I'm delighted to the moon and back to have created something for us all to enjoy.
And how about those blooms...swoon!
 My littlest says it best when she says, "They look like little tiny butterflies!"

 It even looks wonderful up on my chippy cupboard in my bedroom. I love the tapered design, the rustic appeal, and the patina...oh, the patina. mmmm....
 Makes me think I should get more of the ideas done for self more often, eh? haha. This bit of scrap is all I have left of the wide board along with a length of the narrow board. I will show you what I do with those soon!
 It was such a delight to share with you my little DIY FY (do it yourself for yourself) I hope you enjoyed it too! Do pin and share to inspire others to grab that cast off wood and make their own. Even if it takes 6 years to get your reclaimed wood planter box done. tsk.
 Up next, this little thrifted gem gets a mini makeover with a bit of fun. Head HERE to see!
 Be sure to get these DIY tips & tricks in your inbox and sign up for my newsletter. Until next time!


