 You read it right, one pine board and a few extras to make these wonderful, whimsical trees. I'm so excited to show you a technique that I used to get the look of these trees using one of my favorite tools to create heat gun wood burning.

*post sponsored by HomeRight (see full disclosure)
DIY TIME
These whimsical trees fit into most any decor whether it's Nordic, farmhouse, cottage, industrial, even modern. Also, the best part is you can have them look any way you like. I'm just here to get the ball rolling. TERMS OF USE: when you create these trees, you agree to the following: it cannot be shared or distributed for monetary gain in any way, it may not be modified in any way, and you may not claim the work as your own. Likewise, this tree design can not be used as decor in a store either online or brick and mortar. Thanks for complying! Want to create your own for your home or maybe as gifts? Here's what you'll need to make 9 trees (I made 11 using extra scrap):Materials:
- 1 - 1" x 4" x 8' pine board (or wood species of choice)
- paint or stain (my choices outlined below)
- paint brushes
- Ammonium Chloride
- HomeRight Digital Heat Gun
- jig saw
- miter saw (or similar for a straight cut - you can use the jigsaw with a straight edge setup too)
- sander / sandpaper
- safety equipment - goggles, ear protection, dust mask
- pencil
- tape measure
- templates (if desired)
Step 1
First, rough sketch your trees onto your board using a pencil. You could cut your pieces to length first, but I like the random height and width. Most of my trees roughly fell into either a 16", 12 ½", or 7" height. There's no rule to these, just sketch and have fun.
Step 2
Then, once you've got them how you like, cut them to length. I used my miter saw to chop right on the bottom so I got a nice flat surface that the tree can stand on. In addition, you could use any saw for this, but this is the easiest way to do it.
Step 3
Now it's time for some funky saw fun. I love my jigsaw and have used it in oodles of projects as seen HERE. One of my other favorite tools is the Kreg Clamp Trak system. It holds my work steadfast, even hanging off the bench like this. You build it to customize your needs. If you don't have this system, use a clamp and make sure it stays snug. Begin to saw starting from the outside edge working towards the inside corners of your tree branches. It takes two cuts to make each branch stand out. Let me just say I was having a blast making these and got to be out in the sun doing what I love. I feel so blessed!

Step 4
Once you have your Nordic wooden trees cut out, it's time to sand. First, I used my favorite orbital sander and a 120 grit to knock down the frayed edges and soften corners. Easy-peasy.
Step 5
Then, from here it's up to you how to finish, but if you love what I created, here's how to get the look. First, I stained my trees in 3 different stains: Sunbleached, Early American, and Briarsmoke. I left a few in the raw for the next steps.
Step 6
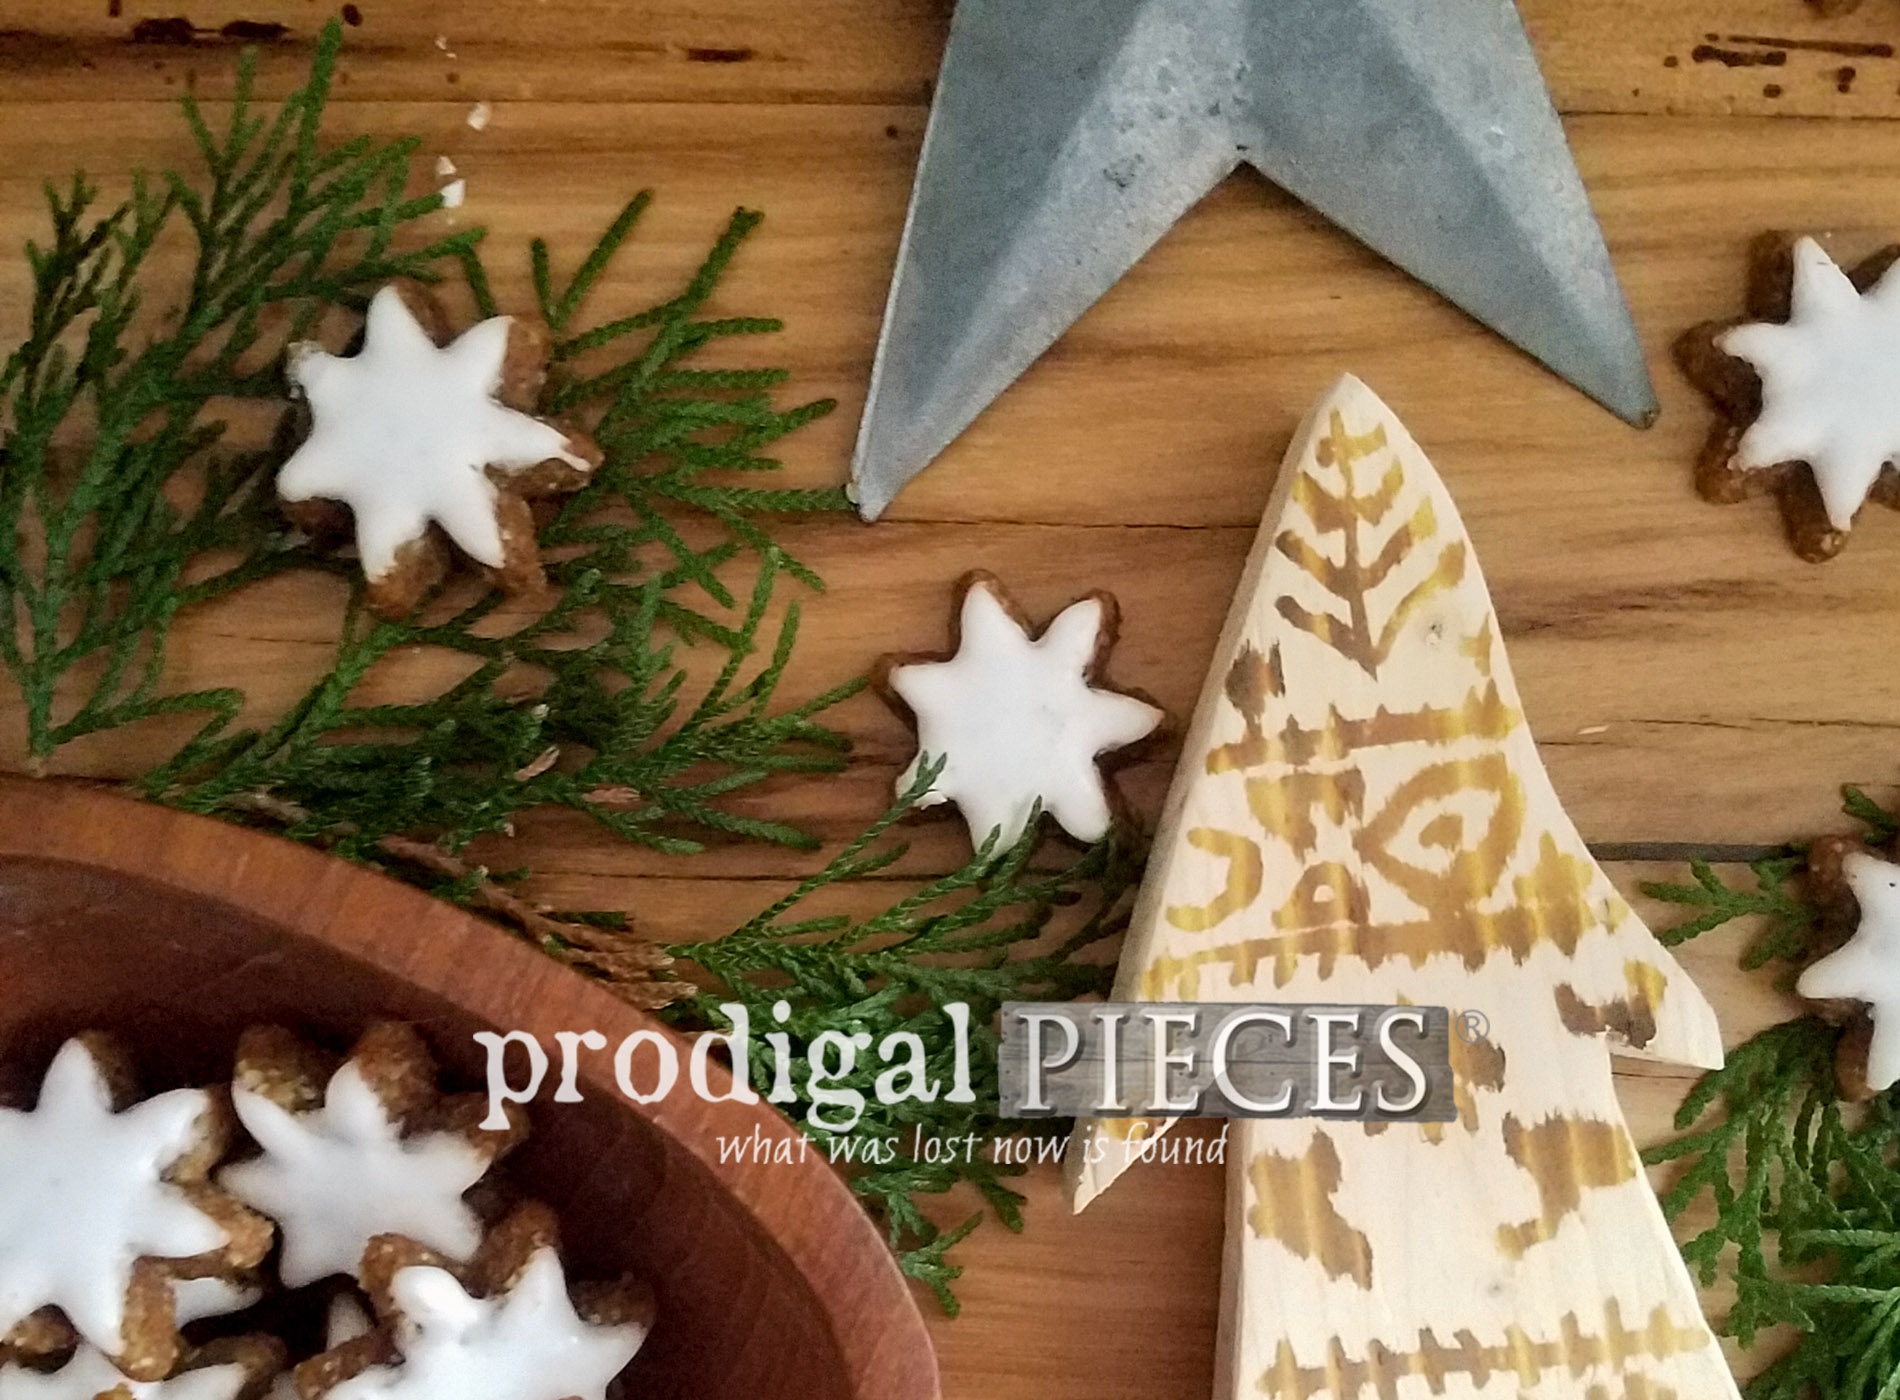
Time to add your designs to your raw wood pieces. Next, simply trace a design on using a stencil like this Union Jack aluminum sheet or trace a knit or crochet design.
Step 7
Now for the exciting part! I've shown you before how I've used my HomeRight heat gun to create many new things (SEE HERE). This time, though instead of using it to take things off, I'm using it to put a design on. Check this out... by using basic ammonium chloride, not only can you design anything you want , but also wood burn it on. I found this idea by watching a few videos on the subject and thought I'd have a go at it myself. You could use a wood burning tool like I did on this antique desk, but...this is so much faster!! Just mix 1 Tablespoon of ammonium chloride with ½ cup water and stir until dissolved. I tried to look at every local resource in my area to find some ammonium chloride, but ended finding it. It's is used as a fertilizer, on farm animals, for fish tanks, and to treat people.

Step 8
Brush, stamp, or apply your design in whatever manner you like. I found the designs that didn't bleed as much were the ones I traced on and made sure to indent into the wood. Mind you, I didn't mind the bleeding look as it gave it a more rustic appeal. Last, let it soak in a bit, but don't have to wait too long. Less is more when deciding how much to apply.
Step 9
Next, place your tree or other item to be wood burned on a proper surface to assure you don't set your counter on fire. ha! Then, put your heat concentrating tip on your HomeRight heat gun and set to roughly 800 degrees. Let it heat to temperature. Also, I found that holding the gun at slight angle gave it the best effect.

THE REVEAL
Finally, let cool for a bit and you're done! So cool (or should I say hot?) and easy to do. The best part of this is that you can use it for ANYTHING. You can also fill an empty marker and hand-write your design on, fill an empty stamp pad and stamp away, even use decals, etc. You get the idea. Seriously, the sky's the limit! This sure beats the pricey branding irons you have to buy, isn't it? You can bet I have more projects to show you using this technique.
 So, I have to ask...what would you create with this heat gun wood burning technique?

GIVEAWAY
My hope is that you've enjoyed not only the tutorial on how to make these whimsical trees, but also learned a new trick to add to your arsenal. Now, it's time for a giveaway for your very own HomeRight Digital Heat Gun.
 Easy entry, just fill out the widget below to complete as many entries as you like (daily even). Open to U.S. & Canada residents 18 years of age and older. Likewise, winner will be notified via email and will have 24 hours to claim their prize. Be sure to check your spam!
Also, pin and share to inspire others to give DIY and new techniques like heat gun wood burning a try!
Easy entry, just fill out the widget below to complete as many entries as you like (daily even). Open to U.S. & Canada residents 18 years of age and older. Likewise, winner will be notified via email and will have 24 hours to claim their prize. Be sure to check your spam!
Also, pin and share to inspire others to give DIY and new techniques like heat gun wood burning a try!
 To get these DIY tips & tricks in your inbox, be sure to sign up for my newsletter. PLUS, you will get your FREE Furniture Buying Checklist and special discount to my shop. Until next time!

In addition, more projects like my heat gun wood burning:

