 The reasons I say you should be jumping out is because just look at those ornate frames. That alone is reason enough to take a peek. So many possibilities with these.
 And...the best part...look at what else I scored!! {{gasp!}}

 How awesome is this embroidered "Tin Lizzie?" I fell in love with it and my sons did too, so I added it to their industrial style bedroom. I can relate the hours someone poured into this. wow.
DIY TIME
Now, back to those fruit prints. They were from 1997 and were in fantastic shape, but just weren't cutting it for me. I really hated to do what I did next, but, ya know. A makeover has to happen for these things to find life. I cut open the back and began to remove the staples that held in the foam core print. I set those prints and glass aside as I'll use them later, then clean up the frames. First order of business is to make the frames more suited for the look I was after.
 I'm using a basic flat brown paint that I have custom mixed as my base coat and my favorite Zibra square brush. Next, I go over it with a wash of the caramel color I used on my faux wood garage door and these farmhouse candlesticks. Once that dries, I do another layer of a black glaze to create even more depth, like I show in my layering tutorials.
DOILIES
While those frames are curing between coats I move on to the fun part. Vintage doilies!! I just have to say that I have the best readers in the whole world wide web. So many of you send me gift of things you know I will love and it means so much. Karen had collected this awesome assortment of doilies over the years and said that she would rather I have them then have them stuffed in a bag on a shelf. How sweet is that?!? sniff....
So, here I am to show you what I am doing with a few of these near 50 beauties. I am a hooker myself (of the crochet kind. ahem) and know how long it takes to make one of these. Each stitch is a gift of love.
Do you know what blocking is? When JC called me from work the other day I told him I had been working, and he asked on what. I replied, "You won't know what I'm talking about, but I'm blocking...and not the basketball kind. tsk" hahaha...
I just have to say that I have the best readers in the whole world wide web. So many of you send me gift of things you know I will love and it means so much. Karen had collected this awesome assortment of doilies over the years and said that she would rather I have them then have them stuffed in a bag on a shelf. How sweet is that?!? sniff....
So, here I am to show you what I am doing with a few of these near 50 beauties. I am a hooker myself (of the crochet kind. ahem) and know how long it takes to make one of these. Each stitch is a gift of love.
Do you know what blocking is? When JC called me from work the other day I told him I had been working, and he asked on what. I replied, "You won't know what I'm talking about, but I'm blocking...and not the basketball kind. tsk" hahaha...
BLOCKING
Okay, so here is what you do to get those doilies to lay flat and kinda stiff for your framed doily wall art. Time to get our block on. {enter dramatic music}
- Grab a bowl, a whisk, school glue, and your doily selection.
- Add a tablespoon of glue to each one cup of water. Mix.
- Place doilies in bowl and get them soaked. Squeeze out excess.
- Lay doily flat on layered cardboard. Pin to shape as desired. Let dry.
 Now back to those foam core prints. I wanted to reuse those mats as the backing to my doilies, so I grabbed a thrifted denim curtain I had on hand, and my sewing scissors, and my glue gun.
 I cut and inch or two wider than the foam core and the boxed the corners like this...
 Then, using the hot glue, I attached the denim to the foam core nice and tight. Easy! All I had to do next was take my dried doily and adhere it to the denim using a spray adhesive. Last, insert back into those painted frames.
THE REVEAL
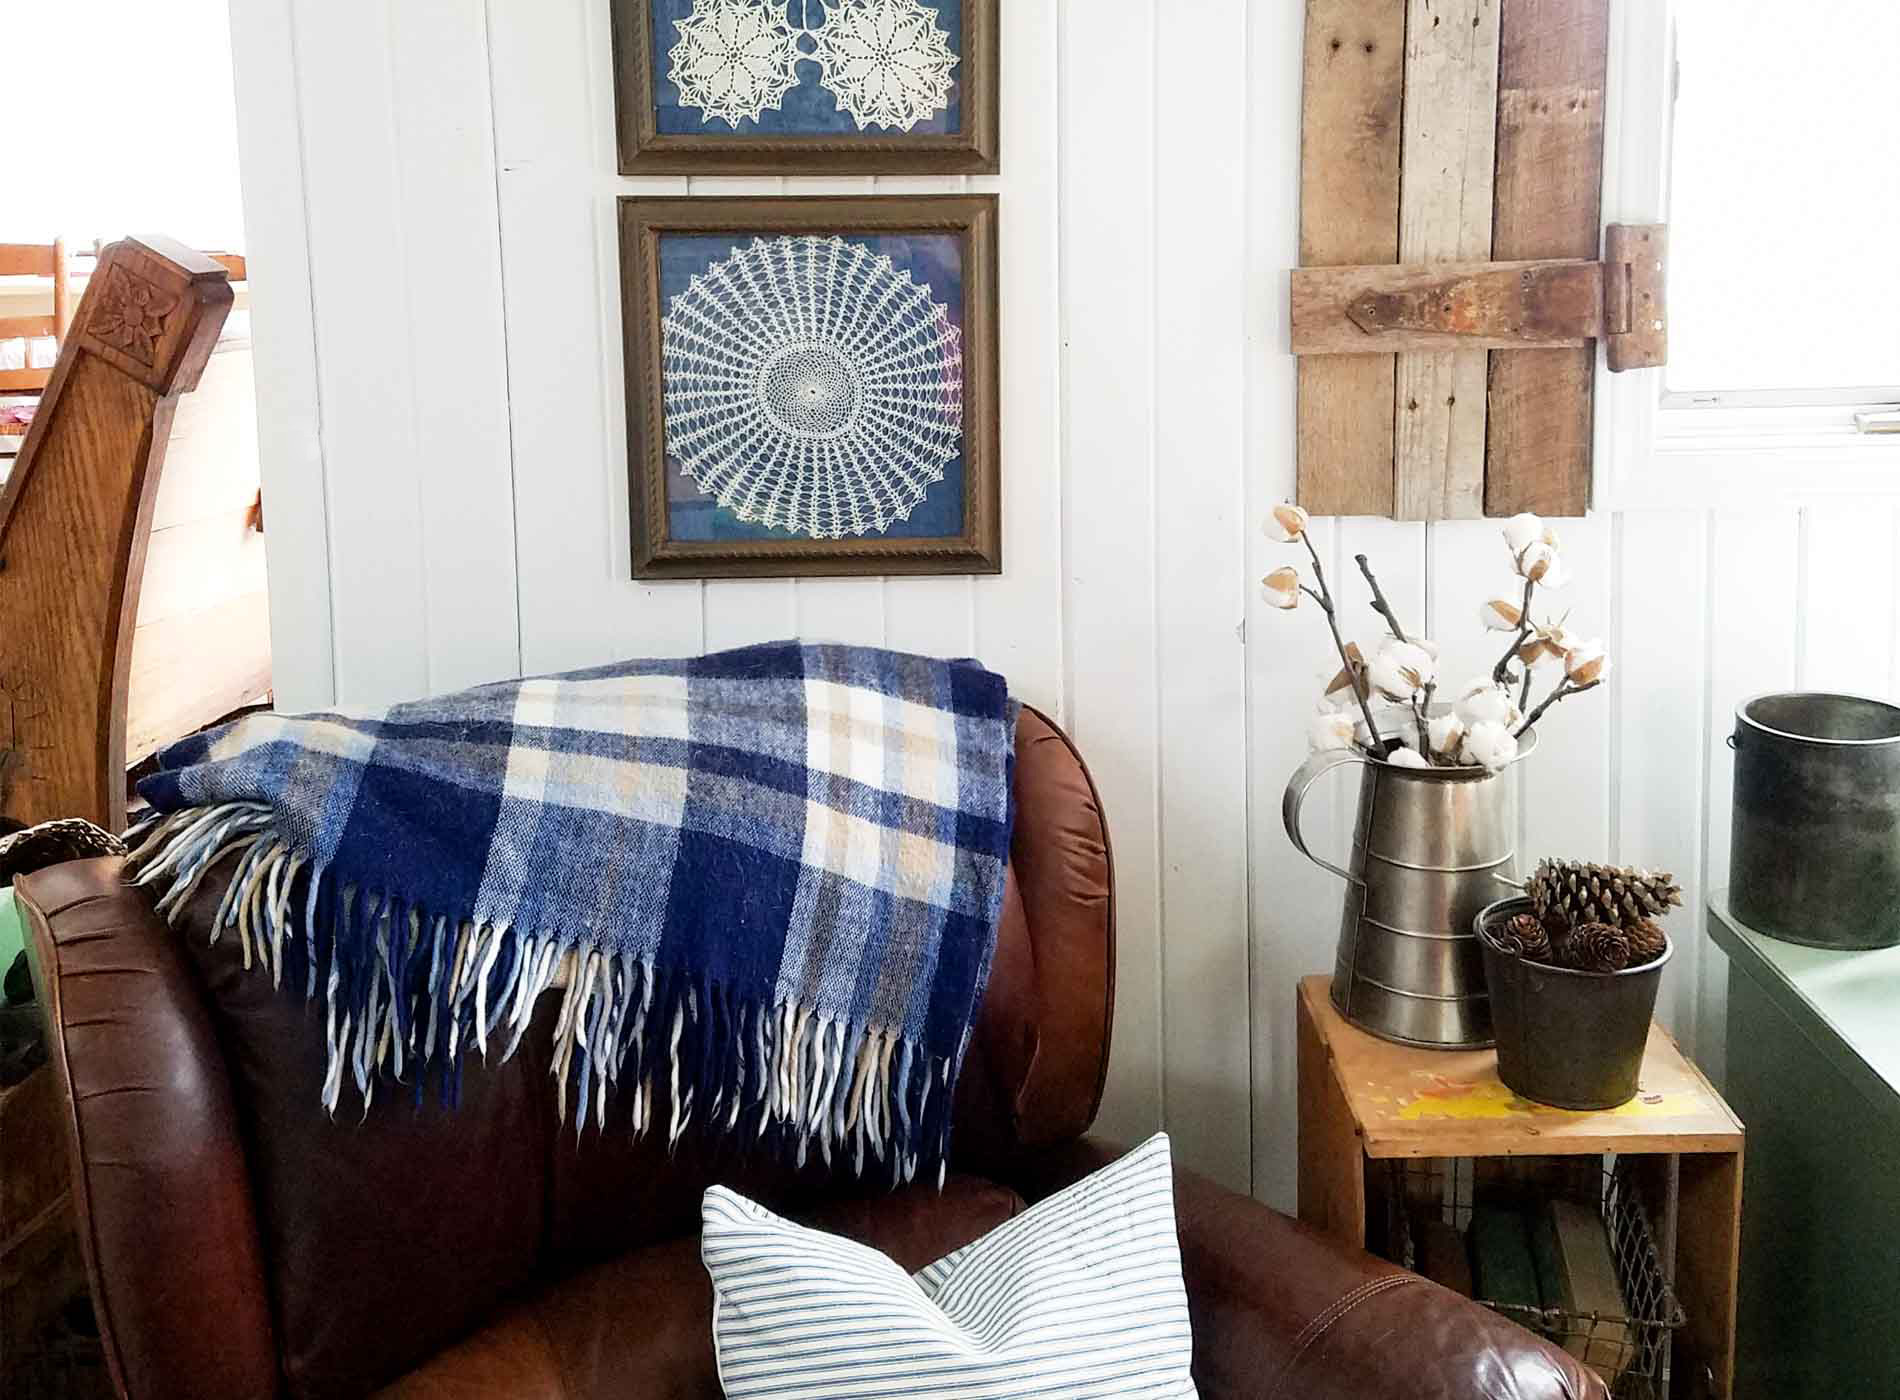
Here are my curbside-find frames done up as framed doily wall art. Whatcha think?[metaslider id=30251]
 I'm lovin' the denim background that really makes those doilies pop. Not bad for some curbside and thrifted finds made new, eh? tee hee.

 By now I hope you can see beauty in the cast-off and maybe even rethink some of the things sitting around your home. You don't have to have a huge budget to make your house your home. I know I don't, that's for sure. It's either kids or money, and you know which ones are my everlasting treasure.
 Do pin and share this framed doily art so that others can break out their grandma's handiwork and display it. And you never know when someone will want to try something new. Thanks!
 Up next is Trash to Treasure Tuesday, when my blogger friends and I do some awesome makeovers to inspire you! To get these DIY tips & tricks in your inbox, be sure to sign up for my newsletter. PLUS, you will get your FREE Furniture Buying Checklist and special discount to my shop. Until next time!

More DIY projects like my framed doily art:

