BACKSTORY
However, we decided it was time to fix a few bugs that were still existing in our home after a quick remodel we did after we moved in. You can see our first post back in 2016 HERE, but I'll update here as well. Here is what you would have seen when we bought our home in 2003.
 As I mentioned in my first post, we quickly decided to change it up. First thing to go was the carpet and the wall separating the dining from the kitchen. The dining used to be an enclosed porch and had nothing between the concrete pad and the sub-floor. To remedy that, we cut holes and blew in insulation. Next, we added vinyl tile for the time being, new window, and new sink and laminate counters. I also added a box of trim to each cupboard door and painted them a creamy white. At that point, we were remodeling to sell and kinda keeping it country cozy as our area is a farming community.
This was the only pic I could find of the difference at the time. Yes, that's me with my oldest who is now an adult and taller than me. Time flies!
As I mentioned in my first post, we quickly decided to change it up. First thing to go was the carpet and the wall separating the dining from the kitchen. The dining used to be an enclosed porch and had nothing between the concrete pad and the sub-floor. To remedy that, we cut holes and blew in insulation. Next, we added vinyl tile for the time being, new window, and new sink and laminate counters. I also added a box of trim to each cupboard door and painted them a creamy white. At that point, we were remodeling to sell and kinda keeping it country cozy as our area is a farming community.
This was the only pic I could find of the difference at the time. Yes, that's me with my oldest who is now an adult and taller than me. Time flies!

MOVING FORWARD
Fast forward a few years...I decided after we pulled or house off the market to make the kitchen my own. I had been through quite a few trials with my health and losing babies, so I needed a change, plus it had been 10 years since and update, so it was time. It was time to re-paint the cabinets and paint all the pine paneling by myself - that took FOREVER. The walls needed a coat of stain-blocking primer and 2 coats of paint to seal it all in. It was so worth it though. Here is what it looked like before we started current day. Not bad, but we had plumbing issues, electrical, and sub-floor issues, as well as we wanted to update our appliances. I loved the cabinet color called Slate Green by Glidden, so that was staying. You can see below the flooring glue is wearing off and looking awesome.
 We had just bought a new refrigerator after our old one died, but still had this portable dishwasher beside it.
 You can see I used a textured wallpaper in the dining to hide the ugly tile as a temporary fix. Plus, we still had upper cabinets hanging up that went around the vintage double oven we had taken out too.
 The glass-topped range was a "temporary" fix that lasted for 3 years. ugh.
 Below, you can see how the sub-flooring did not transition well and was causing wear in our tile. Time to fix that too.

NEXT STEPS
During our farmhouse kitchen remodel, we also decided to take on our adjacent laundry area. That was my chance to upgrade to add a utility sink and more storage. You can imagine my delight as I had to use my kitchen sink to clean up from all my projects. To get this kitchen remodel reveal party started, we began with the floor. Tearing up the tile was easy enough, but what lay underneath was going to be a challenge. Our current dining area used to be a screen-in porch with a weird transition. Then, if you walked into the laundry, there was another transition point. We had to make all those floors meet if this was going to work. We poured many long days and nights into getting that ready.
Once we had the flooring done, it was time to work on the cabinets. Our existing set was in great shape, so we decided to keep them, but update them. After my lengthy pleas to take out the dreaded peninsula, JC caved and let me have my way even though he thought I'd regret it. I was tired of crawling inside my cupboard (aka. spelunking) to get my pots and pans out.
Thankfully, we live in part of the country where reclaimed wood is somewhat easy to find. Our resource we've mentioned before has grown two-fold as the demand gets higher and higher. Take a look at this...
Then, if you walked into the laundry, there was another transition point. We had to make all those floors meet if this was going to work. We poured many long days and nights into getting that ready.
Once we had the flooring done, it was time to work on the cabinets. Our existing set was in great shape, so we decided to keep them, but update them. After my lengthy pleas to take out the dreaded peninsula, JC caved and let me have my way even though he thought I'd regret it. I was tired of crawling inside my cupboard (aka. spelunking) to get my pots and pans out.
Thankfully, we live in part of the country where reclaimed wood is somewhat easy to find. Our resource we've mentioned before has grown two-fold as the demand gets higher and higher. Take a look at this...


BARN WOOD LOVE
It had been just over a year since we had been here and the owner had to build yet another barn to house all his demand. They not only source barn wood, but any old wood that can be salvaged. My ache is that so many are selling their barns for lumber because the price is right, but our heritage landscape is drastically changing. Oh, if only this wood could talk.
 On our first trip we picked out the rough sawn oak to be our peninsula base. We went back on our second trip to get the 1800's hickory. It amazed me that the owner had it all organized according to where they sourced it and knew the story behind each stack. Our choice of wood came from floor joists out of a factory that had been torn down.


DIY TIME
It was definitely rough as was going to take a whole lotta work. Here is where we started...
* product provided by eFaucets & Hickory Hardware (see full disclosure)
The first steps in our farmhouse kitchen remodel were to clean up the wood (obviously). The meant removing all the hand-forged nails, chipping off the debris and prepping them for planing. Our Sawzall made an easy task of that. Next, the boards needed planed. Some of the boards were over 12 feet long and all were warped or twisted to some degree. JC built a sled for his router and 2" router bit since we couldn't just run them through our bench-top planer without a smooth side first. This would allow him to get the boards ready for the next step.

HELP
We eventually needed to call in help with a local Amish man who had a large joiner, then once we had the boards put together and ready for a large planer, a wood shop helped with that.
 What was seriously nauseating was the fact that we had to borrow a van to get all 6 counters to the wood shop as the longest counter is 12 feet. After we paid to have them planed, we found pests. Yup, no joke. Little powder post beetles that would continue if we didn't treat it. Pause the project, find insecticide, and treat. Ugh!
 If you know anything about finishing wood, when you add moisture to it, it's going to raise the grain. All our efforts had seemed fruitless to get them planed. We had to use a belt sander to knock it all down without ruining the plane job. Remember, we only get one day a week to do this, so that is why it took so long. I was going nuts!! I lived with a portable resin table as my counter for over a year. (yes, there are much worse things in the world, but...)
FINAL PREP
Finally, we got them ready for the epoxy treatment to suit our farmhouse kitchen remodel. What you see below is a knot hole from a branch in the tree. We couldn't let those holes stay, so we filled with epoxy, torched the bubbles out, and then filled again if needed, then sanded.


 Once all the holes were filled and sanded, it was time to cut out the openings for the sink and the stove. We needed two on the long counter, and one in the utility sink counter too. Talk about holding your breath...no mistakes!!
 What's awesome is we were able to take those cutouts and makes some gorgeous hairpin hickory tables for my online store.
 JC had his fun with that end of the work, while I worked on the finish topcoats. Boy, was I nervous! We couldn't find anywhere with temperature controlled environment to work on these and be dust-free as well. Our back yard was the only option and we had to get it done before the temps dropped.
 Although our first choice to top coat the counters was Waterlox, like we used on our bathroom vanity and dining table, we decided on pre-catalyzed lacquer. Why? Basically, the Waterlox takes 24 hours between coats - no can do. Whereas the pre-catalyzed lacquer is as durable, food safe, dries lighting fast, and easy to apply. Although we could have used epoxy for the most durable finish, I refused to have a high gloss sheen in my old style kitchen. Both Waterlox and pre-catalyzed lacquer come in satin.
SEE COUNTER UPDATE AFTER 3 YEARS HERE
To apply this finish, I first brushed on a coat of lacquer, let dry, and knocked it down with steel wool. Next, I used my my sprayer and had to add lacquer thinner as the ratio suggested. I worked in batches of coats of 3 for a total of 12 coats. Spray one coat, wait 5 minutes, spray second coat, etc. Cure time between 3 coats was about an hour. The only issue I encountered was a bit of orange peel action going on after my first round of coats due to my spray. To remedy that if you happen to run into it is to immediately spray a light mist of thinner over top of your coat. It worked like a charm and you can see it instantly working. This is what you see after 12 coats. The angels sang...seriously. That wood looks nothing like the wood we brought home.
KITCHEN PENINSULA
While I was doing those steps, JC began building the peninsula out of the oak. These beauties were going to stay in the rustic state if I had anything to say about it. JC wanted them to be "cleaned up". haha. He also had the job of building another cabinet that would go under the cooktop. I had not been able to cook with gas since I moved out of my parent's house, and was determined to have it. Little did we know we already had a gas line that existed, so all we needed to do was finish the pipe up to the range. Can you believe the line wasn't properly capped all these years?!
 Now it was time to prep for counter installation. The base cabinet of the main also needed rebuilt under the sink as it was rotted when we moved in. It only got worse over time. Isn't their patchwork job, pretty?

ASSEMBLY
Since our corner cabinets had a mitered seam, we had to get that ginormous miter right and then use this drawbolt kit to hold it together. The pins had to be routed in from the back side. Again, I am holding my breath, and so is JC! Notice he's working out in freezing temps per our usual Ohio winters. tsk.
 Time to see if they fit on our base. eep!
 I am happy to say, it fit like a glove!
 Even Lily approves! Funny thing is she's never on it now. However, she just had to show who really owns this house. Typical calico. ;)

CEILING
All during the time of this work, I built the ceiling and then added the recessed lighting. That alone took weeks because we had a wiring mess. Can you believe we found a live wire laying in our attic? Crazy! I removed the faux beams and installed a coffered ceiling with beadboard panels, much like the one I just finished in our family room. Then, we added the center pendant and 3 extra lights on a dimmer. As per my usual when a job takes longer than expected, I decide to change it up some more and it makes JC so happy. ahem. The 3 upper cabinets on the right looked out of place to me, so I suggested we take them down and put up open shelving made out of the same hickory as our counters. JC was hesitant at first, but he trusts my vision. Thankfully, we could do most of the work ourselves, but this also meant we had to rebuild the facade above the cabinets.
 We hung the shelves using a set of invisible floating shelf brackets. It required drilling in from the back and routing in a spot for the bracket to sit flush.
Tile is going up and we're beginning to see the light at the end of the tunnel. We sourced our ceramic tile online and couldn't be happier with our choice.
We hung the shelves using a set of invisible floating shelf brackets. It required drilling in from the back and routing in a spot for the bracket to sit flush.
Tile is going up and we're beginning to see the light at the end of the tunnel. We sourced our ceramic tile online and couldn't be happier with our choice.


WINDOWS
Unfortunately, my excitement only lasted for awhile because we had to stop working to get other work done at this point. It would be a few months before we could install the range hood, and finish other details. However, we were able to install our dining room windows. All we had was a single pane of glass with two nails holding them in - no joke. They were covered by cheap storm windows, and some were broken. At that time, we also needed to replace our roof over our family room as the winter before had an ice dam that caused a backup under our roof. We had no major leaks, but thought it wise to upgrade just in case. The roofer broke one of our old windows and I laughed SO HARD! I told him that now I can finally get my new windows!!
 Consequently, we found the roofer didn't know what he was doing. He didn't flash our skylight which caused us leaks we never had in our old roof. Within a month we had a leak and he came to fix it and handed me the bill. I refused to pay, but apparently my husband had already agreed by phone. Talk about a hot mama!!
Two months later I found more leaks on Christmas Eve as I sat by our tree. It dripped on my shoulder and the rest of the winter we had buckets set about. We would have to do it ourselves come spring. The kicker is we could have done the roof ourselves in the first place, but decided to hire it out so we could continue the kitchen. I will say it a thousand times...I don't trust contract workers. Sad to say.
Consequently, we found the roofer didn't know what he was doing. He didn't flash our skylight which caused us leaks we never had in our old roof. Within a month we had a leak and he came to fix it and handed me the bill. I refused to pay, but apparently my husband had already agreed by phone. Talk about a hot mama!!
Two months later I found more leaks on Christmas Eve as I sat by our tree. It dripped on my shoulder and the rest of the winter we had buckets set about. We would have to do it ourselves come spring. The kicker is we could have done the roof ourselves in the first place, but decided to hire it out so we could continue the kitchen. I will say it a thousand times...I don't trust contract workers. Sad to say.
MOVING ON
Back to the kitchen... We waited for a few months for a plumber to feel like showing up and then when he did he messed up some things and even sprayed an awful mess all over my shop inventory in the basement. There are far worse things, but this was a bit much. Finally, we could finish since all the wrinkles were ironed out. JC's goal of installing the hood meant more electrical time in the attic and custom building a wood hood too. I'm telling ya, JC is a math genius! All the angles involved in creating the framing and then the covers was mind-boggling.
 I hoarded that hand-carved trim for years waiting for this day. It came out of an 1800's home that a lady's husband removed and she sold it in her garage sale for a buck! {{happy dance!!}}
 JC kept asking if he could refinish it - nope. I had to keep explaining what patina is and why I love it so. He may never understand me in that regard. haha. I just used my hemp oil and it looks good as new.
Once the hood and cover were installed, all I needed to do was add the finishing touches. I'll explain in a bit.
Meanwhile, we added the laundry counter and sink. Our cast iron kitchen sink came with a like-new faucet, so we would use that in here.
JC kept asking if he could refinish it - nope. I had to keep explaining what patina is and why I love it so. He may never understand me in that regard. haha. I just used my hemp oil and it looks good as new.
Once the hood and cover were installed, all I needed to do was add the finishing touches. I'll explain in a bit.
Meanwhile, we added the laundry counter and sink. Our cast iron kitchen sink came with a like-new faucet, so we would use that in here.

SHELVING
I chose to add more shelving to the ugly back corner and spruce it up.
 At this point we're all like...are we done yet? Even Teddy agrees.

THE REVEAL
Finally, after a few more tweaks and fixes to things, we can finally show you all our hard work. whew. Won't you join me on a tour?

 There's much to our story that I didn't want to spend too much time on writing, so I also created a video tour below. At the end of that, you'll see I kept the promise I had to many of you. tee hee.

 We adore our new space with all the little bells and whistles. It's such a relief to see our farmhouse kitchen remodel done. However, we still have a few things to change. We have a few other projects to finish before winter.


 Doesn't the wood grain just pop? The worm holes and all the story it tells really makes it speak to my heart.

 The open feel our farmhouse kitchen remodel now has makes my heart sing when I walk in. My kids love to be able to have everything easy to access as we cook from scratch for all meals daily.
 I found the sink on Craigslist for $100 and it sat for two years waiting for this day. It's large enough to fit my cookie sheets and large pots easily, but still offers the extra basin for washing up and soaking. {{another happy dance!!}}
 The faucet in the antique brass finish is perfect for the look I was after. In the past,we've used eFaucets for our fixtures in bath and bedroom. They have fantastic lighting we've used too.
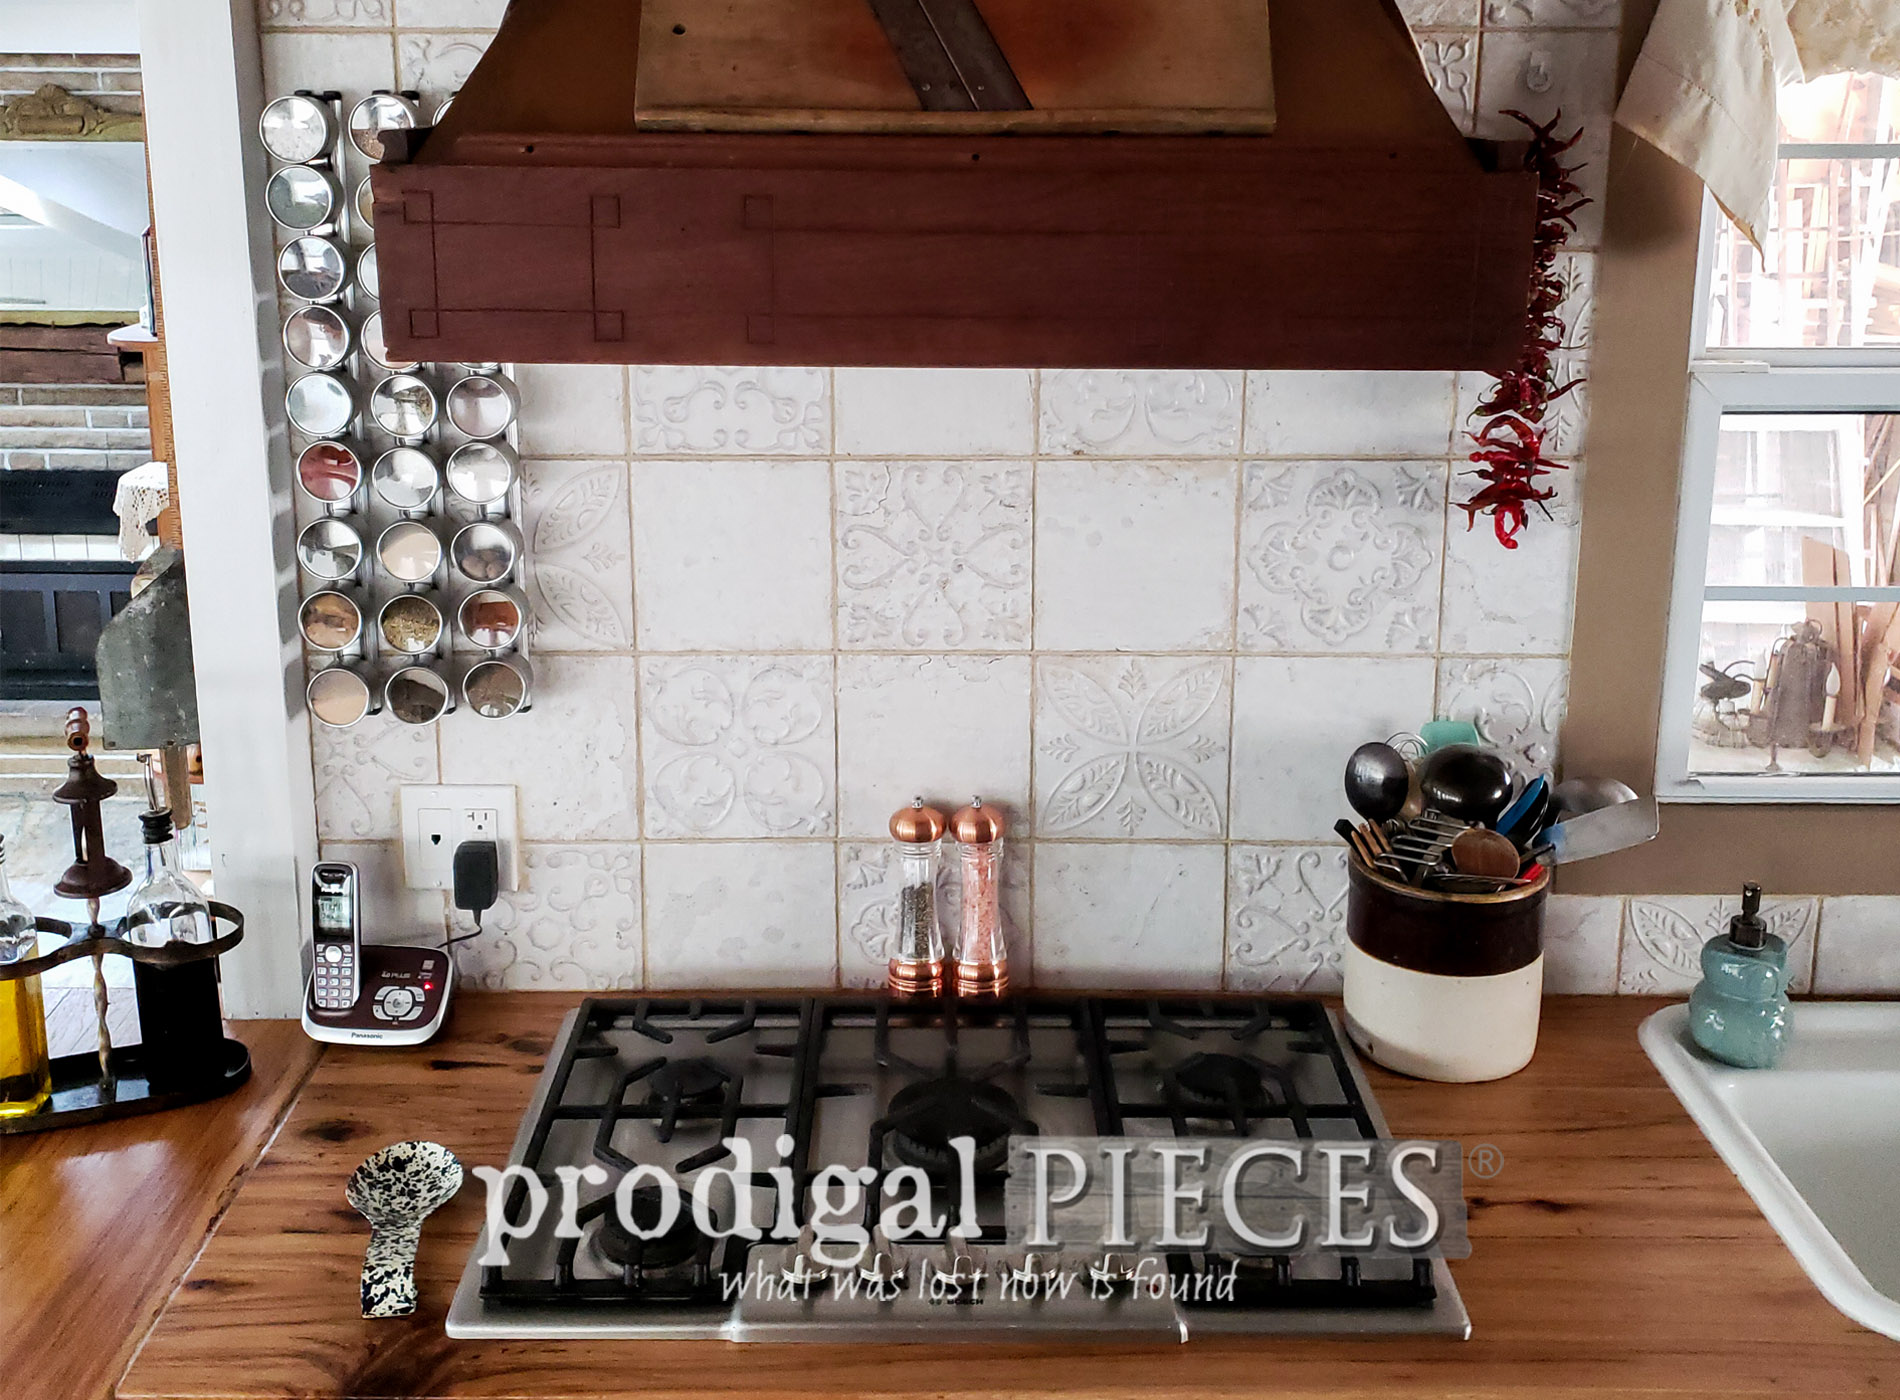
 That beautiful faucet pairs nicely with our custom range hood that I gave a faux aged finished look in copper and brown metallic paints. You can see the mandolin my grandparents used to use. I adore seeing bits of family memories around the house.


MORE FUN
Below, we built the cupboards to suit our needs. First, is a trash bin drawer that keeps my blucky junk hidden. The second drawer is a double-stacked drawer for my kitchen goodies. It makes it nice to have them easy to access.
 Last, a taller drawer is for my cookie sheets, muffin pans, cutting boards, etc. Again, one of the best decisions in our farmhouse kitchen remodel was to go with a cooktop instead of a range to give me more storage space.
 We were after and old world style look, so our choice in backsplash tile reflects that. The embossed design with an aged appeal really suits what we were after. We could have laid it out in many styles, but we like this design best.


 After I suggested getting rid of our dishwasher, you would assume JC would call me crazy. I had dreamed of a double oven and was so ready to ditch the dishwasher. Funny, as I always re-washed the dishes after the dishwasher wherever we've lived before, so this made sense. We don't miss it!
 Plus, we even have more storage for my pans and bakeware that makes it easy to access.

LAUNDRY
Around the corner from our farmhouse kitchen remodel is the laundry, as mentioned earlier. We had much work to do in there. Our efforts made such a difference to the overall function. I'm so happy to have the storage and first-floor laundry.

 Back out in the dining room, I have my repurposed lighting and chalkboard, and my dining table and chair all previously refinished (links below). We also added a built-in bench to house our homeschool books and materials. Makes for a nice spot to tuck our daily grind needs away and cozy up with a book.


 When not used for our meals, this is definitely the hub to our homeschooling day. Because of that, it was key to make this spot be cozy and functional.


WRAP-UP
That, my friends, wraps up our farmhouse kitchen remodel reveal. We truly hope you've enjoyed this trip down memory lane with us and have found yourself inspired. It means so much to us as you've followed along on our journey. Thank you for encouraging and uplifting us when we hit low points. If you take a peek below, I will have all sorts of links to our resources and posts so if you'd like more details, you can access it there. Feel free to email with questions too. We're happy to help!
Thankfully, we are already working on finishing our family room and hope to share that soon. Lord willing, there will be no major hangups like we faced in the kitchen!
If you take a peek below, I will have all sorts of links to our resources and posts so if you'd like more details, you can access it there. Feel free to email with questions too. We're happy to help!
Thankfully, we are already working on finishing our family room and hope to share that soon. Lord willing, there will be no major hangups like we faced in the kitchen!
 I invite you to pin and share our farmhouse kitchen remodel for future reference, as well as to inspire others to give DIY a try. We did this on the tightest budget and know there are many hoping to try to do similar too.
 Up next, I take this pile of thrifted fun and make it into something new. BIG surprise! haha. SEE THE AFTER HERE.
 Before you go, be sure to sign up for my newsletter. Until next time!

Links to past farmhouse kitchen remodel DIY tutorials:
- Limewashed Dining Table Tutorial
- Floor
- Repurposed Cabinets
- DIY Budget Window Treatments Tutorial
- Repurposed Shelves
- Upcycled Lighting Tutorial
- Upcycled Crate Drawers
- Storage Bin Building Plans
- Tips to Deal with Remodeling Stress (haha)
- Farmhouse Bar Stools
- Chemical-Free Oven Cleaning
- Repurposed Drawer Fronts Stand
While you're at it, here are more remodeling projects like our farmhouse kitchen remodel:

