There's no doubt that we all have those projects that go sour and we'd rather not mention. Am I right? Ya know, the "just-donate-it-to-the-thrift-store-while-in-super-sleuth-mode" kinda project. I will be the first to confess I've
given away projects I would have rather thrown in a lake. So, for some reason I felt bad for this set found at the thrift store. However, hang with me as I turn them into a fun set of farmhouse kitchen canisters. yahoo!

My first thought upon seeing them was, "Pinterest fail...bwahahaha". However, that morphed into, "Well, they tried." Me and my pitying self always loves to help the underdog, so I brought them home. I figured there are others who might want to know how to do this kinda project the right way.
DIY FAIL
Let's take a closer look. Upon inspection, I found that latex paint was used, and said person didn't feel the need to paint the inside. Likewise, that green had me curious as to what was underneath. hmmmm...

The bottoms revealed the typical, "Made in China" stamp I expected to see.

The entire set was in good shape with no cracks or chips, just a flubbed-up paint job. What to do? Take it all back to the original, for starters. My littlest wanted to help, so we dove into my utility tub and peeled off the old paint.

Here is what we found...

...not bad, eh? After seeing this I was ready to just let them be as they're pretty. However, I reminded myself that I only took these on to show you how you can update something that may not suit your style and make it your own. I wasn't feeling the ivy love, personally, but they are pretty.
DIY TIME
First, to get these looking like farmhouse kitchen canisters we need to give them a light sanding. Nothing major needed, just a scuffing. My sander made it handy to sand in all the odd spaces. You could also use a deglosser too.

Once sanded, wipe down the canisters with rubbing alcohol to remove any leftover debris and grime. I've used this same technique with a collection of cast-off glass
in this post. Simple and easy.

The next step in turning these into farmhouse kitchen canisters is priming. A favorite product of mine to use is Gripper primer for slick surfaces like this that would receive much use. You can see how I used it on a laminate hutch desk
HERE. Just brush on using a quality brush to avoid brush strokes in your finish. However, I'm not kidding when I say your first layer is as important as your last layer.

PAINT FUN
Once cured, it's time for paint. Fun! My goal in this farmhouse kitchen canisters makeover is to make them resemble old crocks with a brown top and creamy white bottom. To achieve that look, I began by painting a bleached linen color latex in eggshell on the bottom going roughly half way up. No need to be super particular, just watch the brush strokes. Work around the canister rather than vertically.

Paint the bottoms and stand the canisters upside-down to cure for about 2 hours for the time being. After your first coat has cured, add a second and let cure too.
Now that the two creamy white layers have cured, I use my painter's tape to tape off a section of the canisters approximately half-way up.

For my second color, I applied a brown in latex I custom mixed. Again, two coats letting cure each one for 2 hours. As soon as I apply the second coat, I peel off the tape.

TYPOGRAPHY
Then, to add a little more function and charm to these farmhouse kitchen canisters, I decided to add some text to each one. This is easily done by printing out your text, and rubbing the back with a No. 2 pencil.

Tape the text on with the same low-tack tape, and trace. In addition, I chose to use Flour, Sugar, Salt as my text.

Then, for the next step, I used my artist's brush and painted in the text with a black acrylic paint. Let the text cure and we're ready for the last step. Yay! For the canisters, I use this Satin Spar Urethane as a finish.

Notice I started with the bottoms up so I could do two layers with curing in between, and then finished with the tops. It's all a matter of doing the steps in the right order AND letting each step cure.
THE REVEAL
Finally, let's take a peek at the finished product, shall we? They got featured in
Country Sampler Farmhouse Style - woot!


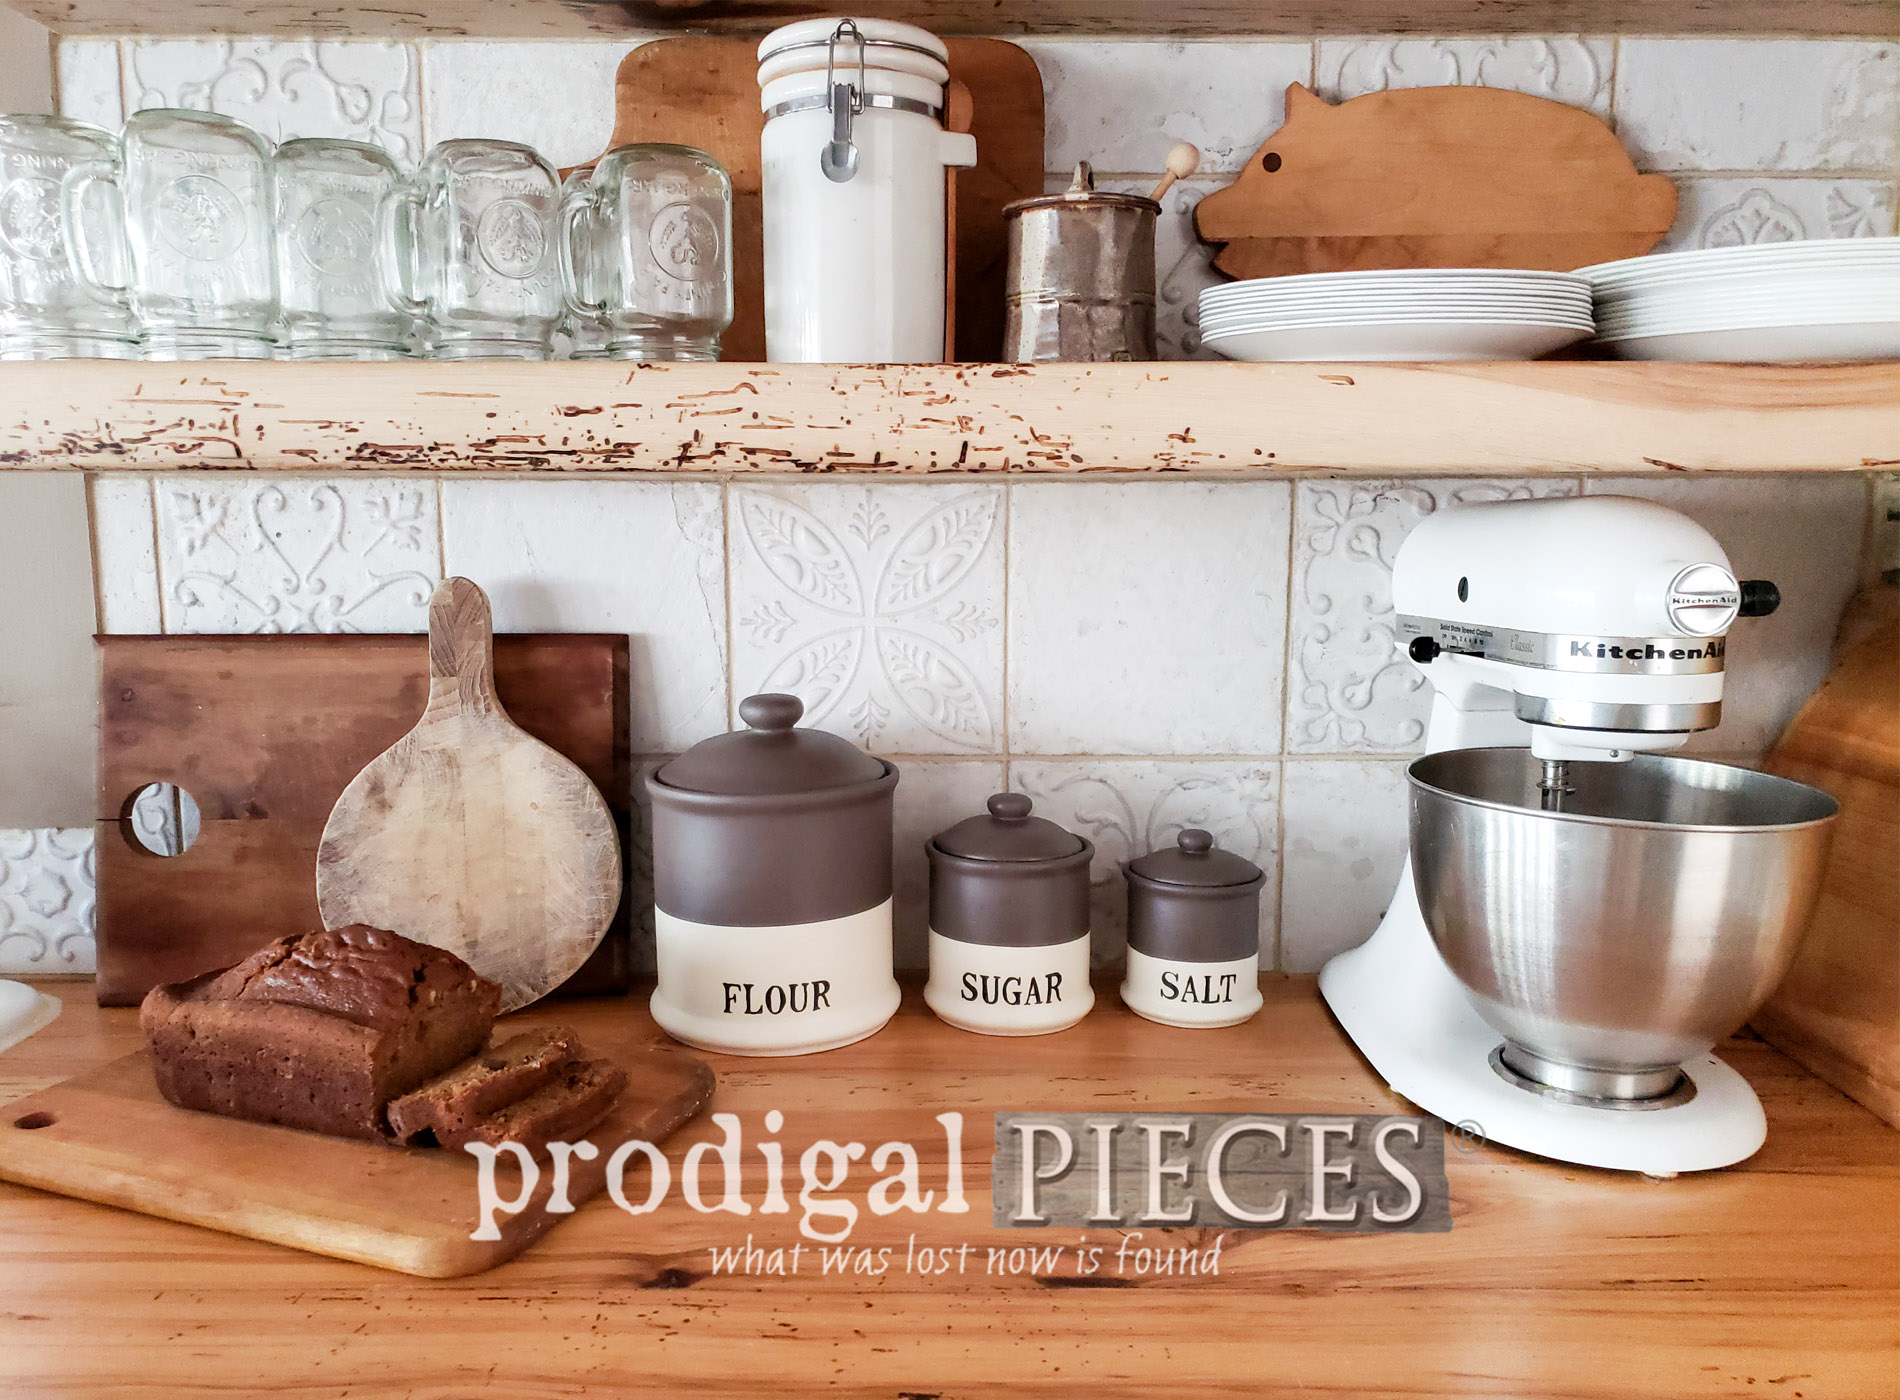
From hot mess to farmhouse fun, this thrifted set never looked so good. As a result, all these needed was the right steps to get a finished look worth admiring.


And, looky...I even painted the inside! tee hee.

Also, many thanks to my daughter for baking this pumpkin bread so I could drool over it while I staged my canisters. mmm...so good!!

Finally, I hope you've enjoyed this make-under turned makeover. In addition, the best part is you can make them to look any way YOU want. All it takes is a willing DIY spirit to make it happen.
ALL DONE
If you're not into DIY or just would love to own this set, you can find it available in
my online store.


I've had fun staging these in my kitchen.

In addition, I invite you to pin and share these farmhouse kitchen canisters made new. You just never know who may need to be inspired.

Up next, this vintage Dixie dresser is going to get a much-needed facelift.
See the after HERE.

Before you go, be sure to
sign up for my newsletter. Until next time!

 PINTEREST | EMAIL
Also, more projects like these DIY farmhouse kitchen canisters: