Sometimes while shopping, do you ever see something and say, "I have to have it." You may not need it, but you know it shouldn't be left behind because it has potential. If you know me then you know this is my life story. ahem. Earlier this week in our Trash to Treasure Tuesday, I said I would be tackling this thrift store cupboard and today's the day. I'd like to show you what I saw when I spied it in the store, and watch how it becomes a farmhouse cupboard. Thrifted Glass Cupboard Before Makeover by Prodigal Pieces | prodigalpieces.com At first glance I thought it was a basic wall cupboard. However, upon closer inspection, I found that it had once been some sort of add-on to other cabinets. It has beads in the shelves for displaying plates, even on top. Inside Thrifted Cupboard for Farmhouse Makeover | Prodigal Pieces | prodigalpieces.com What puzzled me the most was how in the world did they mount this thing to the wall? It had nails going every which way through the frame and out the back. A couple of screws still poked here and there. You typically want to have a cupboard like this sitting flush to the wall with hidden hardware. Hmm...I see a hot mess that needs fixed, don't you? Back of Thrifted Cupboard for Makeover | Prodigal Pieces | prodigalpieces.com

DIY TIME

First order of business is take off that back panel and create a wall cleat. What's that you say?? It's basically like two puzzle pieces that interlock to create a hidden way of hanging large items or even can be used in workshops, craft rooms, etc. Let me show you... First, you cut two lengths that would have a corresponding angle like this. One to fit inside the back of your project. (aka. hidden part), and one for your wall. We used our table saw to run two pieces through. Cutting Wall Cleat for Farmhouse Cupboard | Prodigal Pieces | prodigalpieces.com This is what they look like on the ends. They slip into one another as one is attaches to the wall. The other attaches to the item you are wishing to hang. Make sense? DIY Wall Cleat Diagram by Prodigal Pieces | prodigalpieces.com

NEW TOY

So, after I got my cabinet prepped with a whole lotta wood filler to hide all those holes, I added the cleat with my new toy. Meet Ms. AirStrike (she says as she giggles with glee). Ryobi AirStrike Nailer | Prodigal Pieces | prodigalpieces.com What you see here is an over-the-moon-happy lady. What you don't see is a ginormous compressor, a naughty hose, or any other get-in-my-way stuff to use a nailer. eep! Using the Ryobi AirStrike | Prodigal Pieces | prodigalpieces.com Best part is that I now have two nailers. One for in my workshop (which I still love because it's a stapler too) and one for wherever I want to get naily with it!  :lol: (ya gotta love my outfit, right? just keepin' it real, y'all) And...the batteries are interchangeable with my circular saw and my jigsaw with only one charger needed. Win-Win! Okay, so after I added the cleat, I begin to paint. Farmhouse Cupboard | Prodigal Pieces | prodigalpieces.com

LAST STEP

Once everything has cured, I mount my wall cleat. I use a level and attach it with my drill and screws. Likewise, notice I have it angled toward the wall. Mounting Wall Cleat for Farmhouse Cupboard | Prodigal Pieces | prodigalpieces.com Next, I simply slip the farmhouse cupboard on the wall cleat. Nice and snug. How to Hang a Cupboard using a Wall Cleat by Prodigal Pieces | prodigalpieces.com Side View of Farmhouse Cupboard with Wall Cleat Added | Prodigal Pieces | prodigalpieces.com

REVEAL TIME

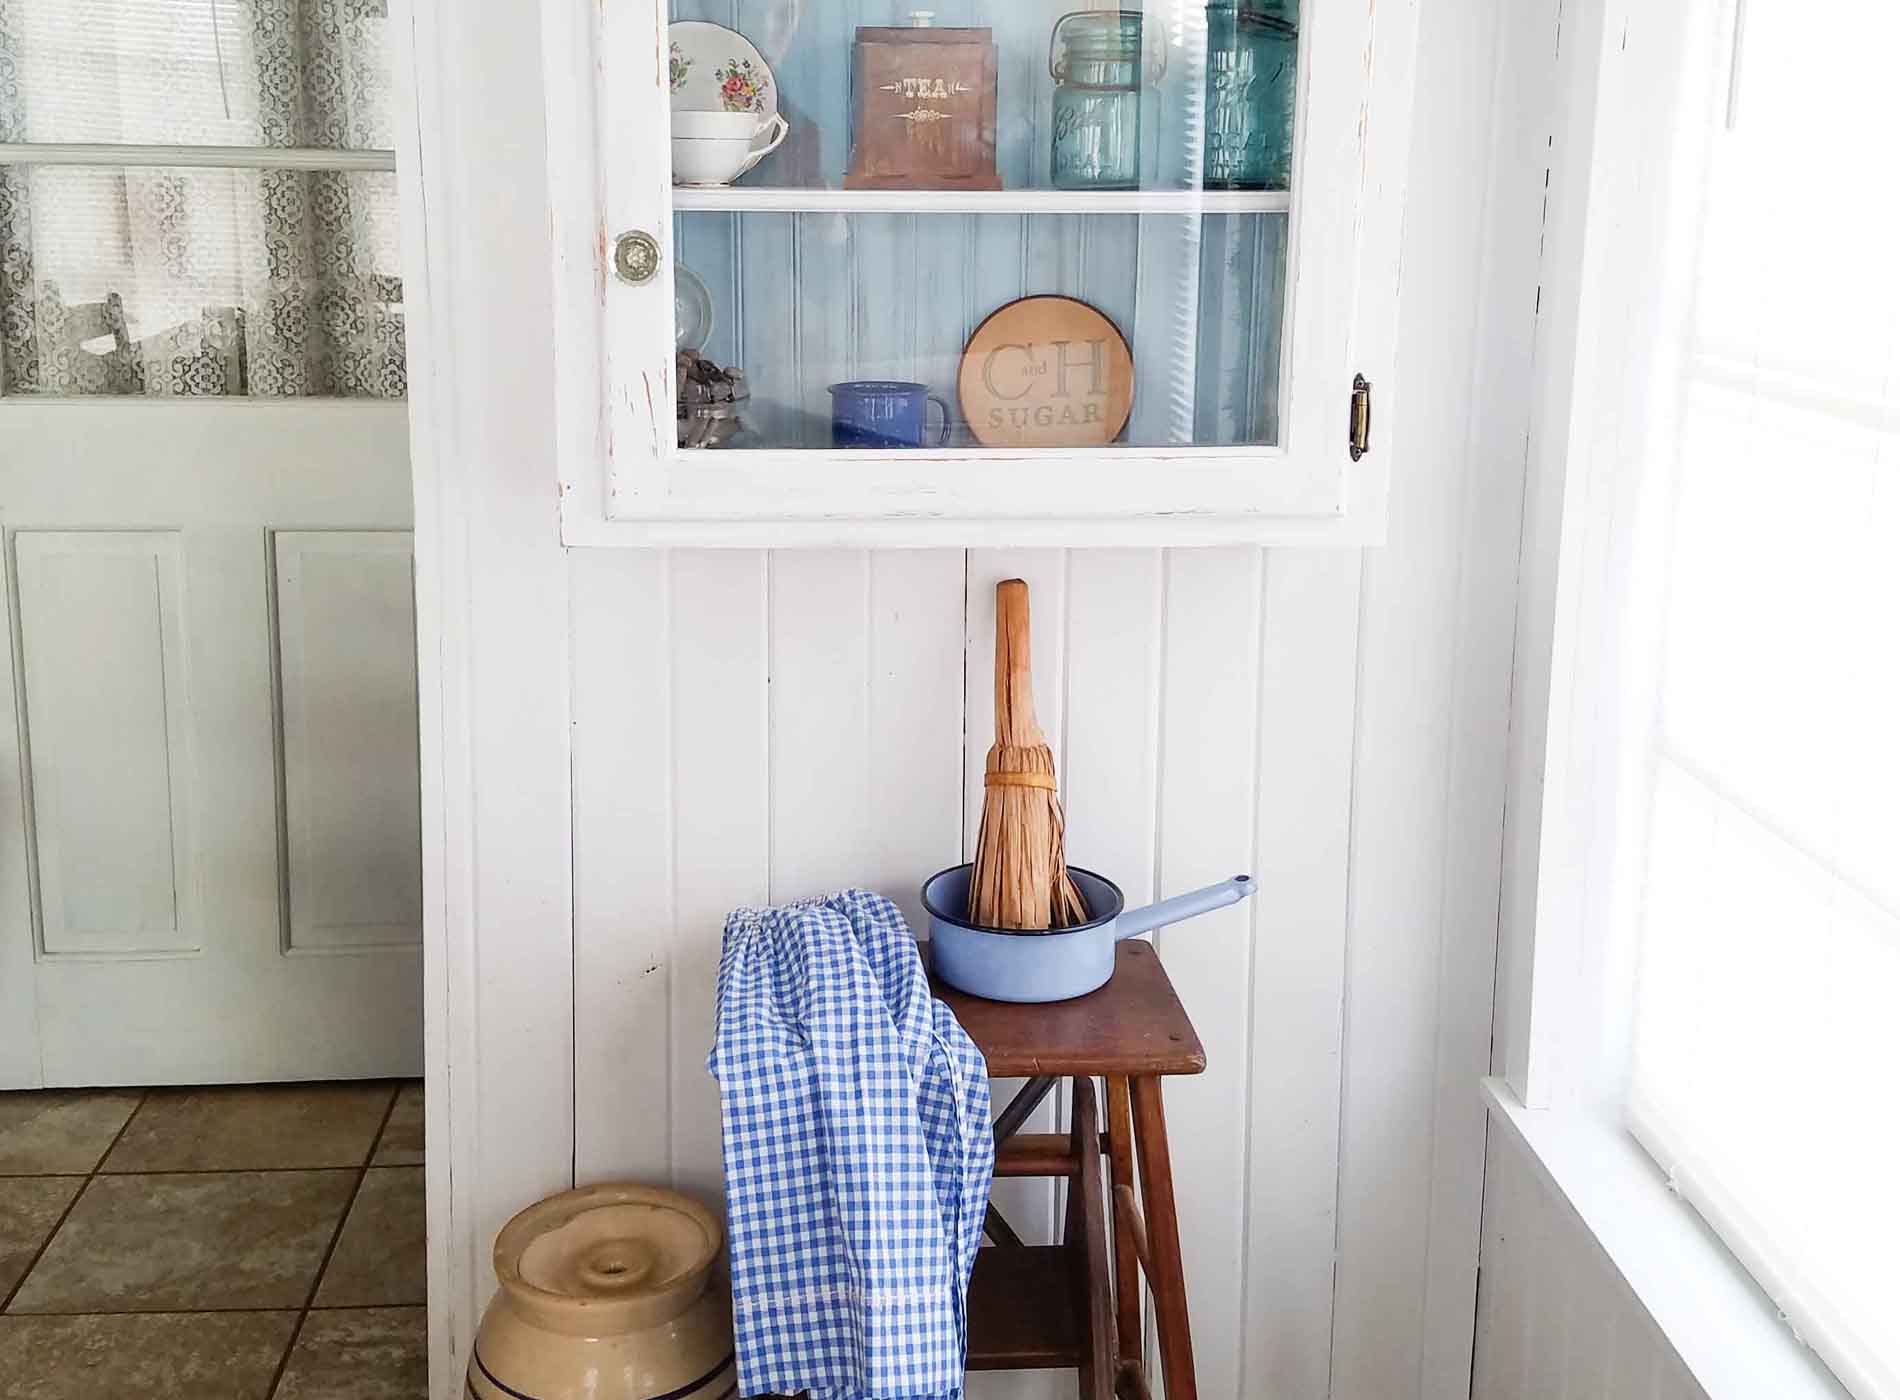
Finally, let's take a peek at how it looks from the front, shall we? Rustic Farmhouse Cupboard Makeover by Prodigal Pieces | www.prodigalpieces.com Since I removed the original hardware to paint, I decided to leave it off and replace it with one of my leftover glass knobs from my vanity makeover ( a must see). They are so gorgeous! Glass Knob by Rustic Brands on Farmhouse Cupboard by Prodigal Pieces | prodigalpieces.com Also, because I removed the backing, I decided to replace it with beadboard for a rustic effect. My nailer made attaching it a breeze. Farmhouse Cupboard Updated with Bead Board and Hardware | Prodigal Pieces | prodigalpieces.com Farmhouse Kitchen Vignette in Cupboard by Prodigal Pieces | prodigalpieces.com As you can see, there is an intentional gap to be able to fit the cleat into the cupboard. However, no worries as no one will notice. Ideally, if we were building the cupboard from scratch, you would make it deep enough to have the backing in front of the cleat so none would be visible. Since I retrofitted this, we make do. Close-Up of Wall Cleat for Cupboard | Prodigal Pieces | prodigalpieces.com Do you love it too? This farmhouse cupboard is now available in my online store.

Shop Prodigal Pieces | shop.prodigalpieces.com prodigalpieces

Vintage Farmhouse Cupboard with Simple Vignette by Prodigal Pieces | prodigalpieces.com

SHARE

Additionally, I had a blast sharing with you how to update and improve your thrifted finds. Farmhouse Cupboard Makeover with Tutorial on Adding a Wall Cleat by Prodigal Pieces | prodigalpieces.com Next up, I will have a fun project involving this side table my parents gave me. There's a little hilarity here, so be sure to come see it HERE. Side Table Before Vintage Chic Makeover by Prodigal Pieces | prodigalpieces.com To get these DIY tips & tricks in your inbox, be sure to sign up for my newsletter. Until next time! blog signature

let's get socialPINTEREST | EMAIL

Also, more projects like my farmhouse cupboard:

Rustic Red Farmhouse Dresser Makeover by Prodigal Pieces | www.prodigalpieces.comFarmhouse Style Repurposed Bread Box turned Charging Station by Prodigal Pieces | prodigalpieces.com


Cheryl

Shared publicly - 2016-12-15 07:52:28

What a transformation, I love it!

Patti

Shared publicly - 2016-12-15 09:42:59

Hi Larissa....Thank you for another wonderful tutorial!! Beautiful makeover!!! I know it takes a lot of time to post blogs and I thank you for sharing your talents and your family with all of us throughout this year <3 I want to wish you and your family a very blessed Christmas and New Year to come!!!

Sherry Stuifbergen

Shared publicly - 2016-12-15 10:49:33

I like it in your "entry", hanging on YOUR wall. You styled it nice. I love looking at your styling "stuff." Seeing your stuff, gives me inspiration to style MY stuff better. What a talented lady you are! Not a dull moment in YOUR house! You have the same 24 hours I do...what am I doing wrong? Love your blog.

Patty

Shared publicly - 2016-12-15 11:34:31

Love, love, love it

Larissa

Shared publicly - 2016-12-15 11:40:56

How awesome to hear, Cheryl. Thank you!

Larissa

Shared publicly - 2016-12-15 11:53:05

That makes my heart happy, Patti, as yes, much work and hoping to encourage others to try and visualize to make their house their home on a budget. Thanks so much! Merry Christmas!

Larissa

Shared publicly - 2016-12-15 11:54:07

If only I could keep it! I have nowhere to hang it and in the current spot I couldn't get past it at my dining table, plus we have our chalkboard there for homeschool normally. Ah well. thanks for the love!

Larissa

Shared publicly - 2016-12-15 11:58:22

Makes my heart happy! Thank you, Patty. Merry Christmas!

Ann

Shared publicly - 2016-12-15 13:01:34

Great Job Larisa I Have a question for you have dried orange slices for craft projects??? Ann

Kari

Shared publicly - 2016-12-15 22:43:00

Well it's official Larissa I know what I am gonna ask Santa for this yr....an all inclusive month of you n your talented family n tools to come stay at my farm n work your magic on my stash! N bring this cupboard it is exactly what my kitchen needs!

Larissa

Shared publicly - 2016-12-16 05:18:33

Thanks, Ann. Yes, I have in the past.

Larissa

Shared publicly - 2016-12-16 06:20:25

Ha! You are a gal after my own heart. We would have a blast!

Marie from The Interior Frugalista

Shared publicly - 2016-12-16 10:32:56

What a difference Larissa - love the soft blue inside too. Pinned to share :)

Kimberly

Shared publicly - 2016-12-16 11:57:54

Wonderful inspiration for taking "blah" and making it "ahh". I like to use a homemade French cleat also to hang anything heavy. They can be pricey but so easy to make yourself.

Mary-the boondocks blog

Shared publicly - 2016-12-16 13:12:03

That was so clever Larissa. It looks like it snapped into place just like that. And it is so pretty now to place all of your lovelies inside.

gwen

Shared publicly - 2016-12-16 20:19:37

love this, especially the blue-ish beadboard on the back! i used a cleat to hang the back of a church pew as a headboard. they're great for heavy objects!

Larissa

Shared publicly - 2016-12-17 05:24:53

It was fun to update and improve. Thanks, Marie!

Larissa

Shared publicly - 2016-12-17 05:25:26

Love it! Those wall cleats have endless uses. I want to implement them in my workshop.

Larissa

Shared publicly - 2016-12-17 05:25:56

Love when things are simple fixes. I wish life was like that! :D Thanks for stopping by, Mary.

Larissa

Shared publicly - 2016-12-17 05:26:54

That has to be one sweet headboard. I don't even have one, so headboard envy here!

Brooke Poole

Shared publicly - 2017-01-05 22:25:51

Larissa.....omg this is a very creative blog. I've been dying for an hutch to go in my dining room, but honestly my dining room is too small...something I've been denying to anyone that would listen! I could add a display cabinet so much easier!!! I need storage and a display for my teapots that are sitting in the attic waiting to be broken w my heart BC they were my great grandmothers. I will be brainstorming for a corner cabinet like you have perfected. Thanks for the idea...wisk me luck! Sincerely

Larissa

Shared publicly - 2017-01-06 18:34:15

That just made my day, Brooke! You just confirmed why I do what I do. I am so excited for you!

Sign Up To Comment