It's not only fun to do trashure work myself (
one man's trash is another one's treasure), but the best part is having a bunch of friends who love to do the same! Welcome to
Trash to Treasure Tuesday where the second Tuesday of each month my blogger friends and I get together to bring you some junkin' goodness. My project today is to show you how I took some repurposed materials and made them into a DIY winter urn. You'll see my friend's projects in a bit.

What I was after was creating something that would last past Christmas and keep my home decorated for winter. I'm all for less work and more fun, so in order to do that I had to go faux. My mind was set on making use of all of the cast-off Christmas trees available this time of year. When I headed to the thrift store, I was so stoked to finda 4' mini one for a few bucks. Not only that, but I found those two foam blocks too. Perfect!
DIY TIME
Confession time...I have had sick kiddos and was not in my right brain, so I forgot to take pictures of the chopping the Christmas tree up part. It was bitter cold outside, so my daughter and I worked fast. But, we basically took the tree and a hacksaw and cut it in half. Since my urns already had a center post built in, I just poked the foam onto the supports and stuck the tree parts in.
I didn't want any waste, so I yanked out the other branches from the unusable base of the tree and stuck them in and around the trees. I even used my jigsaw to get those babies off. whew!

Once I had the trees in place and filled in, then it was just a matter of grabbing some natural elements from around my yard. In goes the some twigs and a few pine cones.

Plus, I added some faux ice covered branches I found at the craft store last year. No glue, just stick them in. I plan to reuse this each year, so less fuss is better.
THE REVEAL
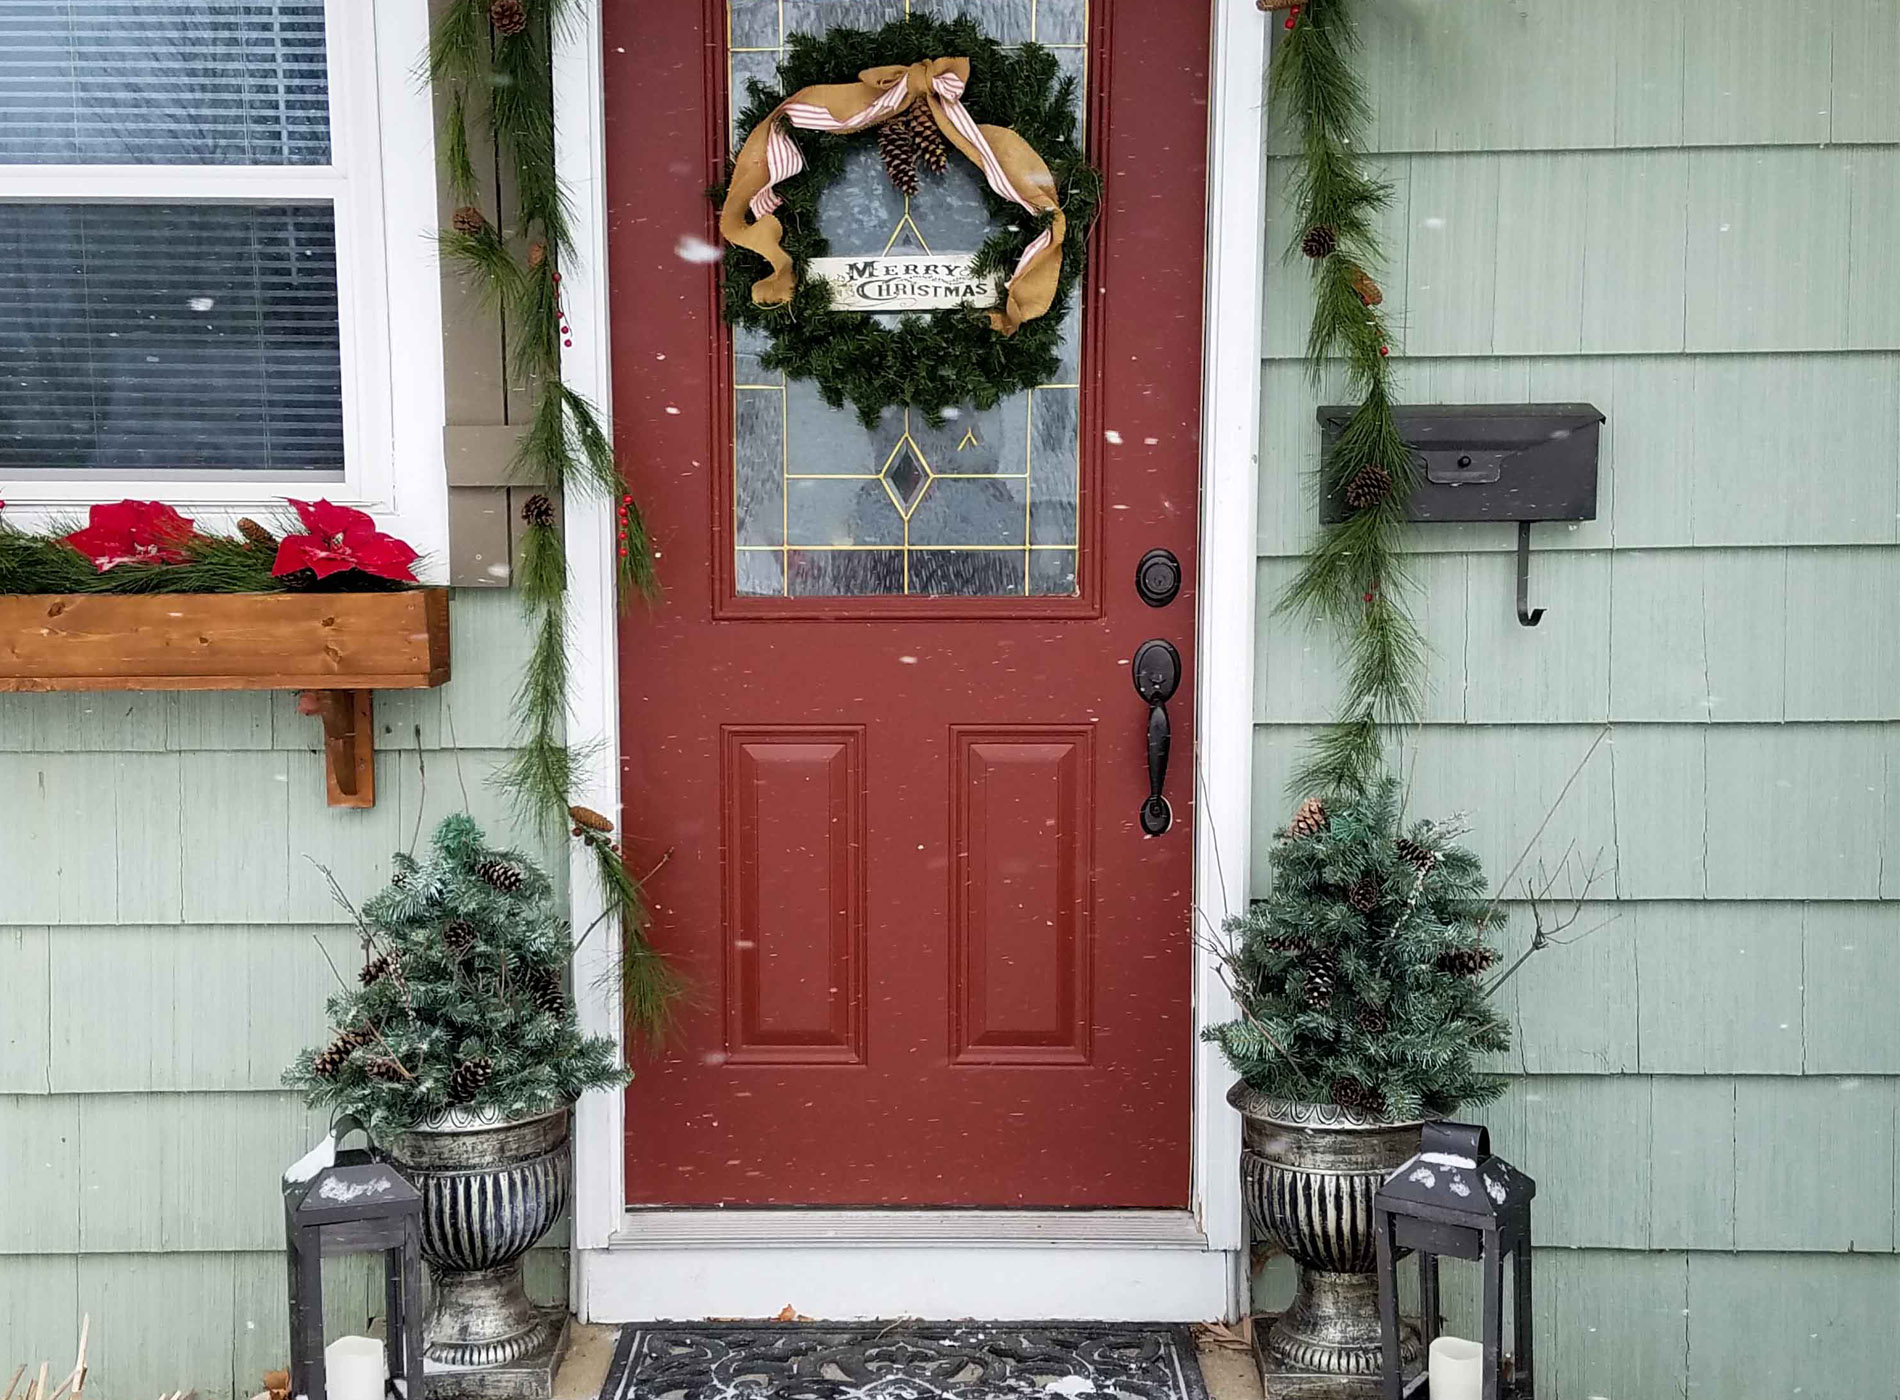
Now I'm all set with my DIY winter urn display for Christmas and thereafter.


They go great with my holiday front door, and could even stand some extra greens and holly stuck in from my flower beds. I might wait to do that next year. I got the garland on after Christmas clearance last year for the door. My flower boxes are filled with cheapie garland and faux poinsettias. It works and make the house have life.

The wreath was a thrifted score as well. I just added some burlap and ticking ribbon from my scrap stash, and hand-painted a piece of barn wood scrap with Merry Christmas.

SNOWY GOODNESS
If you're loving those lanterns, you can get the tutorial how to make them yourself, all from one board,
HERE. I even added a wreath to our stone that my mom had given me a few years ago.It was a blank slate so I added foam balls covered in thrifted sweaters. I was brave enough to hang it outside this year. So far so good!

Our front garden fence even got some thrifted wreaths I tore apart and added a bow. Love having a split rail fence to grow our goodies on, but it can be boring looking in the winter. This adds fun!

Well, I hope you've enjoyed seeing some repurposed goodness happening to up my curb appeal game. All this cost me less than $50 and will give me years of decoration fun.


My hope is that you come away feeling inspired to give decor a try and make some winter goodness happen. I know I'm in love with my new DIY winter urn decor. From my family to yours, I wish you the merriest Christmas ever. Please excuse me while I go make some snow angels. ahem.

SHARE
Please pin and share to inspire others to make their house their home.

Later on this week, I plan to show you how this thrift store cabinet gets a new lease on life. Stay tuned by signing up for my newsletter in the sidebar or at the bottom of this post.
See it now HERE.

Now, pop on down to see what my blogger friends have for you.


- Bless'er House
- Artsy Chicks Rule
- Confessions of a Serial DIYer
- Girl in the Garage
1. To get these DIY tips & tricks in your inbox, be sure to
sign up for my newsletter. PLUS, you will get your FREE Furniture Buying Checklist and special discount to
my shop. Until next time!

 MEWE | PINTEREST | GAB
Also, more projects like this DIY winter urn:


 What I was after was creating something that would last past Christmas and keep my home decorated for winter. I'm all for less work and more fun, so in order to do that I had to go faux. My mind was set on making use of all of the cast-off Christmas trees available this time of year. When I headed to the thrift store, I was so stoked to finda 4' mini one for a few bucks. Not only that, but I found those two foam blocks too. Perfect!
 Once I had the trees in place and filled in, then it was just a matter of grabbing some natural elements from around my yard. In goes the some twigs and a few pine cones.
 Plus, I added some faux ice covered branches I found at the craft store last year. No glue, just stick them in. I plan to reuse this each year, so less fuss is better.

 They go great with my holiday front door, and could even stand some extra greens and holly stuck in from my flower beds. I might wait to do that next year. I got the garland on after Christmas clearance last year for the door. My flower boxes are filled with cheapie garland and faux poinsettias. It works and make the house have life.
 The wreath was a thrifted score as well. I just added some burlap and ticking ribbon from my scrap stash, and hand-painted a piece of barn wood scrap with Merry Christmas.

 Our front garden fence even got some thrifted wreaths I tore apart and added a bow. Love having a split rail fence to grow our goodies on, but it can be boring looking in the winter. This adds fun!
 Well, I hope you've enjoyed seeing some repurposed goodness happening to up my curb appeal game. All this cost me less than $50 and will give me years of decoration fun.

 My hope is that you come away feeling inspired to give decor a try and make some winter goodness happen. I know I'm in love with my new DIY winter urn decor. From my family to yours, I wish you the merriest Christmas ever. Please excuse me while I go make some snow angels. ahem.

 Later on this week, I plan to show you how this thrift store cabinet gets a new lease on life. Stay tuned by signing up for my newsletter in the sidebar or at the bottom of this post. See it now HERE.
 Now, pop on down to see what my blogger friends have for you.

 1. To get these DIY tips & tricks in your inbox, be sure to sign up for my newsletter. PLUS, you will get your FREE Furniture Buying Checklist and special discount to my shop. Until next time!


