
DIY TIME
For this ringing good time you'll need a few supplies. I first shop thrift stores, but I couldn't find enough of the weighted plastic I needed. So, don't hesitate to try there first or even raid your cupboards. Also, keep in mind you can do any finish you want...gold, brass, white, red, green...you get the idea.
*post sponsored by HomeRight & Wagner (see full disclosure for details)
Tools & Supplies:
- HomeRight Quick Finish Sprayer
- Wagner Small Spray Shelter
- Turn Table (optional, but so handy)
- scissors
- hot glue gun/ glue sticks
- drill/drill bit
- plastic cups or pots, or...whatever floats your boat (bowls optional if you want a rounded look)
- jute twine
- jute rope
- rusty bells or wooden beads
- dark gray paint in matte or flat finish
- paint brush
- white wax, white paint or white glazing
- gray wax
STEP 1
If you look at the picture of the loot I grabbed above, you'll see a handful of heavy plastic cups (I aimed for more mixed sizes, but they only had one of the smaller cups), a stack of small bowls, and jute rope. I already had the twine, bells, and paint supplies at home. You can use any kind of cup or flowerpot, etc to make your bells. I always find it a fun challenge to peruse the aisles of stores (thrift stores included) for something that sparks my imagination. I chose to use cups and bowls combined. First, I use my hot glue to attach the bowls to the bottom of the cups.
 They're looking kinda bell-ish, don't you think?
STEP 2
Next, using a drill and drill bit large enough to allow your rope to fit through, drill a hole through the bowl and the cup. Work slow so you don't crack your creation.
STEP 3
Time for some spray fun! In addition to the spray shelter, I also use my turn table and my sprayer. I fill the sprayer with the dark gray paint. However, you may need to thin the paint with a bit of water per manufacturer instructions. I chose to use Kensington Gray in RustOleum Milk Paint. However, you can use any gray you want, just be sure it's a matte or flat paint. You can also see my other zinc tutorials for furniture and outdoor home decor in these past posts.
 As for using the sprayer, give it a few practice spray passes on a piece of cardboard or scrap wood to get the flow right. Then, hold the sprayer approximately 12" from your cups. Head HERE to see the sprayer in action on a past makeover. Let cure and apply a second coat. Last of our painting stent, we need to clean up.

STEP 4
Finally, we can finish our DIY Zinc Bells. Grab your waxes, ropes, and bells. First, we need to feed the rope into the bell. Don't cut a length just yet but leave it on the roll. Tape the end and fish a thin wire through the rope so it can help you get the rope through the bowl and cup.
STEP 5
Next, knot the rope at the end. After that, figure out a length of twine doubled over to be the length of the cup (or longer if you want it to hang out). Tie a knot a the end and use a hang-tag type tie to hang it on the knot. Then, pull the rope up into the cup. Last, make a cut in the rope to make a hanger. Hot glue the end down.
 Also, hot glue around the rope ends where they meet at the bowl on the cup. Tuck in ends.

STEP 6
Last, but not least, we are going to create texture and dimension with waxes. I first use the white wax to make the design pop and age the faux zinc look we created. Likewise, totally optional, but also fun, I use a bit of gray to create shadows.
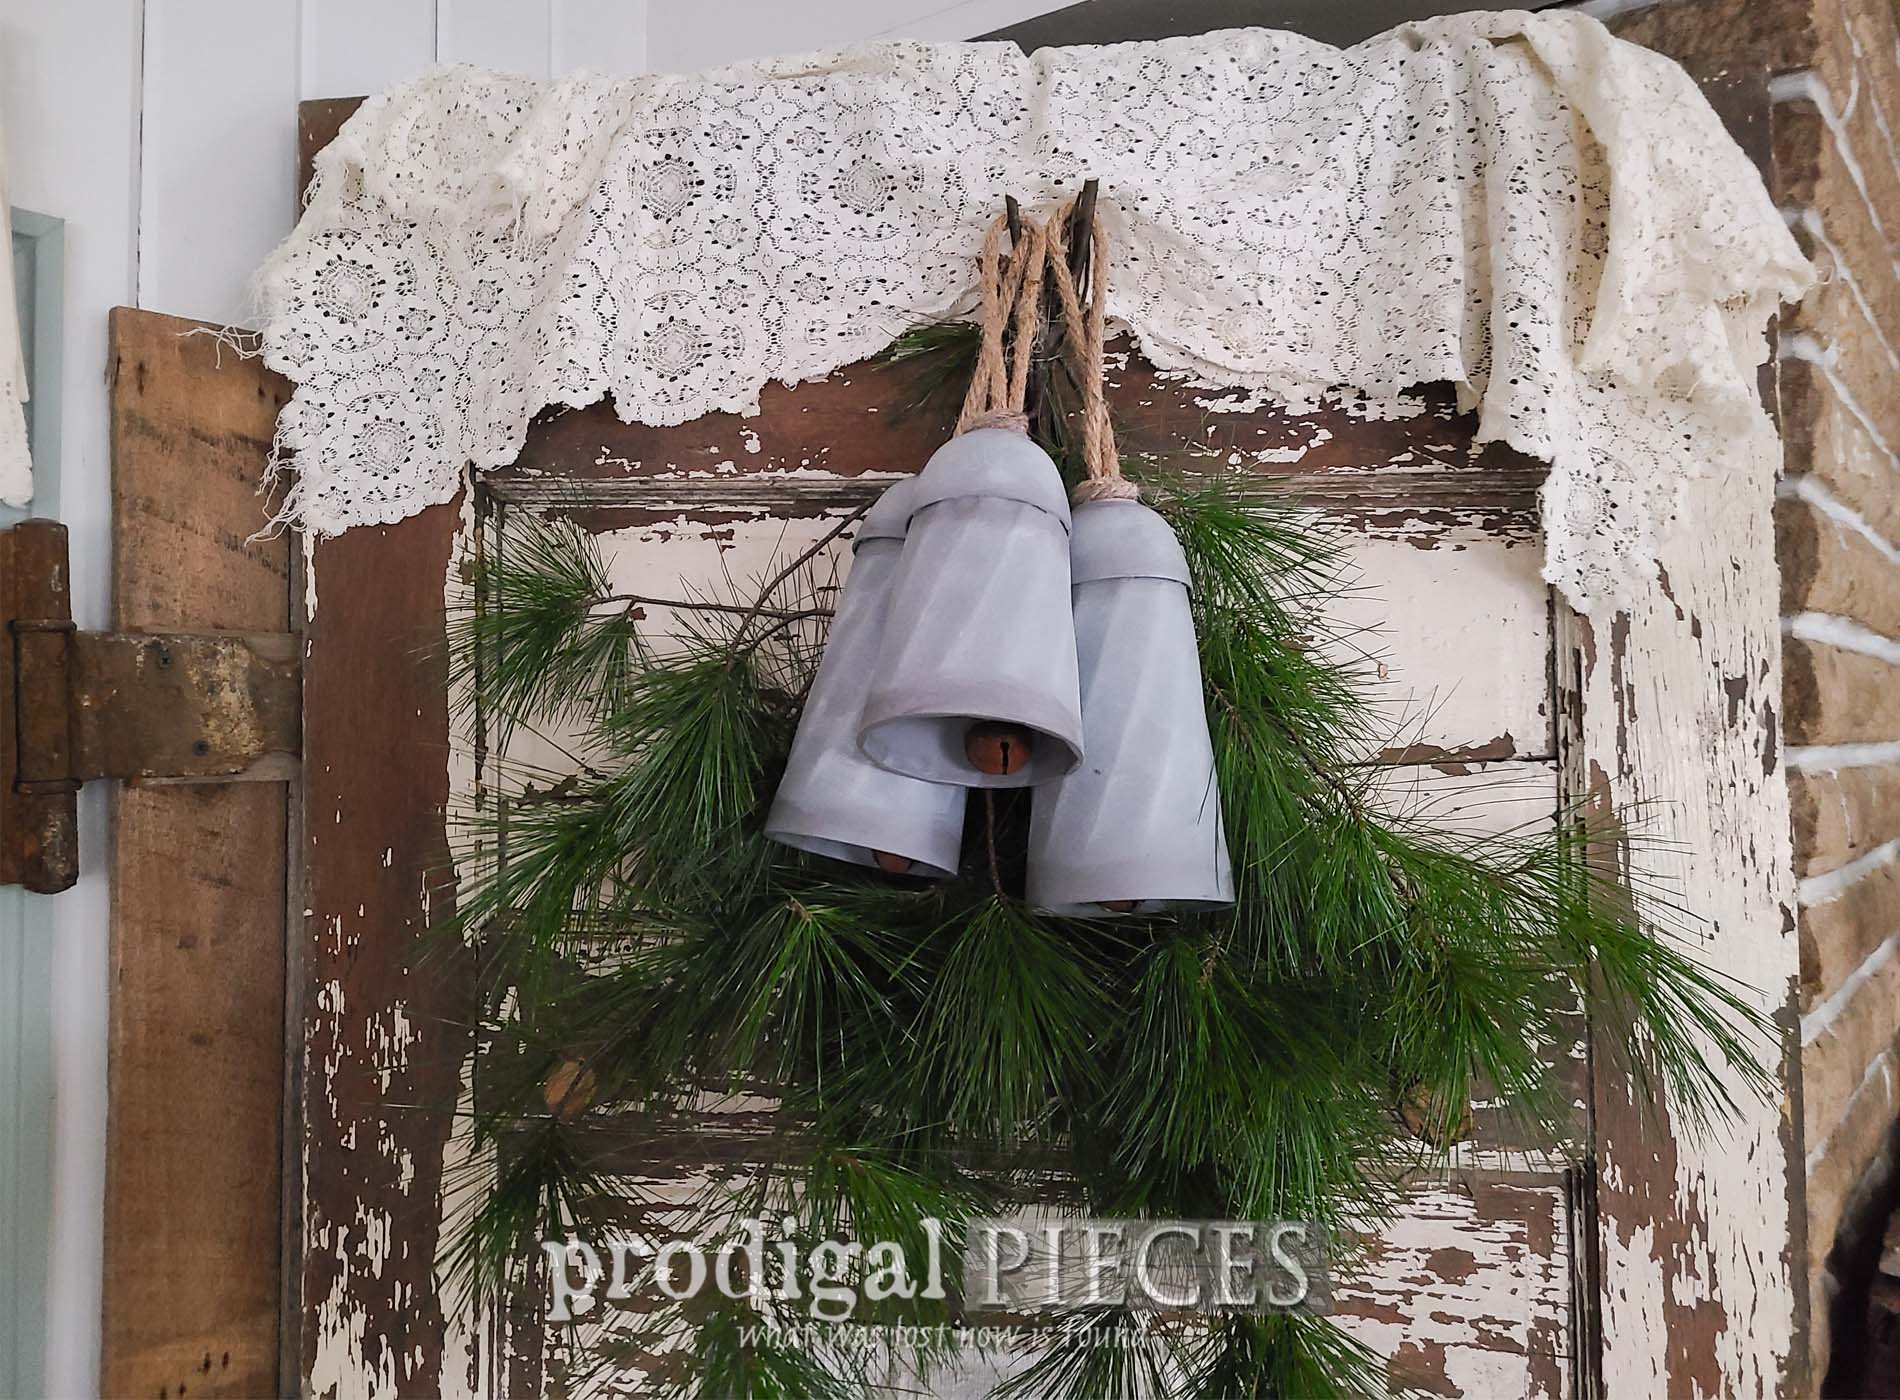
THE REVEAL
My ding-dong DIYing fun is now complete. Yeah, baby!
 Not only are they fun to see, but they even actually do ring because of the rusty bells inside. So fun!

 While I have them hanging with some trimmed greens here, they can also be used in any spot in your home holiday decor. Where would you use some?
 In the meantime, if you'd like to make a set part of your home story, you can find them for a limited time in my online store.


 In addition, do pin and share my DIY zinc bells tutorial so that others can have crafty fun too!
 To get these DIY tips & tricks in your inbox, be sure to sign up for my newsletter. Until next time!

Also, more fun holiday decor like my DIY zinc bells:

