 This is the kinda thing that I just love to have on hand in my stash for when inspiration hits.
 In times past I've used turnings like that to make my woolly sheep. In addition, I've created repurposed candlesticks. To be honest, I set them aside for a day or two on my bench. Finally, one day I sat down beside them and saw carrots. haha. Yep, I'm weird like that. I have two different sizes of the same style leg. One was a basic wood one, and the other had a metal cap.
DIY TIME
Let's get this DIY rustic carrot party started! First, I had to remove those metal feet caps. That just required a little elbow grease to get that foot nail out and pop off the cap.
*post sponsored by HomeRight (see full disclosure)
Then, with the cap off I'm able to take my sander and knock down that edge from the leg cap. I also remove all of the finish to get a fresh slate. After I wipe them down it's time for paint. woot!
PAINT TIME
I can't say enough how the right tools make my job so much easier. Check out some of my favorites. First, I have my spray shelter set up. In addition, I've got my turn table, and also my sprayer ready to go. I've filled my sprayer with a custom mixed orange color and attached my blue tip. With that in mind, the sprayer comes with 3 tips that allow you to switch from one medium to the next depending on your job at hand. See my past projects using it as well as my video demo below.
 Because I wanted the legs to stay upright while spraying, I used a piece of scrap wood temporarily. Thankfully, they are painted in a matter of minutes. Clean-up is easy and also done in a flash, which allows me to put on another coat in an hour or so.

NEXT STEPS
Time to add my vegetation to my carrots. If you've ever grown them in your garden, you know that carrot tops are leggy. I wanted to recreate that feel with a natural element, so I used green raffia and my glue gun. First, cut 6 strips of raffia about 7" long. Then, bind one end with the floral tape. Last, put a bead of glue in the end and tuck in the raffia. One last bit of effect I added was a touch of gray wax. Viola!

SPRING FUN
Finally, I hope you can tell that I had a blast creating this vignette. Take note that everything here is handmade, second-hand, or found.
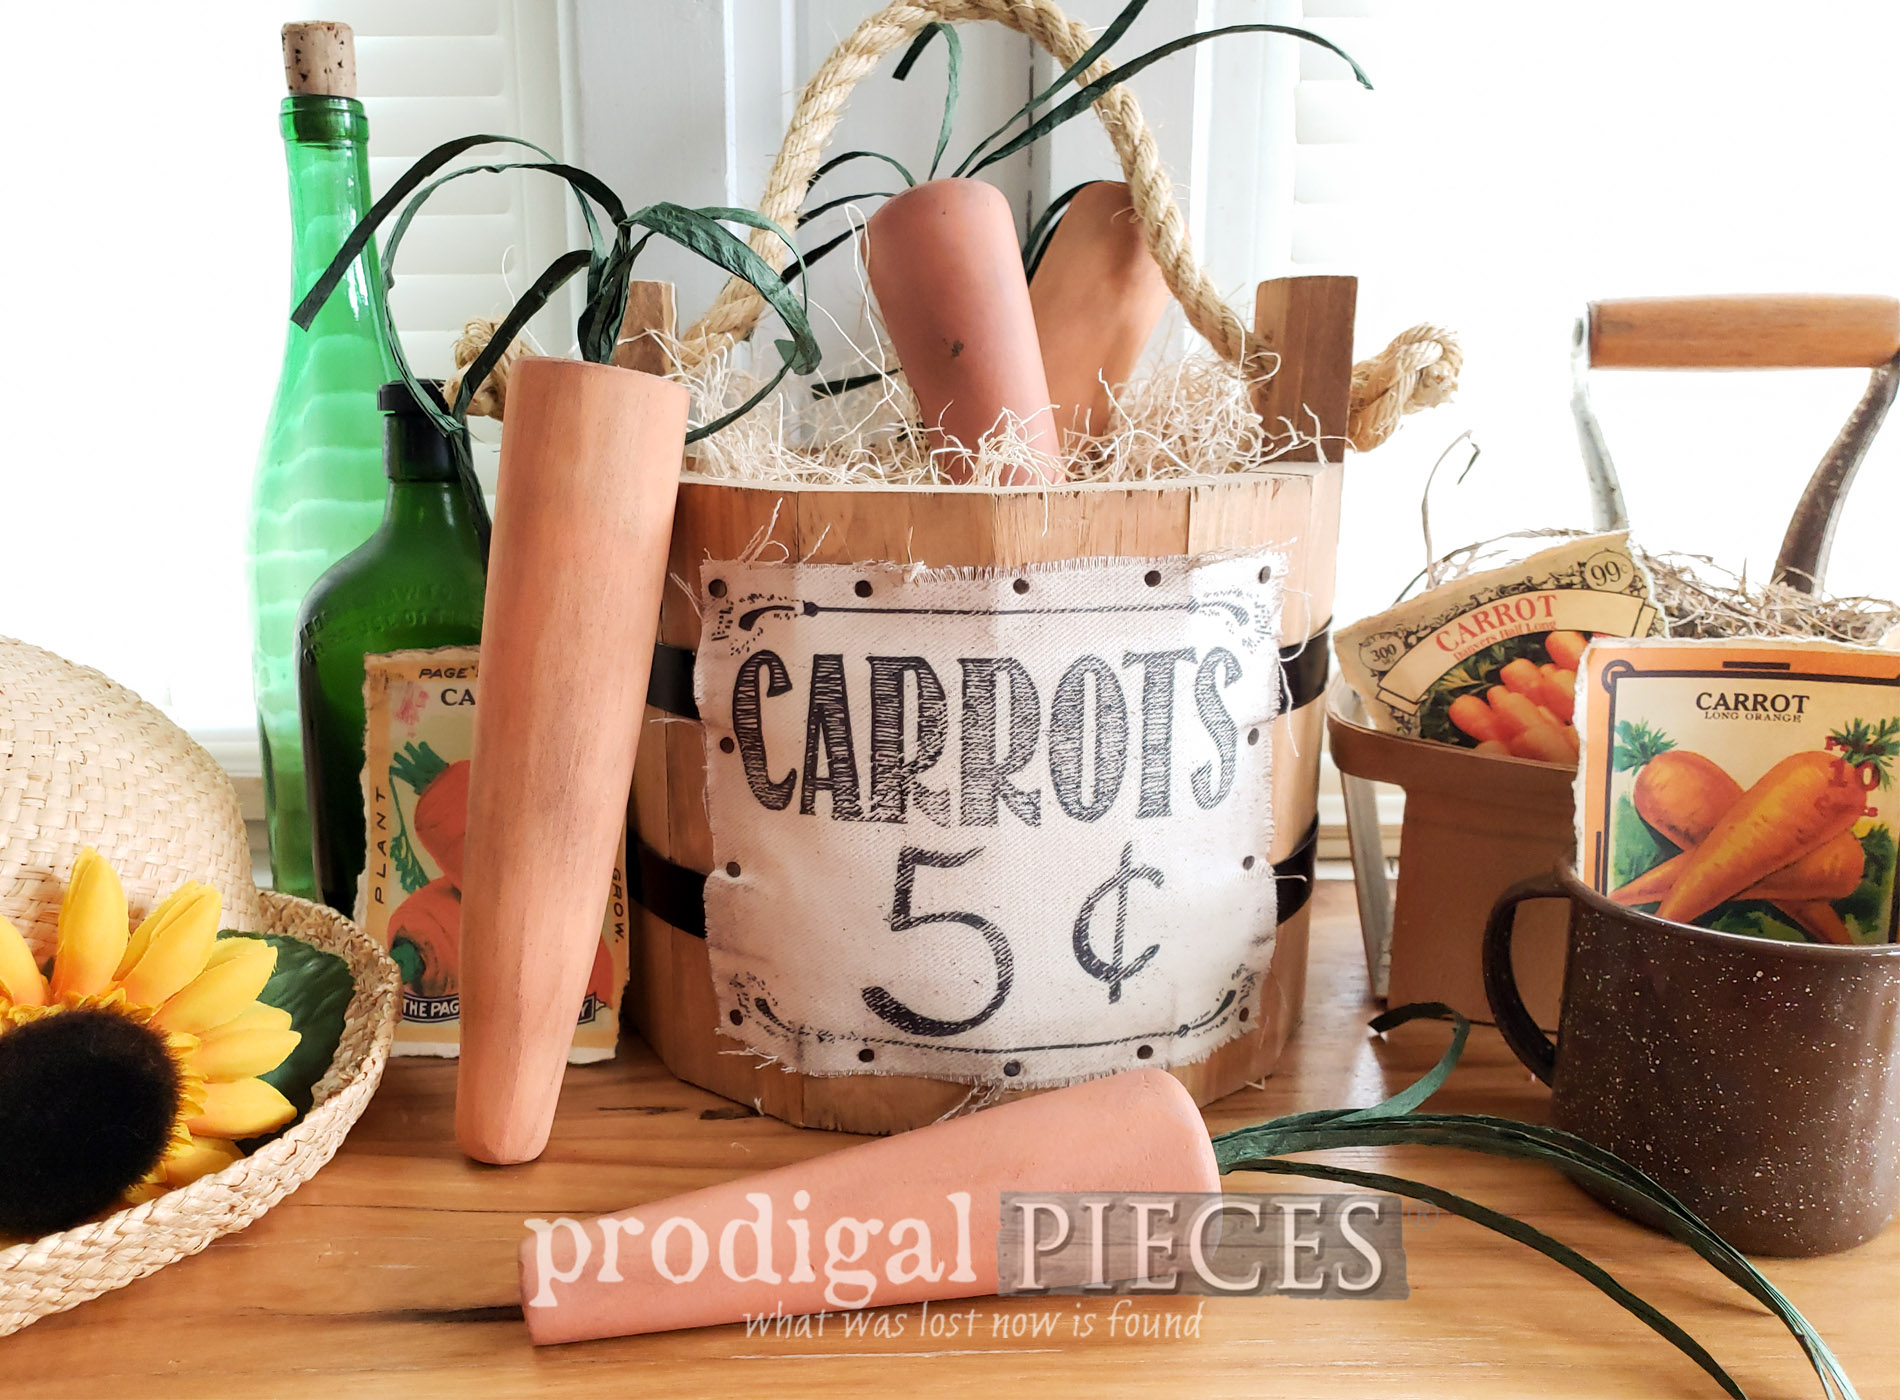
 I've staged them in a Amish-made bucket with dried grass. Did you notice the apothecary bit on the front? I used a scrap of fabric and a t-shirt transfer to make it. Fun, yes?

 Also, these fun printables I used can be found here: Seed packet & Seed packet 2. Make a banner or bunting, craft your heart out. tee hee!
If you're loving this arrangement, you can find two buckets of carrots available in my online store.
Also, these fun printables I used can be found here: Seed packet & Seed packet 2. Make a banner or bunting, craft your heart out. tee hee!
If you're loving this arrangement, you can find two buckets of carrots available in my online store.

 In addition to giving me feedback below, do pin and share these DIY rustic carrots to inspire others to see past the "junk" too.
 Up next, I'll be giving this cutesy churn a facelift. See the after HERE.
 Before you go, be sure to sign up for my newsletter. Until next time!

Also, more spring fun like my DIY rustic carrots:

