 Well, apparently I am ever so drawn to butter churns. I already have two so what would one more hurt, right? Just roll with it, K? In my defense, one of my butter churns is a family heirloom.
 However, the other one isn't an heirloom per say, but a thrifted find paired with a walking stick.
 Both of those are of the crock variety, whereas this one is solid pine wood.
DIY TIME
First, as you can imagine I was smitten with the shape of this churn. However, I was not impressed with how it was finished. Kinda cutesy with a whole lotta chunky brush strokes. So, I break out my sander and relieve this poor thing of it's hot mess-ness bondage. tee hee. What you're looking at is a layer of primer and two heavy coats of paint. This seemed to take forever to get it down to raw wood, but here we are...

NEXT STEPS
I realize you can't totally tell from pic that this looked too new when I bought it. The corners were square the wood has no flaws, especially after I sanded. To remedy that, I rounded corners over with my sander, and banged it up a bit with my tools. Why? It creates a story that I want to add to my home. You can see how I used the same technique in my antique sign tutorial HERE or in the video below. Afterward, once all that is done, I use a Hickory Gel Stain to create a base coat. If you think about it, most antiques have layers of love, whether it's lacquers, paint, rust or just grime.
 As soon as that stain cures, I add color fun with a wash of paint, followed by aging with two different colored waxes.

THE REVEAL
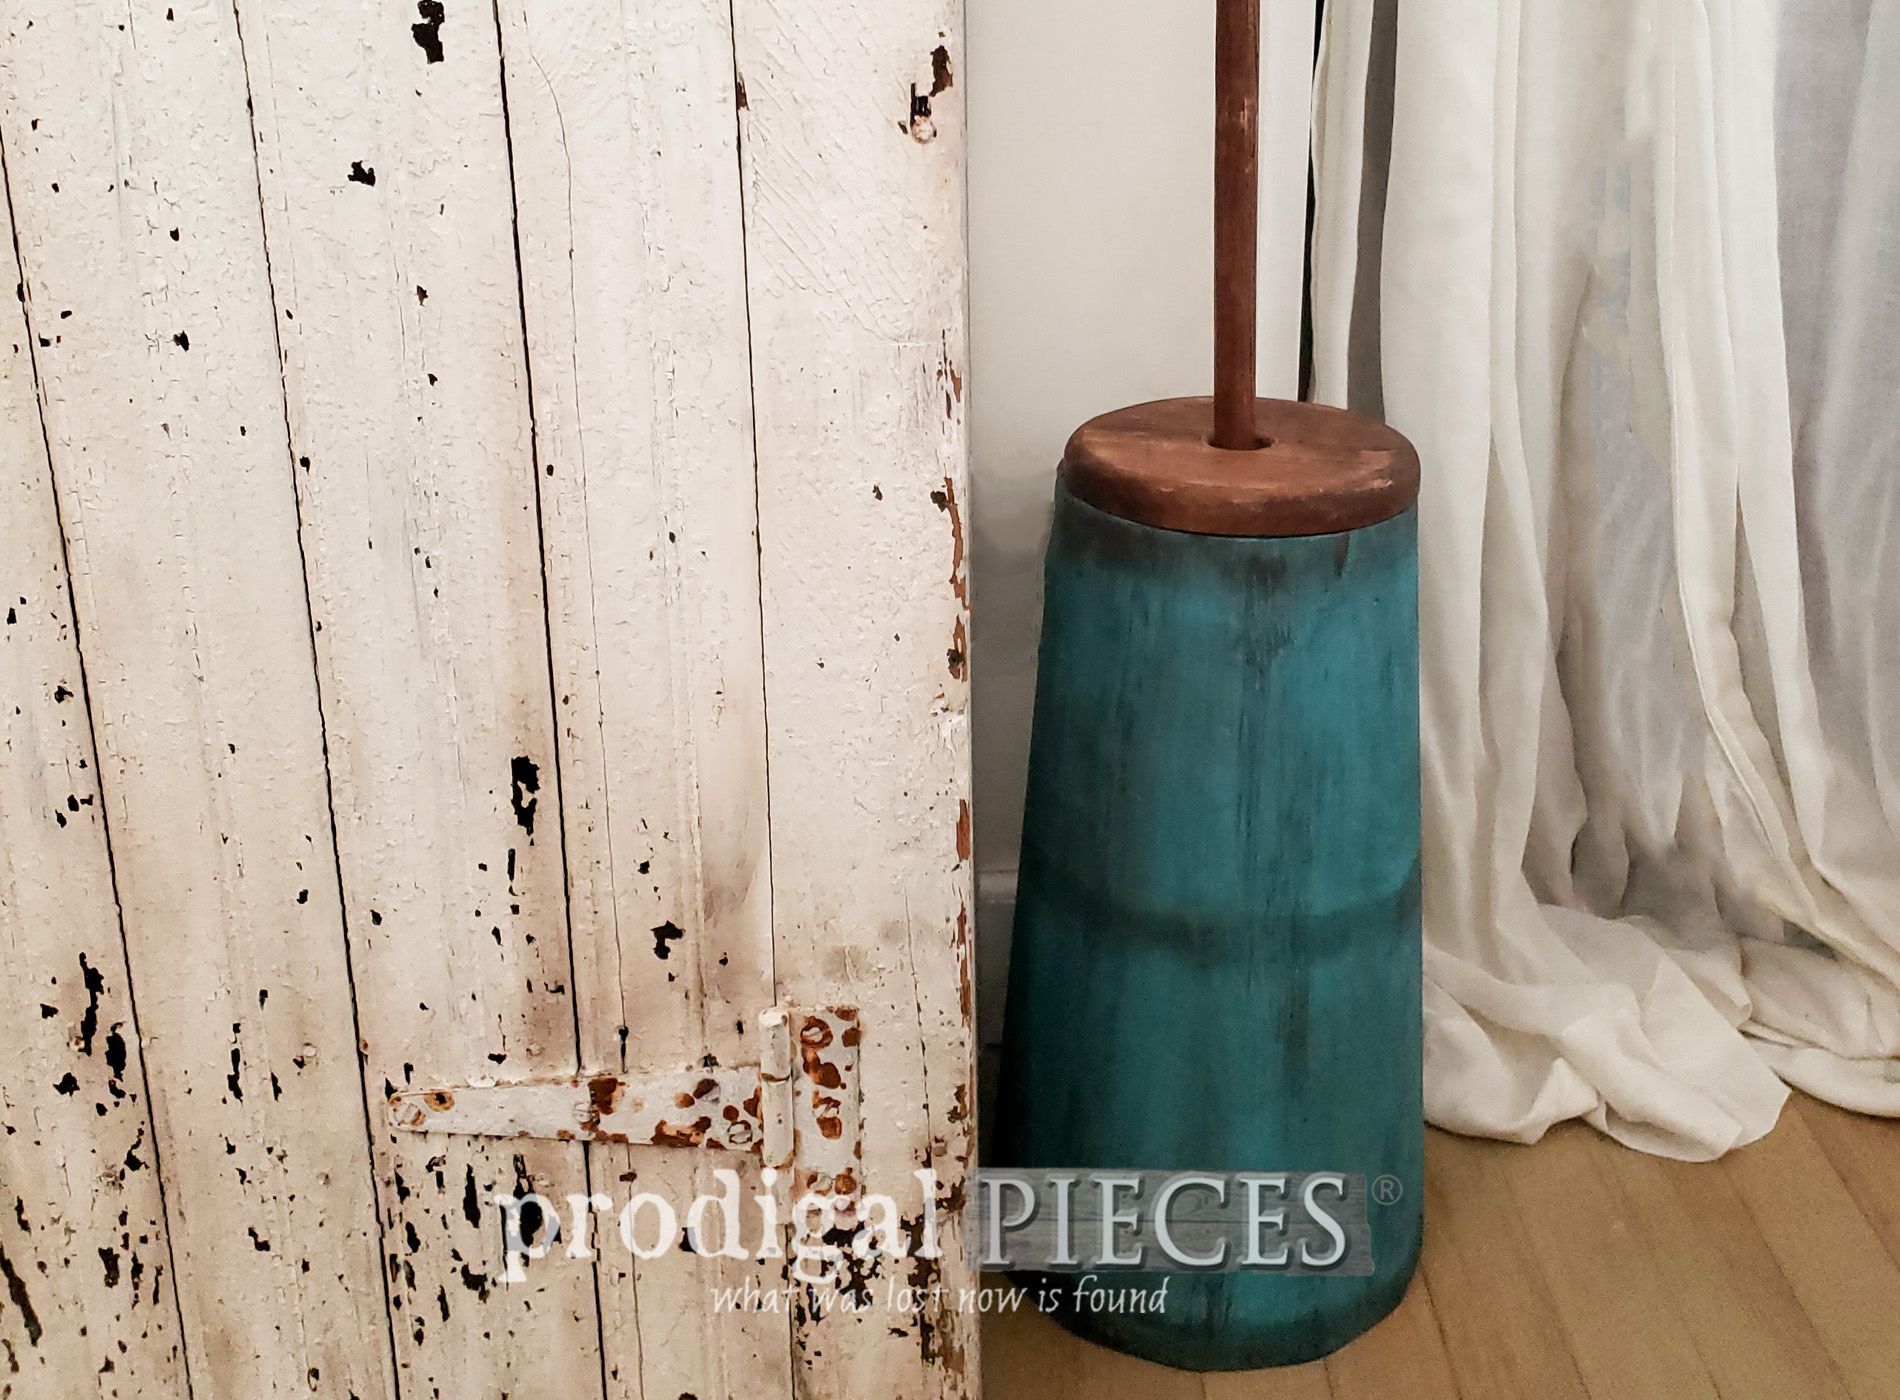
Here is my farmhouse butter churn all layered up and ready for a new life as an "antique".
 This was fun! Did you notice the bands I added with wax? If you look at wooden antique butter churns, they almost all have either metal or wooden bands around them. Mine didn't have that action going on, so I created the illusion.

 I have to ask, are you surprised at the difference between the before and the after? It was just a matter of starting over and creating a story with layers and wear. I hope you are feeling inspired.
If you'd like to add this farmhouse butter churn to your home, you can find it available in my online shop (SOLD) along with other finds and goodies.
I have to ask, are you surprised at the difference between the before and the after? It was just a matter of starting over and creating a story with layers and wear. I hope you are feeling inspired.
If you'd like to add this farmhouse butter churn to your home, you can find it available in my online shop (SOLD) along with other finds and goodies.
[metaslider id=30251]
 Also, do pin and share my farmhouse butter churn makeover. I know there are many more fun rescues just waiting at the thrift store.

UP NEXT
Up next, I'll be sharing some thoughts. Check it out HERE. To get these DIY tips & tricks in your inbox, be sure to sign up for my newsletter. PLUS, you will get your FREE Furniture Buying Checklist and special discount to my shop. Until next time!

Also, more DIY projects like my farmhouse butter churn:
 | Head to prodigalpieces.com prodigalpieces diy handmade toys home homedecor farmhouse")
