 First, to catch you up to speed, I suggest you check out where we started, our flooring reveal and window treatments. So much goodness going on! I am super-excited to show you how I took these antique wooden clamps and turned them into sconces in our dining area. And I even made some funky industrial style DIY farmhouse lighting above our kitchen table. Nothing like a good repurpose to get your blood pumping.

*Electrical materials provided by Snake Head Vintage (see full disclosure)
I spied a large assortment of these antique clamps at a flea market and snatched up a handful of them. These are the two smallest and I also have three large ones. My brain was reeling with ideas when I saw them, but when the lightbulb went off (get it? what a pun!) to use them in our remodel, I was so stoked.A VISION
My vision wouldn't come to fruition until a client of mine bought a coffee grinder from my shop . She turned it into a lamp for her parents. Cool! I inquired about where she got her vintage supplies, and she directed me to Snake Head Vintage. I fell in LOVE! Ever since I was a kid, I would pull things apart to learn how they tick. I was forever fascinated with how lights work and can be created. Remember my floor lamp I made from repurposed rocking chair rockers? Making this lighting is really the same idea, but using a different object to wire through. Our current lighting was a candle chandelier and two sconces that have served us well for about 8 years and I decided to change it out for a new look.

 I'm showing you how I used my antique clamps to make my sconces so you can get the idea. You can turn pretty much anything you want into a lamp or hard-wired fixture.

DIY TOOLS & SUPPLIES
My supplies and tools for one light include:- 1 - socket: I am hard-wiring these sconces (they will not be a plug-in type fixture) and am using a dimmable socket since this is for accent lighting.
- cloth-covered wire (I used 2-wire flat wire) in length needed to reach connection source
- 1 - strain relief
- 1 - Edison style light bulb
- 2-wire caps
- electrical tape
- a vintage tool, jug, camera, etc. to create into a light
- screwdriver
- scissors
- multi-purpose electrical cut, crimp, strip tool

STEP 1
Once you have the length needed, you will need your strain relief piece and one end of the wire. Unscrew the strain relief to have it in two separate parts. Keeping a small amount of masking tape on the end will not only keep the cloth covering from fraying, but also make threading the wire easier.
STEP 2
Thread the cone-shaped part of the strain relief onto the wire. Begin by putting the narrow end on first and having the large, open end towards the direction the socket will be.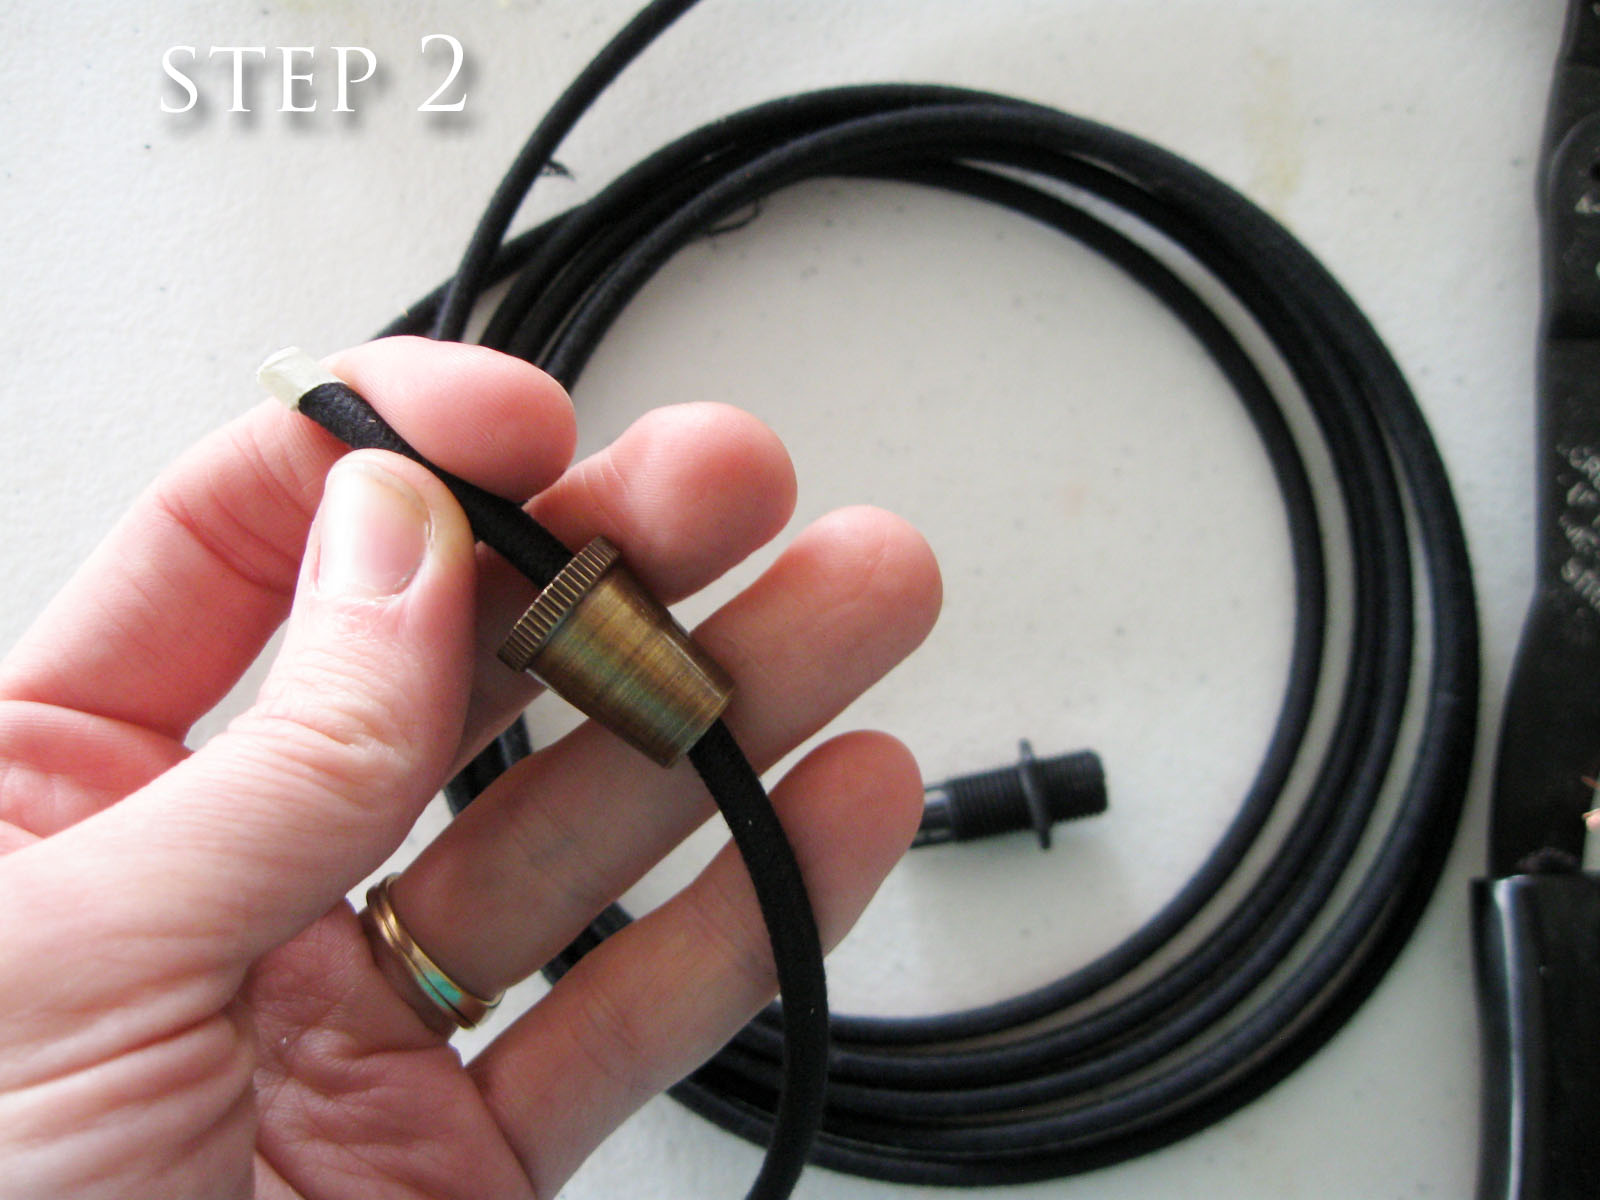 For tips on how to thread the strain reliefs on different gauge wire (because it can be tricky!), check out this video tutorial by Snake Head Vintage.
STEP 3
Separate your light socket into its separate pieces and thread the bottom ring and socket base onto the wire next as shown. Here I'm showing the strain relief assembled to keep it in the picture, but you'll want to keep it separated until wiring is complete.
STEP 4
Take your wiring tool and strip away the cloth covering and separate your wires. TIP: black is "hot", white is "neutral" - sometimes there will be a green or bare copper wire and that will be your ground wire. You'll want to leave about an inch and a half of length to work with. Typically you would need to use an underwriter's knot before attaching wires to prevent straining your wires which would require more wire be exposed, but since I am using a threaded strain relief, this is not necessary.
STEP 5
Using your stripping section of your tool, pull off about and inch of wire coating to bring the wire to bare copper.
STEP 6
When you get down to the bare wire, it's easy to fray the ends unintentionally, so give them a twist and create a hook by bending. This will make attaching them to the socket easier.
STEP 7
place your wire hooks around the corresponding screws and tighten down. FYI: The gold screw is for your hot wire and the silver is for your neutral wire. In this case, it does not matter which one you hook where because this is a single socket connection.
STEP 8
Now that your wiring is attached you will need to assemble the socket. Begin by threading the socket ring over the bottom of the socket and tighten down. Next, thread the inner part of the strain relief into the bottom of the socket. Make sure you have backed out your adjusting screw so the strain relief can thread in. Once in, tighten the adjusting screw on the socket and then thread on the cone-shaped strain relief piece. Again, tighten the adjusting screw on the strain relief piece to secure it all together.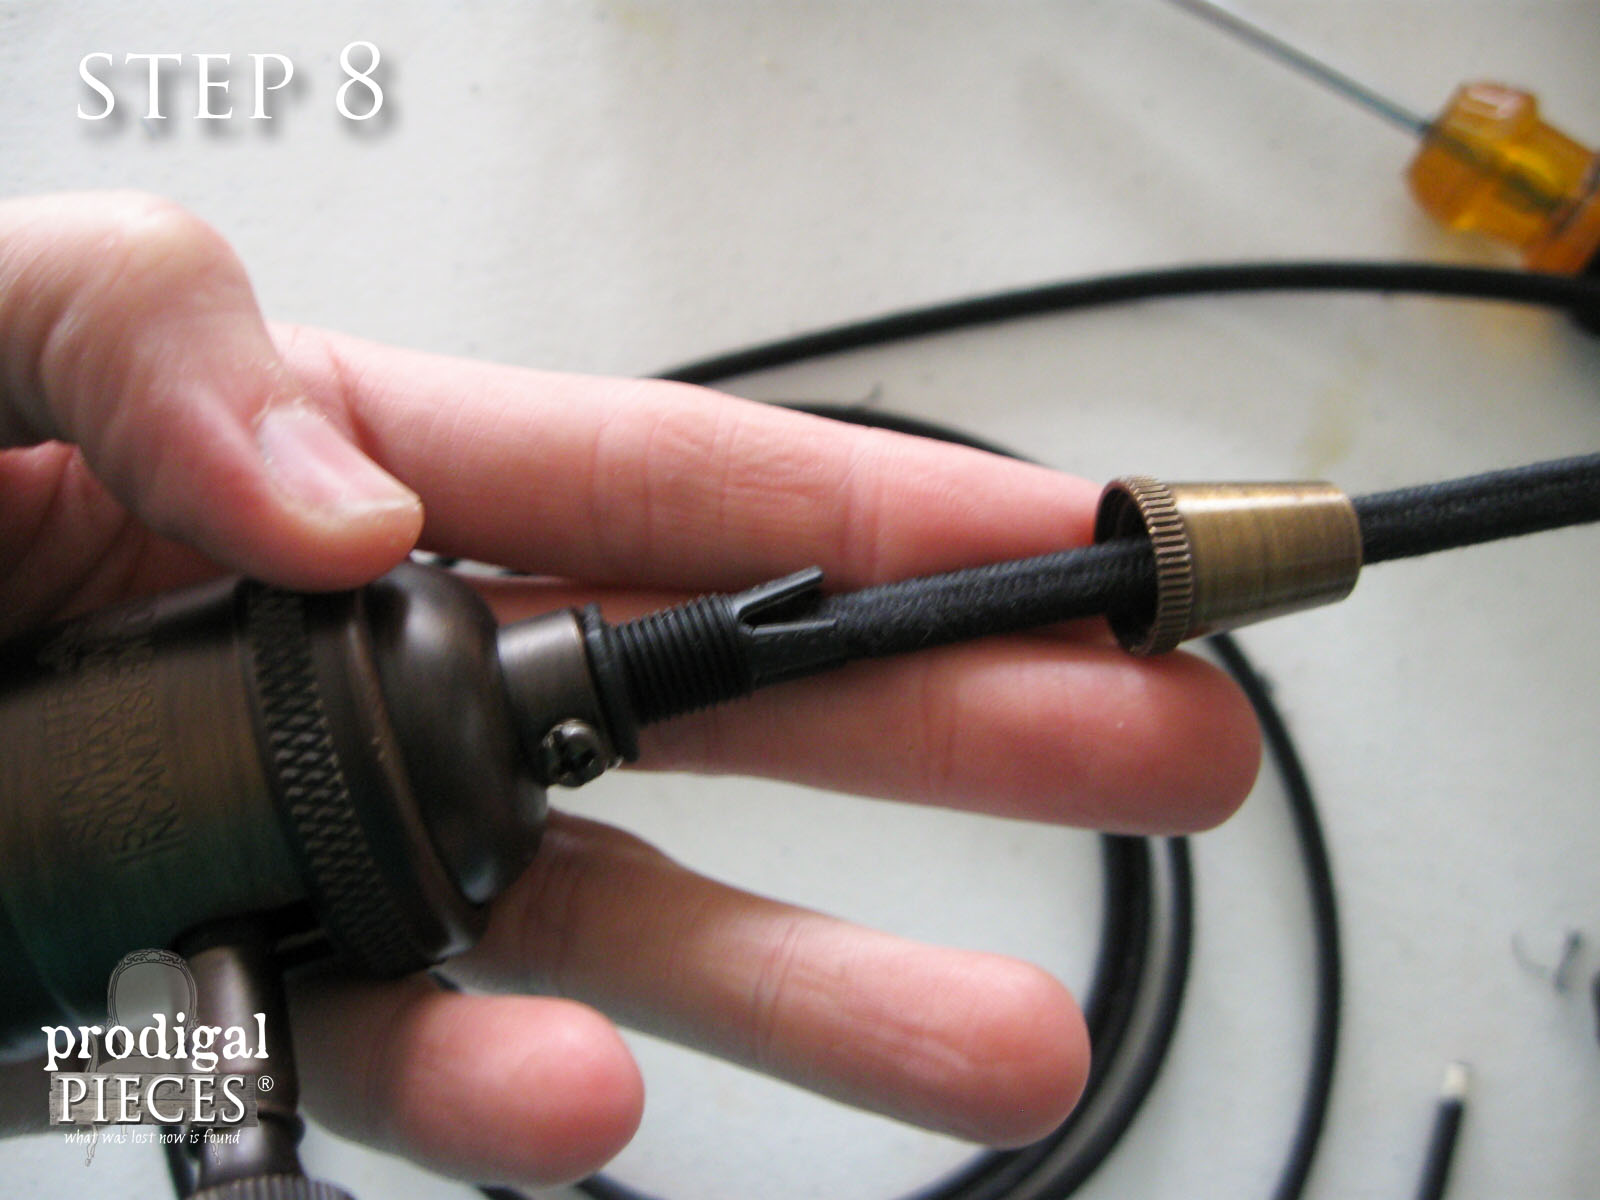 Now your socket is assembled and ready to add to the clamp. Since one of my clamps already had a hole in the one end, all I needed to do was create a hole in the one to match using my drill and a spade bit.
To put it all together, I threaded the socket and wire into the hole.
Now your socket is assembled and ready to add to the clamp. Since one of my clamps already had a hole in the one end, all I needed to do was create a hole in the one to match using my drill and a spade bit.
To put it all together, I threaded the socket and wire into the hole.
 Since I wanted my wire to be hidden, I took a couple of my heavy duty staples in bunches of two or three and tapped them in with a hammer over my wires. That way they lay flush to the clamp.

LAST STEPS
The place where I was putting this sconces was a messed up by the previous owner. I decided to finally fix the mess and cut correct holes using my drill with spade bit, and my cordless jigsaw. After that, I connect the sconce wires to the wall wires by twisting on wire caps and then wrapping them in electrical tape. To hang it on the wall, I counter-sink a few screws through the clamp. Done!
THE REVEAL

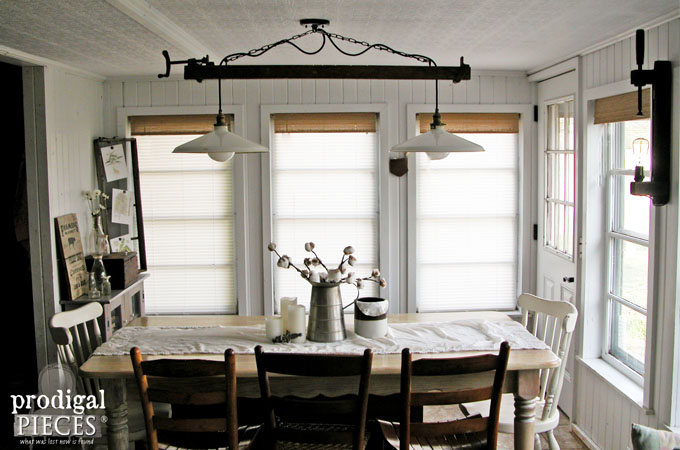
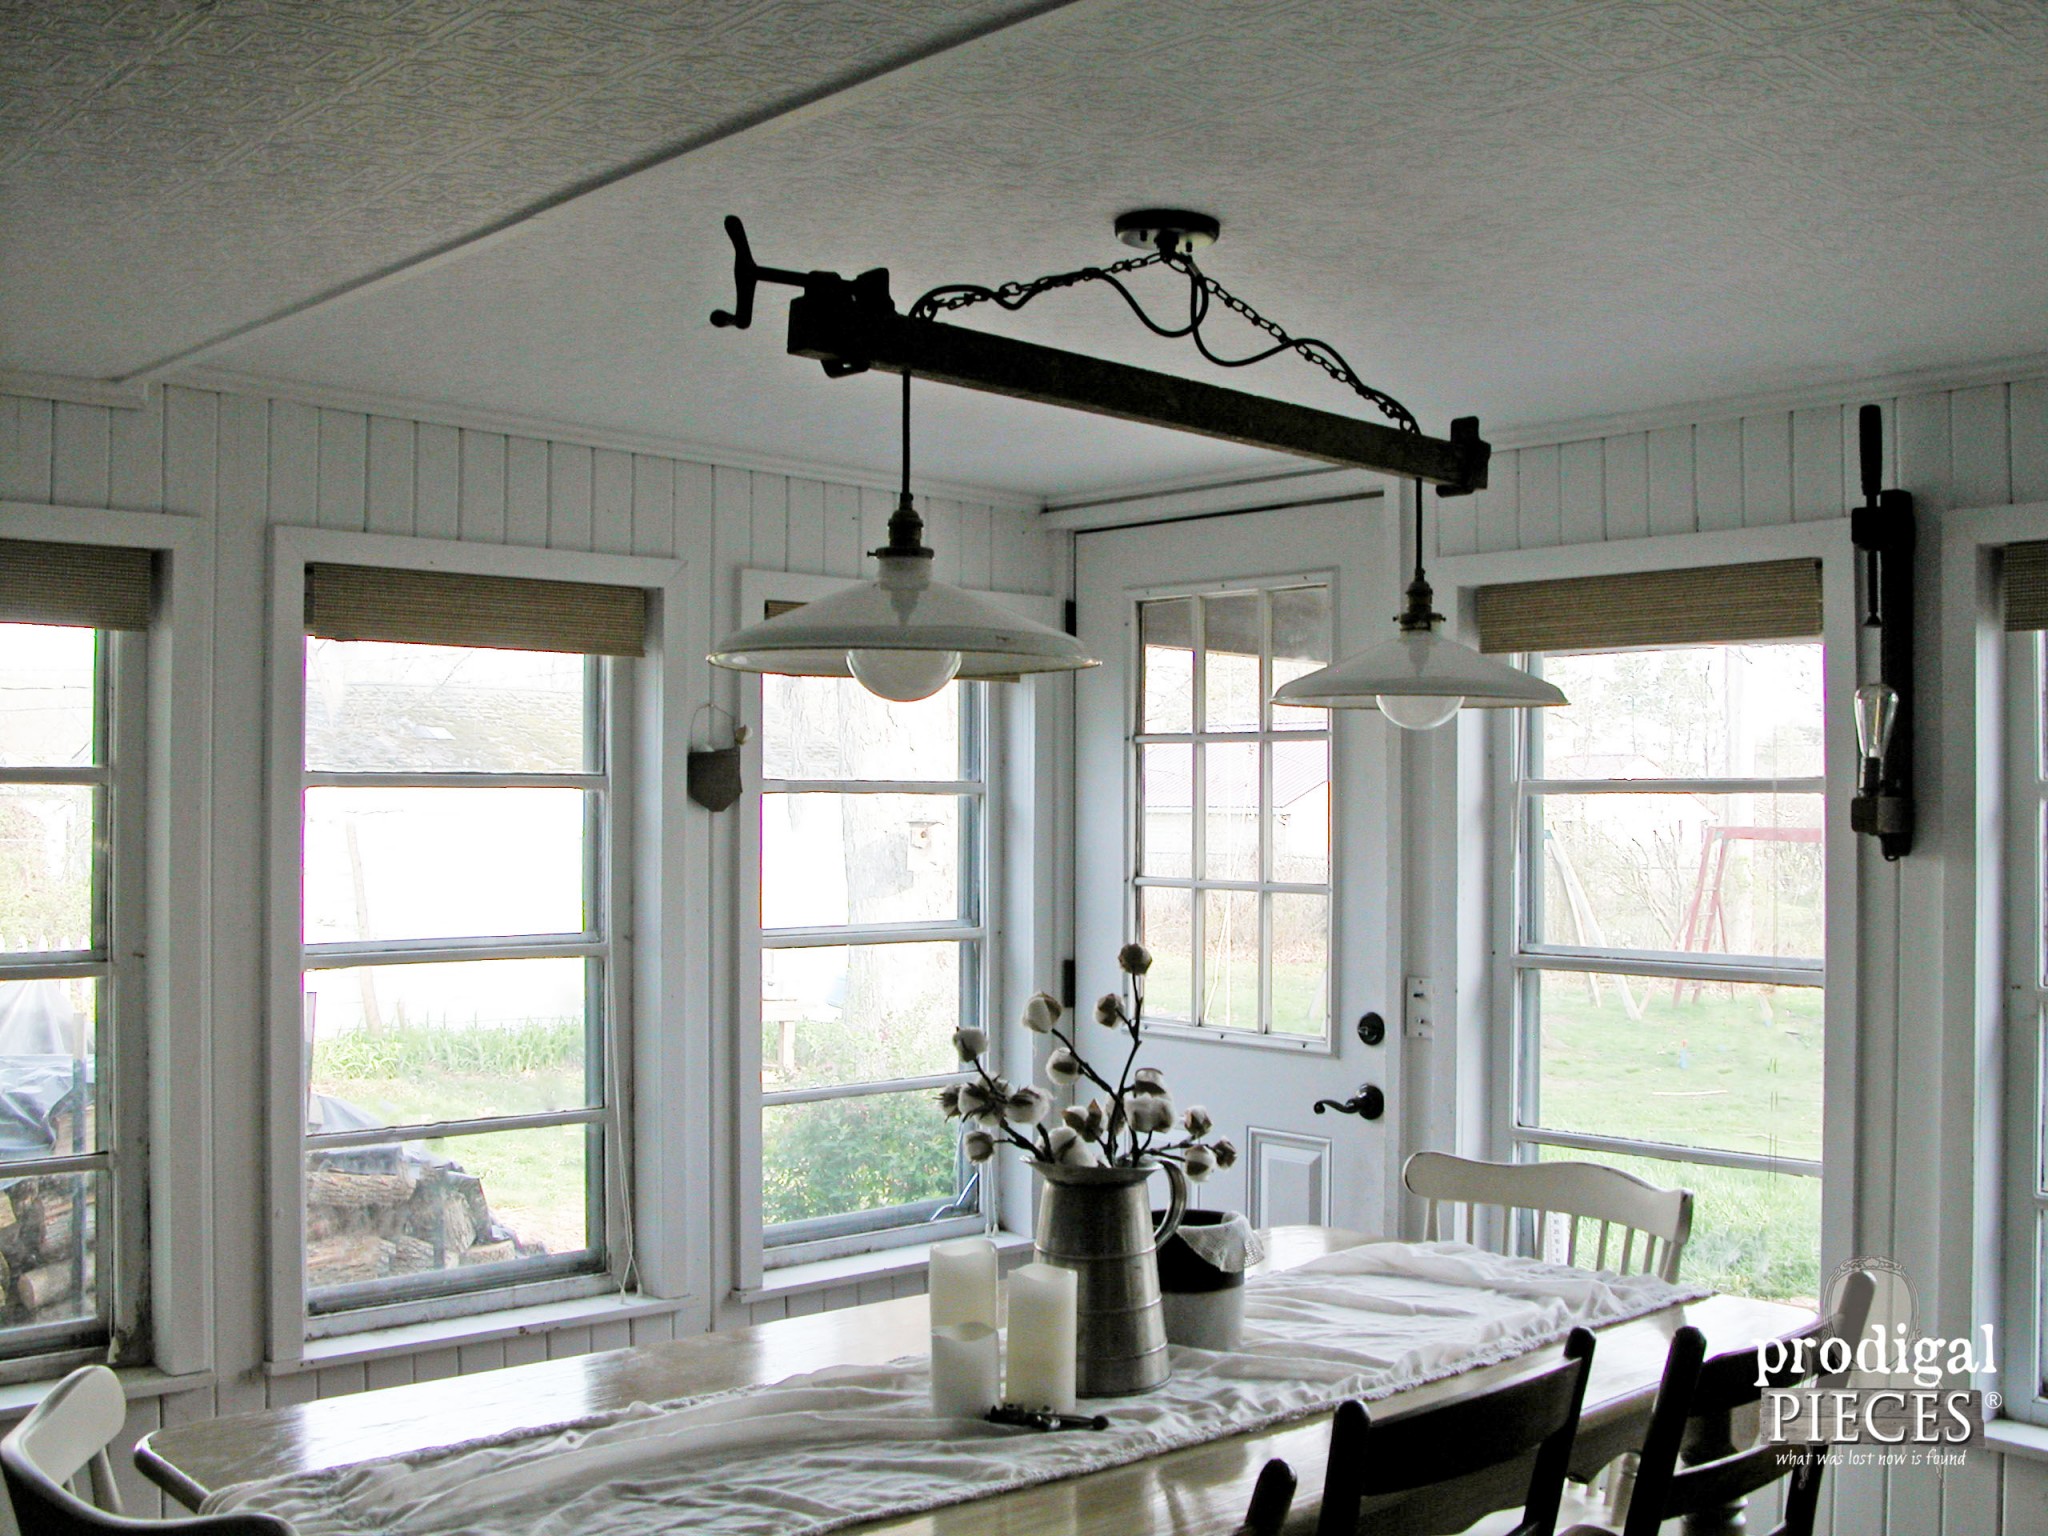
 For the dining area, I used the same steps. However, this time created a dual lamp using a longer clamp and a couple of enamel shades taken out of a local barn. How's that for DIY farmhouse lighting?

 I love the new look and it's funky industrial, farmhouse feel. The shades have imperfections, but that's what I love about them...you can't find that in a box store. The sockets are an antique brass finish that will go perfectly with my antique brass faucet and hardware.

 That completes our dining area farmhouse lighting and next is the kitchen and laundry. So many have asked about my window treatments, and I showed how I achieved the look for all 7 windows for less than $30 in my last kitchen update (head HERE) I was attempting to get that all completed with my son's help. However, my compressor died mid nailing our coffered ceiling. I ain't about to hang stuff with hammer and nail. no siree. (sorry for the blurry pic that my daughter snapped, but you get the idea)
 So I sat for an hour or so and tore apart the compressor and rewired it back together. Whew!
I hope you're enjoying seeing our progress. Also, please pin and share our funky DIY farmhouse lighting so others can create their own home too. ♥
So I sat for an hour or so and tore apart the compressor and rewired it back together. Whew!
I hope you're enjoying seeing our progress. Also, please pin and share our funky DIY farmhouse lighting so others can create their own home too. ♥
 Up next, I know you''ll want to see a vintage chest makeover. It's a good one! Head HERE.

More of my projects like my DIY farmhouse lighting:

