Don't you love how misfits truly fit in? They just need to find the right spot. Apparently, I'm a magnet for such things with my
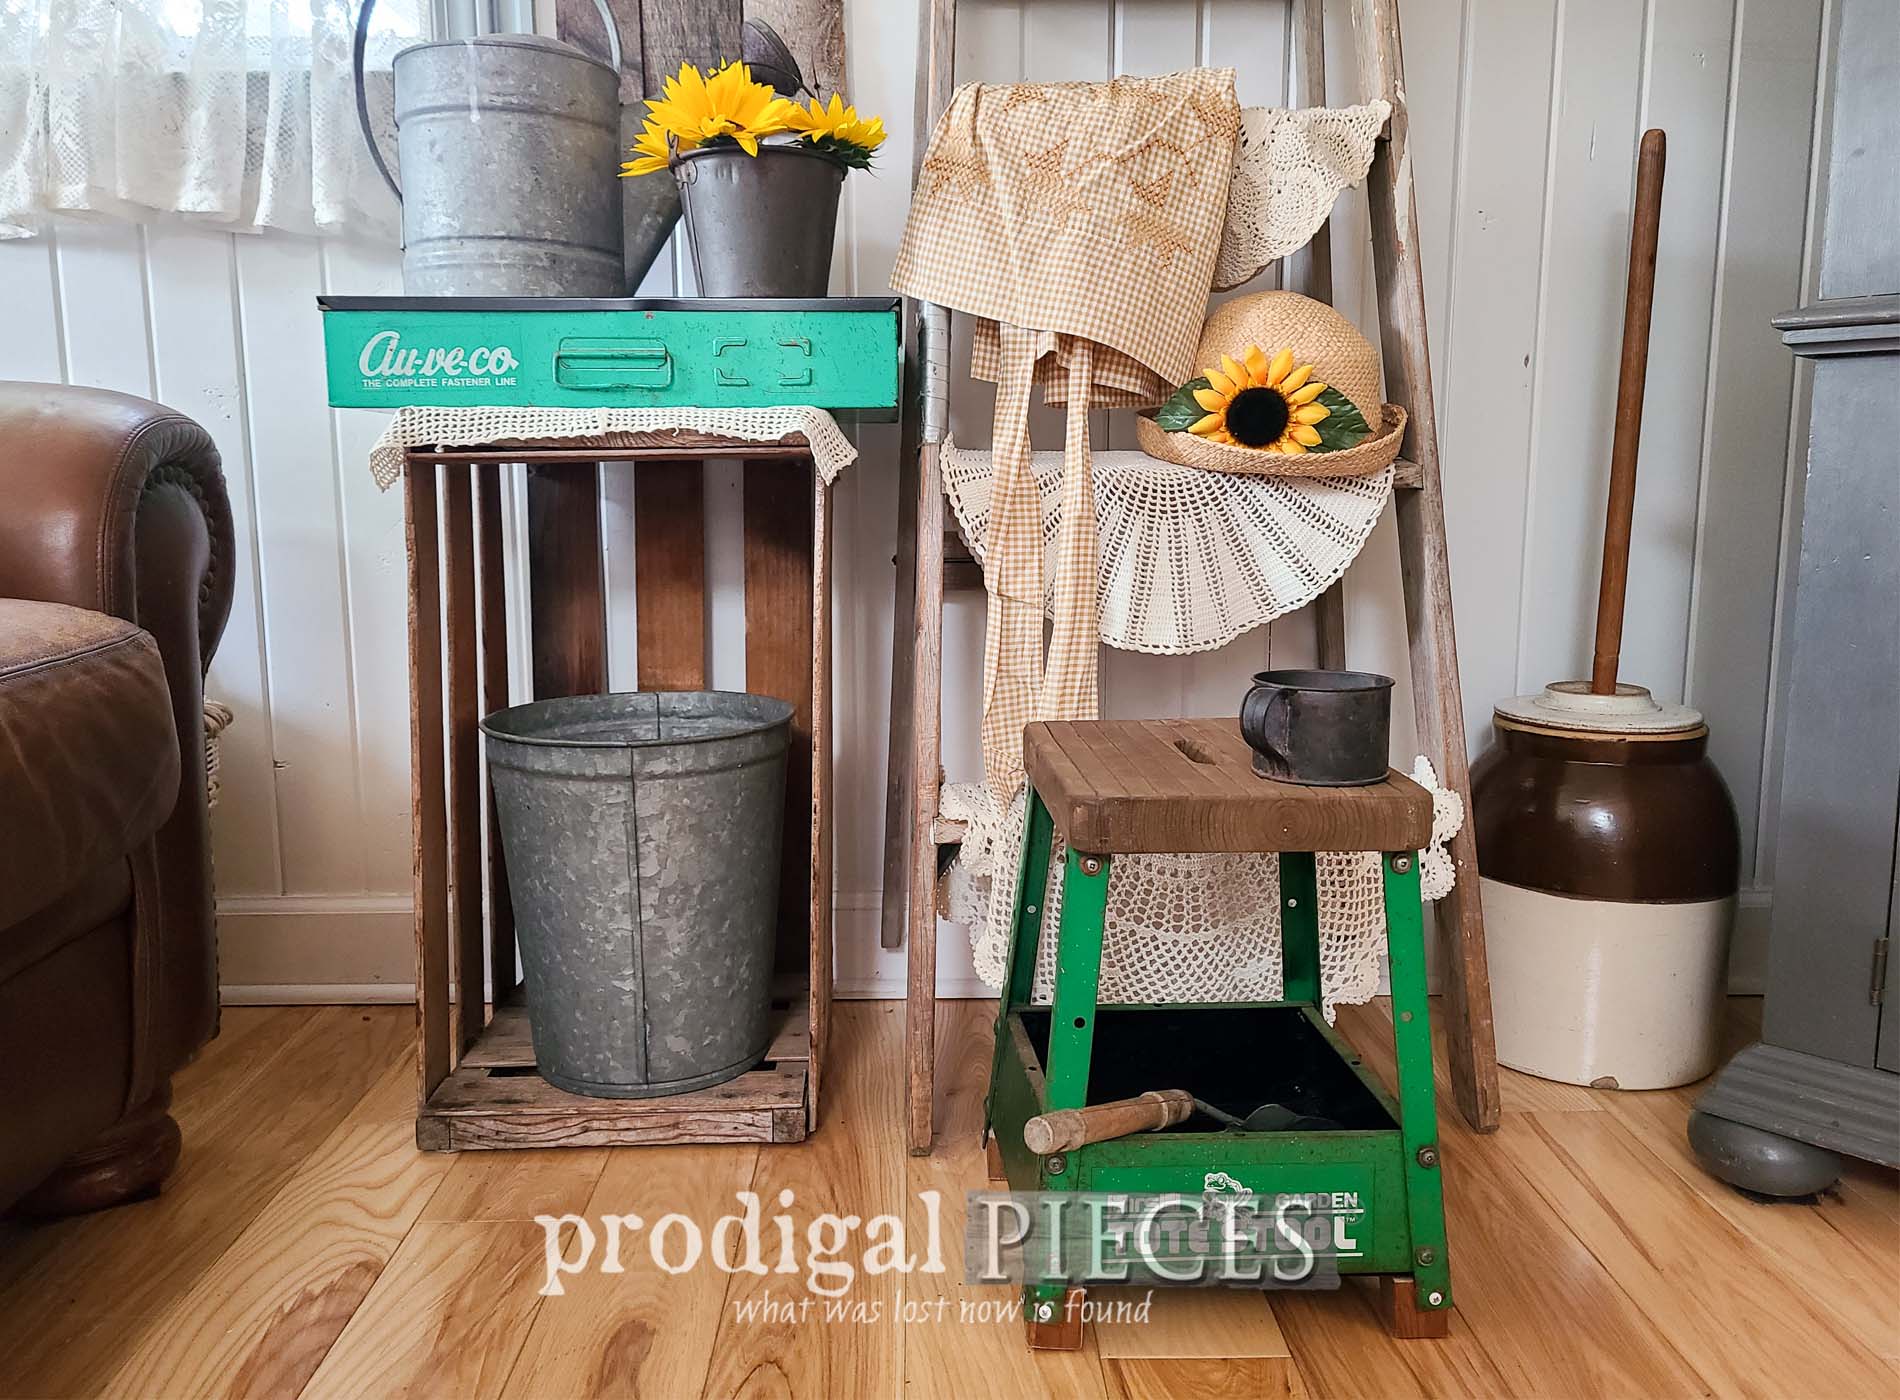
trashure background and willing heart to restore the broken. Take, for instance, this motley crew. We have rust, patina, brokenness, and damage. That means we're on a damaged vintage repair and renewal journey today.

On the bench is a vintage hardware box with original labels inside (some have come unglued).

While the inside is in great shape, the exterior leaves a little to loving it. Don't get me wrong, I'm all about rusty patina goodness, but that's a bit much for having it in a home.

As for the garden stool, it's in similar shape as far as rust goes (that doesn't scare me). Likewise, the seat is a hot mess because it's made of pressed fiber "wood". It's ready to crumble. Why in the world would someone make an outdoor furniture piece out of manufactured wood? sigh...

Finally, there is a rotted little bench that is broken and on its literal last leg.

MAKEOVER TIME
First, let's have at that tote stool for our damaged vintage repair. As you can imagine, I'm excited to remove that seat and make a new one to better suit this vintage gem.

While I don't trash it yet, I want to use it to make a new one. Then, I head over to my stash and pull out a board I salvaged out of the trash from a dismantled vintage waterbed frame. If you recall, I used the rest of the frame to build myself a weight rack for
my over-40 health journey.

Next, I use the old seat to trace a new one and cut it to size with my circular saw. Afterwards, I use my jigsaw to cut a handle hole and round the corners. Here's a tip: I use sandpaper and a dowel (this time it's a salvaged chair spreader) to sand in tight spots.

In addition, I want to replicate those grooves in the seat, so I mark and measure so that I can use my circular saw to make shallow cuts.

While I'm working on the seat, I'm also working on the base. The inside storage is so dirty and rusty that I need to tackle it as well.


NEXT REPAIR
Before I show you the result of the garden stool, I want to tackle that hardware box as well. Much like the garden stool, I want to sand down the rust to get down to the metal as close as possible. Have you ever watched those restoration folks that have a sandblasting booth? Bucket tool list for
my toolsoverjewels!

It's looking better, eh? Once I have the damage removed as best as possible, I use a spray paint to give it a fresh coat of black semi-gloss paint.

Other than painting and re-gluing on the labels that fell off inside, this damaged vintage repair party is ready to shine!
REVEALS
Take a peek at these two misfits now rocking a brand "new" vintage vibe with a refreshed feel while keeping their patina charm.


My tote stool has a new seat, new feet (since one original is missing), and a spiffy new interior finish for many more years of use.


Meanwhile, the toolbox is looking dapper with the fresh coat on the lid.


Like I mentioned, all the damage isn't gone. However, it sure is better than it was before and more functional for sure again.


So, there you have two mini makeovers that keep the vintage vibe but restore them to functional and fun. Oh, and in case you think I forgot, I haven't tackled that red stool from the "before" shot. Why? Well, it's pretty rotted and I have another idea to share for it soon.


As always, if you'd like to make either of these a part of your home story, you can find them and more in
my online store.

SHARE
What is more, leave me some comment love below because I do this to inspire YOU. Have you ever tackled damaged vintage repair? Also, pin and share to inspire others too.

Before you go, take a peek at what's next up for a new life for
Trash to Treasure Tuesday.

Be sure to
sign up for my FREE newsletter. Until next time!

 PINTEREST | EMAIL
While you're at it, check out other ways tackle damaged vintage repair: