Another month has flown by and I can't believe it's already Trash to Treasure Tuesday time! You're in for a treat as I join my four blogger friends to bring you new inspiration. While you're see their work in a bit, take a peek at this "brand new" item I found at the thrift store. While there's nothing wrong with the 50's vibin' design, it wouldn't suit my decor. So that means I'm ready for a thrifted clock makeover. woot!

Here's what's funny...are you the type to be debating on a purchase and put it in your cart while you decide or are you the type to leave it there and come back if you really want it? Honestly, I'm a little of both. This time around, I put this clock in my cart only to come upon another one with all the parts and wrapped as new.

This one not only has everything protected, but it answers the question I had of why the blank space at the bottom...it has cute magnets!

Okay, so remember that the idea is to make this your own if you were wanting something like this but didn't have 50's decor. So, with that in mind, it's DIY time!
BREAK OUT THE PAINT
First, it's important to note the material I'm working with. This is not wood, but manufactured wood, so I won't be able to sand it down and refinish it. Then, that means I break out the paint. Obviously, the fastest way to get this done is spray paint. I use this rustic pink I've used with great fun in
these past posts. Plus, you can see my other clock makeovers and builds here:

Next, once two coats of paint cure, it's time for me to add a whitewash by brushing in all the same direction.

While you think I may be done, not just yet. I also want to add more texture with a thinned gray paint for a gray-wash effect like I used on
my faux wood garage door.

LAST STEPS
Before I call this thrifted clock makeover complete, I want to add details. If you've been around me long on my blog, you know I enjoy adding typography. First, I grab a
clock face HERE and use
my transfer method to get it on. Do you see my little overseer?

Little 5-montn-old Ivan is recovering from surgery, and we're elated the vet was able to remove a large polyp from his right nasal cavity only leaving a small one in the left. That means he doesn't have life-long issues of breathing after his near-death start.
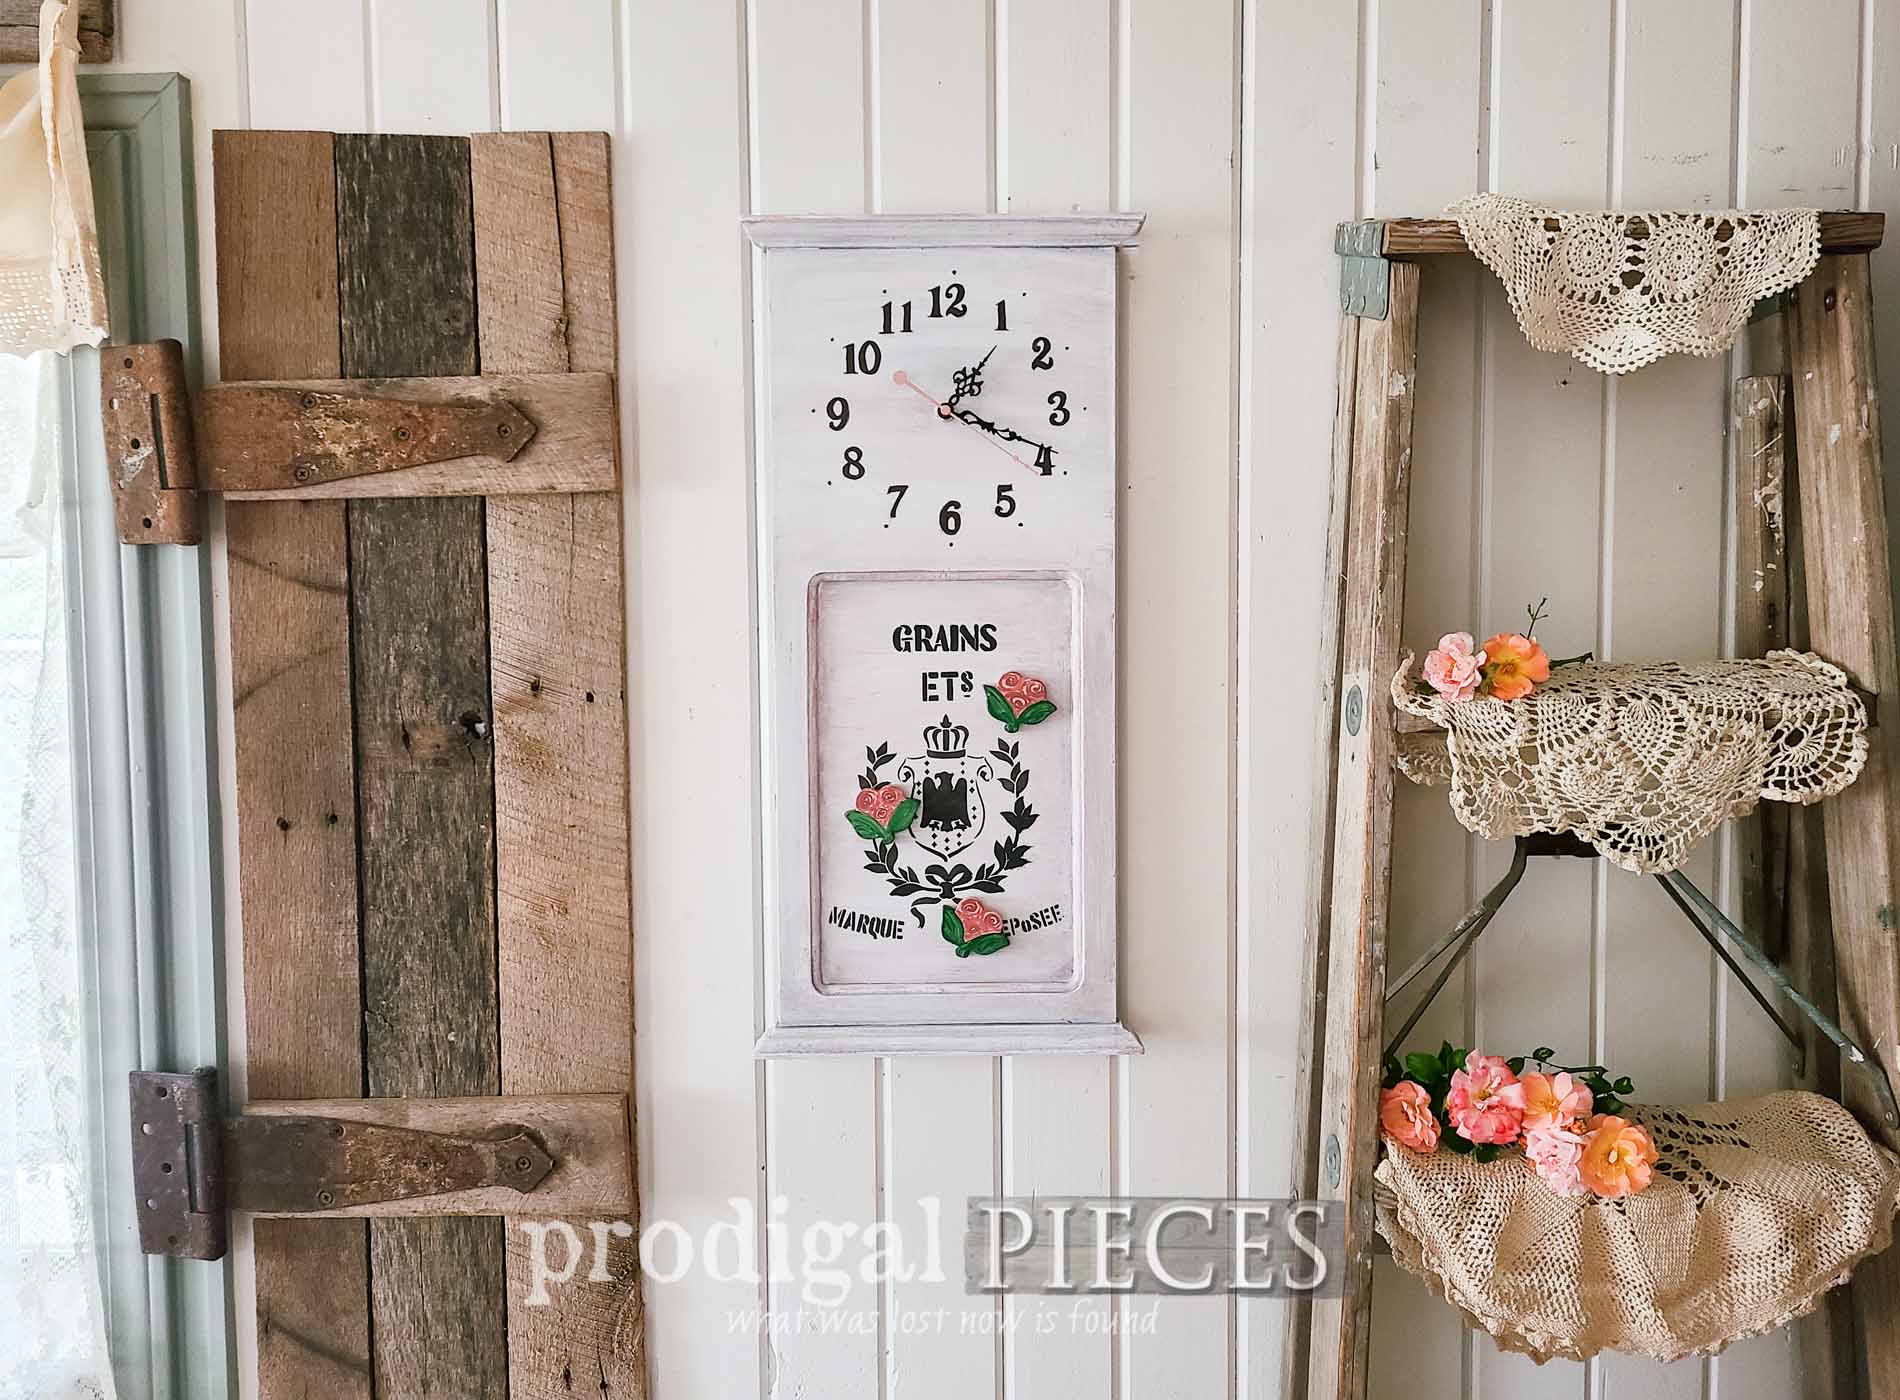
Last, but not least, I want to recreate those magnets and add a something to the magnetic panel. Yes, they started off as cherries, but not they're becoming bloomin' roses.

TIME FOR THE REVEAL
Finally, take a peek at this new clock with a nod to pink with underlayer peeking out and rose accents.


Again, while the cherries were fun, this project just shows you how you can take most anything and make it yours.


Now it's your turn...are you feeling inspired? Maybe you have that one thing that has been staring at you in the corner that needs a new look. It's time to take it on!

If you'd like to make this part of your home story, you can find it and more in
my online store.


SHARE
As always, my goal is getting you to get out there and try DIY for yourself. WARNING: it's addictive! After leaving some comment love below, pin and share to inspire others too.

WAIT! It's time to see what my Trash to Treasure gals have created for you too.


- Confessions of a Serial DIYer
- Artsy Chicks Rule
- Salvaged Inspirations
- Girl in the Garage
To get these DIY tips & tricks in your inbox, be sure to
sign up for my FREE newsletter. Until next time!

 PINTEREST | EMAIL
While you're at it, check out these other projects like this thrifted clock makeover: