It's no surprise that when a friend sends me a picture of a broken piece of furniture that I have a soft spot. In many cases, it depends on how badly damaged it is and how much time I have on my hands. In this instance, this stand is small and looks like a fun
trashure challenge. Broken furniture doesn't always mean it needs to be burned or sent to the dump. There is definitely potential when it is made of wood.

However, this little thing isn't exactly solid wood, but rather a kit piece you assemble yourself made of bamboo, caning, and composite wood.
DIY TIME
First, I take it all apart and decide the best way to make use of all the parts. Here is what I'm faced with.

We have two caned side panels, a caned top, two shelves, and a decorative spreader. Not much, but I'm giving it my all to save what I can. Time to get out my tools and get 'er done!

Obviously, the foot is missing off one of the bamboo uprights. I decide to cut off all the bamboo because that gives me just the panels to work with.

At first, I really have to mull over how to not make waste of any of these broken furniture pieces. Then, it finally make sense to try to reassemble as much as I can. Beginning with the top, I need to find a use for it because the base is now narrower than the top. Now that I have the bamboo legs, I chop them up into handles on my miter saw.

Then, I use scrap dowel from my stash to make them more functional.

Here is the end result. It's still in the finishing stages, but it's coming along!

NEXT STEPS
Next, I take the rest of the pieces and put them together. First, I cut the shelves to size to the panels. Then, I cut a new spreader piece and attach the decorative piece. Last, I use a piece of cabinet-grade ply with iron-on veneer on the side. Also, I cut a piece of luan to cover the back. Not bad, eh?

After the fun of building the shelf, it's time to figure out a finish for both. Let's begin with the shelves. It's fun to work on this part of the upcycling where you can see it come to life.

First, I apply a few coats of paint with a brush to make sure I can get in the crevices. Then, I add details a d whimsy with a few color accents to make it pop a bit.
THE REVEAL
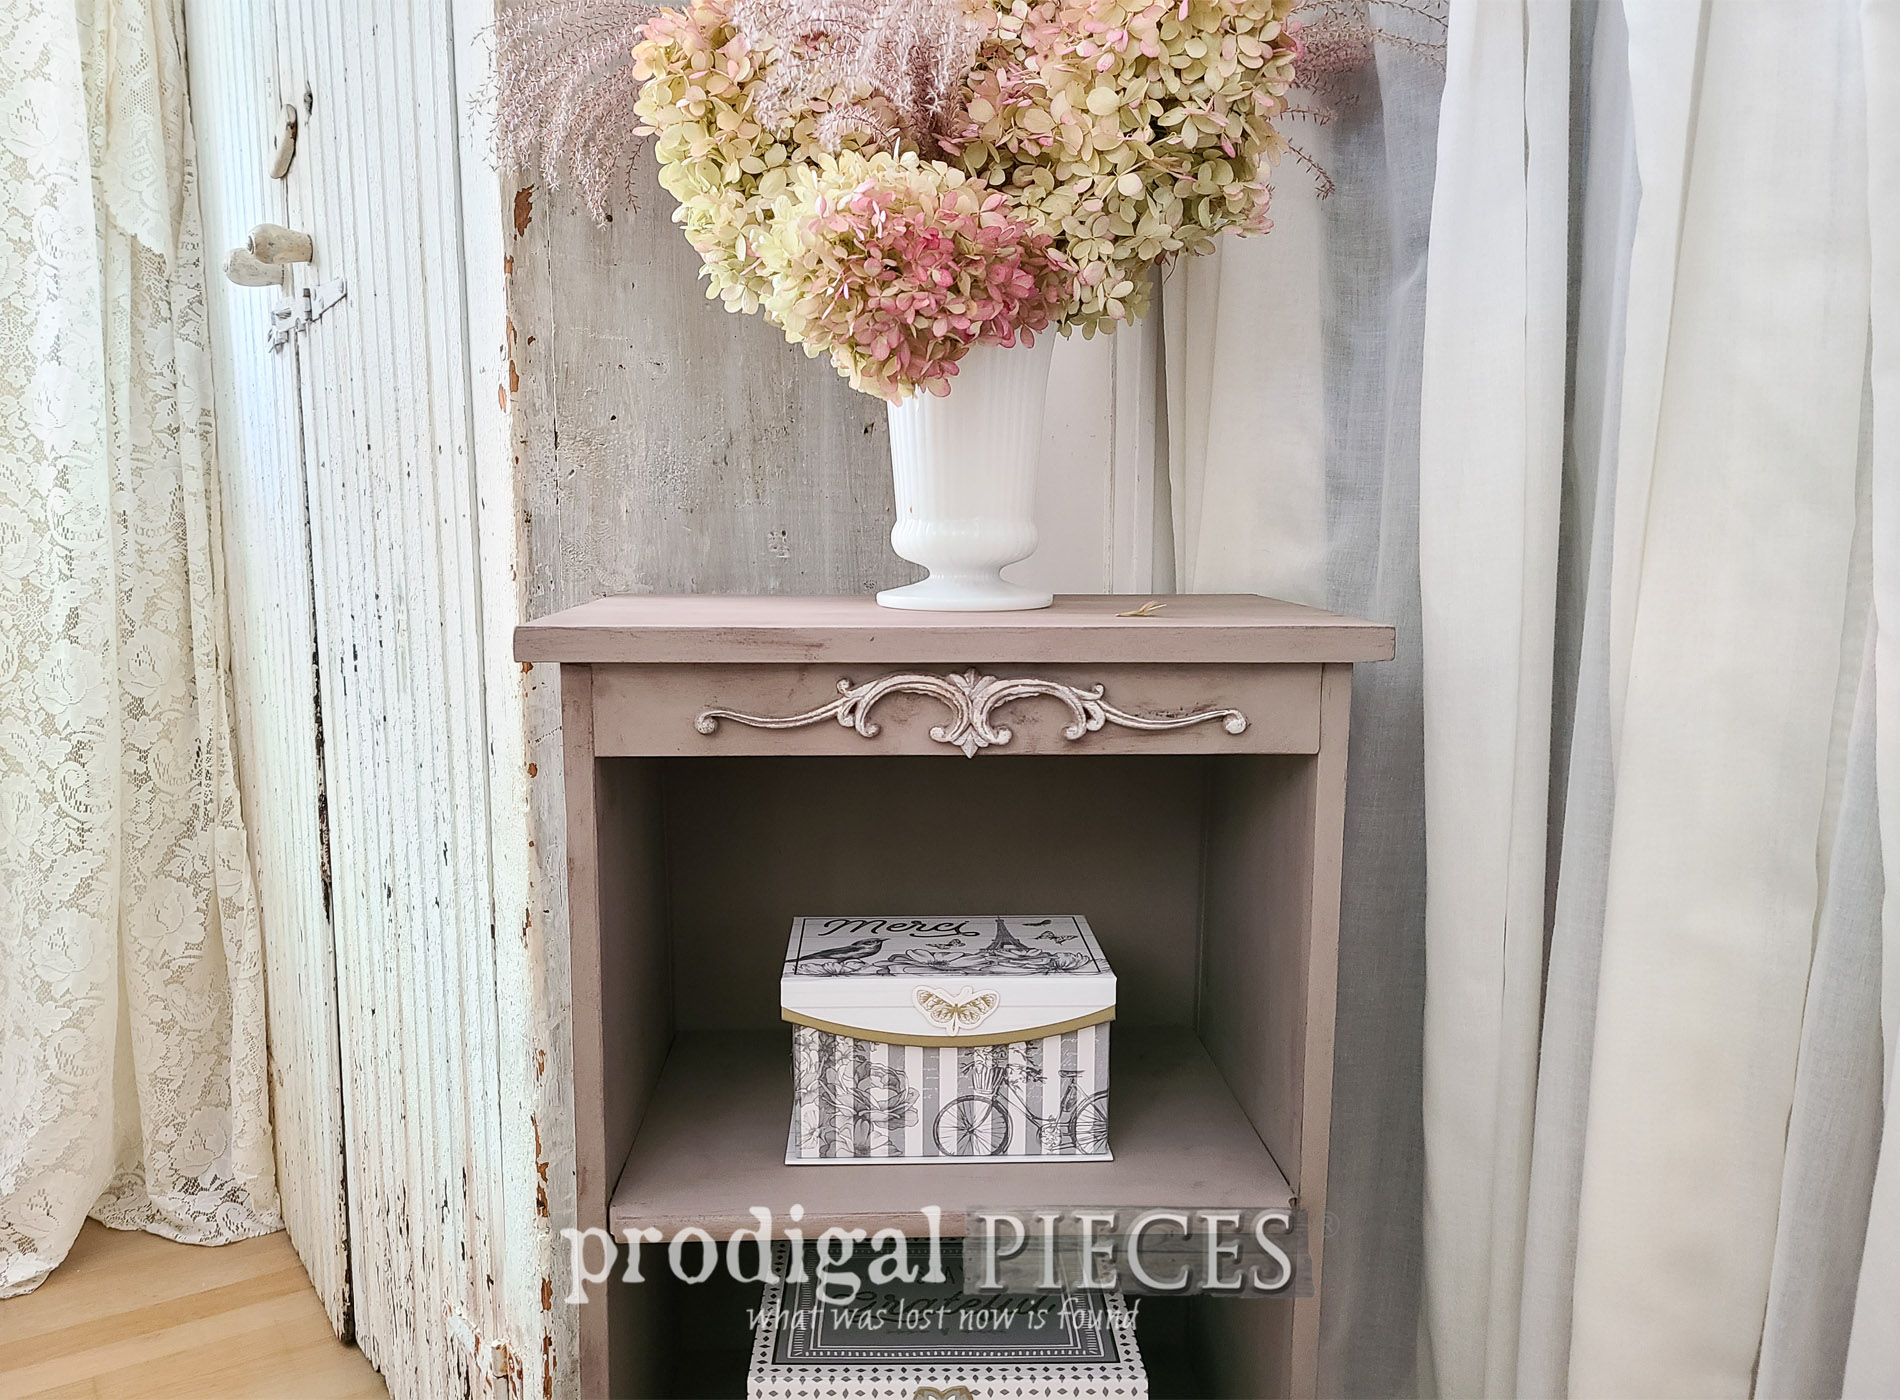
Finally, after my DIY adventures are complete, I'm eager to show you what my broken furniture looks like now. Yay! First, here's the storage shelf.


At first glance, it looks very much like the original since I make use of the sides and applique. However, it stands differently and now has a fun new look. The boxes are a perfect find and make the storage decorative as well as functional.


Next, here's the tray with a fun typography addition that everyone should abide by. {{wink, wink}}


The tray makes use of the cabinet top, the cabinet legs, and even the cabinet feet underneath. Isn't it fun to upcycle? Now, I need to relax. haha.

As always, my goal is to inspire you to try your hand and recreating the broken. It's fun, it's therapeutic, and such a blast. If you'd like to make either of these a part of your home story, you can find them available in
my online store.

In addition, encourage others to do the same - pin and share!

UP NEXT
Up next, this fun little vintage frame is going to get a new lease on life as well.
See the fun new look HERE.

To get these DIY tips & tricks in your inbox, be sure to
sign up for my newsletter. Until next time!

 PINTEREST | EMAIL
Also, more fun makeovers like this broken furniture: