 If you look close, you can see where it was dropped and a piece broke off and fell inside. I already put back part of it, but there is still a missing piece left. Also, one of the mirrors is missing off the base as well.


DIY TIME
Well, we can't let this head to the landfill. tsk. So, it's time to do some fixin'. First, I take a piece of Sculpey (my favorite polymer clay) and create a replacement piece. I press the clay in and gently remove it to bake it. Likewise, you can see how to use the clay to repair furniture in my post HERE. Then, I replace it in the hole and glue on. While it fits perfectly, it does still need a bit of shaping. After that, I use my Dremel with attachment. However, you could hand-sand as well - no special tools needed. Next, the base needs some love. I take off the mirrors and set those aside for another purpose.
 With that in mind, I take my spackling and fill all the holes.
 However, before I call it quits, I also use spackling and a stencil to make a decoration on each panel.
 You can see how I use this technique in the video project below. Or, check out these past posts as well.
 Last, but not least, I use my metallic paint to blend the base in with the rest of this broken decor piece.

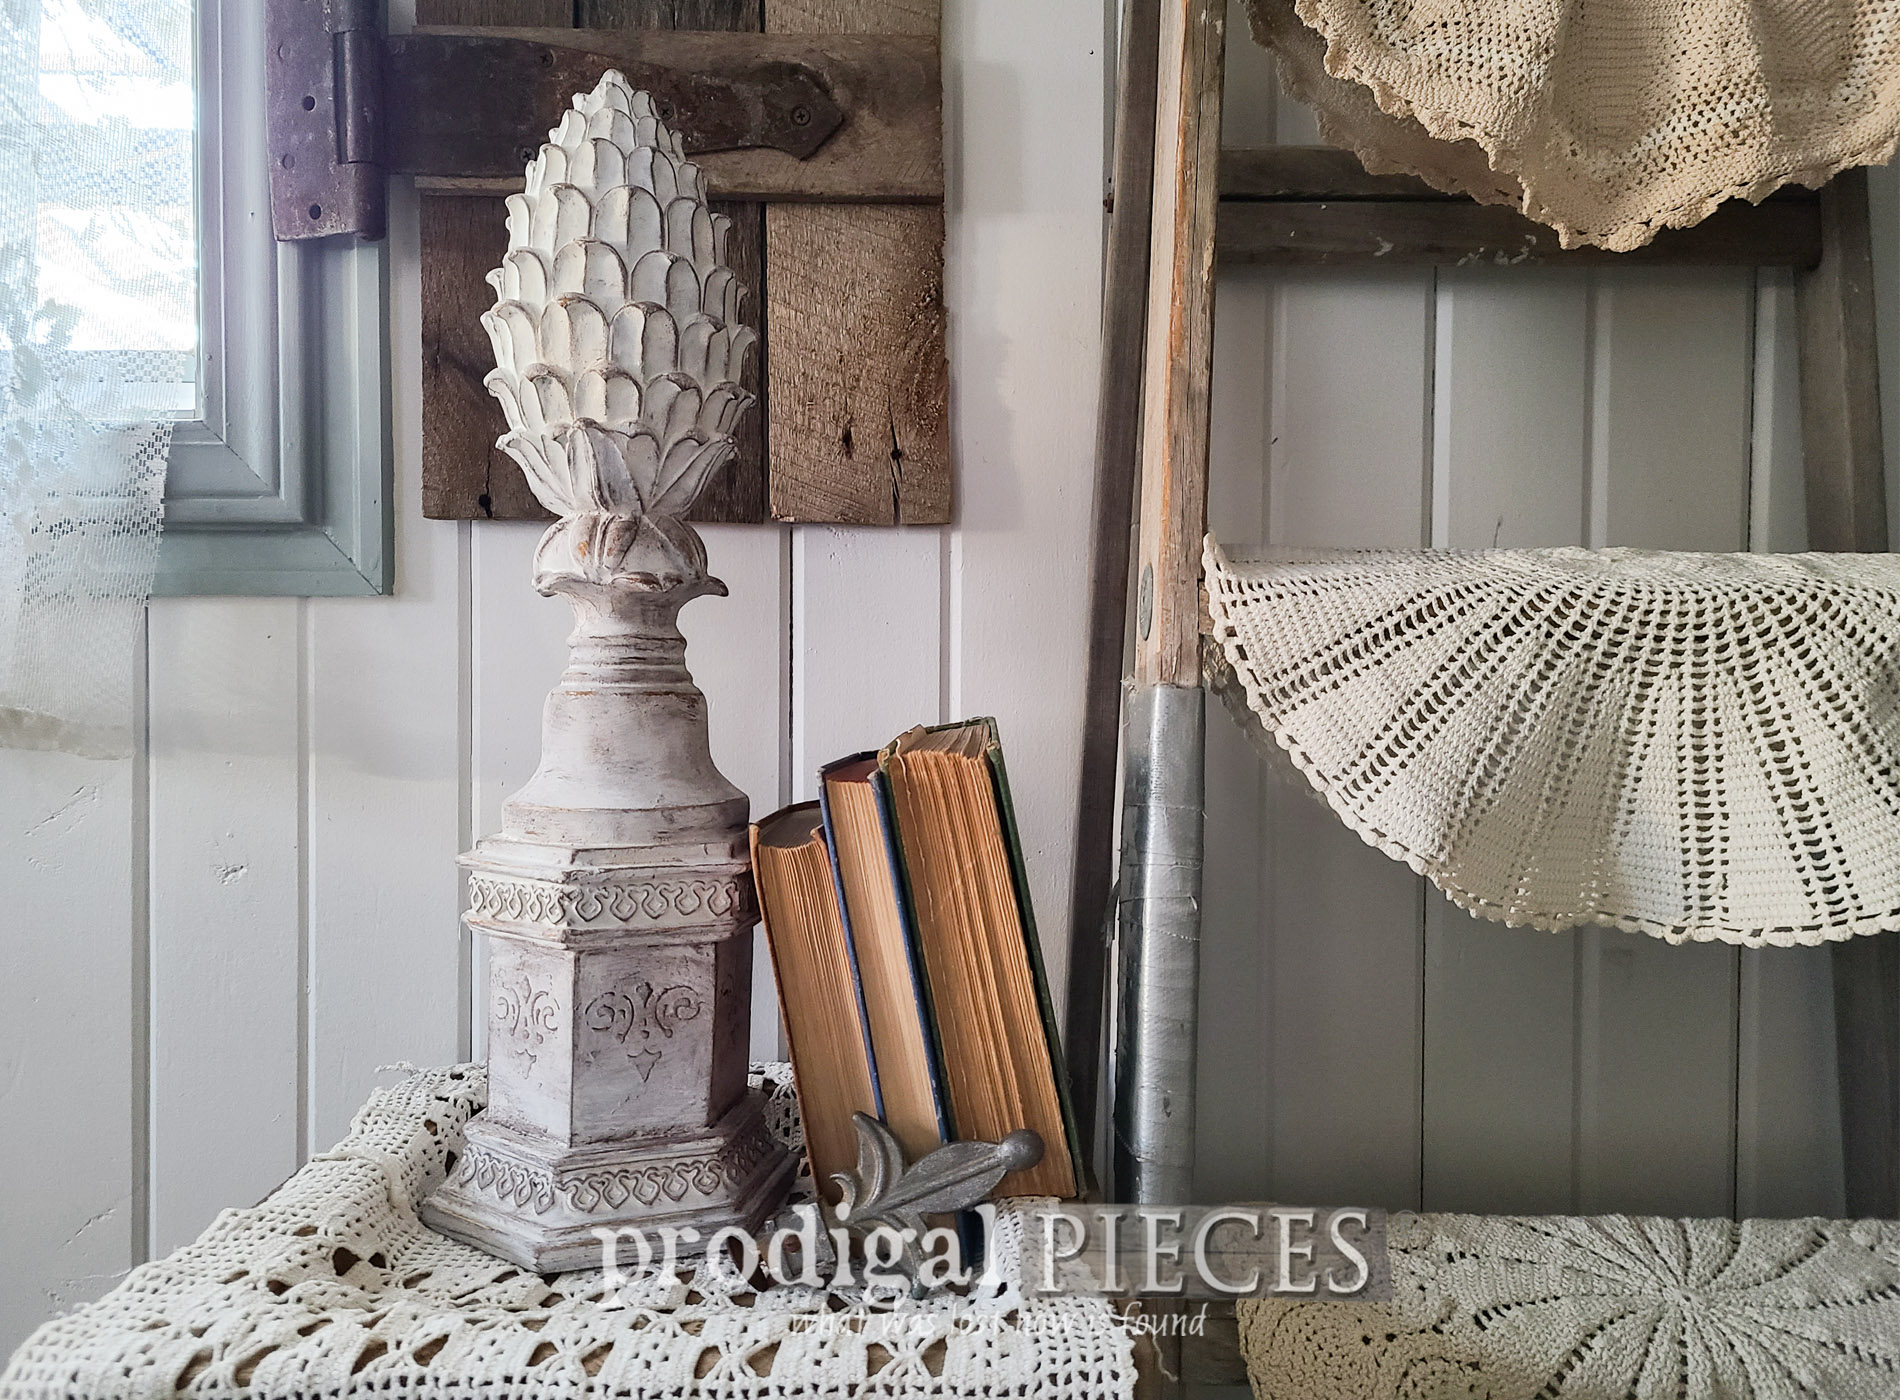
NEXT STEPS
While we have the piece in a finished state, it's time to make it our own. From here you could leave it as is with the touch-ups, or go in a completely different direction. Although, for me, I want a bit more texture and softness added to it, so I give it a base coat of a white milk paint. After that, I apply waxes to draw out the details and distress to see the metallic paint peeking out below.
THE REVEAL
Finally, our broken decor is repaired and ready for a great many more years. Can you believe it's the same piece?
 Not bad for broken decor with that misfit vibe, don't you think? What is more, all it took was a willing spirit and a little elbow grease.

 With that in mind, can you tell I made the repairs? They're facing you bold face - nothing to hide here! woot!

 As always, my goal is to inspire you to see past the obvious and have a vision to what trashure really can become with a DIY spirit. If you want to add this piece to your home decor, you can find it and more available in my online store.

SHARE
Additionally, do pin and share how to repair broken decor. It can be done, and folks need to know! Up next, I have a GIVEAWAY you don't want to miss that also showcases a way to create the most unique gift. HEAD HERE to join the fun!
 To get these DIY tips & tricks in your inbox, be sure to sign up for my newsletter. Next, head below to see my friends' Trash to Treasure fun!

Last, but not least, check out these other inspiring makeovers just for you:


Also, more DIY adventures like my broken decor repaired & updated:

