Y'all ready for this? It's
Trash to Treasure Tuesday! My blogger friends and I love to share with you fantastic projects to inspire you to give DIY a try. My project piece for today is my very own blanket chest. It's looking kinda shaggy, isn't it? Let me show you how I took it from shaggy to rustic chic. (aka.
trashure) You'll get to see my friend's projects at the end.

I originally purchased this piece to redo thinking it was wood when I bought it sight unseen. Little did I know it ended up being coated in multiple layers of paint...ugh. If you remember
from this post, I promised myself to never buy another painted piece to work on. When it arrived here I decided it would find a place in my kitchen during our remodel to help store our homeschool items for the time we are in mess mode.
It wasn't until I moved it to the deck of my shed that the climate began to make the paint peel and flake horribly that I spied beauty...oak. SCORE!!

It was then that I knew I absolutely wanted to keep this thing since I have a sweet spot for a blanket chest. They are functional decor in being that the are awesome for seating, and, of course, storing blankets, etc. This one fast became one of my favorites because of the awesome hydraulic closure it has. Smooth and safe to close...I love it. And, notice they even painted the inside a gorgeous "puice" color (sarcasm intended). meh.

DIY TIME
So, as you can imagine the first order of business was to remove those blucky layers of paint. Out comes my heat gun like I used to create
my door mirror. (see the video in that post for a demonstration) Before I started, I chipped up a piece so you could see the 5 layers I'm up against.

We've got white (most likely primer), orange, red, dark brown, and then light brown on top. Whew! The worst color was that bright hunter orange. It was both inside and out. At this point, the FedEx delivery guy shows up with some happy mail and asks what I'm doing. hahaha... I'm like, "Doesn't everybody get up early Saturday morning to peel paint?"
It took me a bit, but here it is... a hot mess...literally!

Once all that gunk was off, I broke out my sander and took it down to bare bones. That's when the disappointment hit. The side panels and top ends were made of PINE, not the gorgeous oak I dreamed of. See how they look whiter than the legs, top, and front? The pine had soaked that orange paint up so much that it looked like it glowed. Now what, right?

I decided to continue with the oak that I could save and paint the ends, and interior. For the inside, I wanted to lighten it up a bit and chose
a soft, light gray to refresh and hide that blucky color.
It only took one coat of paint to easily cover that old color. Woot! Then, for the sides I used a dark brown I had on hand as a base coat, then choose creamy white for the topcoat.
PAINTING FUN
I wanted the bottom layer to peek out through the top after distressing. A dry brush technique helped me get a washed feel using my paint brush.


Now for some fun! If you have been around me, I like to add a little typography when I can, like
in these projects. Subsequently, I find such therapy in painting - it's fun! My goal was to create a piece that looked like it had been around for years, so I didn't mind a worn look.

Last, to revitalize and seal the wood, I used a poly topcoat. Likewise, this protects the wood without giving it a sheen to keep with the aged look I'm after.
FINE DETAILS
In addition, I even had a super-cute helper. She works like a pro.

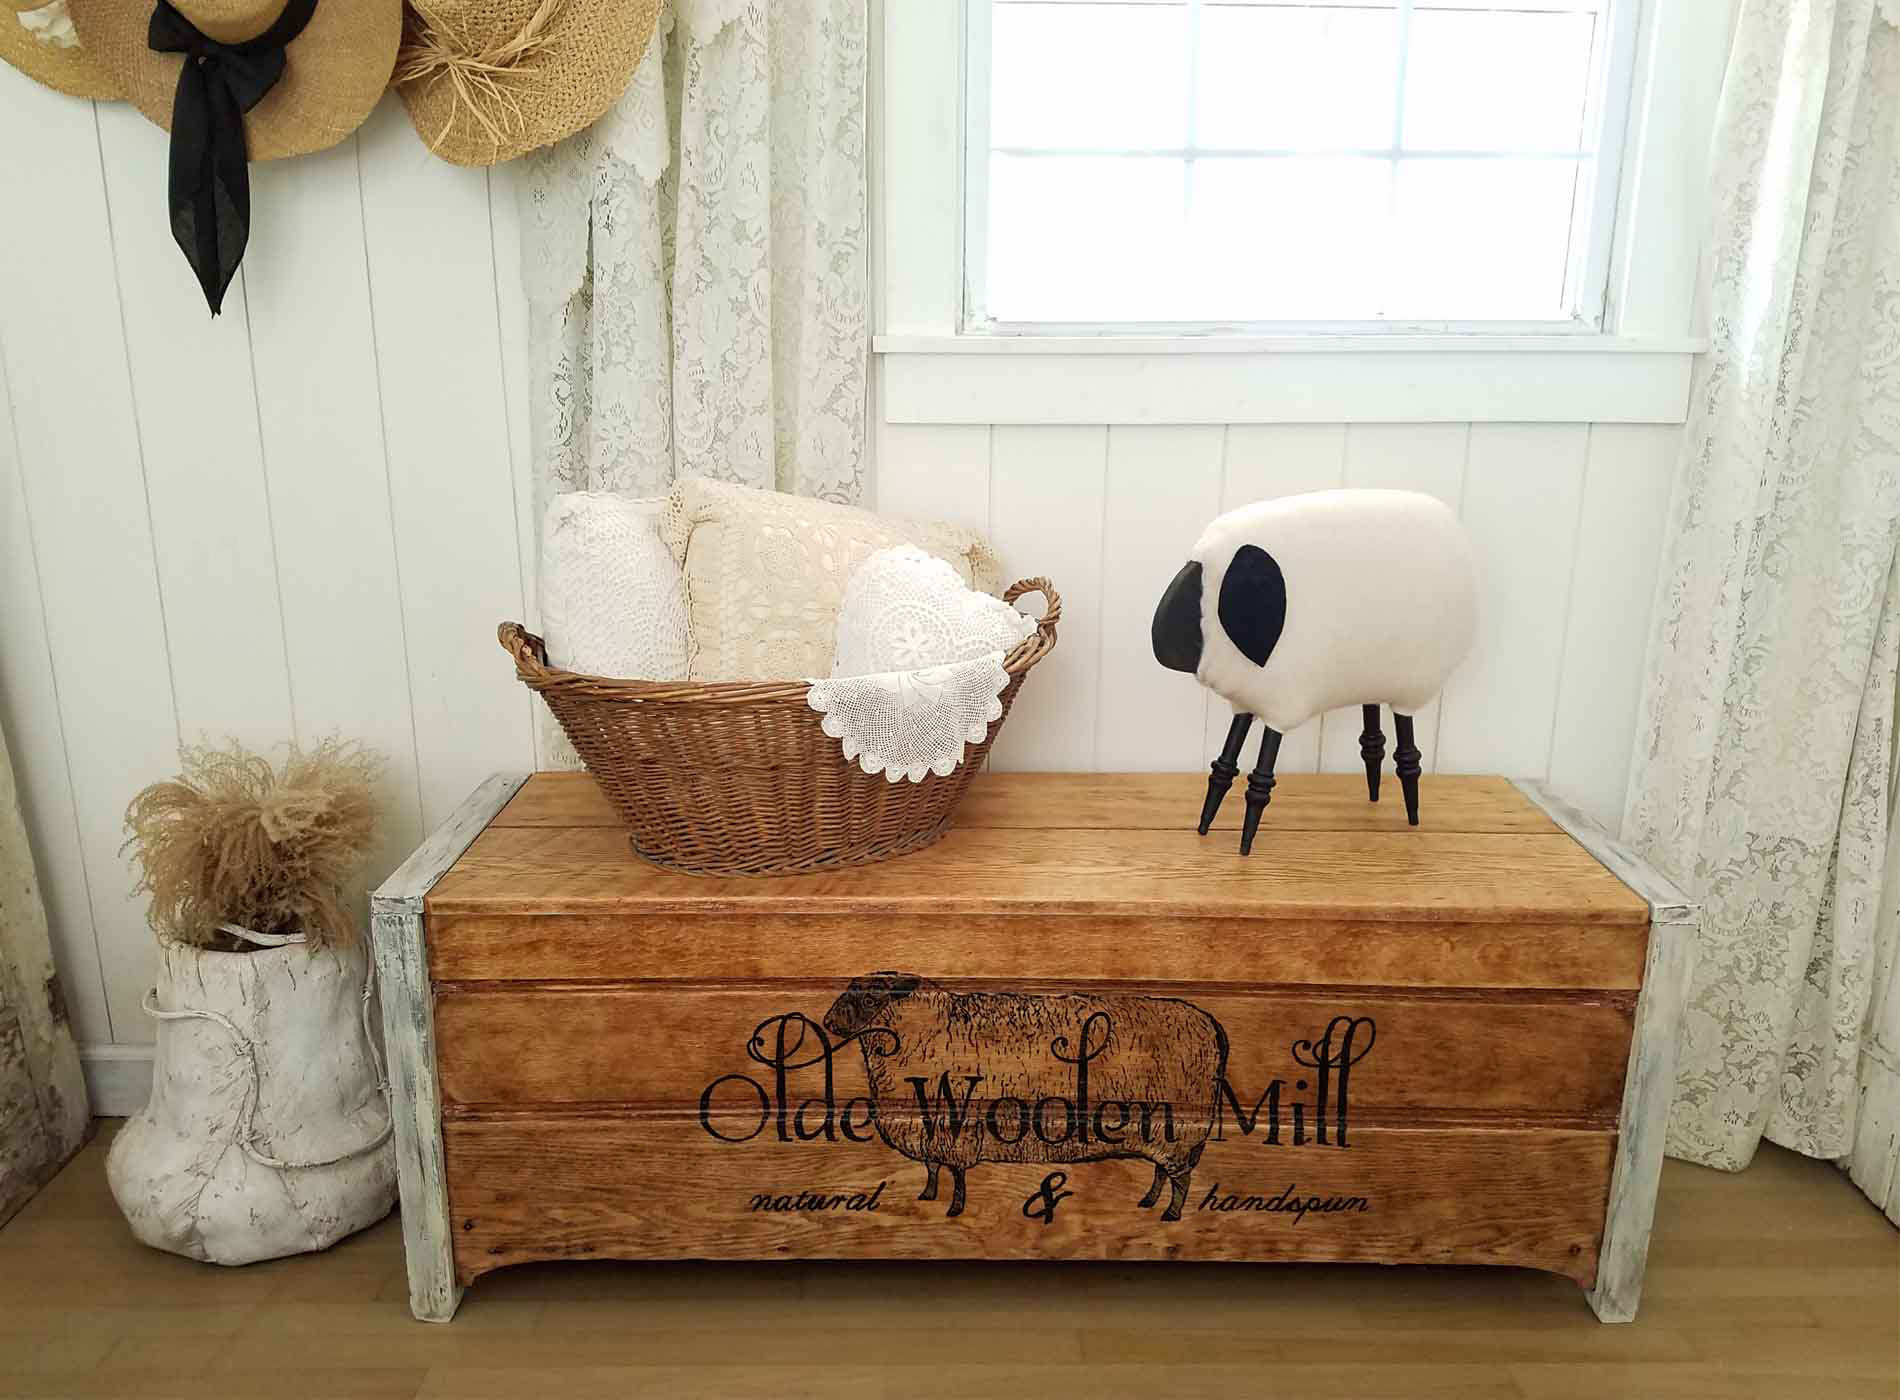
Finally, the blanket chest is done.


My little sheep guy is like...Baa! I see you. (tutorial for those are
HERE or purchase one ready-made in
my shop)
ALL DONE
I couldn't be happier with the outcome, even with the pine issues I had. It looks just as I had hoped. For added texture, I use some cast iron bin pulls to the sides.

The inside is refreshed and no longer has that smell and awful color. Hallelujah!


Even though it's sitting in my bedroom, that's not the forever home (I think...hahaha). I do have plans for another big project by the end of the season to set it in its new home, but we'll see.

And, of course my favorite part of this blanket chest is the woolly sheep graphic. I designed and added it by using
my transfer method. I have more things planned for this graphic, so stay tuned!

Additionally, inspiring others to give DIY a try is what I'm all about. In addition, pin and share to inspire others too!

Up next, I'm sharing a quick-fix breakfast that is sure to nourish and tickle your taste buds. And it's grain-free!
See my recipes here.

To get these DIY tips & tricks in your inbox, be sure to
sign up for my newsletter. Now, time to head below for more fun!

 PINTEREST | EMAIL
WAIT!! You just have to see what my Trash to Treasure Friends have created for you.


- Confessions of a Serial DIYer
- Girl in the Garage
- Bless'er House
- Artsy Chicks Rule
Also, more DIY projects like this blanket chest makeover:


 I originally purchased this piece to redo thinking it was wood when I bought it sight unseen. Little did I know it ended up being coated in multiple layers of paint...ugh. If you remember from this post, I promised myself to never buy another painted piece to work on. When it arrived here I decided it would find a place in my kitchen during our remodel to help store our homeschool items for the time we are in mess mode.
It wasn't until I moved it to the deck of my shed that the climate began to make the paint peel and flake horribly that I spied beauty...oak. SCORE!!
I originally purchased this piece to redo thinking it was wood when I bought it sight unseen. Little did I know it ended up being coated in multiple layers of paint...ugh. If you remember from this post, I promised myself to never buy another painted piece to work on. When it arrived here I decided it would find a place in my kitchen during our remodel to help store our homeschool items for the time we are in mess mode.
It wasn't until I moved it to the deck of my shed that the climate began to make the paint peel and flake horribly that I spied beauty...oak. SCORE!!
 It was then that I knew I absolutely wanted to keep this thing since I have a sweet spot for a blanket chest. They are functional decor in being that the are awesome for seating, and, of course, storing blankets, etc. This one fast became one of my favorites because of the awesome hydraulic closure it has. Smooth and safe to close...I love it. And, notice they even painted the inside a gorgeous "puice" color (sarcasm intended). meh.

 We've got white (most likely primer), orange, red, dark brown, and then light brown on top. Whew! The worst color was that bright hunter orange. It was both inside and out. At this point, the FedEx delivery guy shows up with some happy mail and asks what I'm doing. hahaha... I'm like, "Doesn't everybody get up early Saturday morning to peel paint?"
It took me a bit, but here it is... a hot mess...literally!
We've got white (most likely primer), orange, red, dark brown, and then light brown on top. Whew! The worst color was that bright hunter orange. It was both inside and out. At this point, the FedEx delivery guy shows up with some happy mail and asks what I'm doing. hahaha... I'm like, "Doesn't everybody get up early Saturday morning to peel paint?"
It took me a bit, but here it is... a hot mess...literally!
 Once all that gunk was off, I broke out my sander and took it down to bare bones. That's when the disappointment hit. The side panels and top ends were made of PINE, not the gorgeous oak I dreamed of. See how they look whiter than the legs, top, and front? The pine had soaked that orange paint up so much that it looked like it glowed. Now what, right?
 Now for some fun! If you have been around me, I like to add a little typography when I can, like in these projects. Subsequently, I find such therapy in painting - it's fun! My goal was to create a piece that looked like it had been around for years, so I didn't mind a worn look.
 Last, to revitalize and seal the wood, I used a poly topcoat. Likewise, this protects the wood without giving it a sheen to keep with the aged look I'm after.
 Finally, the blanket chest is done.

 My little sheep guy is like...Baa! I see you. (tutorial for those are HERE or purchase one ready-made in my shop)
 The inside is refreshed and no longer has that smell and awful color. Hallelujah!

 Even though it's sitting in my bedroom, that's not the forever home (I think...hahaha). I do have plans for another big project by the end of the season to set it in its new home, but we'll see.
 And, of course my favorite part of this blanket chest is the woolly sheep graphic. I designed and added it by using my transfer method. I have more things planned for this graphic, so stay tuned!
 Additionally, inspiring others to give DIY a try is what I'm all about. In addition, pin and share to inspire others too!
 Up next, I'm sharing a quick-fix breakfast that is sure to nourish and tickle your taste buds. And it's grain-free! See my recipes here.
 To get these DIY tips & tricks in your inbox, be sure to sign up for my newsletter. Now, time to head below for more fun!
 WAIT!! You just have to see what my Trash to Treasure Friends have created for you.


