Are you ready to take your outdoor (or indoor) decor to the next level? I'm here, as promised, to show you how to create the DIY concrete table that we built for
our backyard fire pit reveal last week. Plus, I'm also going to share how I create two different solar lamps for a few dollars too. So much to share, so let's get started!

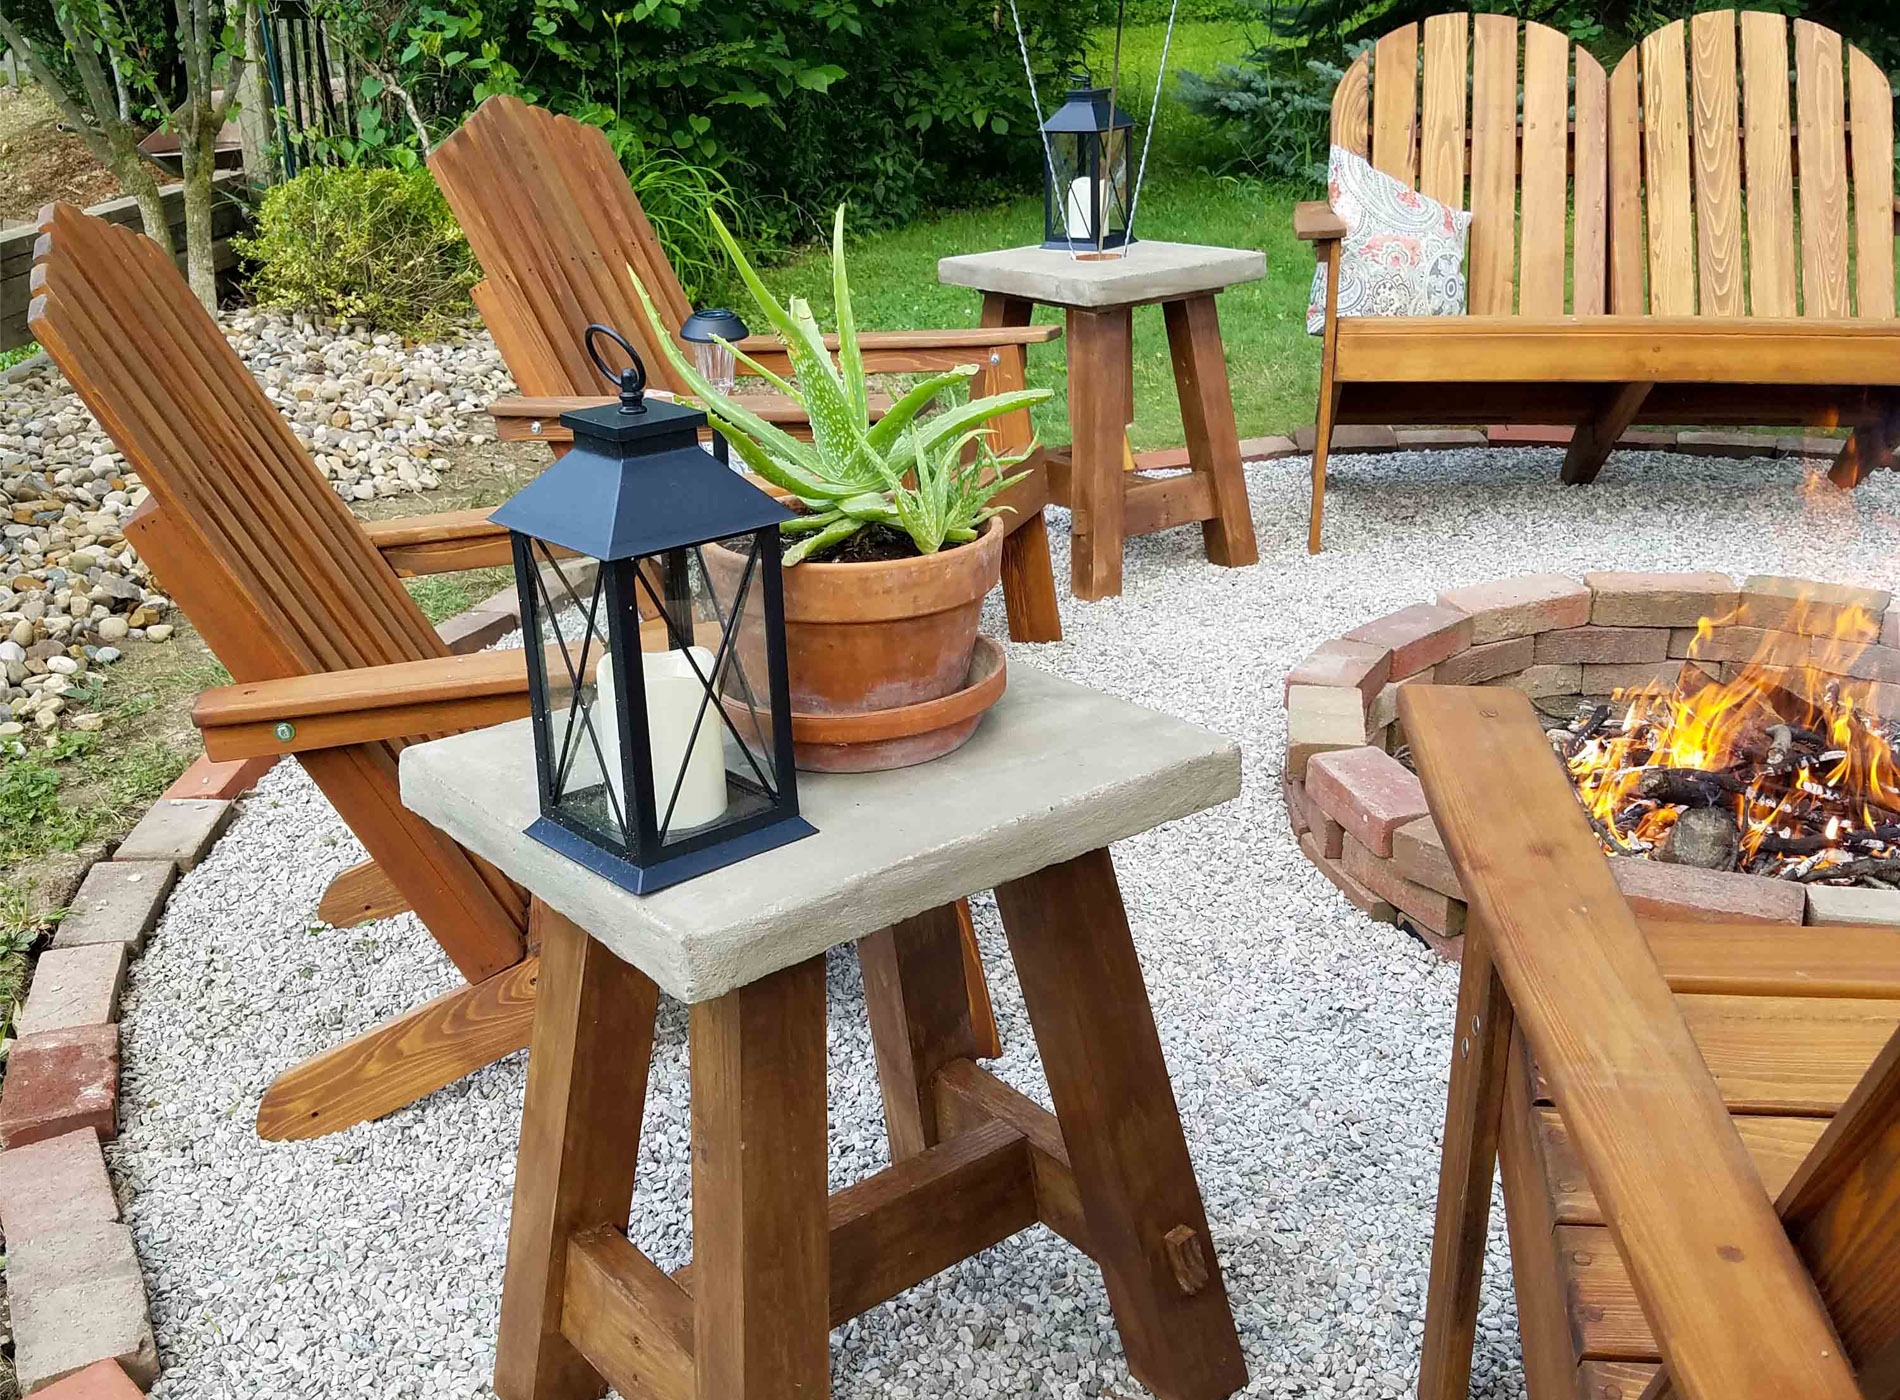
The best part about these concrete tables is that they are very versatile. Also, you can size it to meet your needs and they even look wonderful in your interior decor. Eventually, I will get to the solar lamps in a bit, so hang in there.

We made both tables with flat surfaces. However, one has inserted cylinder to hold roasting sticks when not in use.

Ready to get started? Here is what you'll need for one table:
TERMS OF USE: when you build this concrete table, you agree to the following: it cannot be shared or distributed for monetary gain in any way, it may not be modified in any way, and you may not claim the work as your own. This table design can not be used as decor in a store either online or brick and mortar. Thanks for complying!
Materials: use treated wood for outdoor tables, or naturally rot resistant wood like cedar or cypress. Cuts outlined within post.
- 1 - 4" x 4" x 8' post
- 1 - 2"x 4" x 8' board
- concrete adhesive
- 1 - bag QuikCrete concrete (an 80 lb. bag made two tops)
- wood glue
- 3" decking screws
- 1 ¼" decking screws
- chicken wire or other metal mesh
- Behr Waterproofing Stain in Chocolate (or your choice)
- Thompson's WaterSeal Clear Multi-Surface Waterproofer
- 1 - terra cotta drain pipe (optional for roasting stick table)
Tools:
- double-beveling compound miter saw
- table saw
- drill
- drill bits
- mixing drill bit
- 5 gallon bucket (or something to mix concrete in)
- trowel or spade
- tape measure
- quick square
- Kreg Pocket Hole Jig
- HomeRight Finish Max Extra
- sander
- sandpaper discs in 80 grit and 120 grit
- nailer
- 1" brads
- paint brush
- wire cutters
- concrete form made from scrap wood: Ours top measures 18 ½" x 16" - feel free to change it up.
- 2 - 20" x 1 ¾ x 1"
- 2 - 16" x 1 ¾" x 1
- 1 - 20" x 17 ½" plywood panel
DIY Concrete Table Top
Step 1
First, here is what your concrete form will look like when assembled. We made ours out of scrap wood and it can be used more than once. Then, to create two tables at the same time, we built two so they would cure at the same pace.

Attach the side pieces together with screws at corners. Then attach the base to the frame with more screws through the bottom of the plywood.
note: If you are making the roasting stick table, center the terra cotta drain pipe in the form before pouring concrete.

Step 2
Mix up your concrete per manufacturer's instructions using a 5 gallon bucket and mixing drill bit. We used concrete we had on hand, but if we had to do it over we might try the concrete for countertops. Our choice led to a more rough texture, but worked.

Step 3
Pour a bit of concrete into the form then place your cut piece of chicken wire into the concrete making sure not to press it to the bottom. Pour the remaining concrete to fill the form. (
note: We cut a hole in the chicken wire and slid it over the terra cotta drain pipe on the other table)

Step 4
Drag a scrap piece of wood across the form to level out the concrete. Gently shake or tap the form to make air bubbles come to the surface. Let cure per manufacturer's instructions (approx. 24 hours)
Step 5
After letting your table top cure, it's time to fill in the bubbles and imperfections. Mix up a small amount of concrete and patch those spots. When dry, sand them down with 80 grit paper. It can be messy! Just be sure to use a mask and protection as with any job. Y'all know you want to be just like me when you grow up, right?

You can see behind me that I tried a batch of colored concrete to fill in the bubbles, but it didn't come out quite as I liked it to be. So, I went back over with a skim coat of regular old stuff.
Step 6
Next, your DIY concrete table top is ready for the sealant. First, we use Thompson's WaterSeal and brushed it on. It, too, has to cure approximately 24 hours.

While you're top is curing it's time to build the base. Hoo-Rah!!
DIY Concrete Table Base
Cut instructions for double-beveled legs: (leave out the bevel for straight leg design or do a single bevel - up to you)
- From the 4" x 4" x 8" - cut & rip 4 pieces measuring 20 ¼" x 2 ¾ x 2 ¾" with both ends cut on a double bevel at 7° (see below)
- From the 4" x 4" scrap:
- 2 - 13" x 2 ¾" x ¾"
- 2 - 5 ¾" x 2 ¾" x ¾"
- 4 - 2" x ¾" x ¾"
- From the 2" x 4" x 8":
- 2 leg braces - 9 ½" long with 7° mitered ends
- 1 stretcher - 13 ½" long with 7° mitered ends
Step 1
Here is a look at a dry fit of your leg base side. Notice the legs will be pointing inward toward the center (aka. double bevel)

Also, before assembling, take you sander and 120 grit pads and round over the leg corner sides as seen in our tables. That will make for a better wear-and-tear design as well as make the table more sleek.
Step 2
Next, measure 3 ¾" and 7 ¼" up the inside of the leg and mark with your quick square to the outside. Then, drill two holes an inch apart on the outside towards center using your 5/16" drill bit. This will be where your crosspiece is attached. Also, to get the same countersunk depth, use tape to mark at 1 ½" up from the bit end.

Step 3
Then, attach crosspieces with 3" screws. To make for a rustic feel we decided to cover those holes with a faux mortise and tenon joint using a small bit of wood. Round over the corners to give it a realistic appeal.

We have made the real deal mortise and tenon in
our Pottery Barn knock-off bench by hand, but wanted to make this simple for you. Just add a bit of wood glue and attach using your nailer and 1" brads.
Step 4
Attach your stretcher between the two leg braces with two 3" screws on each side. Mark your screw locations so that the stretcher will be attached at the horizontal center of each brace. You could cover the visible screw holes with another faux tenon if you prefer.
Step 5
Time to add the table top support and then your DIY concrete table base will look like this...

Next,use your Kreg Jig to create two sets of pocket hole joints on each end of the short pieces using your 4" x 4" scrap. (see photo) Assemble the frame and then attach using screws to the table base.
Step 6
Time for some fun! I am totally blown away by the new HomeRight Finish Max Extra because it has an assortment of tips that makes switching from one job to the next so much easier. And, it makes the three other sprayers I have obsolete because this one does it all.

You can imagine this made my project so much easier. I detailed the use of it in this video below. I had a blast! literally...

Now that everything has been built and tweaked, it's time for one last step.
Step 7
Last, using your concrete adhesive, apply a generous amount to the top of the table frame. Square up and center your concrete table top and press allowing time for it to cure. Feel free to use bricks or other material as counter-weight to hold it in place.
THE REVEAL
Finally, your DIY concrete table is done!

Give yourself a pat on the back for a job well done.

 by Prodigal Pieces | prodigalpieces.com")
Okay, so you have your tables, but want to add a little more fun to your outdoor decor? How about a couple of super
cheap easy DIY solar lamps? First, this lamp is for our patio using a thrifted lamp base and shade. Cost = $5
DIY Solar Lamps

Here's what you'll need:

- thrifted lamp with harp (part that holds shade on)
- thrifted shade
- cheap $2 solar light
- Gorilla Glue
- spray paint (if desired)
Step 1
First, remove the wiring and put the harp back on.

Step 2
Next, spray your lamp with desired paint. I used an Antique Brass by RustOleum.

Step 3
Last, take apart solar light so that the bottom stake is removed and only the light housing is left. Glue to the lamp and let cure.

Enjoy! This was such a fun accent to our patio. My kids love it.

Now for the other little addition that was next to free to create. I bought 3 of those same solar lights and simply drilled a hole in some of our firewood and set them around our fire pit.

Not only do we love that they add a rustic feel, but also a bit of safety when moving around in the dark. Plus, an extra spot to set a drink.
First, use a spade bit or forstner bit to create a hole the size of the stake and plug it in.


In addition, pin and share this DIY concrete table tutorial along with the solar lamps to inspire others to get out there and try. DIY is fun!!

RELATED POSTS
Likewise, here is a collection of links to all the DIY's we share that helped us get our backyard in shape:
Up next is
Trash to Treasure Tuesday! I've got a fun project for you so be sure to
sign up for my newsletter. PLUS, you will get your FREE Furniture Buying Checklist and special discount to
my shop. Until next time!

Also, more projects like this DIY concrete table:


 The best part about these concrete tables is that they are very versatile. Also, you can size it to meet your needs and they even look wonderful in your interior decor. Eventually, I will get to the solar lamps in a bit, so hang in there.
 We made both tables with flat surfaces. However, one has inserted cylinder to hold roasting sticks when not in use.
 Ready to get started? Here is what you'll need for one table:
TERMS OF USE: when you build this concrete table, you agree to the following: it cannot be shared or distributed for monetary gain in any way, it may not be modified in any way, and you may not claim the work as your own. This table design can not be used as decor in a store either online or brick and mortar. Thanks for complying!
Ready to get started? Here is what you'll need for one table:
TERMS OF USE: when you build this concrete table, you agree to the following: it cannot be shared or distributed for monetary gain in any way, it may not be modified in any way, and you may not claim the work as your own. This table design can not be used as decor in a store either online or brick and mortar. Thanks for complying!
 Attach the side pieces together with screws at corners. Then attach the base to the frame with more screws through the bottom of the plywood.
note: If you are making the roasting stick table, center the terra cotta drain pipe in the form before pouring concrete.
Attach the side pieces together with screws at corners. Then attach the base to the frame with more screws through the bottom of the plywood.
note: If you are making the roasting stick table, center the terra cotta drain pipe in the form before pouring concrete.


 You can see behind me that I tried a batch of colored concrete to fill in the bubbles, but it didn't come out quite as I liked it to be. So, I went back over with a skim coat of regular old stuff.
 While you're top is curing it's time to build the base. Hoo-Rah!!
 Also, before assembling, take you sander and 120 grit pads and round over the leg corner sides as seen in our tables. That will make for a better wear-and-tear design as well as make the table more sleek.

 We have made the real deal mortise and tenon in our Pottery Barn knock-off bench by hand, but wanted to make this simple for you. Just add a bit of wood glue and attach using your nailer and 1" brads.
 Next,use your Kreg Jig to create two sets of pocket hole joints on each end of the short pieces using your 4" x 4" scrap. (see photo) Assemble the frame and then attach using screws to the table base.
 You can imagine this made my project so much easier. I detailed the use of it in this video below. I had a blast! literally...
 Give yourself a pat on the back for a job well done.

 by Prodigal Pieces | prodigalpieces.com") Okay, so you have your tables, but want to add a little more fun to your outdoor decor? How about a couple of super
Okay, so you have your tables, but want to add a little more fun to your outdoor decor? How about a couple of super  Here's what you'll need:


 Enjoy! This was such a fun accent to our patio. My kids love it.
 Now for the other little addition that was next to free to create. I bought 3 of those same solar lights and simply drilled a hole in some of our firewood and set them around our fire pit.
 Not only do we love that they add a rustic feel, but also a bit of safety when moving around in the dark. Plus, an extra spot to set a drink.
First, use a spade bit or forstner bit to create a hole the size of the stake and plug it in.
Not only do we love that they add a rustic feel, but also a bit of safety when moving around in the dark. Plus, an extra spot to set a drink.
First, use a spade bit or forstner bit to create a hole the size of the stake and plug it in.

 In addition, pin and share this DIY concrete table tutorial along with the solar lamps to inspire others to get out there and try. DIY is fun!!


