Here we are already at the second Tuesday of the month which means it's
Trashy Treasures time! Each month my gal friends and I get together to create new inspiration for you. While you'll see their projects in a bit, take a peek at this wooden plant stand I found at the thrift store.

Honestly, it's not much to look at, but the fact that it's made of oak and has those awesome lines pulled me in. What is more, the top apparently had a tile (or something like that) in the center originally. That gave me an idea to play around with this makeover.

DIY TIME
First, let's take a look at that obvious problem spots (1) the tile adhesive remnant needs to go (2) the finish is worn off and mottled in places (3) two sets of the legs are completely loose and won't stay in.

All those problems are easy enough to fix. Additionally, you can see how I've redone, reinvented, and refashioned
these plant stands as well HERE.
I scrape down the adhesive and lightly sand. As for the finish, I remove any residue with a 2:1 water/vinegar mix. After that, I use my brad nailer and stapler to secure those loose legs.

Then, as soon as the structure and surfaces are ready to go, I begin with the same paint I use on
this recent bookcase makeover. Also, notice I'm not painting the center. More to come on that soon.

For added dimension, I use the color slate green (just like
my kitchen cabinets and trim in
my home)

While that gorgeous green is curing, I head back to the top to begin tiling. Yes, tiles are on the way!

I just love these kinds of tile sheets that are perfect for most anything. You can see how I tiled
this serving tray HERE or watch the video below.

To begin, I need to get the tile sheet cut to fit in the space allotted. While I could use my wet saw, for these small tiles, I use scissors to trim it down, and then these tile snips to make it fit perfectly.

First, I use the tile adhesive and let set for a time. Second, I apply the grout and let cure, followed by two coats of a grout sealant.

STAND UP
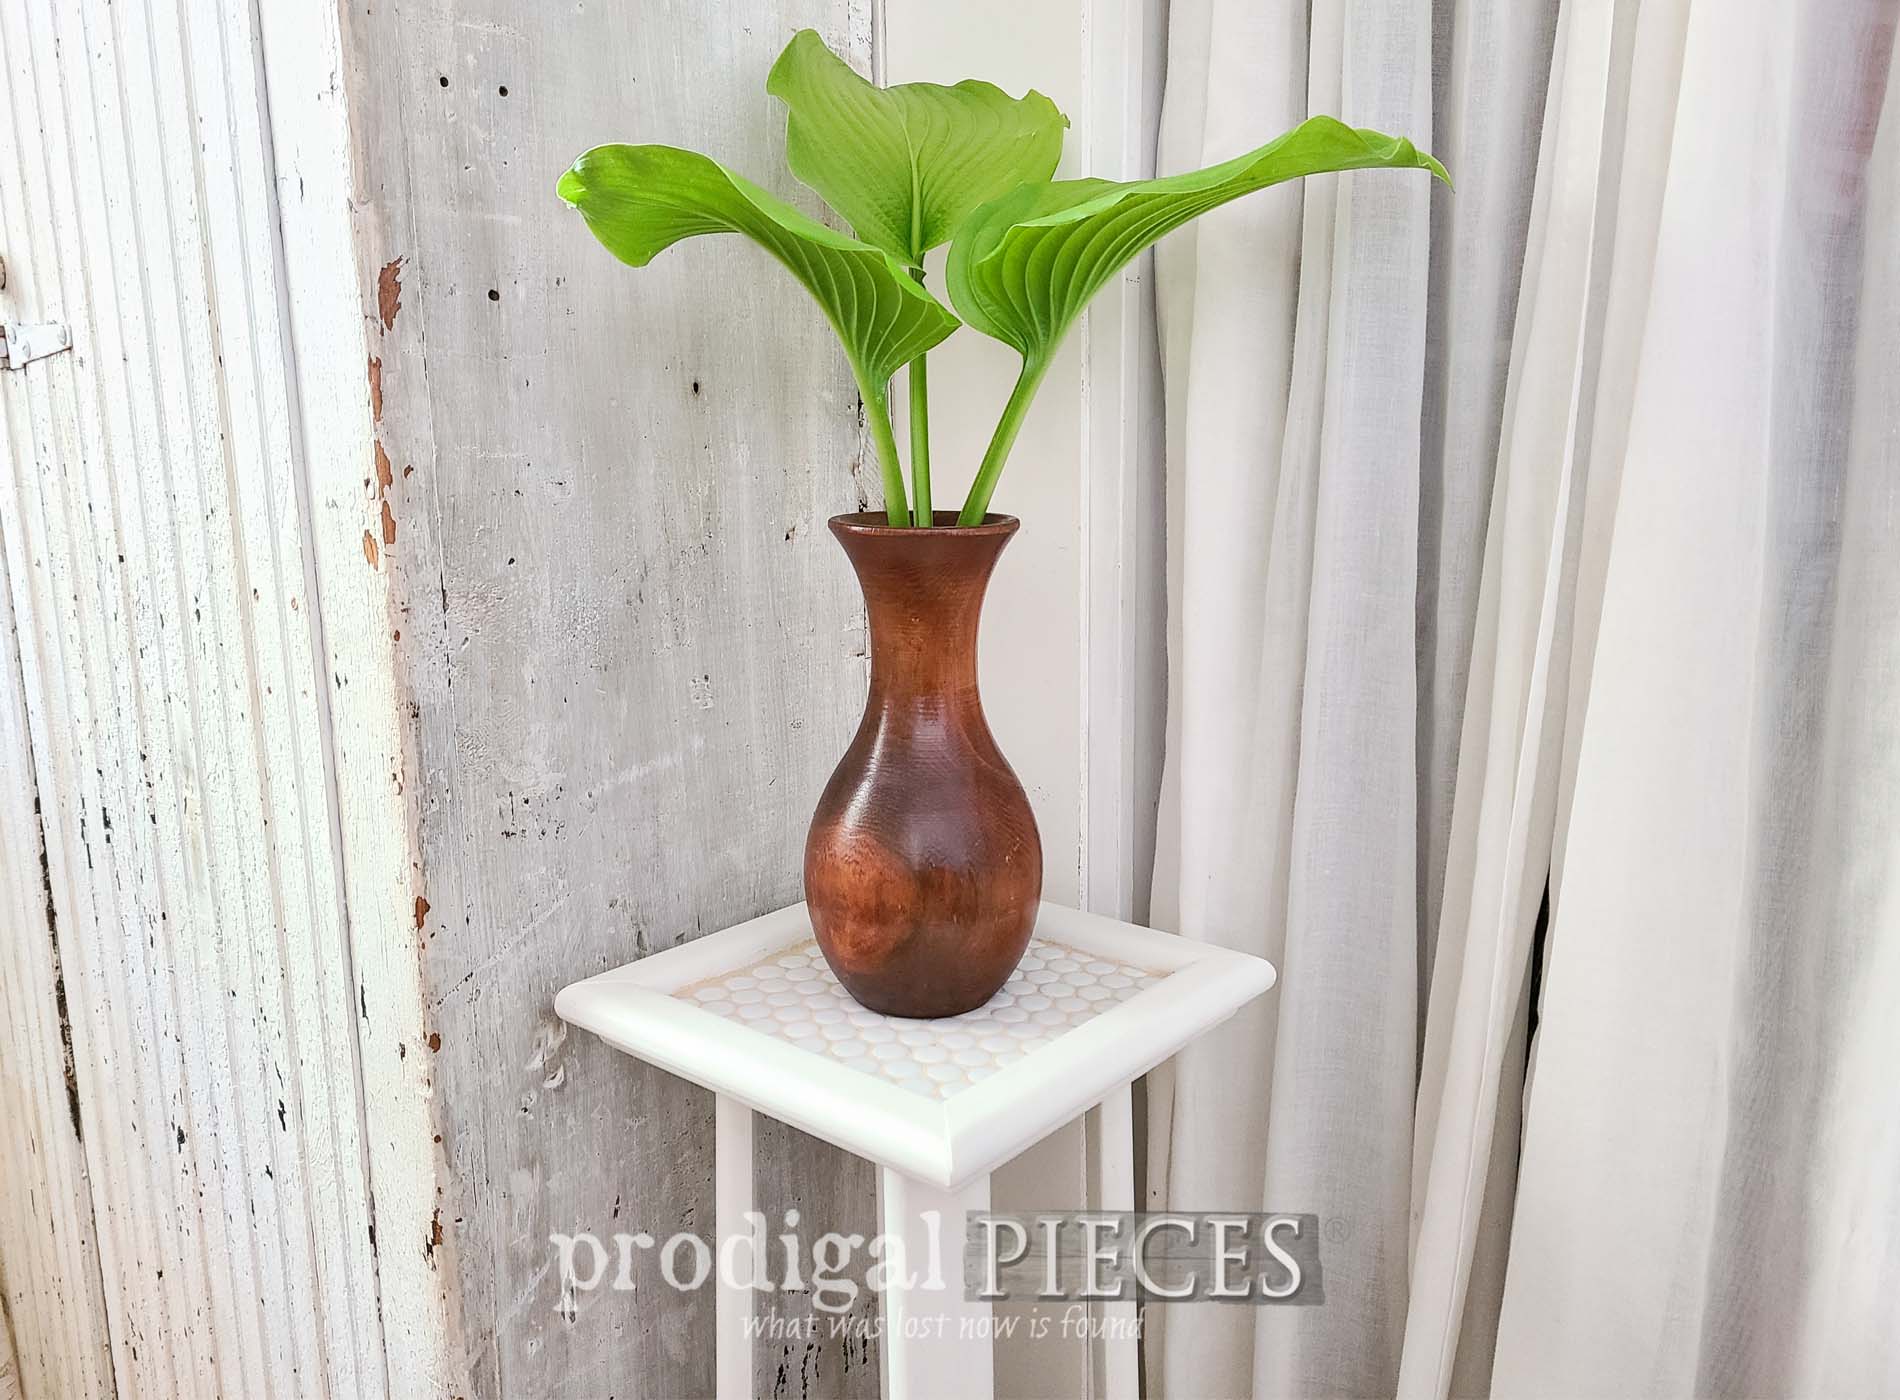
Finally, after a bit of touch up, here is my wooden plant stand now standing tall and gorgeous for many more years to come. Isn't that fun?


I'm happy dancin' with the tile! It not only adds function, but also that play on lines to contrast the hard-line legs.


As a sidenote, I am beyond skip-happy to see leaves, grass, and flowers again, as well as insects, birds, etc. Happy gal here!


Likewise, if you'd like to add this wooden plant stand to your home story, you can find it and more in
my online store.

SHARE
Now it's your turn. Would you have adopted this stand in the original condition? If so, what would you have done with it? Leave me some comment love below. Additionally, I invite you to pin and share to inspire others.

Before you go, be sure to
sign up for my FREE newsletter. Last, but not least, it's time to see what my Trashy Treasures gals have worked on to inspire you below. Until next time!

 PINTEREST | EMAIL


- Salvaged Inspirations
- Confessions of a Serial DIYer
- Artsy Chicks Rule
While you're at it, check out these other thrifty makeovers like this wooden plant stand: