What makes me stop and rethink leaving something behind is the potential it has. Isn't awesome that we all have potential? What you see below is a wooden footstool that I figured I could do something with. Further, what had me pondering the function of this stool within a home in its current or possibly its state yet-to-be.

Like...duh...a footstool is for...feet. I know that, but in this form, its, boring, don't you think? What if instead of looking like it jumped out of the 80's where it sat in front of one of those awfully itchy farm scene couches with wood arms that it has a new story? That's much more my speed.
Okay, so let's say that we could just toss paint onto this and call it done. However, I want to do something
more.
NEXT LEVEL
First, I need to clean it up a bit getting rid of dirt and grime using a 2:1 water/vinegar mixture. That leaves me with a better idea of where to go with this makeover. Then, once I figure out what I have in my stash and how to run with this, I break out a simple white paint and add two coats (letting cure in between)

Next, as soon as the paint cures, I measure and mark for 5 different buttons to make this into a tufted footstool.


UPHOLSTERY
As you can imagine, in order to get tufting, you need some floof. Thankfully, I already have foam in my stash that I cut to fit and adhere with spray adhesive. In addition, I totally think footstools are a great way to dabble in the world of upholstery. You can see all my past footstool makeovers
in these posts or in this video demo below.


Afterward, I adhere a layer of batting over top making it ready for upholstery (you can see a peek in the corner...eep!)

Furthermore, once I have the layers ready, I attach with my stapler - this is literally a workout at times. haha! You can use a heavy-duty stapler and don't need one like mine.

Last, I need to add the button using my simple button cover kit. Don't let this dissuade you from trying this because it's truly so very easy.

In the past, I've used an awl or similar, but have since acquired this set of upholstery needles that makes my life so much easier since doing my French tufted mattresses
HERE and
also HERE.

In order to make the tufts, I create the buttons, use my needle to thread an upholstery thread up to the top. Then, I loop the thread through the toggle on the back of the button 3 times. Next, I thread the needle back down in a close-by, separate hole back down. Finally, using my stapler again, I tie it off and staple to secure.
BUTTON TUFTS!
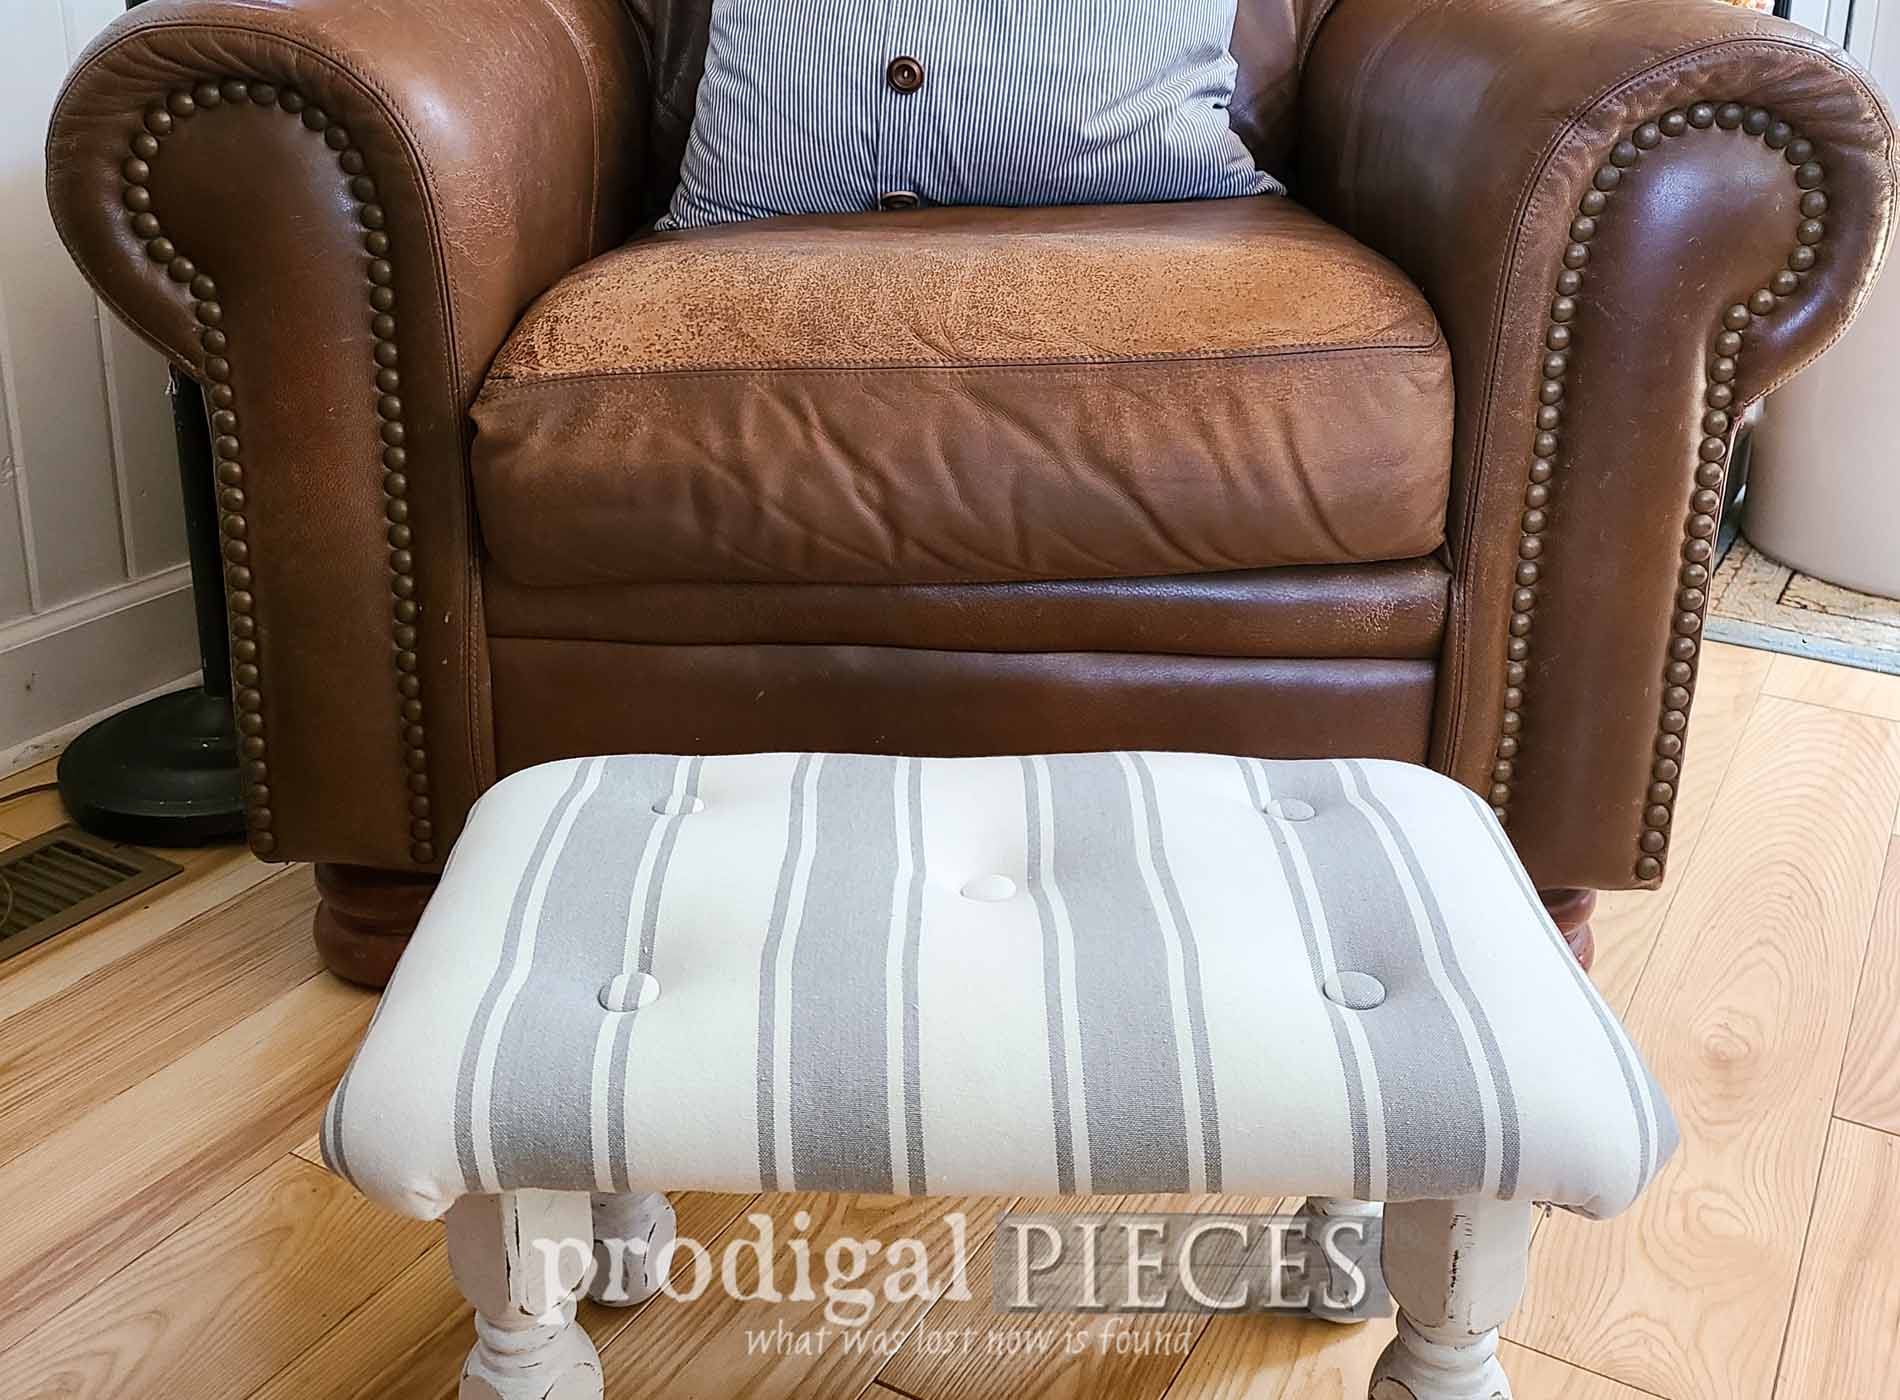
Finally, here is my wooden footstool turned tufted footstool complete with fun stripes!


Also is anyone else hooked on button tufts? I totally love how you can add them to most any furniture with the right know-how (see
my tufted chair HERE or a
tufted bench HERE).


Now it's your turn...what would you have done with this wooden footstool? Better yet, would you try tufting? What is more, you can find this and more in
my online store.


In addition to leaving some comment love below, pin and share to inspire others who may be on the DIY fence.

By the way, don't forget to
sign up for my FREE newsletter because I'll be sharing a second part to the
intro to my neurodiverse marriage post. Read more on
my story HERE.

 PINTEREST | EMAIL
Additionally, check out these other projects like this wooden footstool makeover: