Ever feel like a hot mess? You know I have...tsk. Well, this is a story of a hot mess turned...well...hottie. haha. I felt challenged me with this vintage goodie that needs a whole lotta love. Let's go on a DIY adventure to see this vintage luggage painted, shall we?

Not only is it taped up, beaten up, but also totally full of a story I wish I could hear. This vintage luggage by Hartmann has the original functioning locks, leather handle, and even the monogrammed leather label. eep! I love it.

Conversely, the inside shows the wear and tear the most.

To tell the truth, I have my work cut out for me for sure.
LET'S GO
As you can imagine, most folks would toss this in the trash bin and carry on. However, true
trashure me, is committing to saving this once-beauty. In the past, I've made:
In addition, you can see, I have a slight infatuation with vintage luggage. For me, it brings back times when things were simpler...no screens...just life. For this reason, I want to revive this suitcase to offer a decorative piece with hidden storage.
First, I tear pull off the packaging and duct tape holding it together in replacement of the leather that used to be there.

Then, to my amazement, I find the wooden sides have detailed joints and even metal banding reinforcing.

In order to repair this, I use glue in the joints, but also whip out
my copper contact paper to create reinforced seams once again.

INSIDE OUT
After that, it's time for the inside lining to come out - whew! What a mess, but nevertheless
much easier than working on
silverware boxes.

Regardless of the mess, as soon as I clean it out, I use my custom-mixed paint to paint two coats of it letting cure in between.

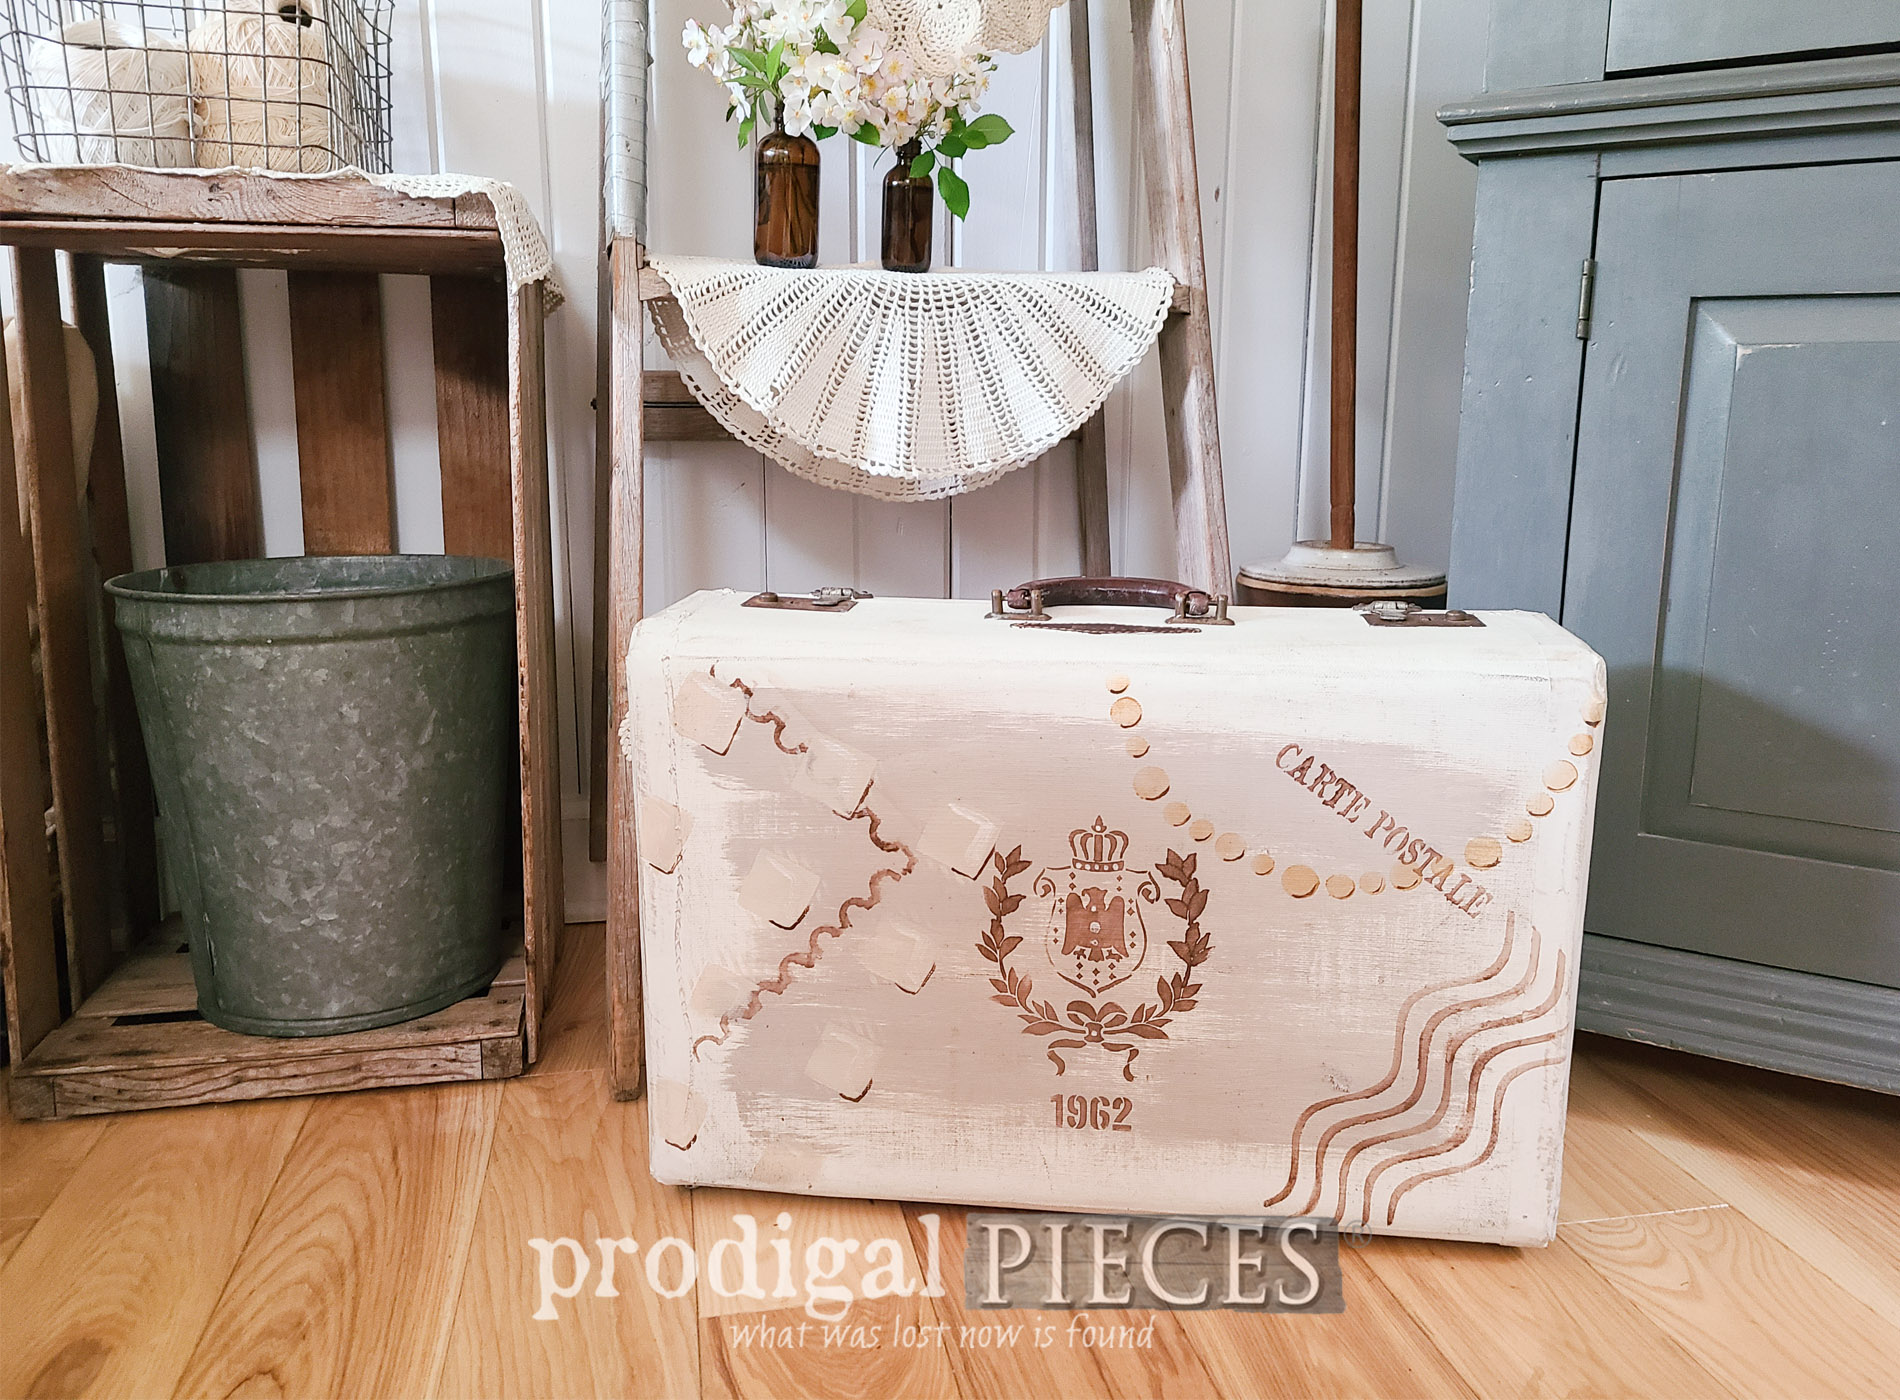
Afterward, the white is dry, I use a custom-mixed beige to loosely brush on a layer. I'm wanting to create a story on each side of the vintage luggage painted, and this is my start.

Next, I break out 5 different stencils I have on hand. You can totally add a transfer, stripes, decoupage...the sky's the limit.

LINING
Finally, I add a layer of batting to the top and bottom using a spray adhesive.

On top of that, I use more adhesive and add a base layer of fabric first.

Last, for the sides, I measure and add 1" so I can fold under. I press it with my iron and allow extra for overlap. To finish, I use my hot glue gun to tack the sides in place.

You can see how I line a box in
this tutorial or video below.

STEPPIN' OUT IN STYLE
As a result of my DIY efforts, I now have a vintage luggage painted in French chic style with beautiful lining to boot. woot!


It's funny...I have a daughter with the initials E.J. and I told her I should save this for her but that she has to marry someone with an S last name! haha...nah...she doesn't need to marry.
Furthermore, I did two different designs on the outer sides because, why not?


It's hard to see in the pictures, but I did use a soft gold and opalescent paint to highlight certain areas and to tie in the monogram. By the way, I had such fun, can you tell?
Further, if you'd like to make this part of your home story or fill it with goodies and gift it to a friend or loved one, find it and more in
my online store.


SHARE
So, I'm curious...what would you store inside this case? As always, my goal is to inspire you to give DIY a try with your own vintage luggage painted. It's fun, a creative outlet, and saves these gems from the landfill. Also, pin and share!

What is more, stick around and
sign up for my FREE newsletter to see what becomes of
this little cutie HERE.

Until next time!

 PINTEREST | EMAIL
While you're at it, more fun DIY projects likes this vintage luggage painted: