 Mr I., like the rest of my kids, are building up a savings. Generally, when I get a free piece of furniture I give it to them and they take turns making them over. Also, they purchase their own project pieces based on my suggestions to sell for the savings. You see my kids projects in this collection of posts.
In this case, Mr I. decided to purchase two Art Deco buffets from a gentleman. This one is the first, so stay tuned for 2!
The term "waterfall" refers to that top design that looks like the veneer is cascading over the front of the buffet. This was always been one of my favorite styles to work with. You can see them in these posts.
The damage to this waterfall buffet was minimal, but still needed tending to. There was chipped veneer on both sides, chemical stains, and a few gouges here and there. The best part was that all the Bakelite pulls were present and that all the hardware functions as it should. Deciphering all that is half the fun, right?
Mr I., like the rest of my kids, are building up a savings. Generally, when I get a free piece of furniture I give it to them and they take turns making them over. Also, they purchase their own project pieces based on my suggestions to sell for the savings. You see my kids projects in this collection of posts.
In this case, Mr I. decided to purchase two Art Deco buffets from a gentleman. This one is the first, so stay tuned for 2!
The term "waterfall" refers to that top design that looks like the veneer is cascading over the front of the buffet. This was always been one of my favorite styles to work with. You can see them in these posts.
The damage to this waterfall buffet was minimal, but still needed tending to. There was chipped veneer on both sides, chemical stains, and a few gouges here and there. The best part was that all the Bakelite pulls were present and that all the hardware functions as it should. Deciphering all that is half the fun, right?


GET STARTED
To get started, Mr. I made any necessary patches using wood filler. I would say he had a fair amount to repair, but nothing horrendous. Then, he used my sander to refinish all the wood surfaces he wanted to showcase the wood.

He's after a wood/paint combination, which is one of my favorites and his too. For the paint part, he chose to use one of my classic favorites, Antique White. My arsenal of paint brushes came to the rescue with the stubby brush tackling the faces of the cabinet.

Mr. I agrees with me that these brushes make such a difference in an awesome finish. His favorite is the square brush for getting the small details in without getting it on the refinished wood.
While the cabinet was curing, he tackled painting the pulls. They have the original Bakelite marble piece, but the metal was lacking serious lustre. They were fair game as they weren't brass or anything fancy. He taped off the Bakelite he wanted to save and then painted the metal using Heirloom White by RustOleum.

Last, but not least, we finished the wood surfaces he was able to save. Since he liked the look I gave my French Country vanity I did not long ago (see HERE), he wanted to do the same effect. This is using a white wax to accentuate the grain, but you can use a whitewash with paint like I did too.

One last touch we added was to stencil to create a bit of drama. We all need a little drama in our lives, don't we? tee hee hee.
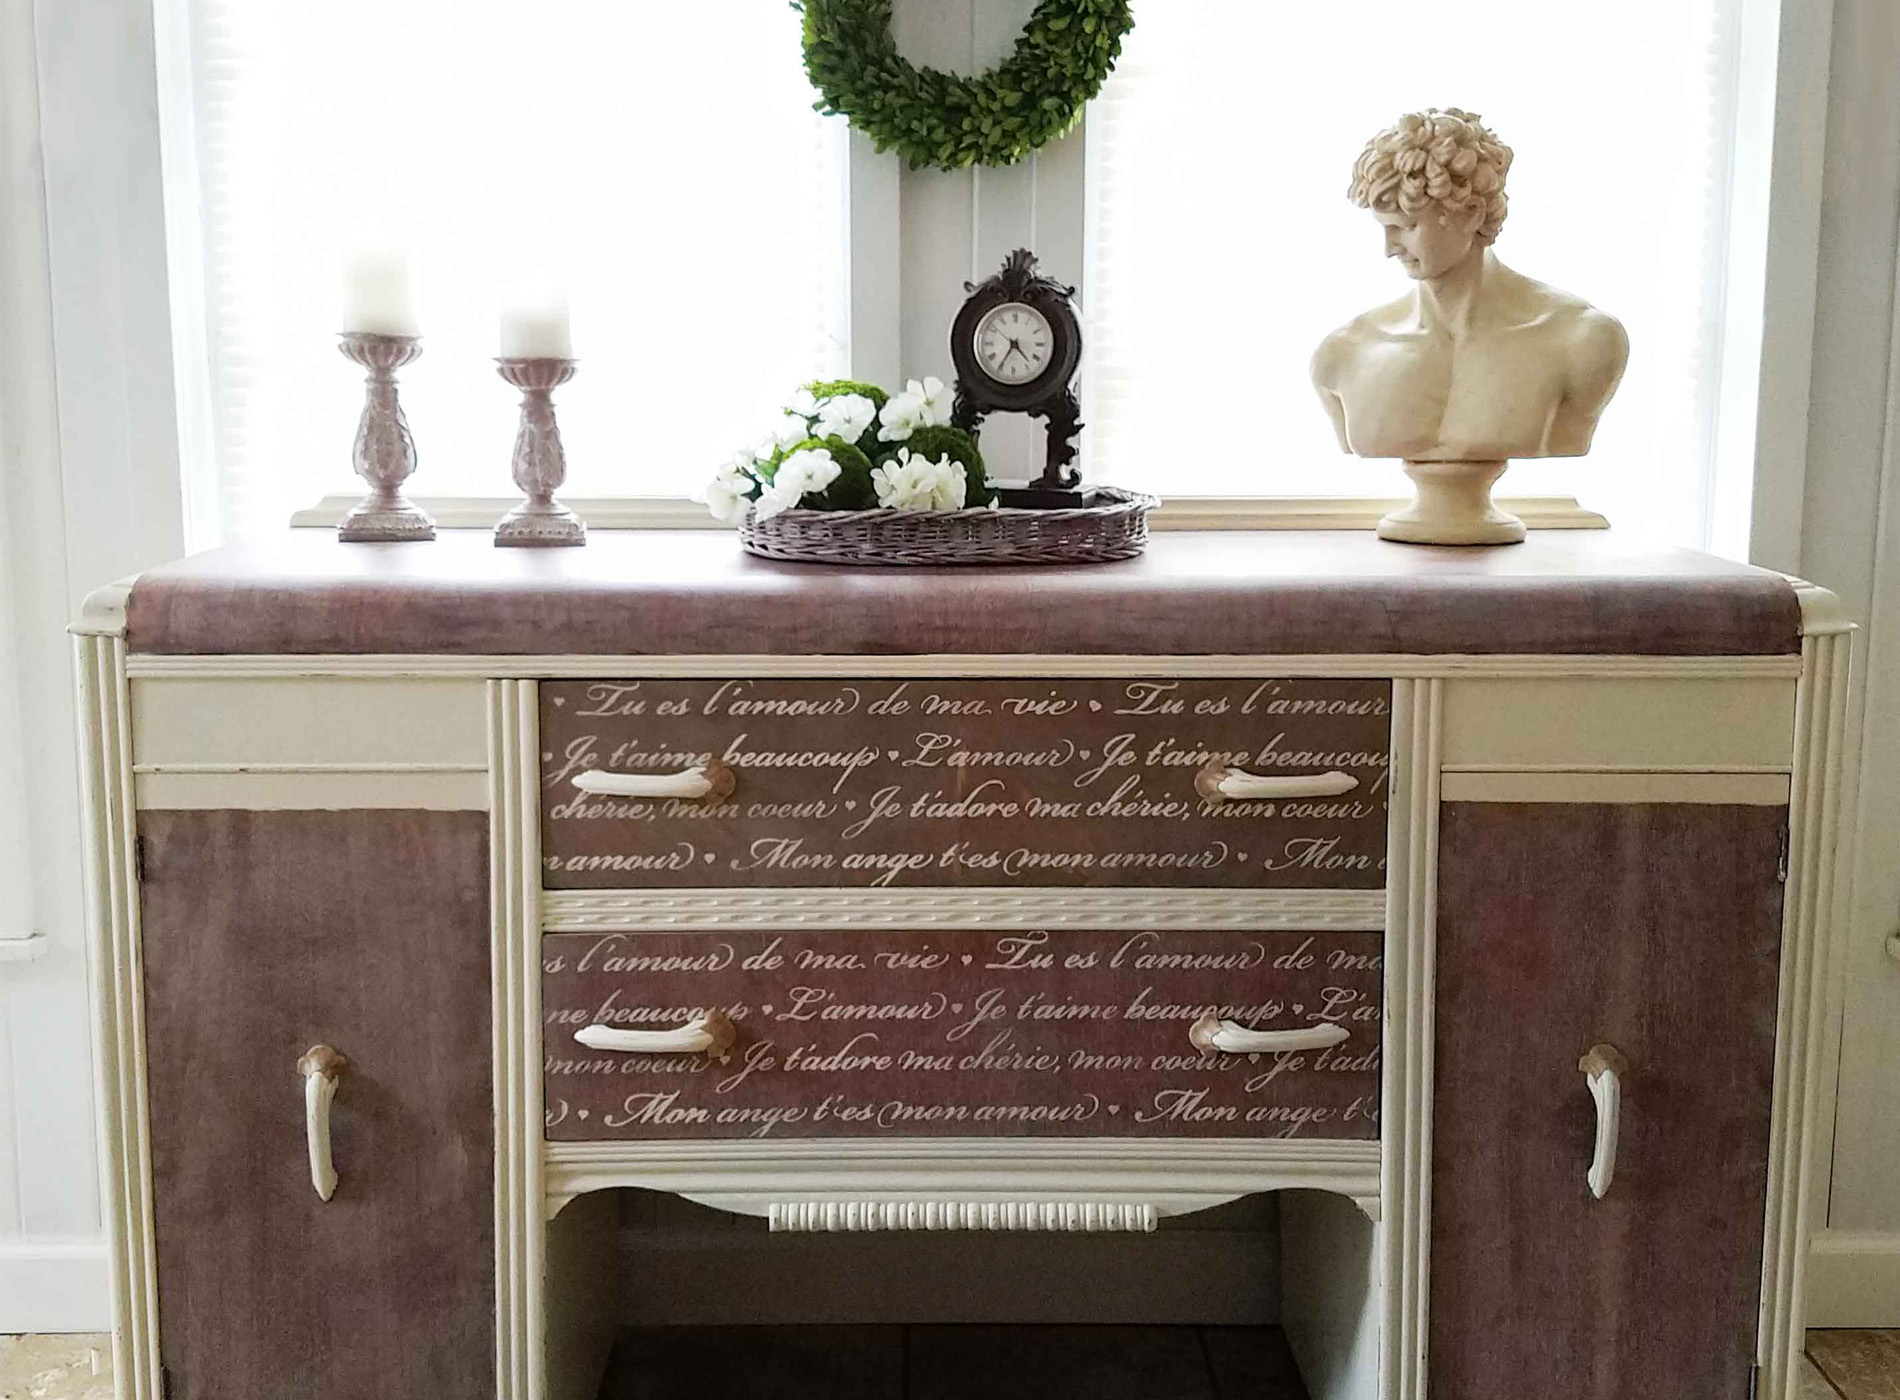
THE REVEAL
Here it is all done with a bit of help from mama.


I seriously am in love with this piece. From the washed wood to the French script...swoon!! That stencil has been one of my favorites on many pieces and you can see why. The script reads:
I adore you my darling, my heart I love you very much My angel, you are my love You are the love of my life Love

Wouldn't you say Mr. I rocked it? I had to help a bit because of time constraints with school and sports, but he totally took the reigns on this one.


I'm an even more proud of the fact that he decided to donate to a military family for our Finding Home program. What a blessing!

As I always say...our goal is to inspire you to give DIY a try. Ya never know what you can do until you give it a go. Do pin and share to inspire others to make their house their home.

Up next, it's Trash to Treasure Tuesday and I'm finally getting to give another of these curbside gems a new look. See the first one HERE and the main door in this post. | Prodigal Pieces | prodigalpieces.com")
To get these DIY tips & tricks in your inbox, be sure to sign up for my newsletter. PLUS, you will get your FREE Furniture Buying Checklist and special discount to my shop. Until next time!

More of my son's work like this waterfall buffet:

