 With the kids in tow, it's fun to pick up a piece and explain its past purpose and maybe what it could be. Do you see what it was used for? Pen holder on top, surface for composing a letter, and storage inside.

DIY TIME
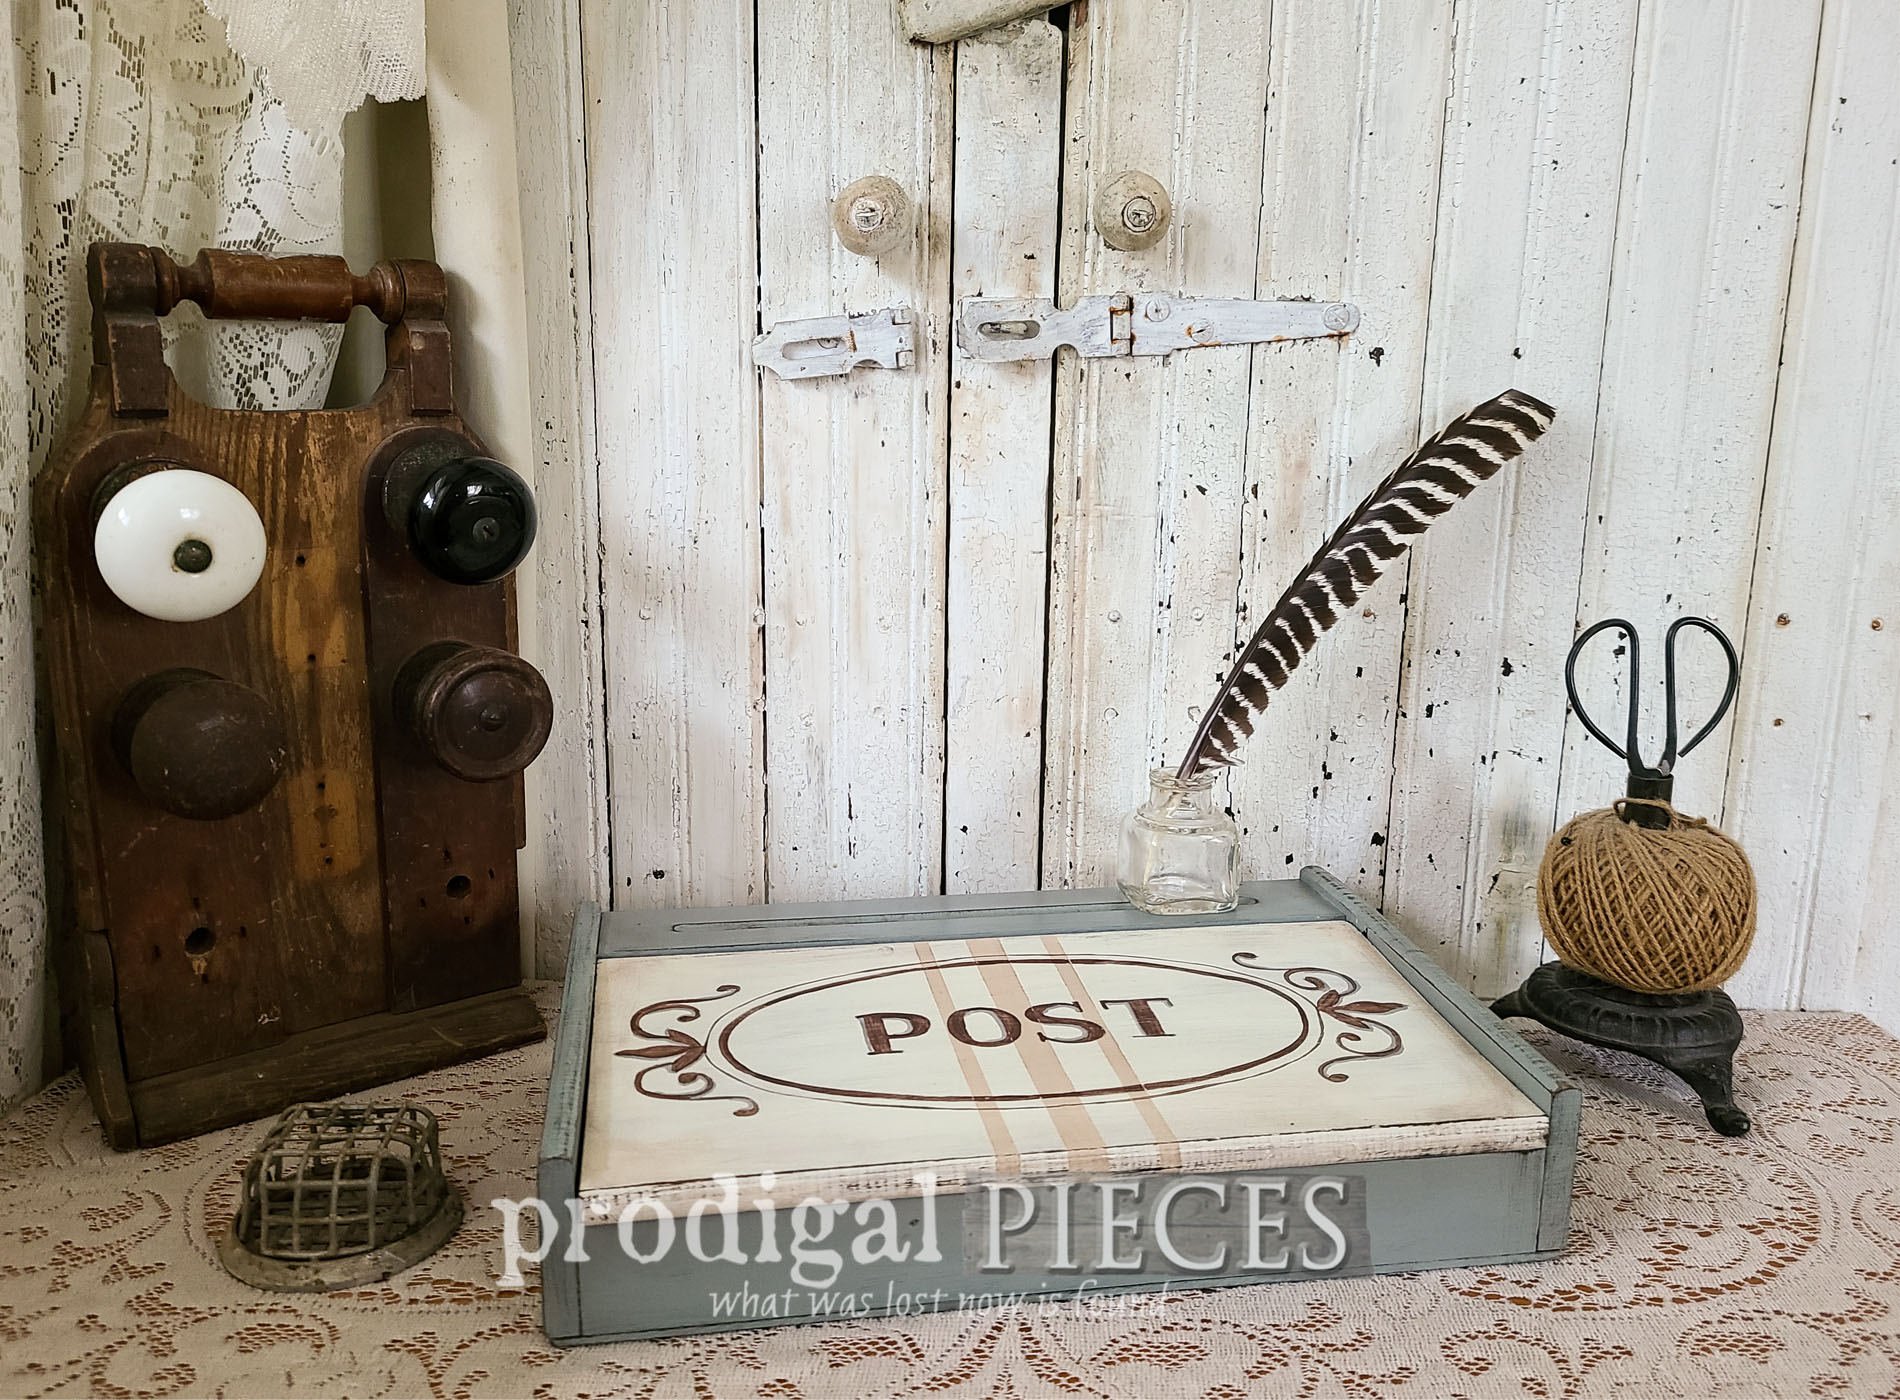
While I could have stripped it down, I kinda didn't like the chipboard bottom. So, paint it is. First, I use this soft gray on the base of the vintage writing box. Then, once that cures, I apply a creamy white to the lid portion of the box. After all is cured, it's time to add some whimsy. tee hee!
Last, if you've seen my past makeovers, I like to add grain sack stripes. You can see my son's demo tutorial for you HERE. It's as simple as tape and paint, but there are a few tricks to making it easier. Definitely take the time to measure and mark. Also, you can use a straight edge and a rotary cutter (or utility knife) to make skinnier pieces of tape, if desired.
Then, once that cures, I apply a creamy white to the lid portion of the box. After all is cured, it's time to add some whimsy. tee hee!
Last, if you've seen my past makeovers, I like to add grain sack stripes. You can see my son's demo tutorial for you HERE. It's as simple as tape and paint, but there are a few tricks to making it easier. Definitely take the time to measure and mark. Also, you can use a straight edge and a rotary cutter (or utility knife) to make skinnier pieces of tape, if desired.
 That stuff can get expensive and they don't have all the varying widths I need.
 Next, I use a beige to paint in the stripes two coats, letting cure in between. Last, I use a frame graphic to add a bit more fun.
THE REVEAL
Here's my little mini vintage writing box makeover. I'm smitten! I don't know about you, but I feel the colors really bring out the uniqueness of this find. Plus, the typography adds that whimsy I was after. You can see how I add typography to my projects in this DIY tutorial.

 In addition, did you notice the ink well? I...ahem...have a strong affinity for those little things. I may have a few in my collection.

 And...don't forget the stationary! I just love to grab all the vintage sets I ever find. Also, I do love to send and receive paper letters. There's no comparison to email...or text. nah. Do you like to send/receive letters?
Not only is my goal to share my passion, but also inspire you to not be daunted by DIY projects. They can be as challenging as you allow them to be...you CAN DO IT! Likewise, you can find items like this available in my online shop.
And...don't forget the stationary! I just love to grab all the vintage sets I ever find. Also, I do love to send and receive paper letters. There's no comparison to email...or text. nah. Do you like to send/receive letters?
Not only is my goal to share my passion, but also inspire you to not be daunted by DIY projects. They can be as challenging as you allow them to be...you CAN DO IT! Likewise, you can find items like this available in my online shop.
[metaslider id=30251]
In addition, do pin and share to inspire others to give mini makeovers a try too.
NEXT UP
Up next, it's Trash to Treasure Tuesday. Stay tuned!! Also, a bit of good news! My second feature in a magazine this month. Look for it to hit stands 5/18. To get these DIY tips & tricks in your inbox, be sure to sign up for my newsletter. PLUS, you will get your FREE Furniture Buying Checklist and special discount to my shop. Until next time!

Also, more mini makeovers like this vintage writing box:

