 That, my friends, is today's project piece. It is begging me (really!) to relieve it from the nightmare it's stuck in. Oh, and just so you know, I did turn down other furniture in this same haul because I really didn't want any more furniture - yes, really. haha!
So take a closer peek at this forlorn piece.
That, my friends, is today's project piece. It is begging me (really!) to relieve it from the nightmare it's stuck in. Oh, and just so you know, I did turn down other furniture in this same haul because I really didn't want any more furniture - yes, really. haha!
So take a closer peek at this forlorn piece.

 The table has great lines. It appears to be well built with solid brass hardware, and also appears to have been smothered in some messy primer application. Poor thing...
 NO FEAR! {{lady in cape appears with dramatic music playing}}
In all seriousness (as if I'm ever really serious), I totally planned on just painting over that mess and letting it be done. However, if you know me in the least, I seem to take on the weirdest challenges that get me in trouble from time to time. ahem.
NO FEAR! {{lady in cape appears with dramatic music playing}}
In all seriousness (as if I'm ever really serious), I totally planned on just painting over that mess and letting it be done. However, if you know me in the least, I seem to take on the weirdest challenges that get me in trouble from time to time. ahem.
FIRST STEPS
When I set the table out to take the before picture, something caught my eye and literally made me gasp. My in-head dialogue: "Was that a pattern I just saw in the top? Could that be a gorgeous veneer I see?" No joke, I grabbed my sander on the spot, even though I had no time to sand, and here is what I saw... ...for real. Quickly, I ran inside to show my kids because the appreciate this kinda thing and sent a picture to my dad. I now knew that I had more work cut out for me. It would be worth it, right? How could anyone cover that up?!
After a whole lotta sanding, I had the top where I liked it. However, I was worried that a few spots might be too thin after I had to sand to get out that primer. The truth would be revealed when I stained the top. I hold my breath and break out my favorite Provincial Stain to dress up this gem.
...for real. Quickly, I ran inside to show my kids because the appreciate this kinda thing and sent a picture to my dad. I now knew that I had more work cut out for me. It would be worth it, right? How could anyone cover that up?!
After a whole lotta sanding, I had the top where I liked it. However, I was worried that a few spots might be too thin after I had to sand to get out that primer. The truth would be revealed when I stained the top. I hold my breath and break out my favorite Provincial Stain to dress up this gem.
NEXT STEP
Okay...so the stain went on well and as I suspected. Unfortunately, veneer ended up being a hair too thin for my liking in one spot in particular. The raw spot jumped out at me and I may have pouted like a toddler that didn't get to play with the big kids. Ah well. What to do next? Improvise. There was no way I was going to cover up that veneer, so I decided to hide the flaw while adding some dimension to this vintage side table. See the spot right inside the taped off area on the bottom left? To remedy that flaw, I chose to use my neutral beige color to give this table some dimension on top. In addition, the base of the table got a couple coats of it too after some fixes.

COOL GOO
While the top was curing, I cleaned the rest. Unfortunately, one of the brass caps for the feet was missing. I searched high and low online and came up empty handed with a replacement. To solve my problem, I went to a product I used on my Art Deco vanity chair seen HERE. I can't say it enough...Plasti Dip is AMAZING. I wanted to protect the vintage side table feet, as well as give them some heft. Then, I dip the foot in the container, and it's done. So cool! FYI, I just use sawhorses to prop up the table while I take care of the feet.
LAST STEP
Now, while the top and feet are curing, I tackle that awfully tarnished hardware. I have thing for solid brass and it has to be showcased. To tell if it's the real deal, just use a magnet. If the metal is magnetic, it's not brass or is plated brass. I carry a magnet in my pocket for testing metals, like brass and silver, while out trashure hunting. All I did to this beautiful hardware was polish it with another favorite product called Bar Keepers Friend. Works like a dream on most metals, and keeps my porcelain in my house shining like new and is so affordable. Just look at that brass shine! Next, I added a bit of dimension with brown wax, gilding wax, and antique white paint.
THE REVEAL
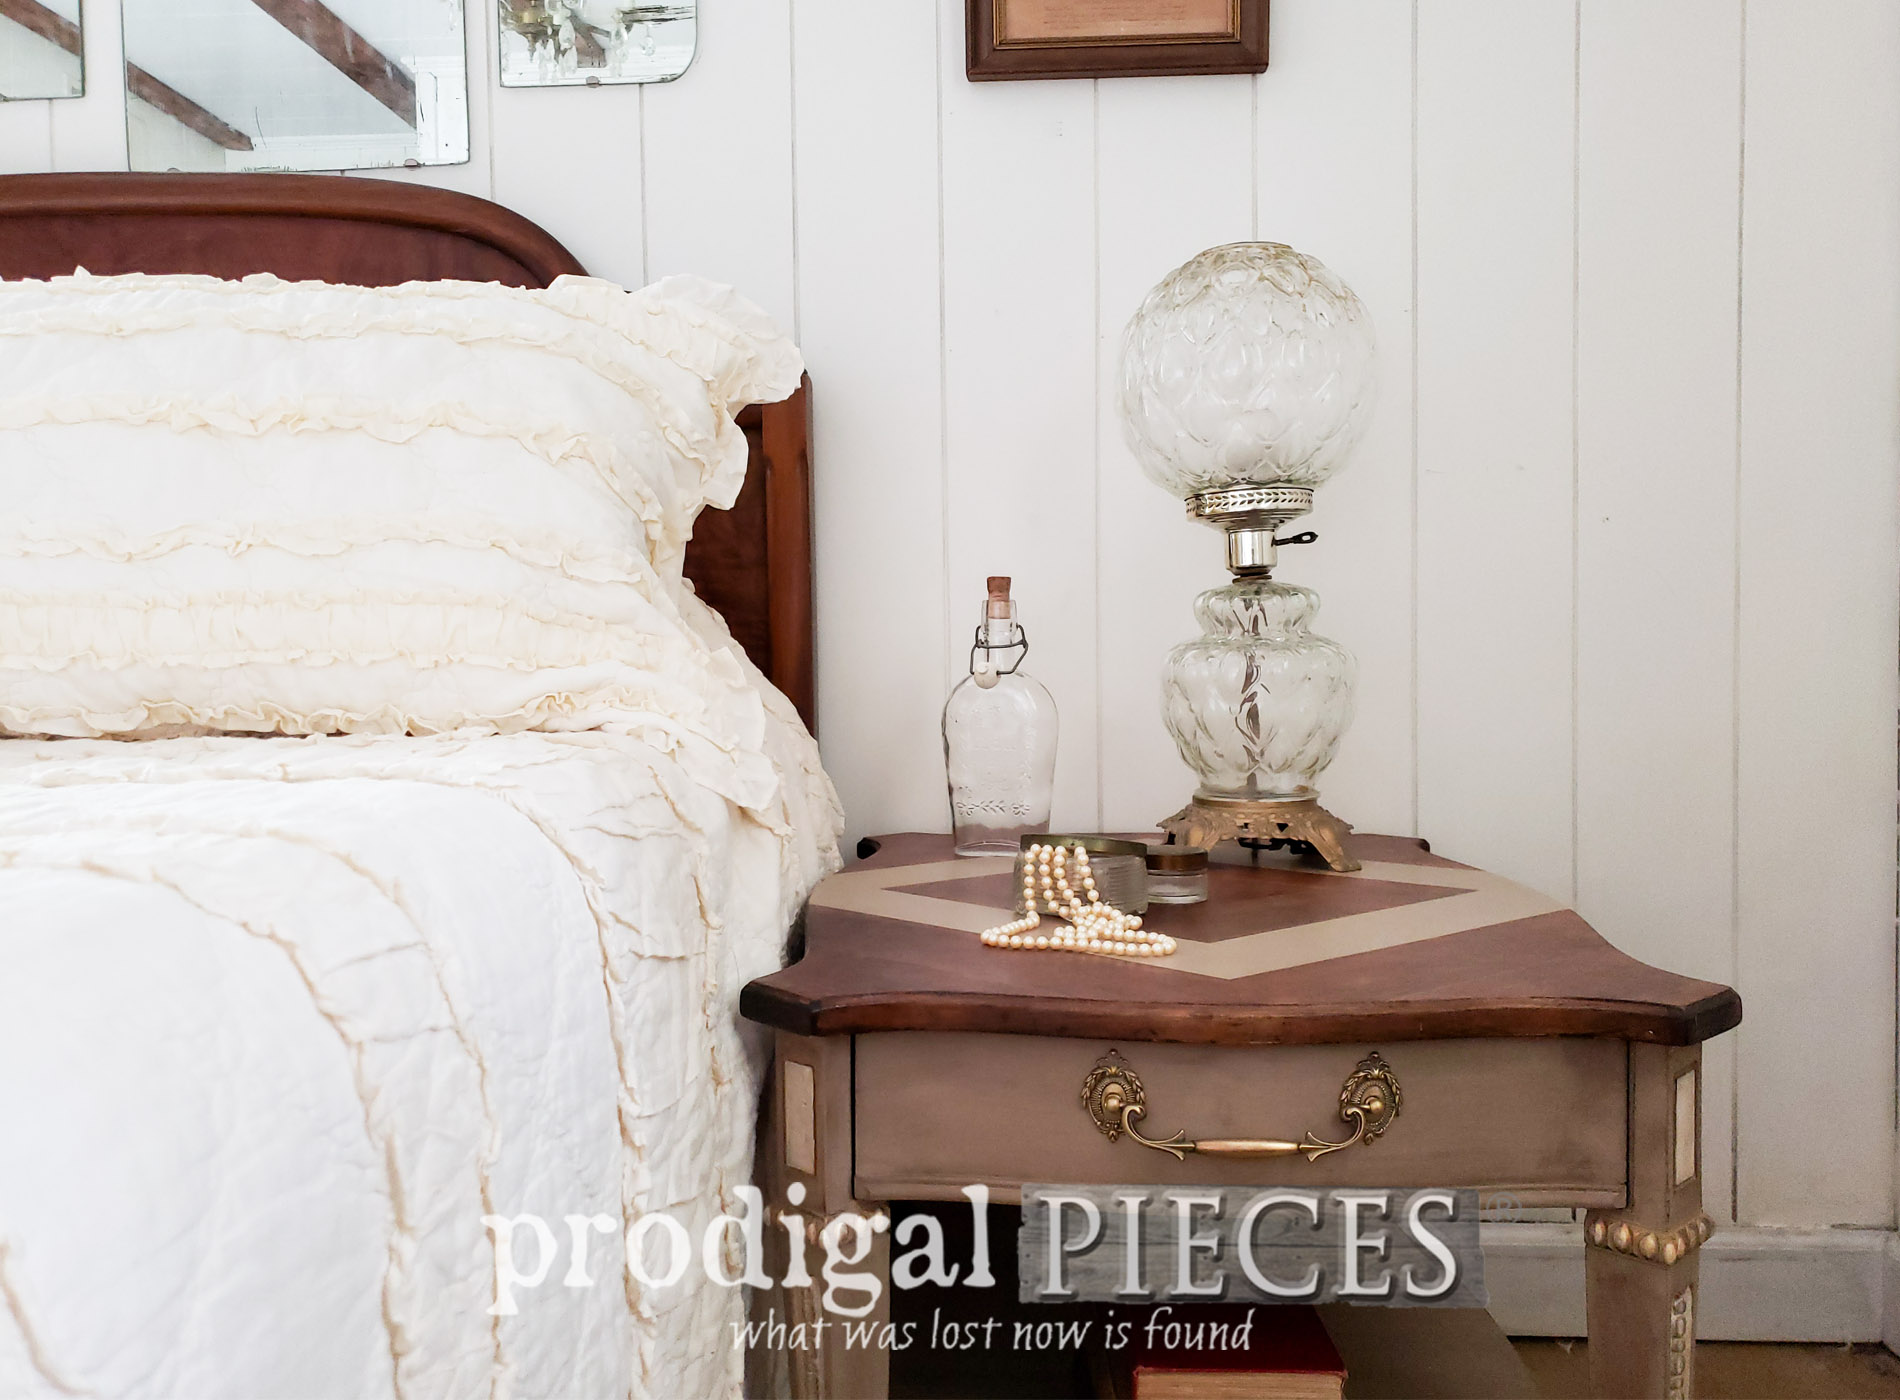
Now it's finally time to show you what this vintage side table looks like. woot!
 After I gave the table stain and paint on top, I used a matte poly to finish it up. You'd never know it was the same table, right?
 Next, for a pop of fun, I used soft blue on the drawer. It's fun to take a peek inside, isn't it?
 Not to mention, now the hardware gets to shine as it should.


MORE FINDS
In addition, another little trashure find I want to share one of my favorite books. This book stole my heart the minute I found it in a box set out for trash along with many others. Can you believe its printing is from 1895? The ornate embossed cover will get your attention but wait until you see the inside. So full of a lost art, in most instances, in our society.

 Not long-ago folks gave books as a treasured gift. People would enjoy them and hand them down from generation to generation. With that in mind, it's easy to see why. Isn't the artwork fantastic?

 It's so important to cherish items from our past. Whether it's a book or a piece of cast-off furniture, like this vintage side table, there is much joy in appreciating them. Likewise, what fun it is to see them revived, restored, and renewed.
 Happily, this table has been donated to a local ministry to aid people who are leaving the Amish order - part of my Finding Home program.
[metaslider id=30251]
SHARE
Oh, and in case you're wondering, the headboard made its way to a local ministry, and the other chest is now a fun pop of color seen HERE. Additionally, I invite you to pin and share this vintage side table makeover. You just never know who will need the inspiration to uncover another beauty and restore it to a new life. Up next, you will see what I do with this fun lot. tee hee! Take a peek HERE.
 To get these DIY tips & tricks in your inbox, be sure to sign up for my newsletter. Until next time!
 Also, more projects like my vintage side table:


